Think Bigger From Filmora User Guide
-
System Requirements Specification - Mac
-
New Features - Mac
-
AI Features - Mac
- AI Text-Based Editing in Mac
- AR stickers on Mac
- Audio ducking on Mac
- AI Copilot Editing for Mac
- Auto denoise on Mac
- AI Text-to-Video for Mac
- AI smart cutout for Mac
- Scene detection on Mac
- Silence detection on Mac
- Auto Beat Sync on Mac
- AI Smart Masking for Mac
- AI Music Generator for Mac
- AI Skin Tone Protection for Mac
- AI stylizer on Mac
- AI portrait on Mac
- Auto reframe on Mac
- AI Thumbnail Creator For Mac
- AI Vocal Remover for Mac
- ChatGPT Plugin - AI Copywriting on Mac
- AI Audio Denoise for Mac
- AI Audio Stretch for Mac
-
Get Start - Mac
-
Creating Projects - Mac
-
Creating New Projects (Mac)
-
-
Importing & Recording - Mac
-
Importing (Mac)
-
Recording (Mac)
-
-
Media for Use - Mac
-
Editing - Mac
-
Editing Video (Mac)
- Playback Speed Shortcuts for Mac
- Enable/Disable Clip for Mac
- Super Slow Motion with Optical Flow for Mac
- Uniform speed on Mac
- Speed ramping on Mac
- Customized Backgrounds for Videos and Images in Mac
- Marked Favorites for Mac
- Markers for Mac
- Multi-Clip Editing for Mac
- Compound Clips for Mac
- Borders on Mac
- Auto Ripple for Mac
- Adjustment Layer for Mac
- Apply Transforming for Mac
- Compositing on Mac
- Stabilize video on Mac
- Motion Tracking on Mac
- Green screen on Mac
- Lens correction on Mac
- Crop and zoom on Mac
- Mosaic on Mac
- PIP (picture in picture) on Mac
- Mask on Mac
- Video snapshot on Mac
- Play video in reverse on Mac
- Split screen on Mac
- Split & cut videos on Mac
- Using Face-Off Effect
- Change speed on Mac
- Freeze frame on Mac
- Applying Drop Shadow for Mac
- Auto enhance on Mac
-
Editing Audio (Mac)
-
Editing Color (Mac)
-
-
Text & Subtitle - Mac
-
Animation & Keyframe - Mac
-
Effects & Transitions - Mac
-
Video Effects (Mac)
- Filmora Countdown Effects on Mac
- Add Effects Mask for Mac
- Add audio visualizer on Mac
- Collection of Effects for Mac
- Audio Driven Effects for Mac
- Add Newblue FX effects on Mac
- Add Boris FX effects on Mac
- Types of effects on Mac
- Add and customize filters on Mac
- Add and customize overlays on Mac
- Filmstock Assets on Mac
-
Transitions (Mac)
-
-
Stickers - Mac
-
Exporting & Cloud Backup - Mac
-
Exporting (Mac)
-
Cloud Backup (Mac)
-
-
Collaboration - Mac
-
Improving Performance & Troubleshooting - Mac
- HDR Seting on Mac
- Known Issues & Fixed Bugs
- Project settings on Mac
- Mark In and Mark Out for Mac
- Working with proxy on Mac
- Playback Zoom Level for Mac
- System compatibility detection on Mac
- Render preview files on Mac
- Manage timeline on Mac
- Change playback quality on Mac
- Group clips on Mac
- Mark clip on Mac
Get Started with Filmora
With Filmora’s updated and proficient video editing options, you can create the best version of videos after editing. To get hold of the effective options for adding effects and enhancing video with the right transitions, download Filmora on your Mac.
Before You Begin
Wondershare Filmora features support for a diverse range of file formats. To get hold of Filmora, you need to look at its system requirements for Mac so that you can utilize it properly with no hindrance.
Get Started Editing
Start a New or Existing Project on Filmora
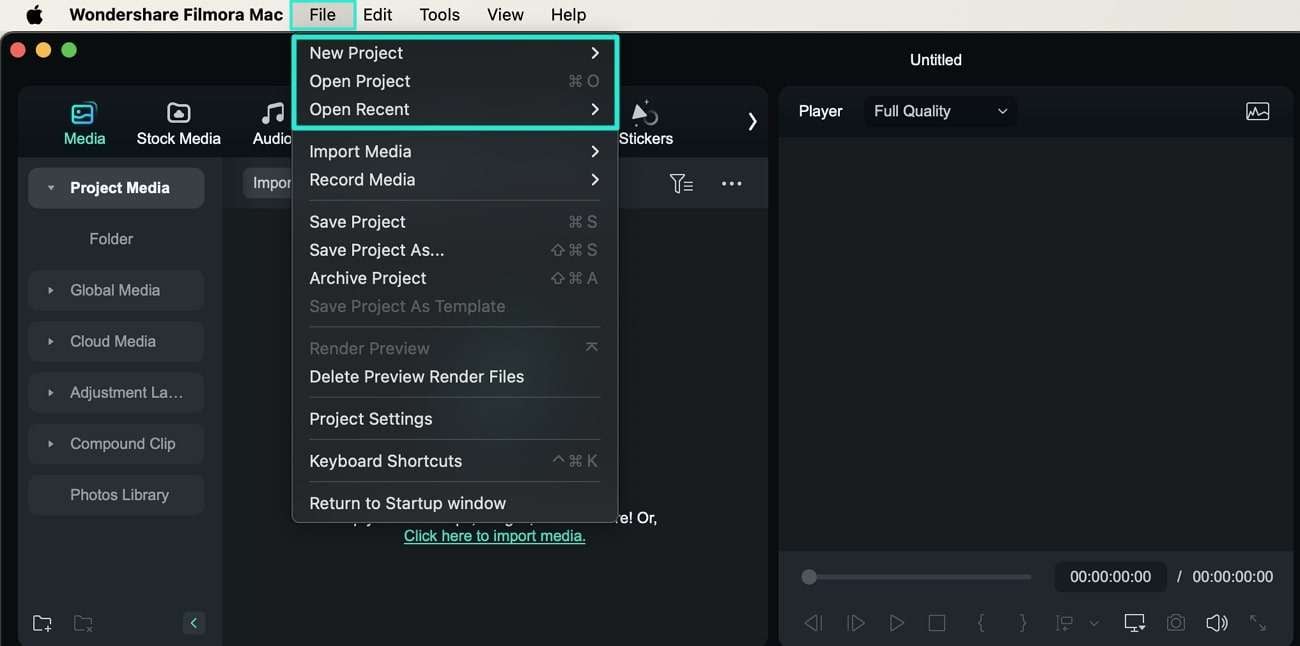
Successfully download and install Wondershare Filmora on your Mac. To start a new project, lead to the "New Project” on the main window. You can also set up a new project by leading to “File > New Project" if you are already on the editing interface. To open an existing project on Filmora Mac, you can look for the "Open Project” or “Open Recent” options in the “File” tab.
Importing Media To Filmora Mac
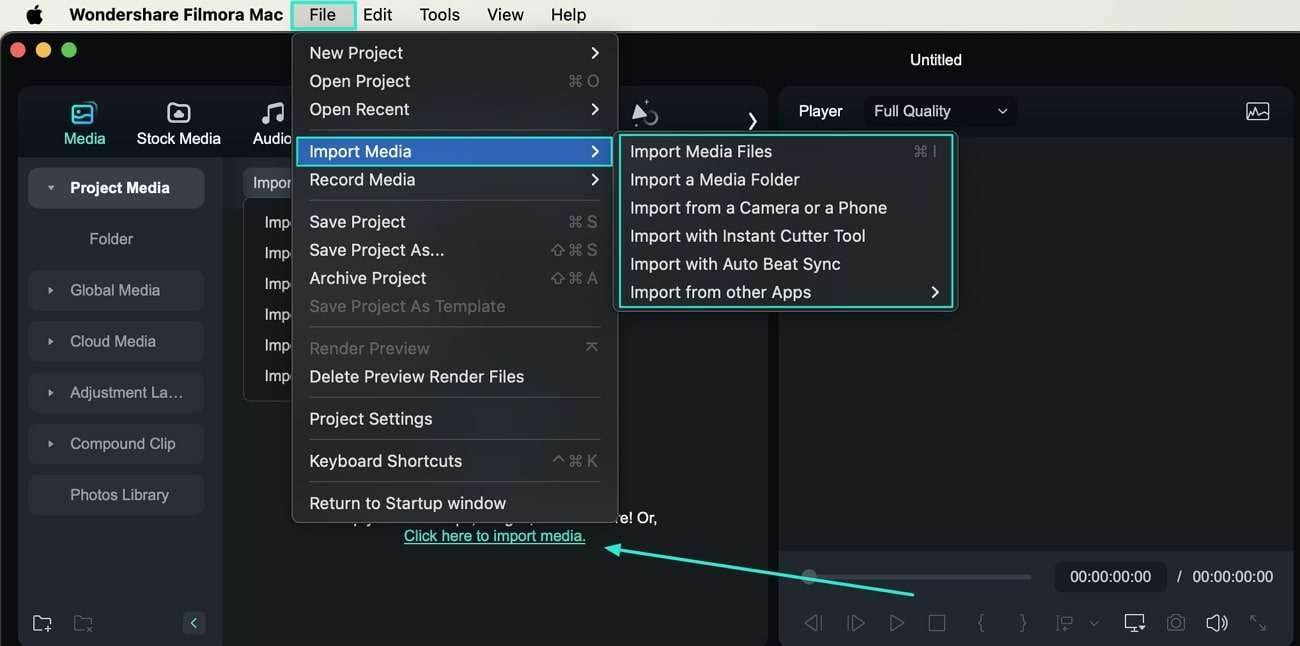
To import the media file on Filmora, look for the “Click here to import media” option in the “Media” panel. Conversely, you can access the “File” tab and look for the “Import Media" option in the drop-down menu. Here, Filmora provides you with the option of importing media files, folders, and data from a camera or phone or importing data with the "Instant Cutter Tool” or “Auto Beat Sync.”
Proceed To Edit and Arrange Clips in Timeline
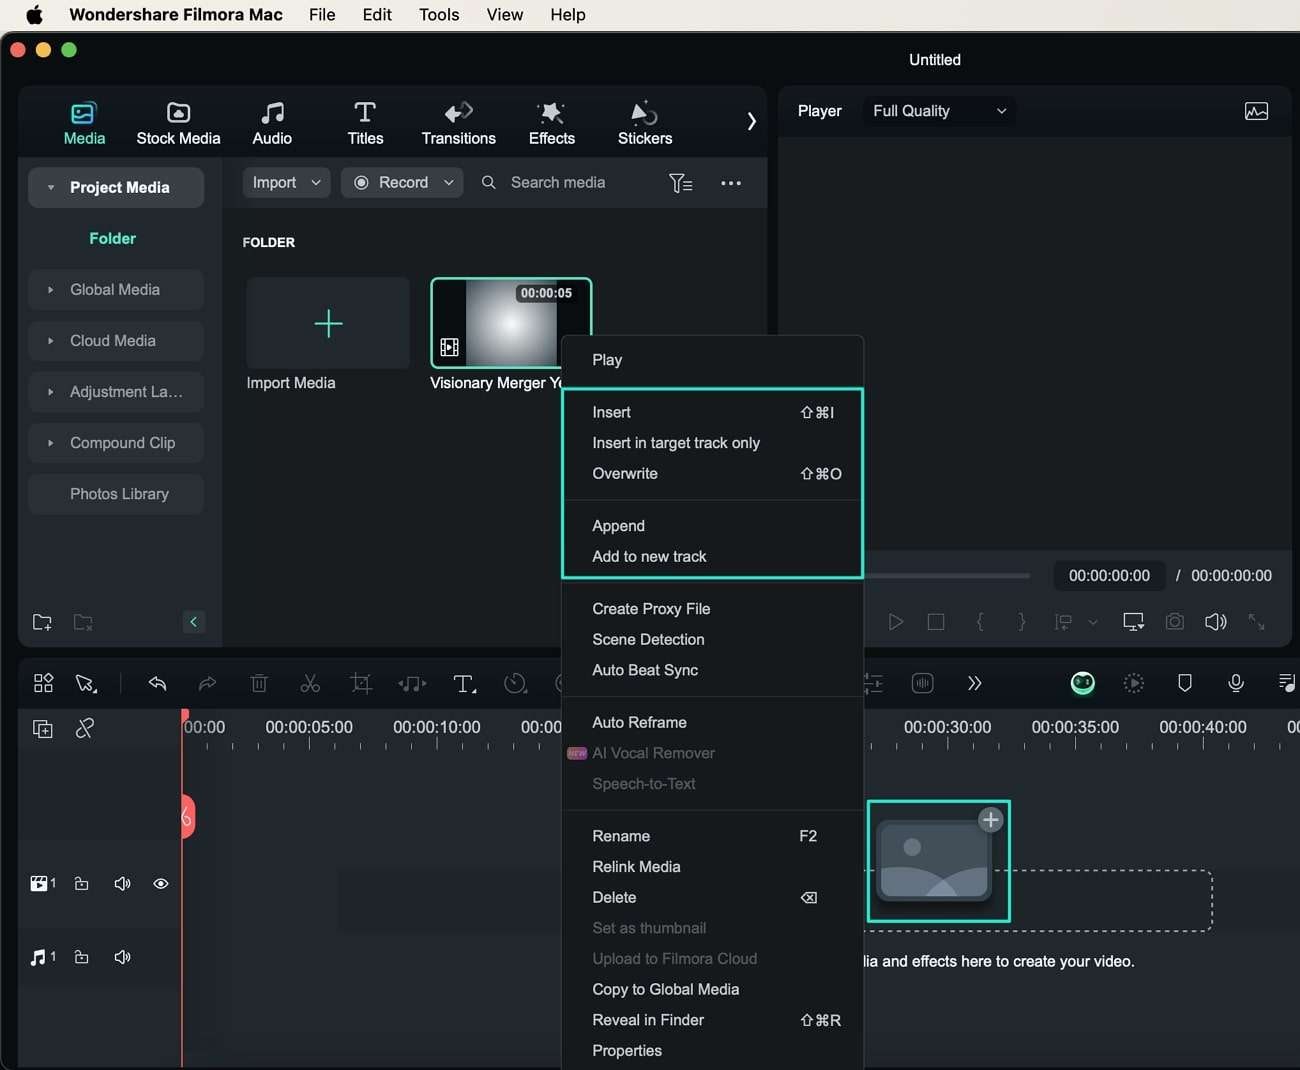
Once you have imported the media file onto Filmora Mac, you can add it to the timeline through two methods. If you right-click on the media file, it provides different options such as "Insert,” “Overwrite,” “Append,” and “Add to new track" to add it to the timeline. Otherwise, you can directly drag and drop the media file onto the timeline for editing.
Include Elements Into Media
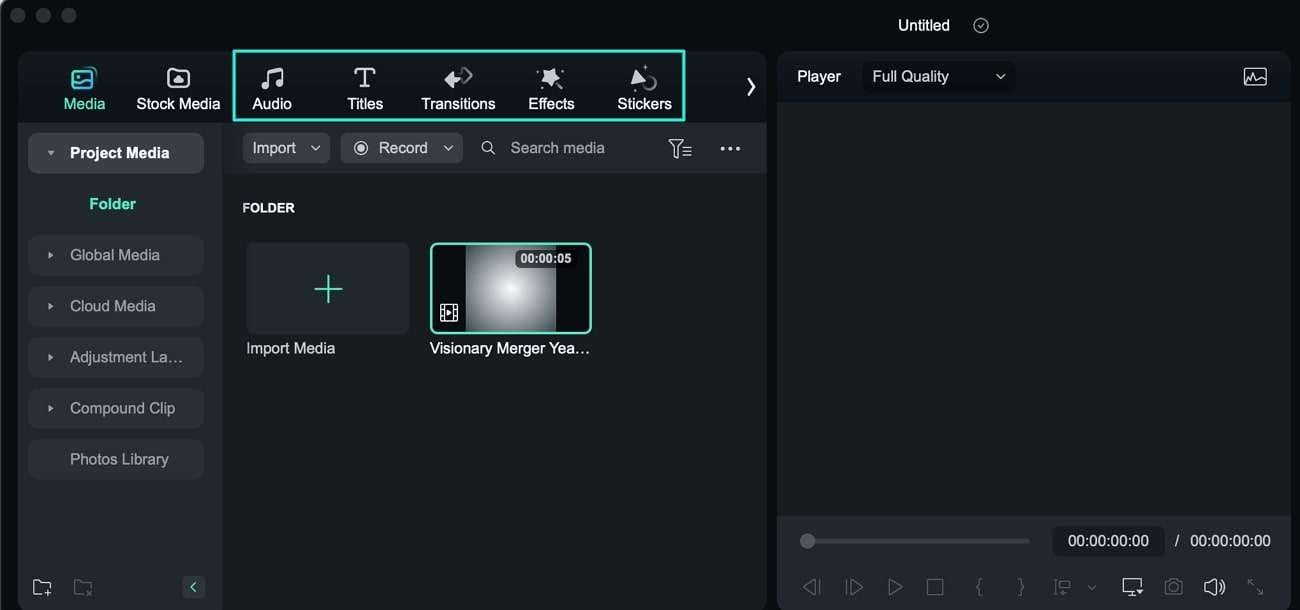
Following the addition of the media onto the timeline, you can include multiple elements in your content. It includes adding "Titles,” “Effects, “Audio,” “Transitions,” and “Stickers.”
Export Video From Filmora Mac
Once you are done editing the video, you can have it exported from Filmora. For that, simply hit the “Export" button on the top-right corner of the editing window. As the export window opens, you can export the video into any of your required options. Filmora provides the option of exporting video data to your device or sharing it across social media platforms directly.

Related Posts
Featured Articles
sRGB VS RGB
Have you even heard of sRGB and RGB? In this article, we’ll share you the concepts of RGB and tell you the differences between sRGB and RGB.
Best Game Screen Recorders
For a handy game recording software, we’ve got some top-of-the-list recommendations for you. Refer to know how to record gameplay on PC with easiness. Learn more here:
How to Change YouTube Playback Speed to Speed Up or Slow Down Video
Are you watching the playback of a YouTube video, and you want to slow down or speed it up to understand the video better? Here's how to change YouTube playback speed to speed up or slow down.
F.A.Q
Trim Video on Mac: 2 Hassle-Free Solutions
Do you want to trim video on Mac, but can't find any feasible solution? Read this post and learn how to trim any video on your Mac with 2 smart apps.
Fail to import AVCHD file.
Guide user how to import AVCHD files.
Why can’t I apply the transition to the video?
Guide user to apply the transition to the files on the 1st track.