Filmora
Filmora - AI Video Editor
Edit Faster, Smarter and Easier!
OPEN

Power Tool-Tilt-shift, Mosaic, Faceoff, Freeze Frame

Apart from all kinds of basic editing features, Filmora also provides you with some more advanced editing tools such as Tilt-shift, Mosaic, Faceoff, Freeze Frame, etc. In this guide you will learn:

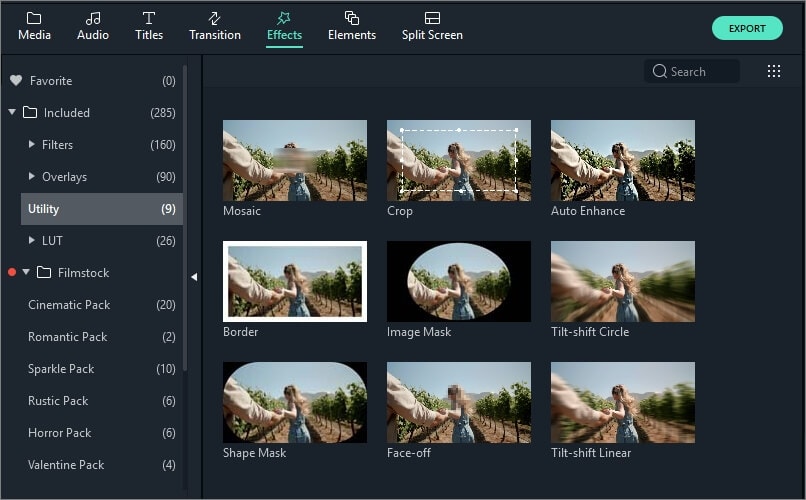
To enter these advanced editing features, first, you will need to import media files to the media library of Filmora, and then drag it to the video track on the timeline. Click Effects at the top, find and click Utility. Then the video Power Tool will be opened.

video power tool in Filmora

1. Create a Tilt-shift effect

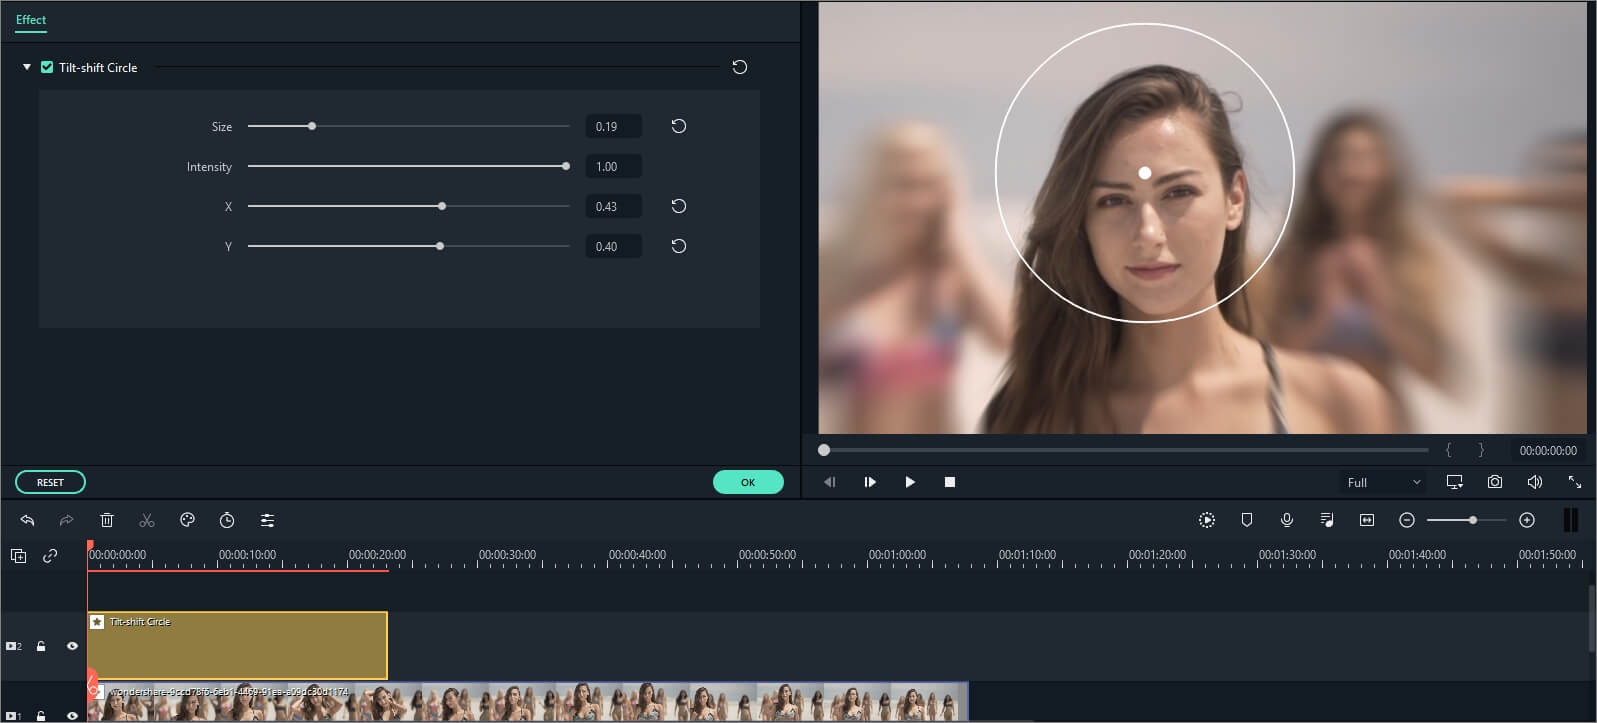
If you can't afford to buy expensive tilt-shift lens to record one, you are still able to make a tilt-shift effect with Filmora easily. The Tilt-shift effect is often used to blur some part of your video clip, bringing an illusion of miniaturization to your video. Here is how to do it with Filmora.

  • There are two options you can choose: Tilt-Shift-Circle and Tilt-Shift-Linear. Let's say you would like to apply Tilt-Shift-Circle to the timeline.
  • After placing the Tilt-Shift-Circle effect above the video, you will see the result in the preview window. Double click the effect in the timeline to enter the Tilt-Shift-Circle setting interface. Here, you can drag the slider to adjust Tilt-Shift-Circle size, intensity and position easily.

filmora tilt shift circle effect setting

2. Apply a Mosaic effect to your video clip

  • In Effects, go to Utility, find and drag Mosaic effect to the track above the video.

apply mosaic on filmora

  • In the preview window, a mosaic area will appear by dragging to reposition the mosaic area, or resize it to get the results you want.
  • You can also double click on the Mosaic effect in the timeline. Then you will see a Control Panel at the top left corner. Here, you can drag slider to adjust blur amount and blur type.

apply mosaic on filmora

3. Add Funny Face-Off Effect to Your Video

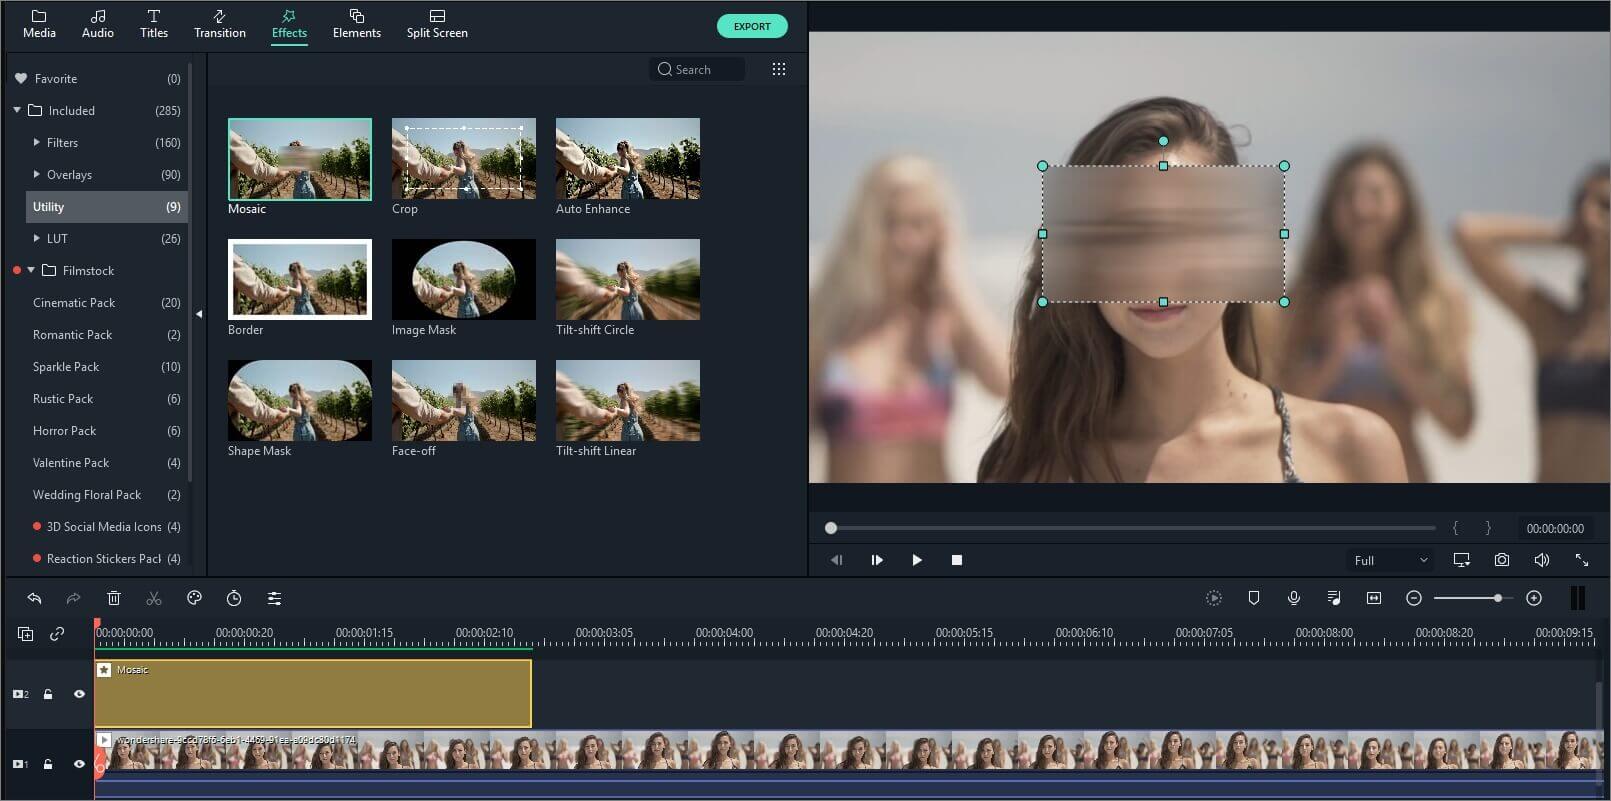
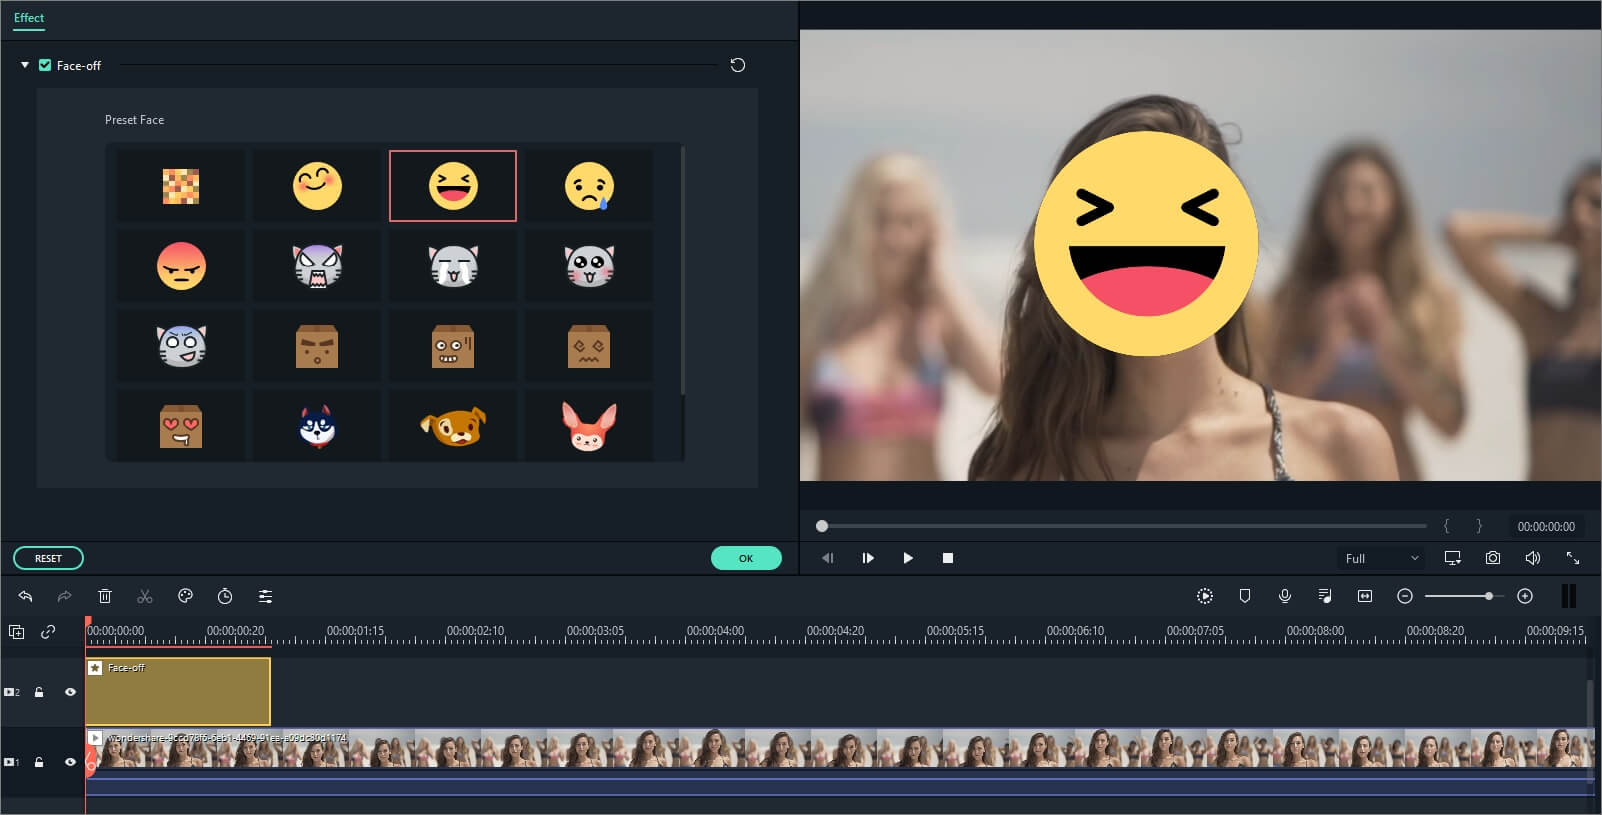
The difference between Mosaic effect and Face-off effect is that, with Mosaic, you will be able to blur any area in the video clip and the area won't move around while your video plays, whereas, with Faceoff, you will be able to cover moving faces. Here is how.

  • Choose Face off option and drop it to the track above the video clip.
  • Double click the face-off effect in the timeline to enter the Faceoff effects library, choose an effect that you like.

eidt face off in Filmora

  • Click OK to save and export.

4. Freeze Frame

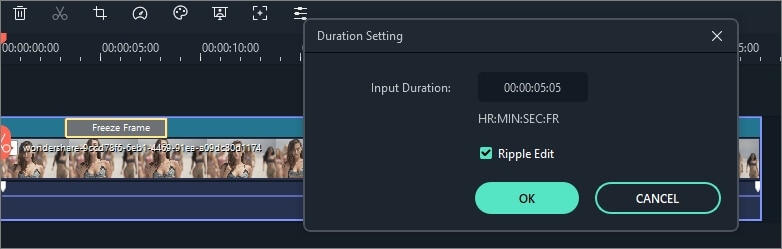
With this technique, directors can show the tiny details, such as the expressions on the main character's face, or some intricate activity within their hands, therefore to distinguish or focus on the major characters or scenes. With Filmora, you don't need any professional shooting lens to get this effect. Here is a detailed guide on how to create Freeze Frame in Filmora.

    • Import your video file to the media library.
    • Drag the video clip to the video track on the timeline.
    • Select the video and click the Freeze Frame. By doing this a freeze frame will be added at the position where your play head locates.
    • Just drag this segment to any part of the video as you want. And you can adjust the duration by a double click.

eidt face off in Filmora