

वीडियोग्राफी की दुनिया में वीडियो को एडिट करना उतना ही जरूरी है जितना कि वीडियो शूट करना। कोई फर्क नहीं पड़ता कि आप कितनी अच्छी तरह से एक वीडियो शूट करते हैं, कुछ हिस्से ऐसे होते हैं जिन्हें आपको ट्रिम करने की आवश्यकता होती है ताकि वीडियो आपके लक्षित दर्शकों के लिए पूरी तरह से प्रस्तुत किया जा सके। यदि आप वीडियोग्राफी की दुनिया में शुरुआत कर रहे हैं, तो यह लेख आपके लिए सबसे अच्छा वीडियो ट्रिमर के साथ वीडियो ट्रिम करने का तरीका जानने के लिए है ।
सबसे पहले, हम वीडियो बनाने के विभिन्न तरीकों के बारे में बात करेंगे। इसके बाद, आप आगे बढ़ेंगे कि किसी वीडियो को कैसे ट्रिम किया जाए जिसे आपने या तो रिकॉर्डिंग सॉफ़्टवेयर के साथ रिकॉर्ड किया है या अपने डिजिटल कैमरे से शूट किया है। हम आपको विंडोज़, मैक और मोबाइल उपयोगकर्ताओं के लिए सर्वश्रेष्ठ वीडियो ट्रिमर की सूची प्रदान करके शुरू करेंगे। वीडियो ट्रिमर शुरुआती और उन्नत उपयोगकर्ताओं के लिए अलग-अलग हैं, और इसलिए, आप अपनी पसंद और आवश्यकताओं के अनुसार चुन सकते हैं।
हम आपके वीडियो को संपादित करने और संपादित वीडियो को अपने लक्षित दर्शकों के बीच साझा करने के तरीके पर भी स्पर्श करेंगे। इसलिए, 2022 के शीर्ष 32 सर्वश्रेष्ठ वीडियो ट्रिमर की हमारी सूची पर जाने के लिए अपना समय लें। शुरुआती और उन्नत उपयोगकर्ताओं के लिए मुफ्त और प्रीमियम वीडियो ट्रिमर से लेकर वीडियो ट्रिमर तक, आपको निश्चित रूप से सबसे अच्छा वीडियो ट्रिमर मिलेगा जो कि दर्जी है अपनी आवश्यकताओं को पूरा करें।
अंतर्वस्तु
भाग 1 ट्रिमिंग से पहले वीडियो कैसे बनाएं
किसी वीडियो अनुभाग की विस्तार से ट्रिमिंग पर आने से पहले, आइए हम वीडियो बनाने के तरीके से शुरुआत करें। जब वीडियो बनाने की बात आती है तो आपके पास दो विकल्प होते हैं। आप या तो रिकॉर्डिंग सॉफ्टवेयर के साथ वीडियो रिकॉर्ड कर सकते हैं या आप अपने कैमरे से वीडियो शूट कर सकते हैं। आइए अब दोनों विकल्पों पर विस्तार से चर्चा करें।
-विडियो रेकार्ड करो
जब आप अपने वेबकैम से या अपने कंप्यूटर स्क्रीन से वीडियो कैप्चर कर रहे हों तो आप रिकॉर्डिंग सॉफ़्टवेयर के साथ एक वीडियो रिकॉर्ड कर सकते हैं। जब रिकॉर्डिंग सॉफ्टवेयर चुनने की बात आती है तो आपके पास दो विकल्प होते हैं।
-
प्रीमियम रिकॉर्डर - एक प्रीमियम रिकॉर्डर एक पेशेवर वीडियो रिकॉर्डिंग सॉफ्टवेयर है जिसे आपको सभी सुविधाओं और कार्यात्मकताओं का लाभ उठाने के लिए खरीदना होगा। सबसे अच्छा वीडियो रिकॉर्डर चुनें।
-
फ्री रिकॉर्डर - यदि आप रिकॉर्डिंग सॉफ्टवेयर पर कोई पैसा खर्च करने को तैयार नहीं हैं, तो बहुत सारे मुफ्त रिकॉर्डिंग एप्लिकेशन उपलब्ध हैं। हम ओबीएस स्टूडियो को सर्वश्रेष्ठ मुफ्त वीडियो रिकॉर्डर के रूप में सुझाते हैं।
-एक विडियो बनाओ
दूसरा विकल्प आपके बाहरी डिजिटल कैमरे से वीडियो शूट कर रहा है। वीडियो शूट करने के लिए आप अपने फोन के कैमरे का भी इस्तेमाल कर सकते हैं। उदाहरण के लिए, व्लॉग, कॉमेडी स्किट, यात्रा वीडियो या लघु फिल्म बनाने के लिए एक डिजिटल कैमरा की आवश्यकता होती है। यदि आप अपने फोन के कैमरे का उपयोग कर रहे हैं, तो आप वीडियो ट्रिमर ऐप या ऑनलाइन वीडियो ट्रिमर का उपयोग करके शूटिंग के बाद वीडियो को काट और काट सकते हैं। यदि आप बाहरी कैमरे से बाहरी शूटिंग कर रहे हैं, तो आप वीडियो को अपने मोबाइल या कंप्यूटर पर स्थानांतरित कर सकते हैं और संपादन के लिए पसंदीदा वीडियो ट्रिमर का उपयोग कर सकते हैं।
पीसी और मैक के लिए भाग 2 वीडियो ट्रिमर
जब वीडियो को संपादित करने और ट्रिम करने की बात आती है, तो कंप्यूटर का उपयोग करना सबसे अच्छा विकल्प होता है। ऐसा इसलिए है क्योंकि आपके पास वीडियो के विवरण पर ध्यान देने और अनावश्यक भागों को आसानी से ट्रिम करने के लिए एक व्यापक स्क्रीन है। इसके अलावा, एक वीडियो को संपादित करने के लिए सीपीयू संसाधनों की आवश्यकता होती है जो कंप्यूटर द्वारा सबसे अच्छी सेवा प्रदान की जाती है। हमने उपयोगकर्ता की सुविधा के लिए कंप्यूटर के लिए वीडियो ट्रिमर को दो श्रेणियों में विभाजित किया है। आप विंडोज पीसी के साथ-साथ मैक के लिए भी आसानी से वीडियो ट्रिमर पा सकते हैं।
# शुरुआती उपयोगकर्ताओं के लिए:
यह श्रेणी उन लोगों के लिए एकदम सही है, जिन्हें वीडियो संपादन का कोई अनुभव नहीं है और वे काम पूरा करने के लिए एक बुनियादी वीडियो ट्रिमर की तलाश कर रहे हैं। इसके अलावा, अगर आपको कभी-कभी वीडियो ट्रिम करने की आवश्यकता होती है, तो ये आपके लिए एकदम सही हैं। आप निम्न वीडियो ट्रिमर के साथ वीडियो को निःशुल्क ट्रिम कर सकते हैं।
1. विंडोज़ तस्वीरें
इसके लिए सर्वश्रेष्ठ: बिना संपादन कौशल वाले विंडोज उपयोगकर्ता
G2 रेटिंग: 4.0/5
कीमत: फ्री
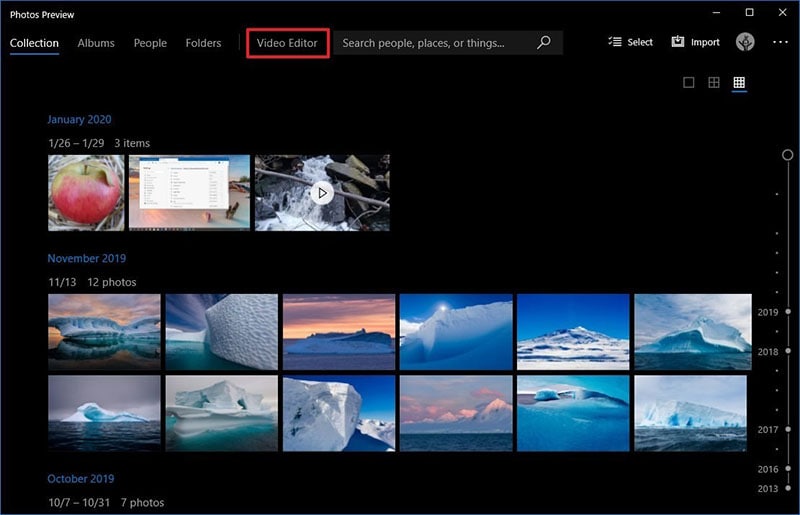
यदि आप एक विंडोज पीसी उपयोगकर्ता हैं और आप एक बुनियादी वीडियो ट्रिमिंग एप्लिकेशन की तलाश कर रहे हैं, तो विंडोज फोटो आपके लिए वहीं है। एप्लिकेशन विंडोज पीसी पर पहले से इंस्टॉल आता है और इसलिए, किसी बाहरी एप्लिकेशन को इंस्टॉल करने की कोई आवश्यकता नहीं है। भले ही विंडोज फोटो का इस्तेमाल मुख्य रूप से फोटो देखने के लिए किया जाता है, लेकिन एक समर्पित वीडियो एडिटर उपलब्ध है जहां आप अपने रिकॉर्ड किए गए वीडियो को आसानी से ट्रिम कर सकते हैं। वीडियो को ट्रिम करने के अलावा, आप कुछ बुनियादी संपादन कर सकते हैं जैसे शीर्षक कार्ड और टेक्स्ट, वीडियो प्रभाव, पृष्ठभूमि संगीत और फ़िल्टर जोड़ना। यहां विंडोज फोटोज के फायदे और नुकसान हैं।
पेशेवरों : -
-
विंडोज में प्री-इंस्टॉल आता है।
-
संचालित करने के लिए सुपर आसान यूजर इंटरफेस।
-
त्वरित ट्रिमिंग और वीडियो काटना।
-
विभिन्न गति संक्रमण और प्रभाव मौजूद हैं।
-
वीडियो में शीर्षक, टेक्स्ट और ऑडियो जोड़ें।
-
विभिन्न फिल्टर और 3डी प्रभाव उपलब्ध हैं।
विपक्ष :-
-
बड़े वीडियो को ट्रिम करने के लिए उपयुक्त नहीं है।
-
वीडियो सहेजने के लिए विभिन्न फ़ाइल स्वरूपों का अभाव।
2. क्विकटाइम प्लेयर
इसके लिए सर्वश्रेष्ठ: बुनियादी ट्रिमिंग आवश्यकताओं वाले मैक उपयोगकर्ता
G2 रेटिंग: 4.2/5
कीमत: फ्री
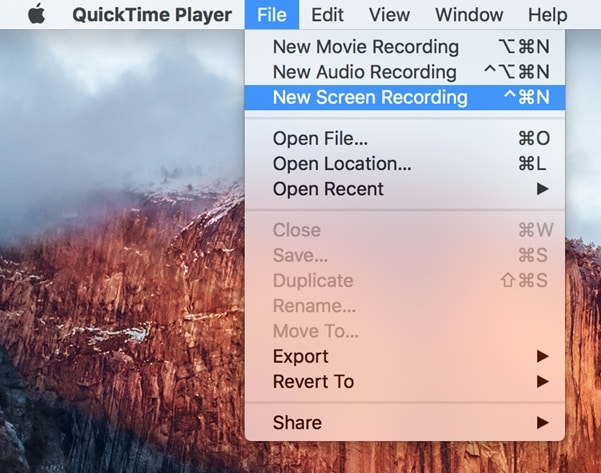
यदि आप एक मैक उपयोगकर्ता हैं और आप अपने वीडियो को ट्रिम करने के लिए एक मुफ्त वीडियो संपादक की तलाश कर रहे हैं, तो क्विकटाइम प्लेयर आपके लिए सबसे अच्छा एप्लिकेशन है। विंडोज यूजर्स के लिए विंडोज फोटो की तरह, मैक यूजर्स के लिए क्विकटाइम प्लेयर पहले से इंस्टॉल आता है। वास्तव में, यह मैक उपयोगकर्ताओं के लिए डिफ़ॉल्ट मीडिया प्लेयर है। मीडिया फ़ाइलों को चलाने के अलावा, आप वीडियो रिकॉर्डिंग के साथ-साथ रिकॉर्ड किए गए वीडियो को संपादित करने के लिए क्विकटाइम प्लेयर का उपयोग कर सकते हैं। इसमें आसानी से पूर्णता के स्तर तक पहुंचने के लिए वीडियो को ट्रिम करना और एप्लिकेशन पर फिर से खेलना शामिल है। यहां क्विकटाइम प्लेयर के फायदे और नुकसान हैं जिनके बारे में आपको पता होना चाहिए।
पेशेवरों : -
-
यूजर इंटरफेस संचालित करने के लिए सुपर आसान है।
-
वीडियो को जल्दी से ट्रिम, फ्लिप, स्प्लिट और मर्ज करें।
-
ऑडियो के साथ त्रुटिपूर्ण तरीके से वीडियो रिकॉर्ड करने का विकल्प।
-
QuickTime पर संपादित वीडियो का त्वरित पूर्वावलोकन।
-
QuickTime iPhone और iPad के साथ संगत है।
-
प्रो संस्करण में उपलब्ध उन्नत स्ट्रीमिंग विकल्प।
-
विभिन्न वीडियो फ़ाइल स्वरूपों को चलाने का समर्थन करता है।
विपक्ष :-
-
कुछ सेटिंग्स जटिल हैं।
-
बड़ी वीडियो फ़ाइलों को संपादित करते समय यह क्रैश हो सकता है।
3. आईमूवी
इसके लिए सर्वश्रेष्ठ: वीडियो चलाना और संपादित करना
G2 रेटिंग: 4.3/5
कीमत: फ्री

यदि आप एक मैक उपयोगकर्ता हैं और आप एक समर्पित वीडियो संपादक की तलाश कर रहे हैं, तो iMovie एक बढ़िया विकल्प है। iMovie मैक पर प्री-इंस्टॉल भी आता है और यह iPhone और iPad के साथ भी कम्पेटिबल है। एप्लिकेशन मैक उपयोगकर्ताओं के लिए पूरी तरह से मुफ्त उपलब्ध है और इसलिए, कई वीडियो संपादन के लिए क्विकटाइम प्लेयर पर इसे पसंद करते हैं। आप अपने वीडियो को जल्दी से ट्रिम कर सकते हैं और साथ ही अपनी आवश्यकताओं के अनुसार अपने वीडियो को रोटेट और क्रॉप कर सकते हैं। आप उपलब्ध प्रभावों और फ़िल्टर के साथ अपने वीडियो को बेहतर बना सकते हैं। यहां iMovie के फायदे और नुकसान हैं जिनके बारे में आपको पता होना चाहिए।
पेशेवरों : -
-
आसान संचालन के लिए सहज यूजर इंटरफेस।
-
कच्चे वीडियो को प्रस्तुत करने योग्य बनाने के लिए त्वरित संपादन।
-
दुर्घटनाग्रस्त हुए बिना 4K वीडियो संपादन का समर्थन करता है।
-
आकर्षक वीडियो के लिए विभिन्न ग्राफिकल तत्व जोड़ें।
-
वीडियो एन्हांसमेंट के लिए विभिन्न प्रकार के प्रभाव और फिल्टर।
-
उपकरणों और ऑनलाइन प्लेटफॉर्म पर आसान साझाकरण विकल्प।
-
एक साथ कई वीडियो प्रोजेक्ट पर काम करें।
विपक्ष :-
-
MP4 वीडियो का संपादन जटिल है।
-
उन्नत संपादन सुविधाओं का अभाव है।
4. मीडिया कोप
इसके लिए सर्वश्रेष्ठ: ज़रूरतों का उपयोग करने वाले एकाधिक वीडियो
G2 रेटिंग: 4.0/5
कीमत: फ्री
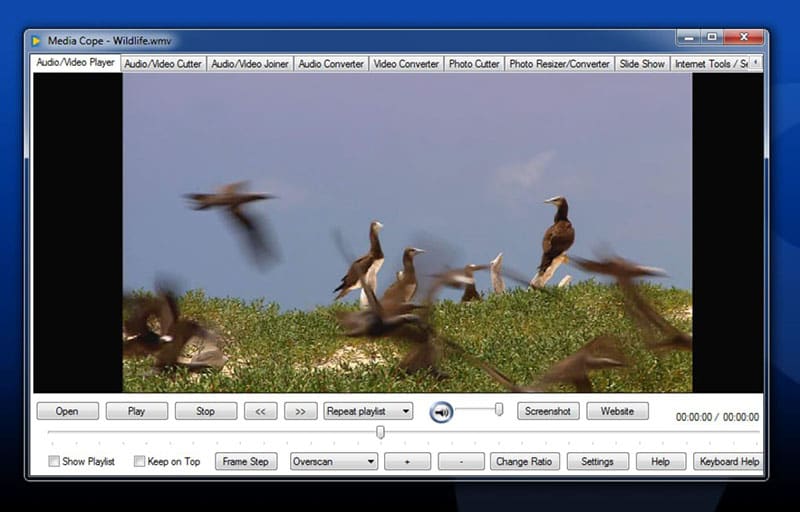
Media Cope केवल Windows उपयोगकर्ताओं के लिए एक फ्रीवेयर वीडियो ट्रिमर है। यह मानक संपादन विकल्पों के साथ एक बुनियादी वीडियो संपादक है। सॉफ्टवेयर उन लोगों के लिए सबसे उपयुक्त है जिनके पास विंडोज 7 जैसे पुराने विंडोज संस्करण हैं। लाइटवेट एप्लिकेशन ऑडियो और वीडियो प्लेयर के रूप में कार्य कर सकता है। आप अपने वीडियो को आसानी से ट्रिम कर सकते हैं और आयात भागों को भी निकाल सकते हैं। आप ऑडियो और वीडियो फ़ाइलों को भी जोड़ सकते हैं और उन्हें वांछित फ़ाइल स्वरूपों में परिवर्तित कर सकते हैं। यहां मीडिया कोप के फायदे और नुकसान हैं।
पेशेवरों : -
-
विभिन्न स्वरूपों की ऑडियो और वीडियो फ़ाइलें चला सकते हैं।
-
वीडियो और ऑडियो फ़ाइलों को तुरंत ट्रिम और कट करें।
-
ऑडियो और वीडियो क्लिप से जुड़ सकते हैं और वांछित फ़ाइल प्रारूप में सहेज सकते हैं।
-
आवश्यकता के अनुसार ऑडियो और वीडियो फ़ाइलों को परिवर्तित कर सकते हैं।
-
तस्वीरों को तुरंत स्लाइड शो में बदलें।
-
फ़ोटो का आकार बदलें और वीडियो से स्क्रीनशॉट लें।
-
विभिन्न वीडियो मापदंडों को संशोधित करें और फ़ाइल को निर्यात करें।
विपक्ष :-
-
विभिन्न मानक वीडियो संपादन विकल्पों का अभाव।
-
आधुनिक विंडोज ओएस के लिए पुराना लग रहा है।
5. ओपनशॉट
इसके लिए सर्वश्रेष्ठ: ओपन सोर्स सॉफ्टवेयर प्रेमी
G2 रेटिंग: 4.4/5
कीमत: फ्री

यदि आप एक ऐसे वीडियो संपादक की तलाश कर रहे हैं जो सभी डेस्कटॉप ऑपरेटिंग सिस्टम के अनुकूल हो, तो ओपनशॉट आपके लिए सबसे अच्छा विकल्प है। यह विंडोज, मैक और यहां तक कि लिनक्स यूजर्स के लिए पूरी तरह से फ्री, ओपन सोर्स वीडियो एडिटर है। शुरुआती लोगों के लिए वीडियो संपादकों की इस सूची में, यह सुविधाओं और कार्यात्मकताओं के मामले में सबसे अच्छा है। आप वीडियो सामग्री को बढ़ाने के लिए वीडियो को ट्रिम और स्लाइस कर सकते हैं, एनिमेशन जोड़ सकते हैं, विभिन्न परतें और वीडियो प्रभाव डाल सकते हैं। वीडियो संपादक में आपके द्वारा खोजे जाने वाले सभी विभिन्न विकल्पों के होने के बावजूद उपयोगकर्ता इंटरफ़ेस अपेक्षाकृत सहज है। यहां ओपनशॉट वीडियो एडिटर के फायदे और नुकसान हैं।
पेशेवरों : -
-
सरल लेकिन शक्तिशाली यूजर इंटरफेस।
-
विभिन्न विकल्पों के बिना तुरंत वीडियो ट्रिम करें।
-
3D शीर्षक, 3D एनिमेशन और धीमी गति के प्रभाव जोड़ें।
-
वीडियो और ऑडियो प्रभावों का भार लागू करने के लिए मौजूद है।
-
वीडियो, ऑडियो ट्रैक और छवियों की विभिन्न परतें जोड़ें।
-
कीफ्रेमिंग और टाइम मैपिंग के लिए उन्नत विकल्प।
-
बहुभाषी समर्थन और नई सुविधाओं के लिए लगातार अपडेट।
विपक्ष :-
-
बड़ी वीडियो फ़ाइलों के लिए अस्थिर प्रदर्शन।
-
हार्डवेयर त्वरण बहुत शक्तिशाली नहीं है।
# उन्नत उपयोगकर्ताओं के लिए:
यदि आप एक नियमित वीडियो निर्माता हैं और आप चाहते हैं कि आपके वीडियो सबसे अलग दिखें, तो यह श्रेणी आपके लिए है। आप अपने वीडियो को ठीक वैसे ही संपादित और ट्रिम कर सकते हैं जैसे आप चाहते हैं। इसके अलावा, आप निम्न वीडियो संपादकों के साथ अपने कच्चे वीडियो को पेशेवर-गुणवत्ता वाले वीडियो में बदल सकते हैं।
1. फिल्मोरा
इसके लिए सर्वश्रेष्ठ: रिच वीडियो प्रभाव और टेम्प्लेट
G2 रेटिंग: 4.4/5
कीमत: $49.99

Wondershare Filmora एक उत्कृष्ट वीडियो संपादक है जहां आप एक पेशेवर की तरह अपने वीडियो और ऑडियो फाइलों को ट्रिम कर सकते हैं। चूंकि आप एक उन्नत उपयोगकर्ता हैं, इसलिए आपको अपने कच्चे वीडियो को आश्चर्यजनक दिखाने के लिए केवल ट्रिमिंग से अधिक की आवश्यकता होगी। Filmora आपको अपने वीडियो को अगले स्तर तक ले जाने के लिए आवश्यक सभी उपकरण और सुविधाएँ प्रदान करता है।
अन्य लोकप्रिय प्रीमियम वीडियो संपादकों की तुलना में, Filmora को भारी CPU संसाधन की आवश्यकता नहीं है और इसमें एक सहज उपयोगकर्ता इंटरफ़ेस है। यही कारण है कि वीडियो निर्माता विशेष रूप से YouTubers और Vloggers अपने वीडियो को नियमित रूप से संपादित करने के लिए इसे पसंद करते हैं। सॉफ्टवेयर विंडोज और मैक दोनों यूजर्स के लिए उपलब्ध है। यहां फिल्मोरा के फायदे और नुकसान हैं जिनके बारे में आपको पता होना चाहिए।
विन 7 या बाद के संस्करण (64-बिट) के लिए
MacOS 10.12 या बाद के संस्करण के लिए
पेशेवरों : -
-
ऑडियो स्रोतों के साथ स्क्रीन और वेब कैमरा वीडियो रिकॉर्ड करें।
-
वीडियो फ़ाइलों को ट्रिम करने, विभाजित करने और जोड़ने के लिए बुनियादी उपकरण।
-
विभिन्न वीडियो सेटिंग्स और मापदंडों को अनुकूलित करें।
-
वीडियो और ऑडियो प्रभाव और ग्राफिकल तत्व जोड़ें।
-
मीडिया फ़ाइलों और एनिमेशन की स्टॉक लाइब्रेरी की विस्तृत श्रृंखला।
-
कई परतें जोड़ें और संपादन करते समय कई चैनलों के साथ काम करें।
-
रिकॉर्ड की गई या संपादित वीडियो फ़ाइल को विभिन्न फ़ाइल स्वरूपों में निर्यात करें।
विपक्ष :-
-
एडिटेड वीडियो को सेव करने में प्रोसेस पार्ट होने के कारण समय लगता है।
2. एडोब प्रीमियर प्रो
इसके लिए सर्वश्रेष्ठ: पेशेवर वीडियो ट्रिम, संपादित करें और प्रभाव के बाद
G2 रेटिंग: 4.5/5
कीमत: $20.99/माह

Adobe Premiere Pro सबसे शक्तिशाली वीडियो संपादक है और यही कारण है कि पेशेवर वीडियो संपादक भी इसका उपयोग फिल्मों के संपादन के लिए करते हैं। शायद ही कोई वीडियो फ़ाइल प्रारूप हो जो प्रीमियर का समर्थन नहीं करता है। आप एक ही समय में कई वीडियो संपादित कर सकते हैं और दृश्यों और क्लिप के बीच स्विच कर सकते हैं। वीडियो और ऑडियो फाइलों को ट्रिम करना सहज नियंत्रण के साथ तेज है। उन्नत उपयोगकर्ताओं के लिए गैर-रेखीय वीडियो संपादन का विकल्प भी है।
चूंकि यह वीडियोग्राफी की दुनिया में बेहद लोकप्रिय है, इसलिए बड़ी वीडियो परियोजनाओं और एकीकृत वर्कफ़्लो के संपादन के लिए कई संगठनात्मक उपकरण उपलब्ध हैं। सॉफ्टवेयर वीआर वीडियो, 3डी वीडियो और मल्टीकैम वीडियो एडिटिंग को सपोर्ट करता है। सॉफ्टवेयर विंडोज के साथ-साथ मैक यूजर्स के लिए भी उपलब्ध है। एडोब प्रीमियर प्रो के फायदे और नुकसान यहां दिए गए हैं।
पेशेवरों : -
-
यूजर इंटरफेस के पुनर्गठन के लिए अनुकूलन योग्य लेआउट।
-
प्रतिपादन के बिना त्वरित ट्रिमिंग और प्लेबैक विकल्प।
-
आयात और निर्यात के लिए फ़ाइल स्वरूपों की एक विस्तृत श्रृंखला का समर्थन करता है।
-
पेशेवर वीडियो और ऑडियो संपादन के लिए सभी विभिन्न उपकरण।
-
पर काम कर सकते हैं और कई वीडियो फ़ाइलों को आसानी से प्रस्तुत कर सकते हैं।
-
अद्भुत स्थिरीकरण सुविधाओं के साथ क्रॉस-ऐप कार्यक्षमता।
विपक्ष :-
-
सीखने की अवस्था काफी कठिन है और इसमें बहुत समय लगता है।
-
सॉफ्टवेयर केवल हाई-एंड कंप्यूटर के लिए उपयुक्त है।
3. फाइनल कट प्रो
इसके लिए सर्वश्रेष्ठ: किसी भी पेशेवर वीडियो संपादन के उन्नत आयोजन उपकरण
G2 रेटिंग: 4.4/5
कीमत: $299

फ़ाइनल कट प्रो वीडियोग्राफी की दुनिया में उतना ही लोकप्रिय है जितना कि एडोब प्रीमियर प्रो। फाइनल कट प्रो मुख्य रूप से मैक उपयोगकर्ताओं के लिए है क्योंकि इसे ऐप्पल द्वारा विकसित किया गया है। मैक उपयोगकर्ताओं के लिए यह सबसे शक्तिशाली वीडियो संपादक है क्योंकि यह पेशेवर वीडियो संपादन के लिए बहुत सारी सुविधाओं से भरा है। अन्य मानक संपादन विकल्पों के साथ, वीडियो को ट्रिम करना जितना आसान है, उतना ही आसान है।
सॉफ्टवेयर मल्टीकैम वीडियो, वीआर वीडियो, 3 डी वीडियो के साथ-साथ 360 डिग्री वीडियो के संपादन का समर्थन करता है। अंतहीन प्रीसेट और प्रभाव उपलब्ध हैं जिन्हें आप संपादन करते समय अपने वीडियो पर लागू कर सकते हैं। आप बिना परफॉरमेंस लैग के आसानी से 4K वीडियो एडिट कर सकते हैं। वास्तव में, फाइनल कट प्रो चमकता है जहां अन्य वीडियो संपादक उच्च रिज़ॉल्यूशन और बड़ी वीडियो फ़ाइलों के साथ प्रदर्शन करने में विफल होते हैं। यहां फाइनल कट प्रो के फायदे और नुकसान हैं।
पेशेवरों : -
-
वीडियो को ट्रिम करना, काटना, विभाजित करना और जुड़ना आसान है।
-
मानक और उन्नत टूल के साथ निर्बाध वीडियो संपादन।
-
विभिन्न गति ग्राफिक्स टेम्पलेट उपलब्ध हैं।
-
बाहरी प्लग-इन और वीआर हेडसेट प्लेबैक का समर्थन करता है।
-
उचित वीडियो फ़ाइलें और संपत्ति आयोजन और ऑडियो संपादन विकल्प।
-
बड़ी वीडियो फ़ाइलों का अपेक्षाकृत त्वरित प्रतिपादन।
विपक्ष :-
-
सभी उपलब्ध विकल्पों के अभ्यस्त होने में समय लग सकता है।
-
साथियों की तुलना में अपेक्षाकृत महंगा।
4. Movavi वीडियो संपादक
इसके लिए सर्वश्रेष्ठ: वे लोग जिन्हें वीडियो में अधिक शानदार प्रभाव पसंद हैं
G2 रेटिंग: 4.8/5
कीमत: $74.95

Movavi वीडियो एडिटर वीडियो ट्रिमिंग और एडिटिंग के लिए एक प्रीमियम सॉफ्टवेयर है। यह विंडोज और मैक दोनों यूजर्स के लिए उपलब्ध है। एक मुफ्त संस्करण उपलब्ध है लेकिन यह आउटपुट वीडियो पर वॉटरमार्क डालता है। वीडियो को ट्रिम करने और विभाजित करने के अलावा, आप शीर्षक और संक्रमण से लेकर स्टिकर और तत्वों तक शुरू होने वाले विभिन्न वीडियो प्रभाव जोड़ सकते हैं। इसके अलावा, आप ग्रीनस्क्रीन प्रभाव का विकल्प चुन सकते हैं और वर्टिकल मोड में वीडियो संपादित कर सकते हैं। यहां Movavi Video Editor के फायदे और नुकसान हैं जिनके बारे में आपको पता होना चाहिए।
पेशेवरों : -
-
विभिन्न स्रोतों से एकीकृत वीडियो कैप्चरिंग विकल्प।
-
वीडियो को तुरंत ट्रिम करना, विभाजित करना और जुड़ना।
-
ढेर सारे शीर्षक, फ़िल्टर और बदलाव मौजूद हैं।
-
वीडियो PiP लेयर्स के साथ-साथ वॉयसओवर भी जोड़ें।
-
लंबवत वीडियो संपादन मोड मौजूद है।
-
वीडियो स्थिरीकरण मोड और क्रोमा कुंजी।
-
कीफ्रेमिंग, स्लो मोशन और मोशन ट्रैकिंग।
विपक्ष :-
-
प्रतिपादन बहुत तेज नहीं है।
-
रंग ट्यूनिंग विकल्पों की कमी।
5. बैंडिकट
इसके लिए सर्वश्रेष्ठ: तेज गति के साथ वीडियो ट्रिम करें, जुड़ें और विभाजित करें
G2 रेटिंग: 4.0/5
कीमत: $44.96
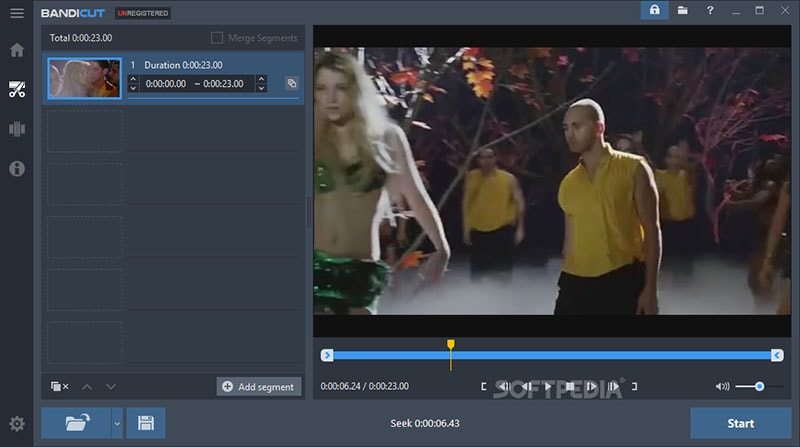
Bandicut Windows उपयोगकर्ताओं के लिए एक समर्पित वीडियो ट्रिमर है। यह एकमुश्त खरीद शुल्क के साथ एक प्रीमियम एप्लिकेशन है। सॉफ्टवेयर दोषरहित वीडियो ट्रिमिंग सुनिश्चित करता है, और आप इसके सहज उपयोगकर्ता इंटरफ़ेस के लिए वीडियो को तुरंत ट्रिम कर सकते हैं। यह एक बहुमुखी एप्लिकेशन है जिसका उपयोग आप वीडियो से ऑडियो निकालने के साथ-साथ कई वीडियो फ़ाइलों में शामिल होने के लिए कर सकते हैं। एक बड़ी वीडियो फ़ाइल को कई फ़ाइलों में विभाजित करना बहुत आसान है। हालाँकि, यह Filmora या Premiere की तरह एक पूर्ण वीडियो संपादक नहीं है। इसलिए, यदि आपका उद्देश्य विशेष रूप से वीडियो को ट्रिम करना, विभाजित करना और उसमें शामिल होना है, तो यह आपके लिए एक है। यहां बैंडिकट के फायदे और नुकसान हैं।
पेशेवरों : -
-
वीडियो को तुरंत ट्रिम और विभाजित करें
-
सुपर सहज यूजर इंटरफेस।
-
वीडियो से सेगमेंट काटें।
-
कई वीडियो जल्दी से जुड़ें।
-
विभिन्न फ़ाइल स्वरूपों का समर्थन करता है।
-
संपादन के दौरान वीडियो की गुणवत्ता का कोई नुकसान नहीं।
-
उच्च प्रदर्शन के लिए हार्डवेयर त्वरण।
विपक्ष :-
-
बहुत सीमित संपादन सुविधाएँ।
6. वीएसडीसी
इसके लिए सर्वश्रेष्ठ: हल्के पेशेवर कौशल के साथ मूवी स्तर का वीडियो कट
G2 रेटिंग: 4.0/5
कीमत: $19.99

वीएसडीसी एक मुफ्त वीडियो संपादक है जिसमें सभी बुनियादी संपादन उपकरण उपलब्ध हैं। वीएसडीसी प्रो एक प्रीमियम वीडियो संपादक है जहां उन्नत सुविधाएं उपलब्ध हैं। एक वीडियो को ट्रिम करने के लिए, वीएसडीसी मुक्त वीडियो संपादक काम पूरा कर सकता है। भले ही यह पूरी तरह से मुफ़्त है, लेकिन कुछ सुविधाएँ कई प्रीमियम वीडियो संपादकों के समान हैं। उदाहरण के लिए, आपको फ़िल्टर, प्रभाव और ट्रांज़िशन के एक बड़े सेट तक पहुंच प्राप्त होती है जिसे आप अपने वीडियो पर लागू कर सकते हैं। यहां तक कि जब आपके पास लो-एंड पीसी है, तब भी आप बेसिक वीडियो एडिटिंग का काम आराम से कर सकते हैं। यहां वीएसडीसी के मुफ्त वीडियो संपादक के सभी फायदे और नुकसान हैं जिन्हें आपको जानना चाहिए।
पेशेवरों : -
-
वीडियो का त्वरित ट्रिमिंग और मूल संपादन।
-
प्रभाव और फिल्टर के साथ-साथ क्रोमा कुंजी की विस्तृत श्रृंखला।
-
रंग सुधार विकल्प और गैर-रेखीय संपादन उपलब्ध है।
-
360 डिग्री वीडियो और स्प्लिट-स्क्रीन वीडियो संपादित करने का समर्थन करता है।
-
विभिन्न वीडियो और ऑडियो फ़ाइल स्वरूपों का समर्थन करता है।
-
लाइटवेट और लो-एंड कंप्यूटर के लिए उपयुक्त।
विपक्ष :-
-
मानक ऑडियो संपादन विकल्पों का अभाव है।
-
हॉटकी और उपयोगी कीबोर्ड शॉर्टकट का अभाव है।
7. कैमटासिया
इसके लिए सर्वश्रेष्ठ: ट्यूटोरियल वीडियो रिकॉर्डिंग और संपादन
G2 रेटिंग: 4.6/5
कीमत: $224.99

Camtasia by TechSmith विंडोज और मैक यूजर्स के लिए एक प्रीमियम वीडियो एडिटर है। भले ही यह वीडियो एडिटर के रूप में अधिक लोकप्रिय है, आप सॉफ्टवेयर पर अपने वीडियो को आसानी से ट्रिम कर सकते हैं। आप अपनी स्क्रीन के साथ-साथ बाहरी वेबकैम पर कुछ भी रिकॉर्ड कर सकते हैं। आप रिकॉर्ड किए गए वीडियो को संपादित कर सकते हैं और साथ ही त्वरित संपादन के लिए बाहरी वीडियो फ़ाइलों को आयात कर सकते हैं। सॉफ्टवेयर आसान शेयर तत्काल प्रदान करता है जिसके माध्यम से आप लोकप्रिय वीडियो स्ट्रीमिंग प्लेटफॉर्म पर साझा कर सकते हैं। विभिन्न श्रेणियों के वीडियो बनाने और संपादित करने के लिए विभिन्न टेम्पलेट और थीम उपलब्ध हैं। यहाँ Camtasia के पक्ष और विपक्ष हैं।
पेशेवरों : -
-
त्वरित ट्रिमिंग, विभाजन, वीडियो विकल्पों में शामिल होना।
-
बहुमुखी वीडियो निर्माण के लिए विभिन्न टेम्पलेट और पैकेज।
-
विभिन्न संक्रमण, एनोटेशन और प्रीसेट मौजूद हैं।
-
पावरपॉइंट एकीकरण, स्क्रीन और वेब कैम कैप्चर।
-
रॉयल्टी मुक्त संपत्तियों के साथ विभिन्न कर्सर और ऑडियो प्रभाव।
-
विभिन्न मीडिया फ़ाइलों को आयात करें और सीधे वीडियो स्ट्रीमिंग प्लेटफॉर्म पर अपलोड करें।
विपक्ष :-
-
बड़ी फ़ाइलों के साथ काम करते समय क्रैश की रिपोर्ट।
-
कोई कीफ़्रेम और गति ट्रैकिंग नहीं।
-
बहुत कम अनुकूलन विकल्प।
मोबाइल के लिए भाग 3 वीडियो ट्रिमर
In today's world, the cameras of smartphones are extremely powerful, and there are many who shoot videos with phone cameras instead of a dedicated digital camera. For example, there are many popular vloggers who shoot their videos with phone cameras, and video creators make short videos with phone cameras. When you shoot a video on your phone, you must be looking for a video trimmer app for your phone so that you can trim the recorded video instantly and share across social media and video streaming platforms. Here is the list of the best video trimmers for mobile.
# For Beginner Users:
1. YouCut:
Best for: Best Video Trimmer and Joiner app for YouTube and other social media.
Rating: 4.9/5
Download Link: https://play.google.com/store/apps/details?id=com.camerasideas.trimmer&hl=en_US&gl=US
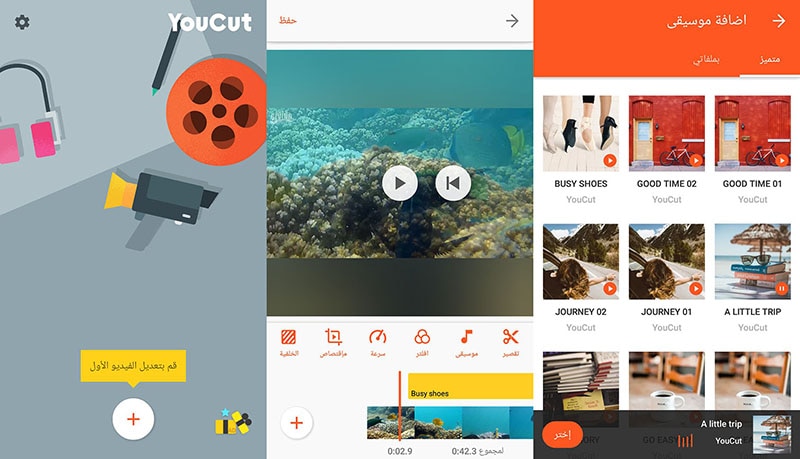
YouCut is a popular Android video editor where you can trim and join videos instantly. There are many who consider YouCut as the best video editor available. It is completely free to use and there is no watermark issue. You can edit videos without prior experience and even create videos from photos and video clips. Here are the pros and cons of YouCut you should know.
Pros:-
-
Trim and cut video without any length issue.
-
Split and slice large video files without losing quality.
-
Merge and join video clips to make a complete video.
-
Change speed of video as well as add filters and effects.
-
Add text and music as well as adjust colors.
-
Change aspect ratio, video background, and save videos in HD.
Cons:-
-
No undo button available yet.
-
Output video file formats are limited.
2. VidTrim Pro:
Best for: Android video trimming, merging, frame grabbing
Rating: 4.1/5
Download Link: https://play.google.com/store/apps/details?id=com.goseet.VidTrimPro&hl=en_US&gl=US
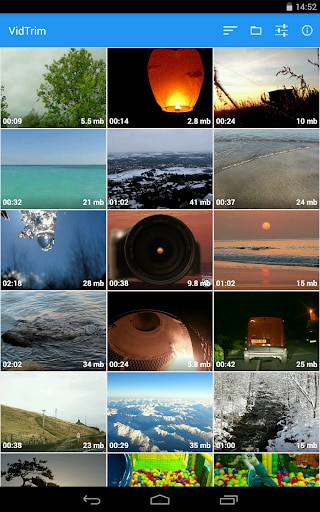
VidTrim is a dedicated video trimmer available for Android users. The free version adds a watermark to the output video, and hence, you have to opt for VidTrim Pro to avoid all limitations. Apart from trimming videos, you can merge videos and convert videos into audio files. You can also add effects and music tracks to your videos. The user interface is as simple as it gets. Here are the pros and cons of VidTrim Pro app.
Pros:-
-
Trim videos as well as merge video clips.
-
Convert supported video files into Mp3 audio files.
-
Rotate videos as well as save screenshots from videos.
-
Add cool video effects, sound effects, and soundtracks.
-
Multi-lingual support and video file format converter.
Cons:-
-
Limited video editing features for a paid video editor app.
-
The user interface is simple but outdated.
3. Inshot:
Best for: Powerful all-in-one Video Editor and Video Maker with professional features.
Rating: 4.8/5
Download Link: https://play.google.com/store/apps/details?id=com.camerasideas.instashot&hl=en_US&gl=US

InShot is an extremely popular video editor among Android as well as iOS users. It is a great app to perform all the basic video editing works starting from trimming and merging to cropping and rotating. Besides, there are advanced features of adding music, filters, effects, stickers and much more. The user interface is great for beginners and even though the app mostly free, there are some in-app purchases available. Here are the pros and cons of InShot app.
Pros:-
-
Trim, cut, split, merge, crop and rotate videos.
-
Add music, voiceover as well as extract audio from videos.
-
Add video effects, filters, transitions, texts, and stickers.
-
Adjust video speed, brightness, contrast, and likewise.
-
Add video borders, blue background and convert file formats.
Cons:-
-
Does not support working with multiple video and audio files in the timeline.
-
There are complains on app crashing when working with large, high-resolution videos.
4. KineMaster:
Best for: Video content downloadable
Rating: 4.2/5
Download Link: https://play.google.com/store/apps/details?id=com.nexstreaming.app.kinemasterfree&hl=en_US&gl=US

You must have seen many videos online with the watermark “Made with Kinemaster”. This is because KineMaster is very popular among amateur video creators. KineMaster is available for Android as well as iOS users. You can instantly trim and crop videos. Besides, you can add special effects, animations and stickers as well as tweak different video settings for enhancements. KineMaster is available free of cost but it attaches a watermark to the output video at one corner. You can subscribe to KineMaster Premium to remove watermark and unlock more features. Here are the pros and cons of KineMaster.
Pros:-
-
Trim, cut, slice, and crop videos instantly.
-
Add music, sound effects as well as voiceover.
-
Provides amazing visual effects and animations.
-
Adjust color filters, modes and video speed.
-
Supports keyframing and motion tracking.
-
Save 4K videos and share instantly online.
Cons:-
-
KineMaster chroma key feature has bugs.
-
Can crash or freeze handling large video files.
5. Quik:
Best for: Producing cinematic auto-edits.
Rating: 4.3/5
Download Link: https://play.google.com/store/apps/details?id=com.gopro.smarty&hl=en_US&gl=US
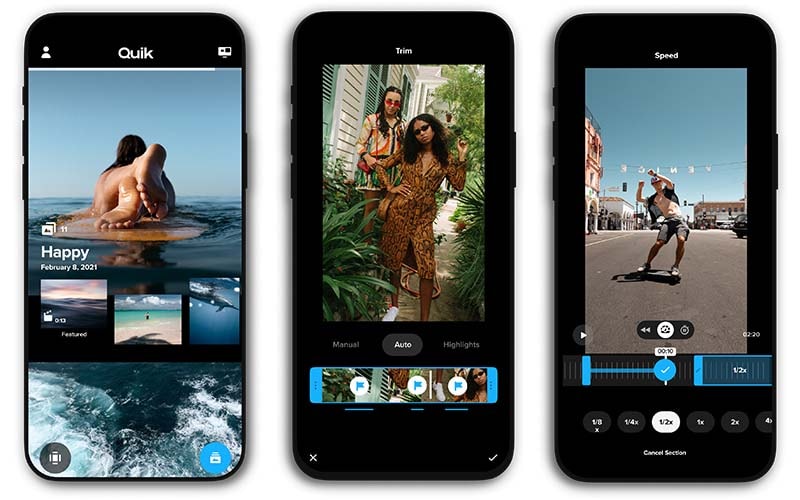
Quick from GoPro is fast becoming a popular video editor app. GoPro is the most popular action camera brand and naturally, its video editing app has garnered enough attention. The app is available for Android and iOS users. The app has a mixed bag of options for editing videos quickly. You can trim your videos, add filters and adjust video speed. Besides, its AI can locate the best shots in a video and enhance them with special effects. Here are the pros and cons of Quick app.
Pros:-
-
Trim, crop, adjust speed, remove audio from videos.
-
Different preset templates available with effects and filters.
-
Add music, titles, effects, and transitions.
-
Easy sharing of videos and photos.
-
Powerful AI to highlight the best shots in a video.
-
Adjust video orientation, save in 1080p resolution.
Cons:-
-
Not suitable for large video files.
-
No font adjustment options.
6. iMovie:
Best for: Create Hollywood-style trailers and beautiful movies
Rating: 4.0/5
Download Link: https://apps.apple.com/us/app/imovie/id377298193
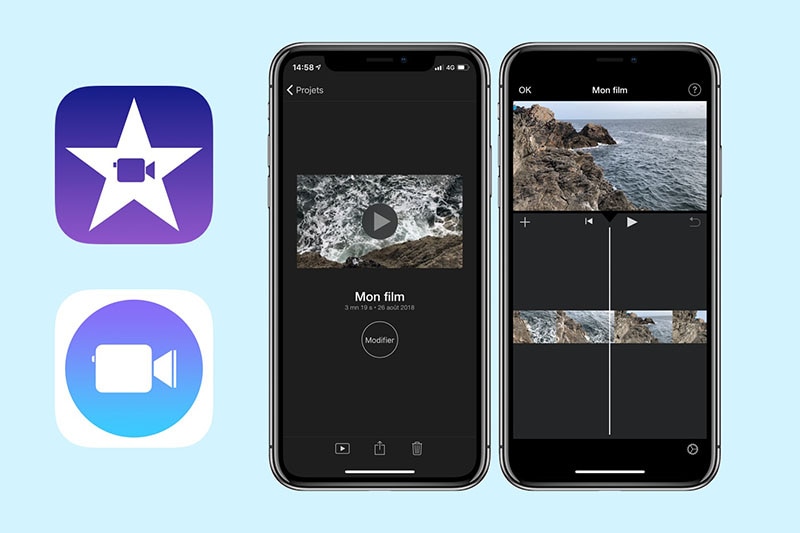
iMovie app by Apple is exclusively available for iOS users. iMovie is also available as a software which we have already discussed. In terms of features, iMovie app is very similar to iMovie software. You can instantly make basic editing works. Apart from editing, the app is ideal for creating different types of videos with ready-made templates. There are loads of graphical effects, animated titles, and video filters available to apply. Here are the pros and cons of iMovie app for you.
Pros:-
-
Record, trim, split, join and crop videos on the go.
-
Choose from different themes and templates to create videos.
-
Animated titles, video filters, graphical effects available.
-
Chroma key, PiP mode as well as split screen effect possible.
-
Add sound effects, music, and depth of field effect.
-
Optimized output for social media and video streaming platforms.
-
Supports 4K video editing and easy share across Apple devices.
Cons:-
-
Limited resources and customization options.
-
The app size is large and uses high CPU resources.
# For Advanced Users:
1. LumaFusion:
Best for: Professional video trimming for iOS devices
Rating: 4.8/5
Download Link: https://apps.apple.com/us/app/lumafusion/id1062022008

LumaFusion is a top-rated video editor for iPad and iPhone. The app is as good as a premium video editor for desktop users. Therefore, professional video creators who use iPhone or iPad for video editing prefer LumaFusion all the time. You can trim, cut, crop, split, and merge videos intuitively from its timeline. Most importantly, you can edit multiple video and audio files together like a professional. Here are the pros and cons of LumaFusion.
Pros:-
-
Trim and export video in different file formats.
-
Work with multiple video and audio files.
-
Preset transitions, instant preview, markers for timeline.
-
Add Chroma and Luma key effects as well as stunning visual effects.
-
Adjust speed, audio, use keyframes, correct colors.
-
Work with titles, fonts, borders, and share conveniently.
-
Wide range of media files available in the library.
Cons:-
-
Does not support motion tracking.
-
Can be difficult to edit large files.
2. Adobe Premiere Rush:
Best for: Shoot, edit, and share online videos anywhere.
Rating: 3.0/5
Download Link: https://play.google.com/store/apps/details?id=com.adobe.premiererush.videoeditor&hl=en_US&gl=US
Even though Adobe Premium Rush app is available or Android and iOS users, it is more popular among iPhone and iPad users. The app is free though there are in-app purchases available. Rush Premium has more features and functionalities. Editing any video is quite convenient though Adobe has tried its level best to offer all the possible features of Adobe Premium Pro desktop software on the app. The app supports multitrack timeline for professional videos. Here are all the pros and cons of Adobe Premiere Rush you should be aware of.
Pros:-
-
Record video in high-resolution with the app.
-
Trim, crop, mirror, and flip videos.
-
Add images, overlays, texts, and stickers.
-
Pan and zoom effect, animation titles.
-
Royalty-free audio tracks, color correction options.
-
Easy exporting of files in different formats.
Cons:-
-
Rendering projects can be slow.
-
Comes with limited features.
3. Filmmaker Pro Video Editor:
Best for: 4K quality video editing
Rating: 4.6/5
Download Link: https://apps.apple.com/us/app/filmmaker-pro-video-editor/id1082956994
Filmmaker Pro is a highly rated video editor that you can use to trim your videos. Filmmaker Pro app is available for both Android and iOS. The app supports 4K video for editing works. The timeline has color codes for different assets and hence, editing becomes easy. You can edit different video parameters and settings and add different effects. The auto save option is extremely useful when it comes to editing a large file. Even though it is available for free, they have a subscription plan for unlocking all features. Here are the pros and cons of Filmmaker Pro Video Editor.
Pros:-
-
Trim, split, crop and rotate videos.
-
Adjust video speed, volume, video grading.
-
Chroma key, voice to text caption, keyframe and motion tracking.
-
Different Picture-in-Picture mode for videos, photos, and GIFs.
-
Various transition effects, audio effects, and text overlays.
-
Different drawing tools, stickers, and graphical elements present.
Cons:-
-
The free version has limited features.
-
The number of effects are relatively less.
4. Splice Video Editor and Maker:
Best for: Vloggers and social platform video cutting
Rating: 4.7/5
Download Link: https://play.google.com/store/apps/details?id=com.splice.video.editor&hl=en_US&gl=US
Splice Video Editor and Maker is a free but powerful app that enables you to do pro-level editing. You can trim your video clips, adjust speed, and add music on the go. In fact, you can create videos and slideshows instantly and you can add texts and overlays. The music library has different categories of tracks to apply to videos. You can also merge videos as well as change aspect ratio according. The app is available for Android and iOS users. Here are all the pros and cons of Splice Video Editor and Marker.
Pros:-
-
Easy interface for smooth trimming and merging of videos.
-
Adjust speed, aspect ratio, and video parameters.
-
Organize clips and tracks in the timeline intuitively.
-
Add custom texts, titles, tracks, transitions, and effects.
-
Comes with a wide stock library of media files.
-
Direct uploading video files on different social media platforms.
Cons:-
-
Limited effects and filters available.
-
Frequent crashes while handling large files.
5. Funimate:
Best for: Mobile game video trim to show off gaming skills
Rating: 4.5/5
Download Link: https://play.google.com/store/apps/details?id=com.avcrbt.funimate&hl=en_US&gl=US
Funimate video editor and maker app is quite highly rated on both Play Store and App Store. It is a very powerful and feature-rich app where you will get all the desired editing tools to publish a professional-quality video. Starting from element library to video masks and AI effects, the app takes your video to the next level. You can obviously perform the basic editing works like trimming, splitting and joining. Here are the pros and cons of Funimate app.
Pros:-
-
Trimming, merging, and cutting videos.
-
Text effects, video AI effects, and effect mixer.
-
Comes with over 100 advanced video effects.
-
Allows adding music to videos for engaging videos.
-
Supports slow motion and looping videos.
-
Advanced keyframing and element library.
-
Allows creating a professional photo slideshow.
Cons:-
-
No multilingual support and auto-save feature.
-
Some lagging issues have been reported.
Part 4 Online Video Trimmers
If you are using a video editor on your computer, it takes considerable amount of space in your storage. The same is applicable to video editors for smartphones. If you do not want to install any app on your device yet trim videos conveniently, the online video trimmers are for you. You can open the video trimmer directly from your web browser and trim your video and save it without installing any application on your device. Here is the list of the best online video trimmers.
# For Beginner Users:
1. https://online-video-cutter.com/
Best for: Trimming large videos files.
Ratings: 4.2/5
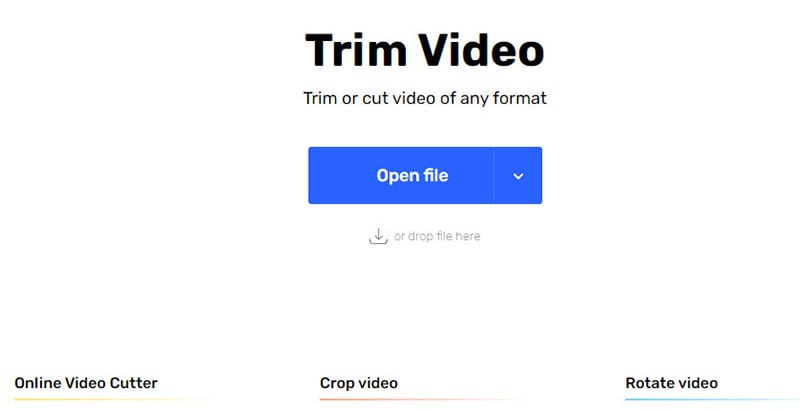
Online Video Cutter is a dedicated video trimmer where you need to drag and drop your video file and cut out the required portion. You can even crop and rotate your videos if there is any such requirement. You can access the online platform directly from your web browser. There is no need for installation of any web launcher. The platform is also secured and hence, your videos won't get leaked. There is also a Chrome extension available that you can use if you are a Chrome user. Here are the pros and cons of Online Video Cutter.
Pros:-
-
Easy video trimming by drag-and-drop files.
-
Enables uploading different file formats.
-
Rotate feature for saving in portrait and landscape mode.
-
Automatically deletes files for better security.
-
Crop feature for changing frame size.
-
Can edit video file of 4GB capacity.
Cons:-
-
May reduce the video quality for the editing video.
2. https://clideo.com/cut-video
Best for: Trimming short videos.
Ratings: 4.5/5
This is another online video trimmer that supports different video file formats. The user interface is sleek for quick video trimming. You can upload file from your device as well as from Cloud storage. In fact, you can use the platform to convert video files. The level of trust and security is high and there are additional settings available for better editing. Here are the pros and cons Clideo Video Cutter.
Pros:-
-
Intuitive interface for quick trimming.
-
Supports different file formats.
-
Converts videos into different formats.
-
Offers high-level online security.
-
Add fade in and fade out effects.
-
Upload video files from Google Drive and Dropbox.
Cons:-
-
No drag and drop feature.
-
File size is limited to 500 MB only.
3. https://www.kapwing.com/tools/trim-video
Best for: Editing video elaborately.
Ratings: 4.4/5
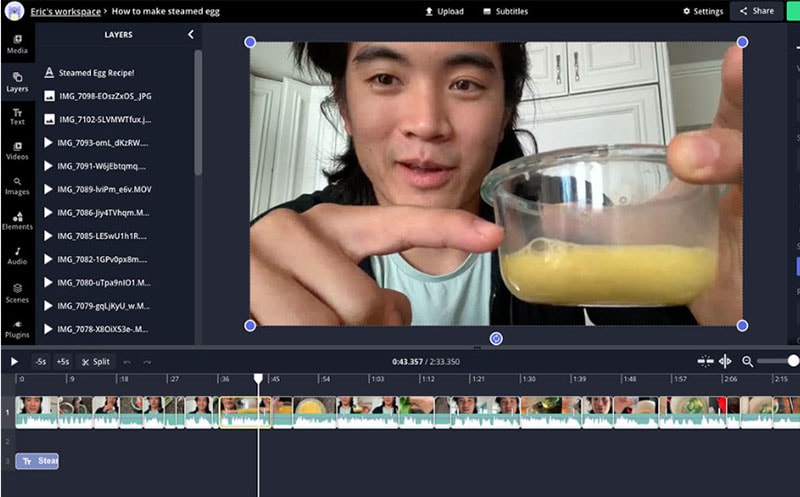
Kapwing is a dedicated online video editor that will give you the vibe of using a desktop video editor. Therefore, it is suitable for those who are looking for an online platform for trimming as well as various other editing works. You can add texts, images, elements, audio, transitions, as well as record videos. You can also export in different file formats. However, the free version attaches a watermark. Therefore, you have to upgrade to its premium version and use the platform is a full-fledged video editor. Here are the pros and cons of Kapwing.
Pros:-
-
Trim, crop, zoom videos and adjust video parameters.
-
Supports import and export of different file formats.
-
Add effects, audio, and elements to the videos.
-
You can work with multiple layers while editing.
-
Different sound effects, templates, and scenes and emojis present.
-
Stunning user interface that looks like a video editor software.
Cons:-
-
Free version attaches watermark and lowers video quality.
4. https://www.freeconvert.com/video-trimmer
Best for: Basic video trimming
Ratings: 4.0/5
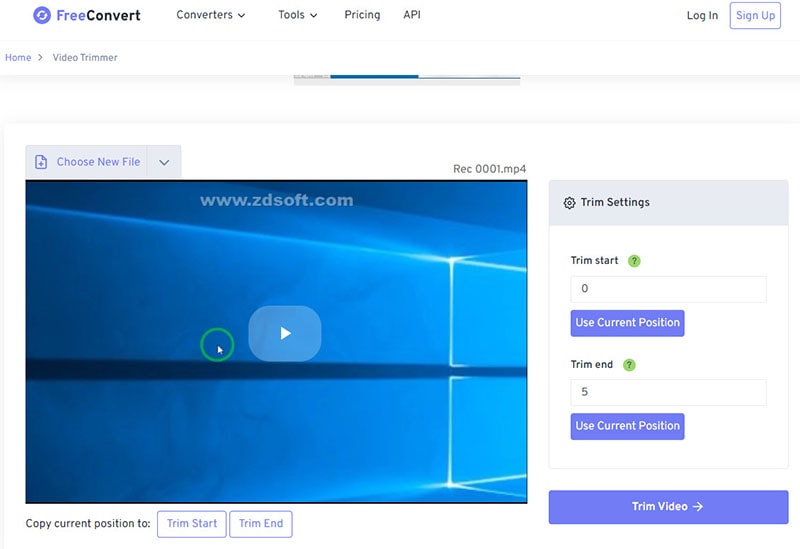
FreeConvert Video Trimmer is a free online tool through which you can trim videos of size up to 1GB easily. The platform supports as many as 40 different video file formats. Therefore, you can trim almost any video file easily. The security is tightened so that the uploaded videos do not get leaked. You can upload video files from your device, Google Drive, Dropbox as well as from URL. Therefore, if you want to trim videos that are available online, you can do it easily with this tool. Here are the pros and cons of FreeConvert Video Trimmer.
Pros:-
-
Easy to use, intuitive interface.
-
Does not require any registration.
-
Supports over 40 file formats.
-
Compatible with multiple browsers.
-
256-bit SSL encryption offers better security.
-
Allows adjustment of parameters before conversion.
Cons:-
-
There are too many annoying ads.
# For Advanced Users:
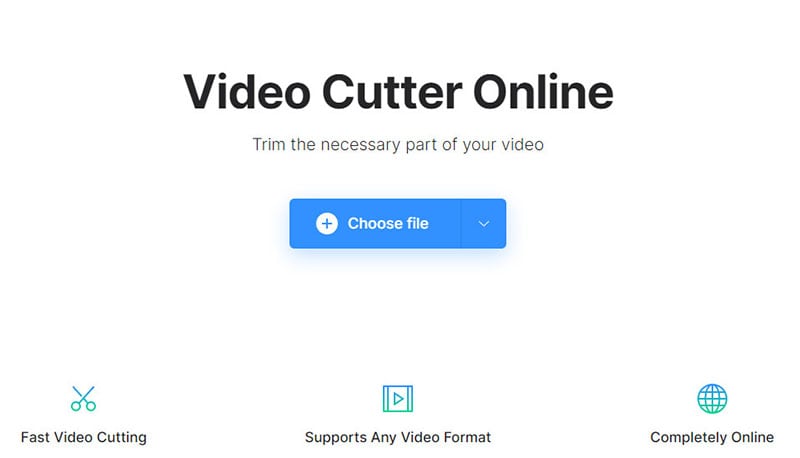
5. https://www.veed.io/tools/video-cutter
Best for: Trimming videos for social media platforms.
Ratings: 4.3/5
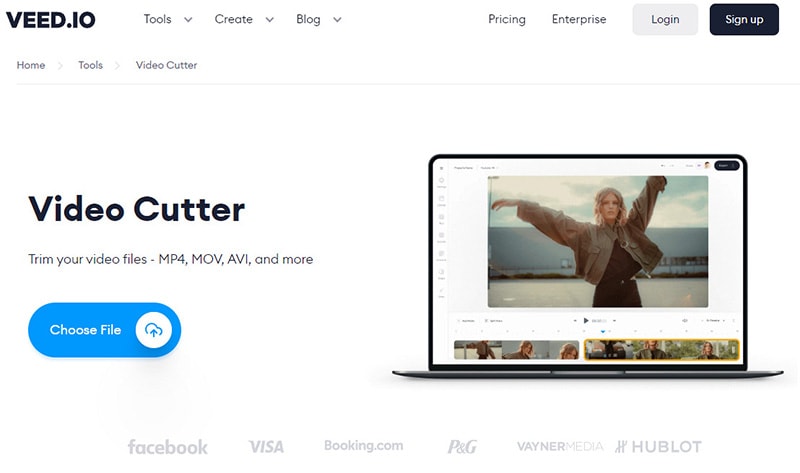
Veed.io has a wide collection of tools for video editing and the video cutter is a dedicated video trimmer. You can trim videos of popular file formats easily. Apart from video files, the platform supports trimming GIFs and audio files. You can upload videos as well as mention URL of videos that are present online for trimming. The online tool does not degrade the video quality and the output file is of high-quality as well. Here are the pros and cons of Veed.io video cutter.
Pros:-
-
Allows saving the video in a high-quality format.
-
Supports cutting a wide range of audio file formats.
-
Ability to upload and cut animated GIFs.
-
Allows cutting YouTube videos directly using URL.
-
Easy drag and drop feature for saving time.
-
"Split" option for removing the middle part of the video.
Cons:-
-
Not suitable for trimming large video files.
6. https://www.fastreel.com/video-cutter.html
Best for: Trimming videos for personal use.
Ratings: 4.2/5
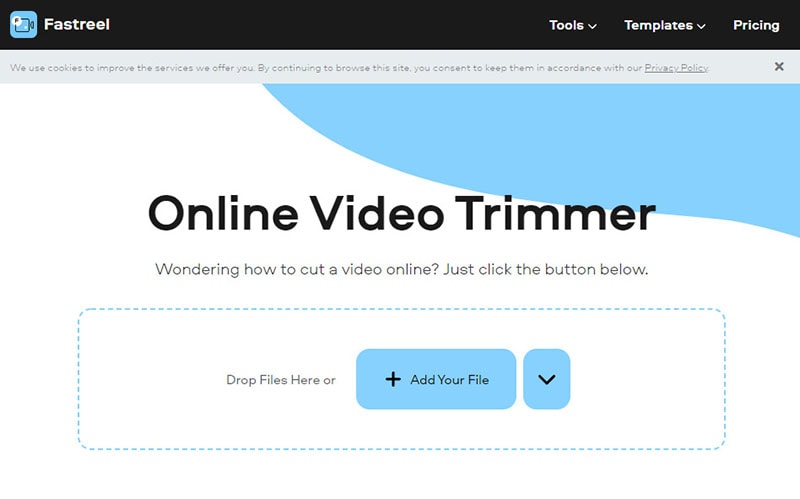
Fastreel online video trimmer lets you trim your videos with a few clicks. Drop your file and mark the points for trimming and there you go. That tool is also useful if you want to split your video. There are several video file formats that the platform supports. The user interface is intuitive and the trimming can be precise. The free version attaches a watermark and hence, the premium version is what you should have. Here are the pros and cons of Fastreel online video trimmer.
Pros:-
-
Simple interface for hassle-free trimming.
-
Supports different video file formats.
-
Feature of data security offers better safety.
-
Quick video trimming without using the editor.
-
Different file formats while saving the video.
-
Precision cutting for removing unwanted segments.
Cons:-
-
The free version comes with watermark.
-
Free version lowers the video quality.
7. https://flixier.com/tools/video-trimmer
Best for: editing videos as a teamwork
Ratings: 4.4/5

Flixier Video Trimmer is a premium tool to trim and crop videos instantly. The tool is available in a free version but there are many limitations. Therefore, you need to have a premium version of Flixier Video Trimmer. You can export videos in 1080p and 4K resolution. You can opt for transcribing your videos and store videos in the cloud. In the premium version, two team members can work together. Here are the pros and cons of Flixier Video Trimmer.
Pros:-
-
Upload videos from YouTube, Twitch, and cloud platforms.
-
No need to create account for instant trimming.
-
Trim, crop, cut, and add images to videos.
-
Supports multiple file formats.
-
Comes with an easy collaborative platform.
-
Additional translation and transcribe options.
Cons:-
-
There are lots of limitations of premium plans as well.
-
Only the highest premium plan supports 4K resolution.
8. https://www.wevideo.com/features/video-cutter
Best for: Best premium online video editor
Ratings: 4.5/5
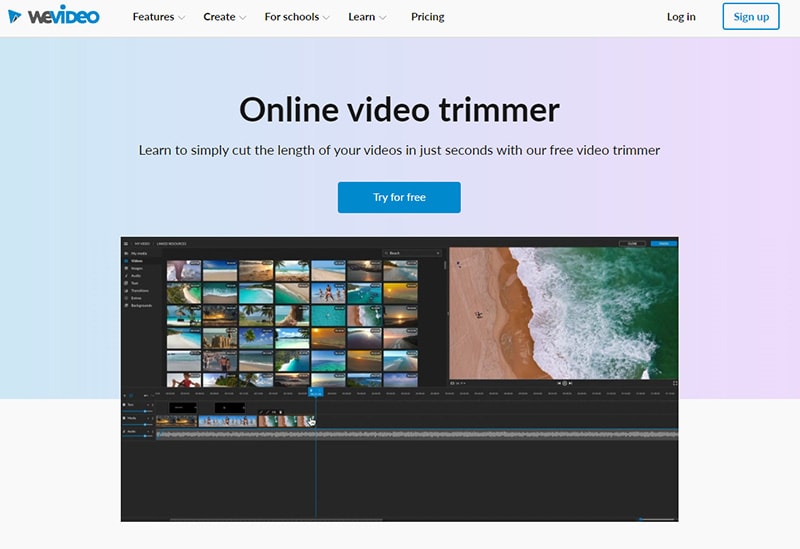
WeVideo Video Cutter is a paid video trimmer though you try out the platform for free. The platform supports a wide range of video files. You can drag and drop files and trim videos instantly. Trimming cannot get any easier and the processing speed of the editing video is fast. You can finish trimming your videos in a few seconds. There is a unique zoom feature to trim out videos accurately. You can also add texts and music to your video file before exporting. Here are the pros and cons of WeVideo Video Cutter.
Pros:-
-
Drag and drop feature for quick editing.
-
Smooth and accurate trimming with zoom function.
-
Music and motion titles library.
-
Compatible with different web browsers.
-
Export edited files in different file formats.
-
There is no capping on file size as such.
Cons:-
-
The pricing is on the steeper side.
Part 5 Editing Tips to Improve Your Videos
Apart from trimming, you have to edit different other aspects so that you can make the video engaging and eye-catching. Here are some editing tips you should stick to improve your video content.
Get The Best Video Editor - Editing a video is equally important as shooting a video. Once you have the best video editor, you can rest assured that your editing work is half done. This is because you have all the tools to turn your raw video into stunning video. You can experiment and come up with the best editing work to your own surprise.
Get The Length Correct - In today's world, viewers have very less time to watch videos. Therefore, a lengthy and elaborative video is a bummer. Hence, you should trim the video and keep only the portions that are relevant, engaging, and not boring.
Start with a Bang - The first impression is always the most important, and hence, the intro of your video is extremely crucial to keep the attention of the audiences intact. To make the intro interesting, you should not only focus on the content but also on video effects and animations that are attention-grabbing.
Smooth Cuts and Soothing Colours - When you are cutting from one scene or angle to another, the transition should be smooth so that it does not feel abrupt. Therefore, you should cut scenes when the subjects and objects seem to be static so that the transition is smooth naturally. Play attention to colour and the video editors allow you to enhance the quality by adjusting the colors and picture properties.
Graphical Objects - Use graphical objects and animated texts wherever possible for better explanations. Things can get boring visually when you do not add graphical elements, transitions, and animations appropriately in different places. Similarly, the use of texts and titles makes the video more engaging. Instead of static texts, there are animated texts and titles available with stickers and memes that you can edit your video with.
Play Attention to Sound - Sound is the most neglected part of a video by amateur video creators when one should pay attention to it. The sound effects can keep the audiences hooked to your video and make them not get bored. Certain sound effects refresh the attention of the audiences when it starts to fade, and hence, you should place the sound effects wisely.
Proper Flow - The editing work should be smooth so that the flow of the video is smooth and efficient. It takes time, and hence, you can practice and learn video editing so that your video can stand out instantly after your editing touches. Besides, the editing should be such that the video feels like a story that audiences can invest in and get engaged throughout.
Part 6 How to Share Your Videos
In order to share videos after trimming them, you need to save the video properly. There are different file formats available for video files. For example, MP4 is the most popular video file format among Windows users. On the contrary, MOV is the most popular video file format. Different file formats have different features such as compression and lossless. According to the file format, the file size varies for the same duration of video.
Therefore, the video trimmer you are using must have different file formats for saving and exporting the editing video files. Some video trimmers have in-built features to share videos on social media platforms and upload on video streaming platforms like YouTube. Depending on your target audiences, you need to adjust the parameters like aspect ratio, video resolution, as well as duration. Besides, you can upload videos on cloud storage and share with anyone as per your requirements.
Part 7 Related FAQs about Video Trimming
1. What is the best video trimmer?
Wondershare Filmora is the best video trimmer as all the features are well-balanced. Apart from trimming, it has all the tools for professional-quality video editing. Filmora can also be used for recording videos. Trimming videos is as easy as it gets and you can export the edited video in different file formats.
2. How can I trim a video?
To trim a video, you will need a video trimmer. If you are a desktop user and you need to regularly edit videos, there are video trimmers available for beginners as well as advanced users. Similarly, there are video editor apps available for mobile users. If you need to trim just one video, you should use an online video trimmer.
3. How can I trim a large video?
In order to trim a large video file, you will need a professional video editor like Filmora so that there is no loss in video quality and frequent crashes and screen freezing incidents while trimming. Drag and drop the video file on Filmora's timeline and trim the unnecessary parts. You can view the changes and export the file in desired file format.
4. What does trim mean in video editing?
Trimming a video means you are cutting off different portions of a video and reducing its length. Trimming is mostly done to remove unnecessary parts from a video so that the video becomes more engaging without any unnecessary fillers.
5. Can I trim a video in VLC?
Here are the steps to trim a video in VLC Media Player.
-
Open VLC Player. Go to View> Advanced Controls. This will make the recording buttons appear.
-
Open the video that you want to trim. Mark the portion that you want to keep in your video.
-
Play the video and go to the point from where you want to keep the video. Click on Record button.
-
Go to the point where you want to end the video. Click on Record button again. All other portions are trimmed and the edited video will be saved.
6. How to trim YouTube videos?
In order to trim YouTube videos, you need to download the videos on your device. You can use an online video trimmer where you can upload the files and trim the videos as per your requirements.