Do you still have a lot of editing to do after spending hours creating a video for your client? Though you already have a lot on your plate, you can't continue to devote all of your working hours to only video editing. What if we told you there is a way to make this video editing process much quicker and easier? Keep reading this article to learn how to make the video editing process simpler and more effective.
Part 1: Best Way to Manage your Timeline
We all know that keeping good habits while editing could be helpful, whether you are a professional or a newbie. It could make editing so much more efficient. Today, we will show you some easy tips to organize your media browser and timeline while editing videos. But before we begin, download Filmora from their official website so you can follow all the steps easily.
1. Create folders in Filmora
If you have footage from multiple cameras, it is best to create some folders first.
Step1 Create a Folder for Camera 1
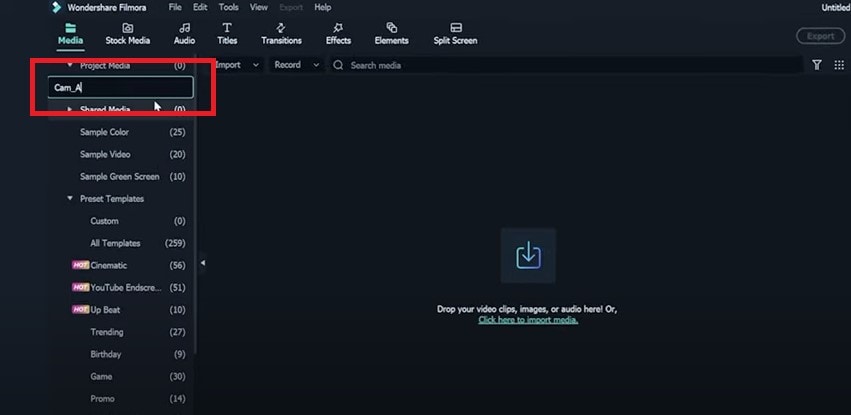
If you have video footage from three cameras, you can create one folder for each camera.
Go to the default folder on the top left and rename it Cam_A.
Step2 Create a Folder for Camera 2
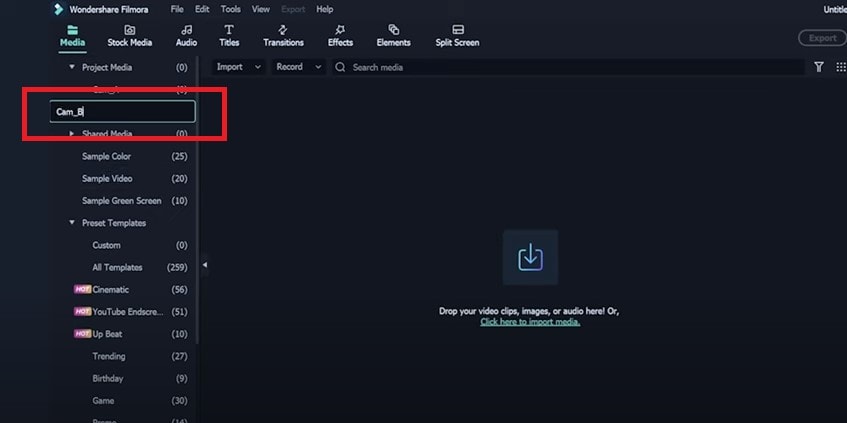
Then go to the bottom left of the media browser and click on this icon to add a new folder. Rename it to Cam_B.
Step3 Create a Folder for Camera 3
Repeat the steps to create another folder called Cam_C. Now you can import footage from your different cameras into each folder.

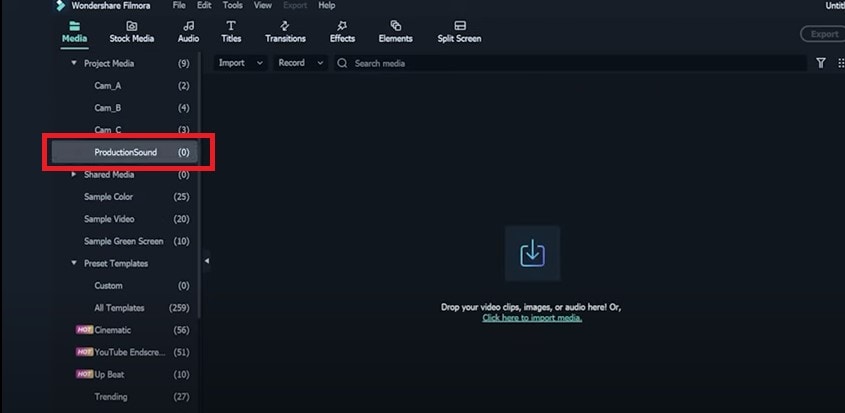
Step4 Create a Folder for Production Sound
After that, add three new folders and rename them to Production Sound, SFX, and Music. Production sound is usually the sound that is recorded on set. If you have recorded all dialects from the subjects on the location, you can put them into this folder.
Step5 Create a Folder for SFX
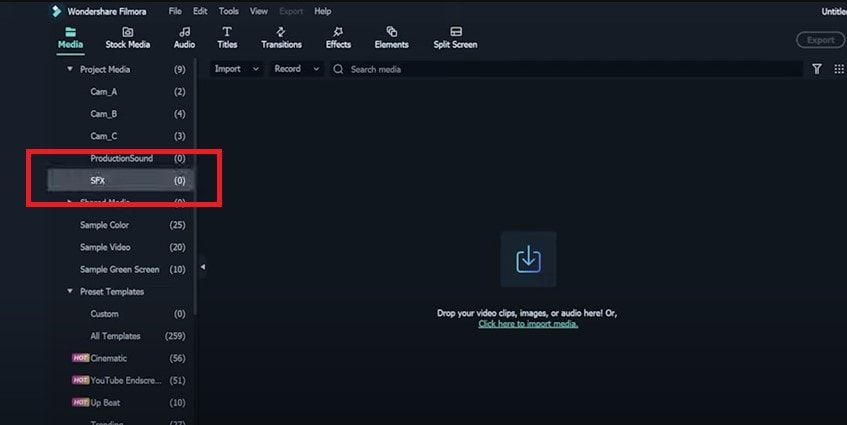
SFX stands for sound effects. You can add push clapping, laughing and other Folly sounds into this folder.
Step6 Create a Folder for Music
Next, import all music files into the music folder. You can create folders for your graphics, B-roll, and stock footage if needed.

2. Organize your Timeline and Video Tracks
Step1 Create Tracks for Picture Editing
Keep the first three tracks for picture editing. These tracks are usually for picture editing that includes footage with no effects or some simple effects—for example resizing, keyframing, transitions, or Green Screen.
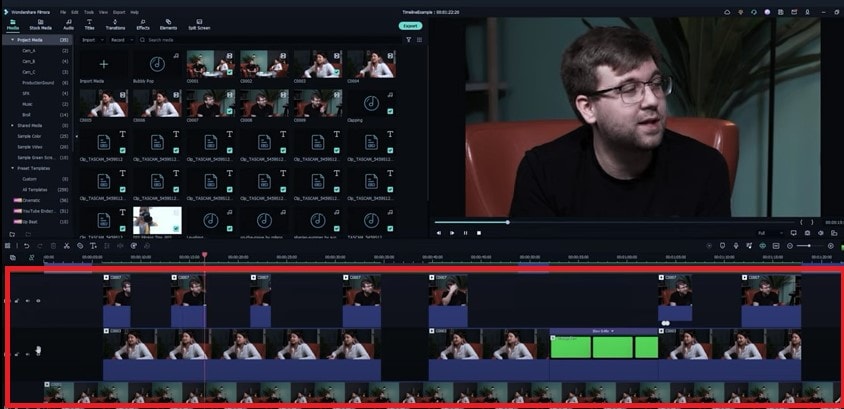
Step2 Create Tracks for Temporary Footage
Set up the fourth track for the temporary footage or placeholders so you can quickly switch the temporary footage without spending extra time looking for them.
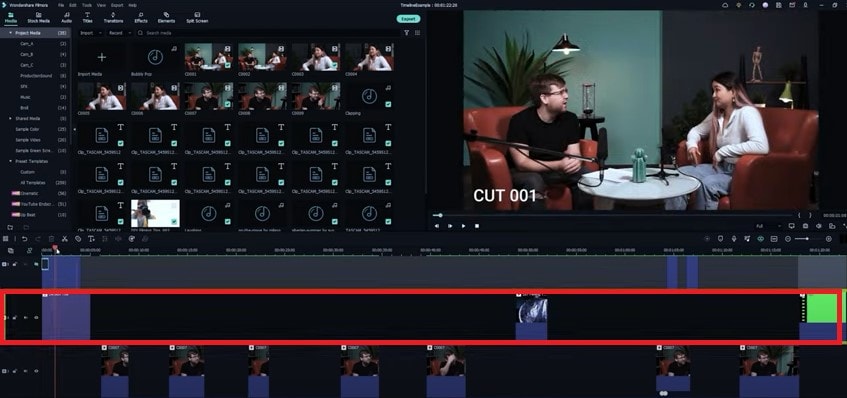
Step3 Create Tracks for Effects
Set the fifth video track as the effect track. It will include all effects from firmware that do not apply to the footage directly.
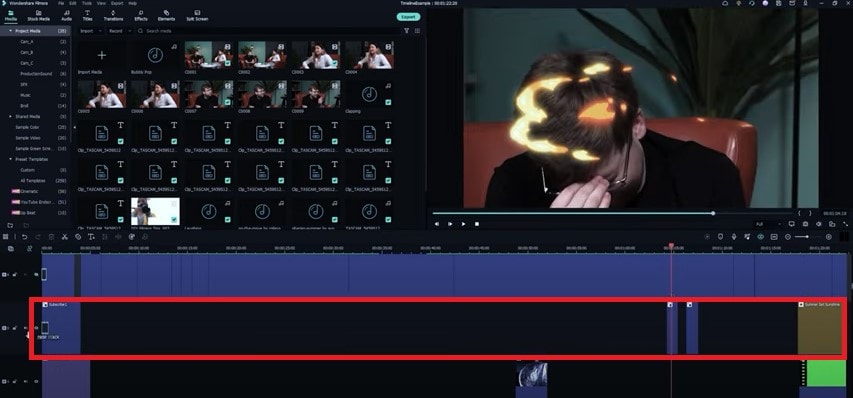
Step4 Create Tracks for On and Off Content
Next, on the sixth video track, you can add the content that you would want to turn on and off from time to time. In this example, you can put the subtitles here.
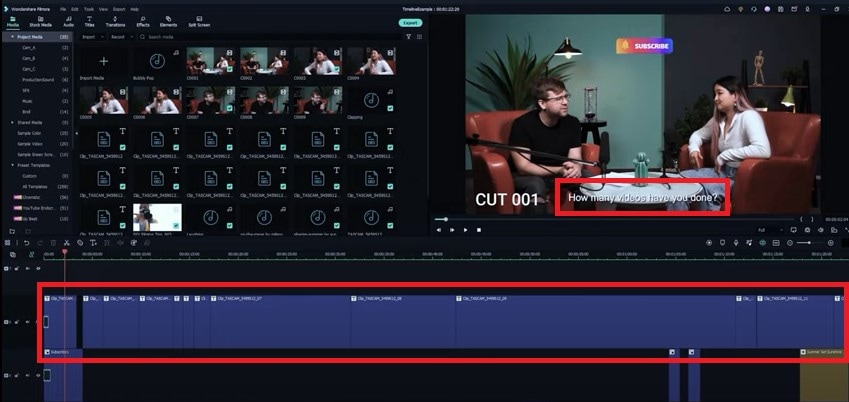
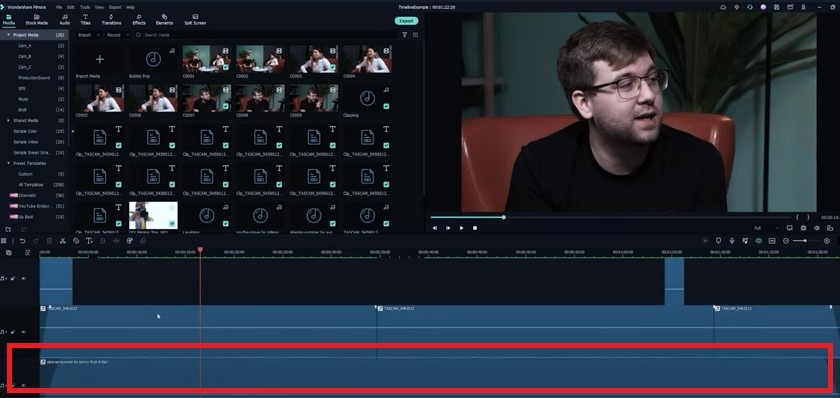
3. Organize your Audio Tracks
Step1 Create Tracks for Dialects
The first two tracks are usually for dialects. You can include all the dialects of characters in these tracks. Keep one track for each character. If you have more characters, feel free to assign more tracks to them.
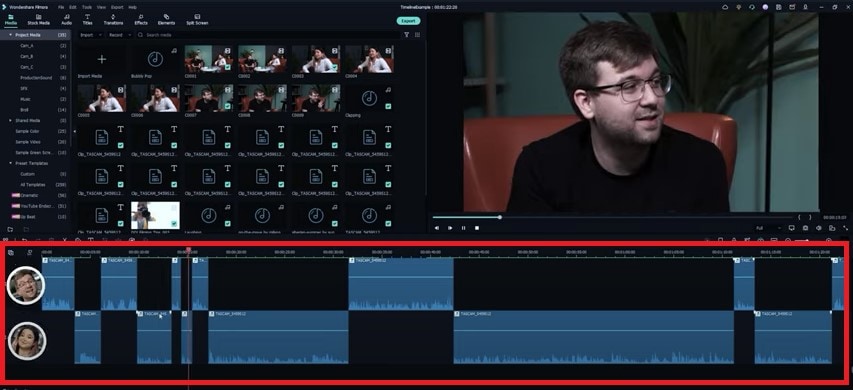
Step2 Create Tracks for Additional Audio
The third audio track could be for any additional audio, such as voiceover. If you don't have a voiceover in your video, you can leave it empty.
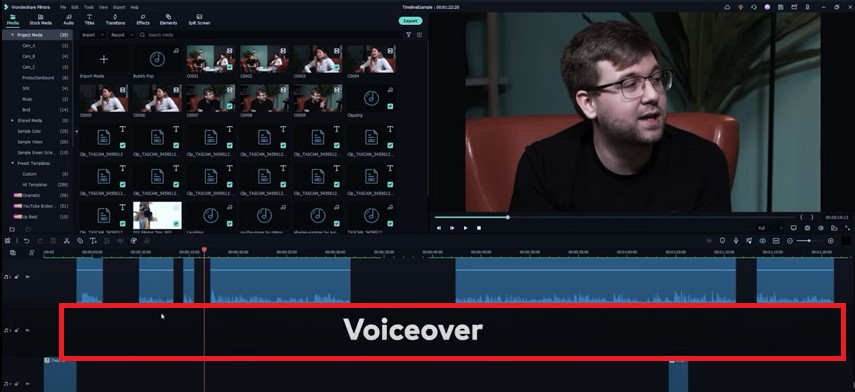
Step3 Create Tracks for Sound Effects
The fourth track could usually be the sound effects track. You can add all the clapping sounds, laughing, and all kinds of other foley sound here.
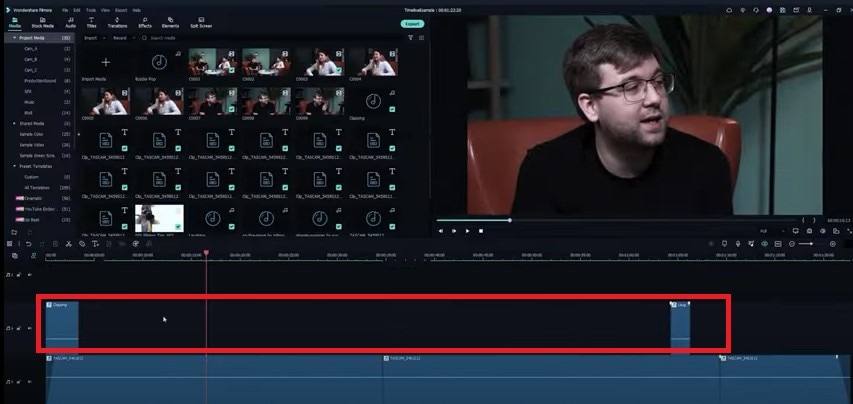
Step4 Create Tracks for Ambient Sound
Keep the fifth track for Ambient sound and room tone. You can use it to keep a very subtle environment sound in specific scenes. For example, you can use the room tone recorded on sets.
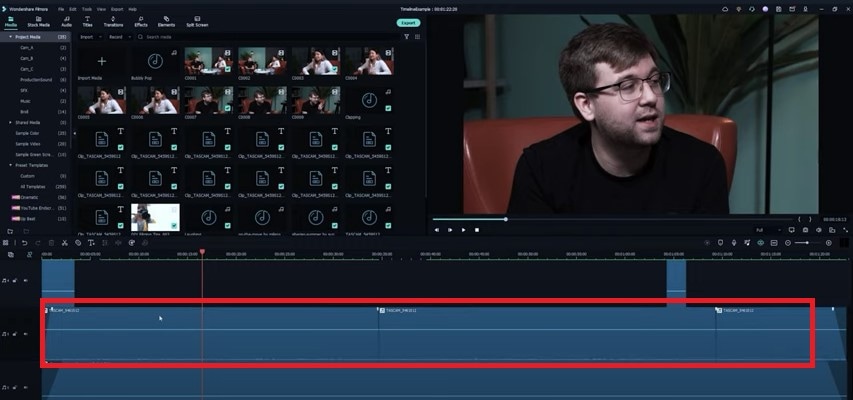
Step5 Create Tracks for Background Music
Finally, the sixth track is usually for background music. But, of course, you could also keep it empty if your project has no background music.
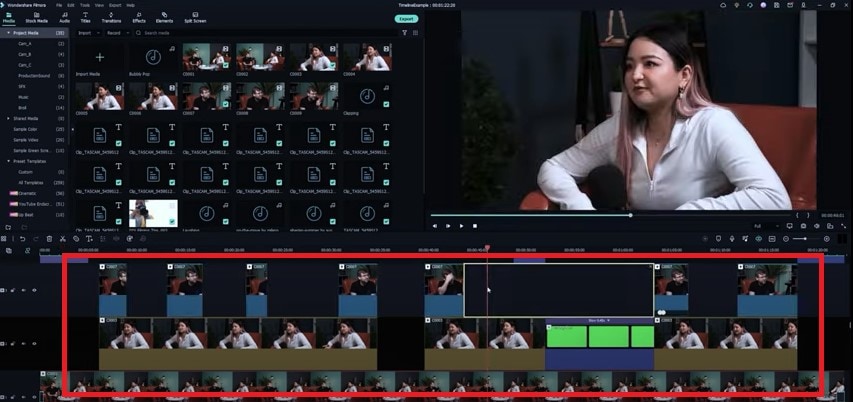
4. Color Code Your Clips
Suppose you want to make the timeline even easier to view. In that case, you can select all clips from a camera or a subject and color code them into a specific color. For example, you can color code the footage from camera A in red, camera B in yellow, and Camera C in blue. Now, when you look at the Timeline, you can quickly distinguish footage from different cameras.
Part 2: Pro Tips about Improving Video Editing Efficiency
1. Rename Individual Clips
It would be much simpler to organize the timeline if you could quickly rename individual clips. Cut a clip into smaller segments and give each clip a different name. Make sure these clips have a name other than the source video to avoid confusion.
2. Remove Empty Timeline
For quick video editing, timeline organization is essential. Organize your materials and footage at all times to prevent delays. Put everything in the correct folders with the proper labels. To keep your timeline organized, select "Delete Empty Tracks" from the context menu when right-clicking on the track window on the left.
3. Use Keyboard Shortcuts
Knowing keyboard shortcuts allows you to carry out the editing process quickly and precisely.
4. Select Good Music
Don't only concentrate on the images; the music also affects how well your video comes out. For example, suppose you're making a drama movie. In that case, you should pick the right music track to evoke particular emotions in your viewers.
5. Add Text and Graphics
Depending on the style of the video, adding text, graphics, or stock video to your project could be helpful. You should provide more text than just the title for some videos.
Summary
You don't need to be an expert in video editing to produce high-quality videos. In reality, you can complete the task without any expensive, high-end professional training. So how? Well, with the proper video editing tools like Wondershare Filmora, anything is possible. Follow the above guide, organize your timeline and keep the tracks consistent while video editing on Filmora so it's easier to come back and edit a project or share with other editors.


