How to Do Speed Ramp Transitions
Filmora is not an ordinary tool as it enables users to edit their videos with easily customizable options. Combining tons of video clips can be tricky, but by creating speed ramp transitions, you can make a flawless merged video efficiently. Thus, Filmora can help you to produce speed ramp transitions with the help of its clean and delightful user interface.
Tool
Assets


Transcript
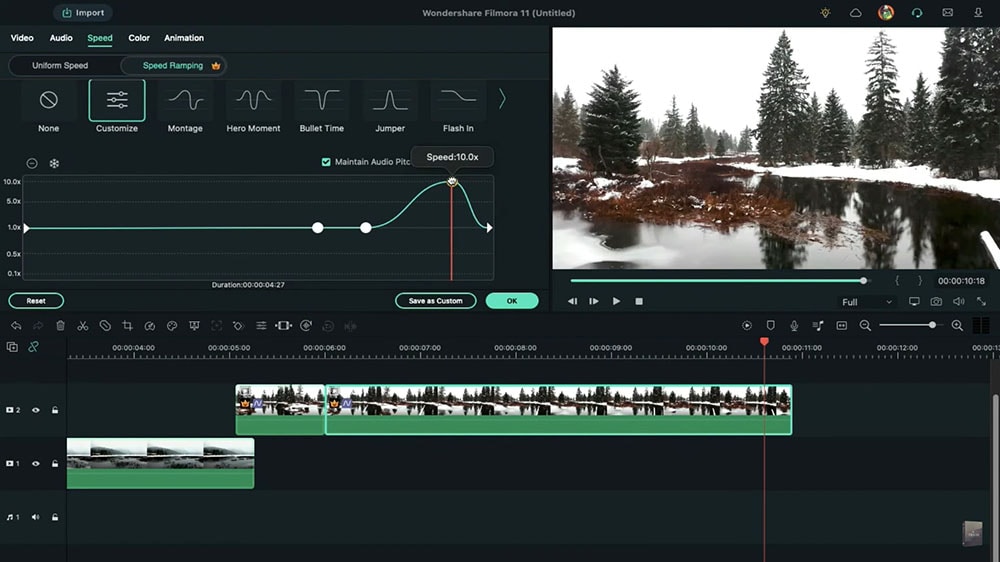
First of all, choose your videos and import them to project media. Now, drag the first clip on the timeline. Double-click on it to access the setting panel. Click on speed and select Speed Ramping. Click on Customize. Select the third dot on the right side and drag it towards the right upward and set it at 10x speed.
Select the second dot and drag it towards the right upward but keep it at 9x speed. Select the third dot and drag it towards the right at normal speed. And create this kind of bump at the end of the clip.
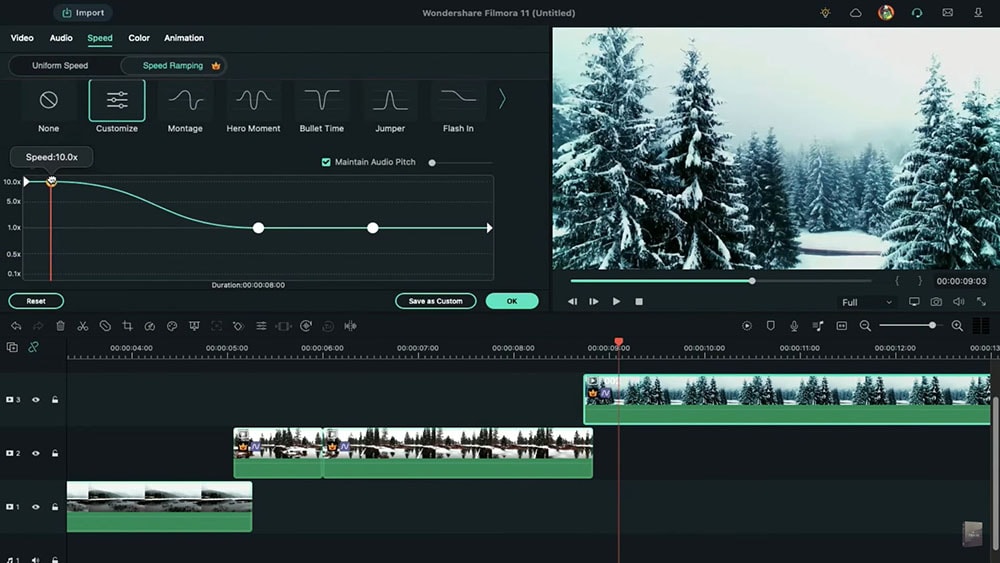
Now, drop the second clip on the playhead position. Double-click on it, go to Speed Ramping and select Customize. Drag the left arrow to 10x speed, select the first dot towards the left upward side and place it just after the left arrow at 10x speed.
Drag the second dot to the left upward side and place it at 9x speed. Drag the third dot towards the left side and keep it at normal speed.
Split the second clip, place the playhead at the end and add a dot in the speed remap section. Add two more dots.
Now drag the third dot and place it at 10x speed. And drag the second dot and place it at 9x speed and the third dot at normal speed. Place the playhead just before the third dot.
Now, put the third clip on track 3 at the playhead position. Double-click on it and go to Speed Ramping and drag the left arrow upward and place it at 10x speed.
Select the second node and place it at 9x speed and drag the third node towards the left side and keep it at normal speed.
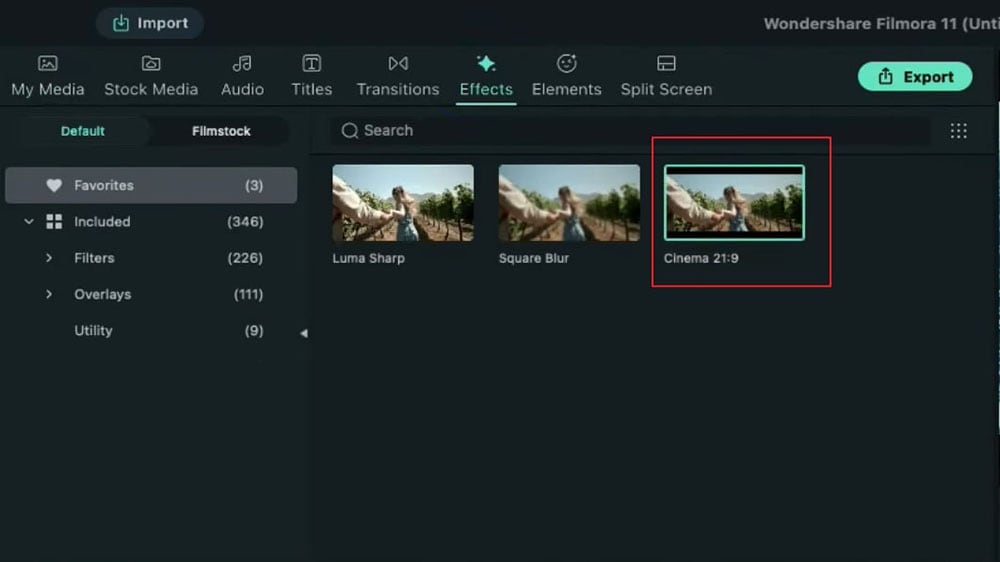
To make it more cinematic, go to the Effects and apply a Cinematic Bar. Click on the render preview to see the final preview.
How to Make Speed Ramp Transitions
What you need to prepare:
- A computer (Windows or macOS)
- Your video materials.
- Filmora video editor
Begin by visiting the website of Filmora and tap on the Free Download button. Once the installer of Filmora gets downloaded, double-click on it and install the latest version.
First, select your video files from your computer and import them to the project media. Afterward, drag the first video clip from the project media to the timeline and double-click on it. A setting panel will open, from which navigate to the Speed section.
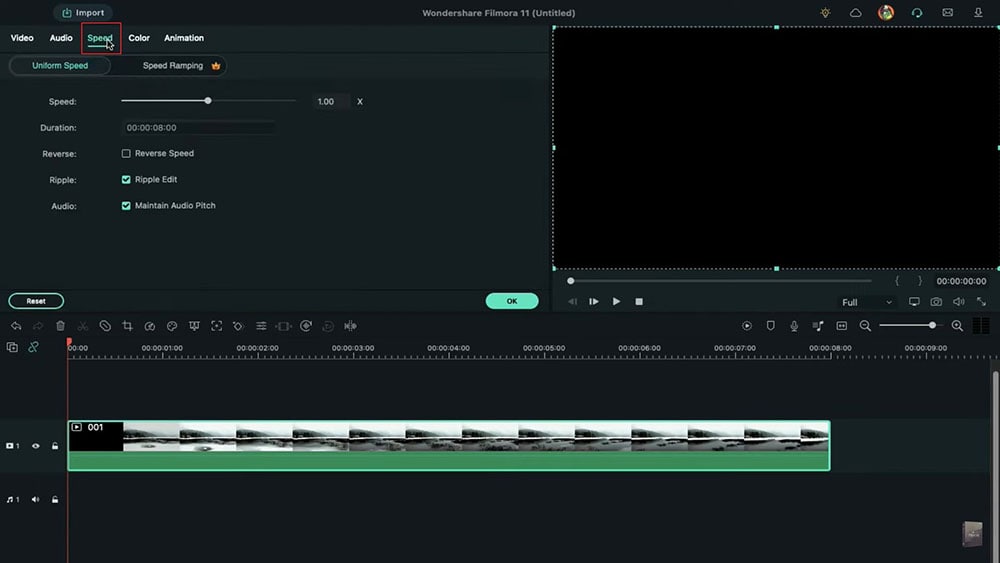
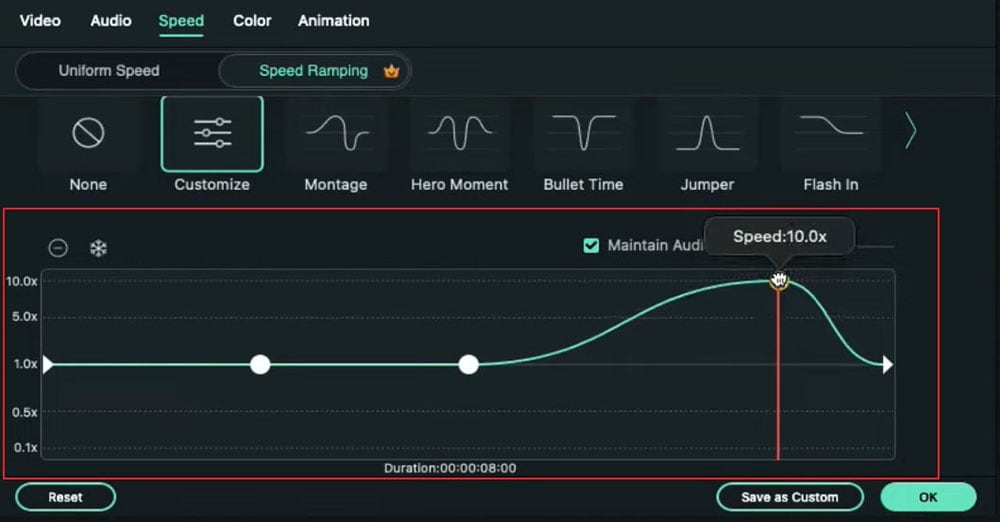
From the Speed section, click on Speed Ramping and select Customize. You would be able to see three dots on the screen. Select the last dot and drag it in the upward direction at 10x speed. Move the second dot upward and keep it at 9x speed. Afterward, drag the first dot and keep it at a normal speed, such as 1.2x. It will create a bump at the end of your video clip, which completely depends on the video you are using.
Now move the play head on the timeline and keep it near the third dot. Once done, drag the second video clip on the timeline before playing head on the above track. Double-click on it and go to the Speed section from settings. Select Speed Ramping and click on Customize. Drag the left dot in an upward direction and place it at 10x speed. Move the second dot upwards at 9x speed and do the same with the third dot by placing it at 1.0x speed.
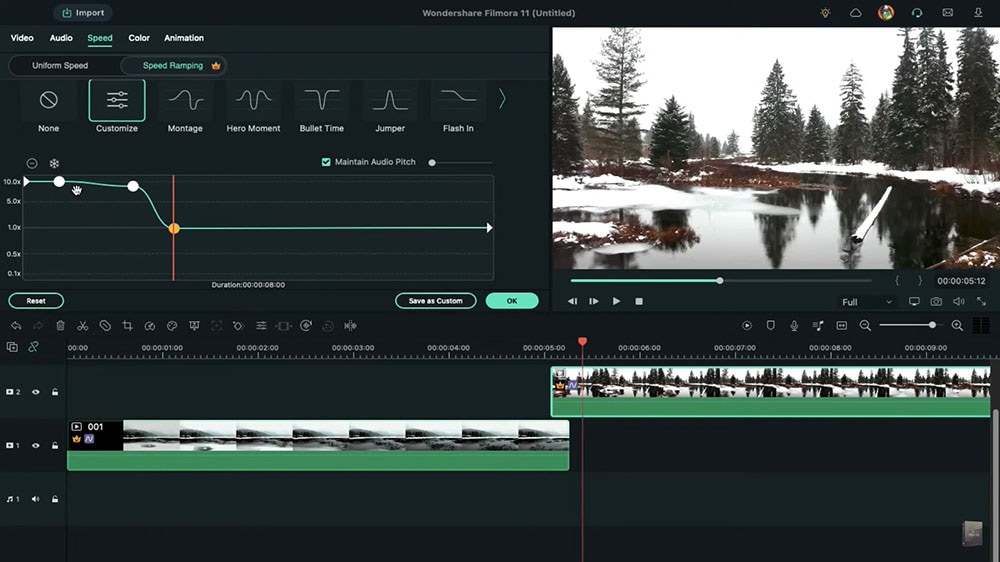
To proceed, split the second clip on the timeline and move the play head at the end. Now click on the Speed Remap section and add three dots to it. Drag the rightmost dot upwards and place it at 10x speed. Move the center dot to 9x speed and the third dot to 1x speed.
Now place the play head near the third dot. Add the third video clip to the timeline next to the play head. Double-click on it and proceed to the Speed section in the Settings menu. Select Speed Ramping and then Customize option. Afterward, move the first left dot upwards at 10x speed. Move the center dot at 9x speed and the third at 1x speed.
To make your video look more attractive, head to the Effects tab and choose Cinema 21:9 effect. Drag this effect to the timeline and start rendering your video. You can see the results from the Preview screen.
What you've learned:
- You can change any background in video with green screen.
- Use transitions in video to make it more smoothly.
- Filmora comes with many types of background, including social, busiess, sports and more.
Speak Your Mind