- 1. Record your computer screen and webcam simultaneously.
- 2. Allow you to customize screen capture and frame rate .
- 3. Powerful editing tools and effects to enrich your video clips.

How to Use Nvidia Share or ShadowPlay to Record Gameplay

Nvidia's ShadowPlay has been one of the best applications for video game broadcasting and recording for years. This screen recording utility is a part of the standard gaming setup used by some of the currently most famous gamers in the world.
The release of the new GeForce Experience, which accompanies the GeForce GTX graphics card, and keeps the drivers up to date has brought a new makeover for the famous ShadowPlay app, which is now known as the Nvidia Share. In this article, we will provide you with all the information you need about Nvidia Share and we will take you through the process of how to record gameplay with this application.
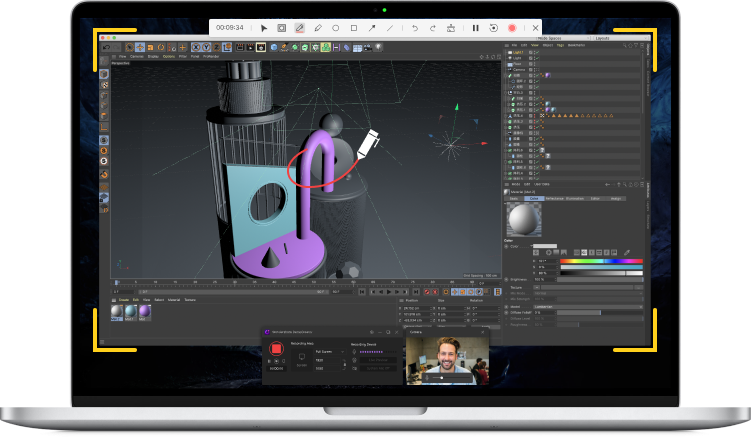
The All-in-One Screen Recorder & Video Editor
- Record desktop screen,audio and webcam simultaneously
- Edit videos quickly with a wide range of professional tools
- Built-in plentiful video effects
- Export to MP4, MOV, MKV, GIF and multiple formats
 Secure Download
Can I Use Nvidia Share or ShadowPlay?
Before we move on, you need to confirm if your computer meets the requirements. So, what are the requirements for Nvidia Share? Well, you'll need to have an Nvidia's graphics card from the GTX 650 or higher graphics card and you'll also have to make sure that the version of the GeForce Experience you have installed on your PC is up to date. Furthermore, if you already have a GSAS or VAST PC, you'll discover that the GeForce Experience is already installed on your computer. Otherwise, you can download it from Nvidia's website, along with all the drivers you're going to need for a smooth performance.
If you want to be absolutely positive that your computer supports Nvidia Share, you should launch the GeForce Experience and check the Share Capacity and My Rig options in the Preferences menu. Keep in mind that you'll need at least 4GB of RAM memory and an Intel i3-2100 processor on 3.1 GHz to accompany your GTX 650 series, Nvidia Graphics card if you would like to use the ShadowPlay application.
However, for a better playing and recording experience, we recommend you to have:
- 8GB RAM
- i7 CPU
- Recorded footage stored on an SSD or HDD (SSD is preferred)
- GTX 660 Graphic card
Once you've made sure that all of your drivers are updated and that your PC meets all the system requirements, you can start recording your first gameplay with Nvidia Share/Shadowplay.
How to Use Nvidia Share or ShadowPlay to Record Gameplay?
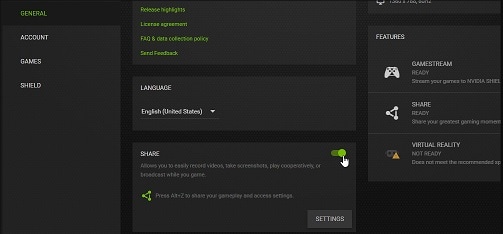
Step 1: Launch GeForce Experience and Enable Share Feature
Setting up a gameplay recording session with ShadowPlay is not a complicated process, although there are quite a few settings you'll have to adjust before you can start recording. First, launching your game that you want to record and minimize it. Launch the GeForce Experience window, by clicking on its desktop icon and make sure that the sharing feature is enabled. You can do so by clicking on the Settings icon and heading over to the General section where you'll be able to spot the Share feature. Simply toggle it on, if it's turned off.
Step 2: Audio Recording Settings
Now that the sharing option is enabled, you need to click on the Open-In-Game-Overlay icon located next to the Settings icon, in the upper right corner of the screen.
Adjusting the audio settings before you start recording is important, because failing to check if your microphone is enabled may result in a video that doesn't feature your narration during the gameplay.
You can access the audio options by clicking on the Microphone icon and selecting the Customize option. If you connected your mic properly, it should be on by default, and you can also choose from Push to talk, Always on and Off options, depending on the type of video you are recording. Nvidia Share also enables you to select the audio recording device, turn the volume up or down or boost the audio volume.
Step 3: Webcam Recording Settings
Enabling the webcam and using it during the gameplay recording session can be done by clicking on the Camera icon. However, if the application won't allow you to enable your webcam, you should head over to the Settings menu in the GeForce Experience's main window, locate the In-Game-Overlay option and switch it on under the General tab.
Step 4: Set up Hotkeys
Gamers that want to use this application on a constant basis can configure hotkeys in order to speed up the gameplay recording process. You'll need to head over to the Settings menu and click on the Keyboard Shortcuts option.
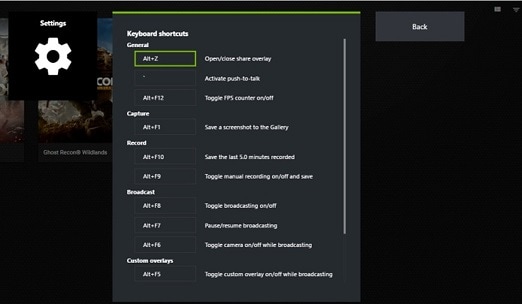
Customizing the hotkeys is simple. You can set the keyboard keys as hotkeys that you find the easiest to use during a gameplay recording session.
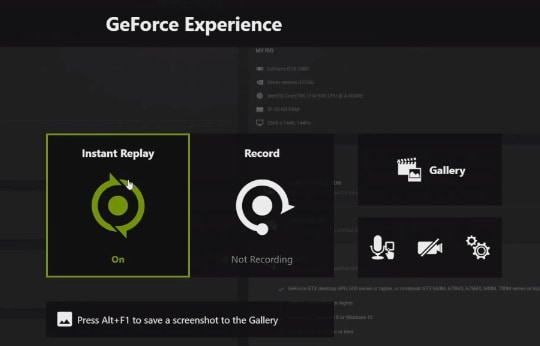
Step 5: Choose the Recording Types: Instant Replay or Record
The Instant Replay feature should be used if you want to capture special moments from the video games you play, which have already happened, while the Record option is best used while the gameplay is still in progress. If you would like to use the Instant Replay option, click on it and then click on the Customize button, to tweak the settings to match the requirements of your video recording session.
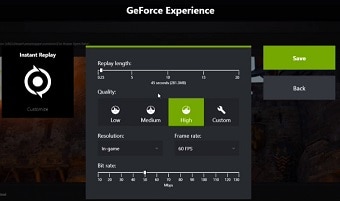
You'll be able to adjust the duration of the replay, the output video quality as well as the video resolution, frame rate, and bitrate. The Recording menu will enable you to adjust the exact same settings as the Replay menu, but using both of these options while recording can slow down the gameplay. In most cases, you can just use the default settings, as the high option is the best choice for the video quality you can make, and record in in-game resolution will enable you to produce a video that has a good quality.
Experimenting with the settings is advised only if you have the particular requirements you need to meet and if the video-sharing platform to which you want to upload the video has limitations that prevent you from recording the gameplay in the maximum quality ShadowPlay has to offer.
Step 6: Record Your Gameplay with ShadowPlay/Nvidia Share
In order to initiate a gameplay recording session, simply click on the Record icon in the Open-In-Game-Overlay and hit Start. Alternatively, you can use the hotkeys on your keyboard to start, pause, and stop recordings.
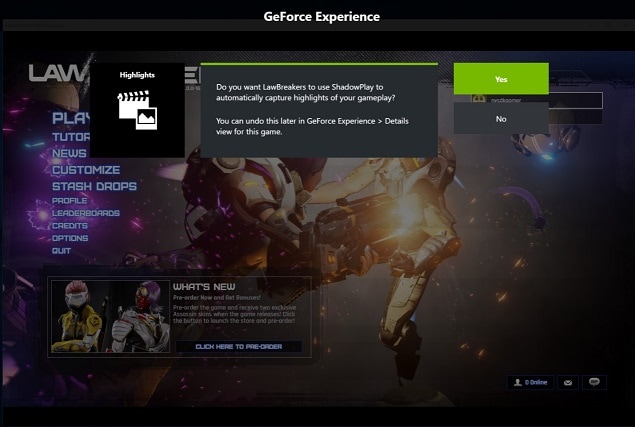
Tips: Nvidia Share can automatically record the highlights of your video games, which can be accessed by clicking on the freshly added Highlights button. In most cases, the application will display a message before you start a recording session asking you whether you want to capture the highlights of a video game. If the message doesn't appear you can activate this feature by holding CTRL+Z and then clicking on the Settings menu and selecting the Highlights option.
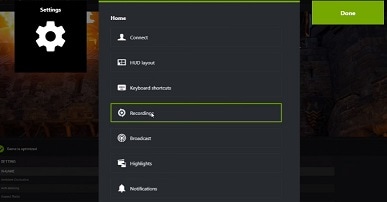
If you'd like to change the destination that your videos will be saved, you should click on the Settings button and select the Recording options in the Nvidia Share overlay. This feature will show you where your video is stored on your hard drive, and you can use it to set the new location to which all of your future gameplay video recordings will be placed.
Conclusion:
Nvidia Share is an amazing application that will enable you to record the gameplay of your favorite games, but it only works with an Nvidia graphics card and you'll need to check which games are supported by this application since it can happen that Nvidia Share doesn't allow you to record gameplay of certain games. Furthermore, using this application may slow down your computer, which is the reason why you should make sure that you have the equipment that will enable you to create smooth gameplay recordings. If you are looking for gameplay recording software that has lower hardware requirements, we recommend you to try Wondershare DemoCreator, which allows you to record and edit your gameplay video footage easily.
- Add Markers to important points during recording
- Record high paced games at up to 120 fps
- Record the entire screen or just a part of your screen
- Capture video, system audio, webcam, and mic at the same time
- Detach audio and record voice narration during editing and reduce the noise

Other Popular Articles From Wondershare


