- 1. Record your computer screen and webcam simultaneously.
- 2. Allow you to customize screen capture and frame rate .
- 3. Powerful editing tools and effects to enrich your video clips.

How to Record Screen with Audio on Windows 7

The Windows computer is used by many people whereas Windows 7 is one most popularly used versions of Windows. Many times, the users wish to record videos or execute screen recording on Windows 7 but they feel perplexed since they don’t find themselves well-aware about recording screen along with the sound. In other words, we can say when the users export the video; they find the output without any audio. This is why; here we are going to explain how to record a screen with audio by using DemoCreator that will be ideal to use when your desire lies in recording your screen with audio.
The Ultimate Solution to Record Screen with Audio: DemoCreator
Wondershare DemoCreator is powerful enough to take all your trouble for no audio and promises to give out the best results with both screen and audio recorded. This screen recorder takes a few steps and a little time recording your screen that lets even the non-tech savvy people capture videos themselves without any hassle. It contains some very powerful video editing features that help in making the video even better.
The features include changeable cursor effects(lets you adjust the shape, size, and color of the cursor), annotations (adds texts and various other elements), tutorial features (helping in drawing circles or arrows for explaining purpose), and many more. We will now provide you with the step guide on how you can use this screen recorder to get the screen recorded with audio in your Windows 7. Scroll down to grasp the tutorial.
 Secure DownloadSecure Download
How to Record Screen with Audio on Windows 7 Using DemoCreator
Here in this section, we are going to demonstrate how to capture a screen with audio with the help of DemoCreator. But before moving on to guide, let us make you aware of the very interesting and helpful features. With the best screen recorder, you have the privilege to record the audio in a screen recording video during a video call or while narrating instructions when making tutorial videos. Let’s understand how to set up your DemoCreator and then record video with sounds as well.
Step 1 – Head to the Setup Window
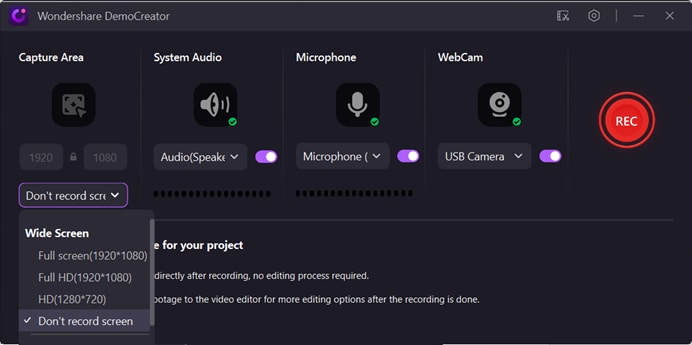
After installation, launch the software and click on "Screen+Webcam". You’ll then be directed to a window where you’ll see 4 different tabs in the Setup interface – "Screen, Audio, Camera & Advanced". Here in these tabs, you can customize your recording settings, for instance, frame rate, recording region, the source for the audio stream, and also to set up hotkeys for your convenience.

Step 2 – Selecting the Audio Tab
Now, since you wish to record audio on Windows 7 with your screen recording, hit on the “Audio” tab out of the 4 tabs available. Here you will see two Audio Sources – “Computer Audio & Microphone”. Next to each option, there is a drop-down menu where you can set your preference whether you wish to record audio from Computer Audio or Microphone. Set “Don’ Capture” next to either from which you do not wish to record the Audio.
Now that you are satisfied with the settings, you are ready to start off by recording your computer screen along with the preferred audio source. You’ll be able to see a button that says “Capture” in the bottom right corner. Now, it’s time to get your screen recording with sound done. Hit the Capture button and you will have a console popping up on your screen along with a customizable selection window.
Step 3 – Set the Capturing Region
If you wish to record the full-screen video simply hit “Shift + F” to set the customizable selection window to full screen or simply just stretch the corners till the extreme end from all 4 sides in order to record a full-screen video. Or, if you wish to record a specific area of the screen set the selector window over to that area.
Once satisfied with the selection, hit on the big “Record” button available on the console. Or alternatively, you can hit “F10” to initiate the recording of the video. The DemoCreator program then counts down for 3 seconds and starts off recording audio.
Step 4 – Pause or Stop the Screen Capturing
If in the case at any point of time during the video, you may wish to pause the recording, you just have to simply push the “F9” key on your keyboard or hit the “Pause” button on the DemoCreator console, alternatively. Also, to resume capturing the video, hit “F9” again.
If you are done with capturing the screen from your preferred audio source, simply hit the F10 key on your keyboard to stop recording and the recorded video will be imported to the Video Editor media bin for further editing.
Secure DownloadSecure DownloadStep 5 – Edit the Recorded Audio
You can click the recorded video in the Media bin under Video Editor mode to check if the system audio or microphone is recorded successfully. If everything is OK, you can use Express Export to export the recorded video and audio. If you find any noise in the recorded audio, you can reduce the background noise with the Denoise feature; or, if you find that you have missed some voice narration during the recording, you can add the voiceover when you edit the video footage. What's more, you can add fade-in and fade-out effects to the recorded video and audio with a simple drag.
Step 6 – Exporting the Video
After editing the recorded video and audio file you can save it to various formats such as MOV, MP4, GIF, or simply an MP3 file; you can also upload the recorded video and audio file to your YouTube, Facebook, Vimeo or Twitch directly. The Export feature also allows you to customize the frame rate, bit rate, and resolution.
Conclusion
At this point, we are going to conclude this post with a great hope that we could help you out by giving information on the best screen recorder with audio and you are out of the confusion now. DemoCreator has made it easy to record the screen with sound on your Windows 7. In addition, the software also comes with the ability to support the video editing functions with a powerful editing suite, such as voice changer, audio fade-in and fade-out. You can make a comment to us and share your experience using DemoCreator.
Secure DownloadSecure Download
Other Popular Articles From Wondershare


