

Do you want to become a YouTube star? Or maybe you just want to share your awesome videos with the world? Well, you've come to the right place! In this super helpful guide, we'll show you exactly how to record YouTube videos like a total pro.
You've probably watched tons of amazing videos on YouTube and thought, "Hey, I can do that too!" But then you realize it's not as easy as it looks. There's a whole bunch of stuff you need to know about recording, editing, and uploading videos. That's where this guide comes in!
We'll walk you through every single step, from getting the right gear to hitting that "record" button to making your videos look and sound awesome.
And the best part? You don't need to be a tech whiz or have a huge budget to make great YouTube videos. We'll show you how to use free and affordable tools that anyone can master with a little practice.
So, what are you waiting for? Get ready to learn how do I record a video on YouTube and become the next big YouTuber!
In this article

Part 1: Getting Started: What is needed to record YouTube videos?
Before you can start recording awesome YouTube videos, you'll need to gather a few essential things. Don't worry, you don't need a whole professional studio or crazy expensive gear. You can enhance your YouTube recording with these basic items:
● Recording Device: A dedicated camcorder or DSLR camera with video capabilities. Or even your smartphone (many have great cameras these days!)
● Microphone: Built-in mics on cameras are okay, but an external mic will give you much better audio quality. Look for affordable USB mics to get the job done.
● Steady Surface or Tripod: This will prevent shaky, blurry footage. A simple tripod or even a stack of books works great
● Lighting: Natural light is best, but affordable lighting kits can improve video quality. Ring lights are popular for vloggers and gamers
● Video Editing Software: Free options like iMovie, Windows Movie Maker, or DaVinci Resolve. Paid options like Adobe Premiere Pro or Final Cut Pro for more features
Once you've gathered all these things, you'll be ready to start recording! Don't stress if you don't have everything at first – you can always upgrade your gear as you grow on YouTube.
Part 2: How to Record YouTube Videos on Any Devices
Now that you have the necessary equipment, let's explore the various methods you can use to how do I record videos on YouTube.
Method 1: How to Record YouTube Videos on PC & Mac Using Wondershare DemoCreator (Recommended)
Wondershare DemoCreator is an awesome tool for recording your screen and making YouTube videos. It's super easy to use, even for total beginners. And it's packed with really cool features that will help you make your videos look professional and fun!
With DemoCreator, you can record whatever is happening on your computer screen. Want to share a gaming session, a tutorial, or just what's on your desktop? DemoCreator lets you capture it all with just a few clicks.
But it gets better! DemoCreator also allows you to draw on the screen, add text callouts, and do all sorts of cool annotations as you're recording. That means you can highlight important stuff, circle things, or even doodle silly drawings to make your videos way more engaging.
Here's how you can use it:
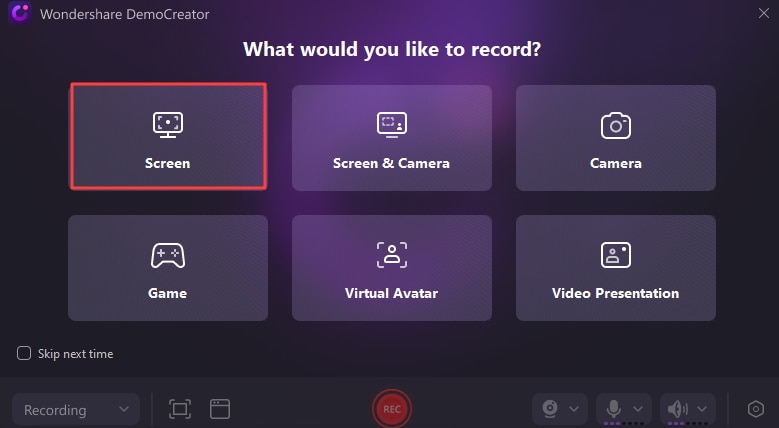
Step 1: Install Wondershare DemoCreator on your Windows or Mac computer. Launch the software and choose the “Screen” recording mode.
.
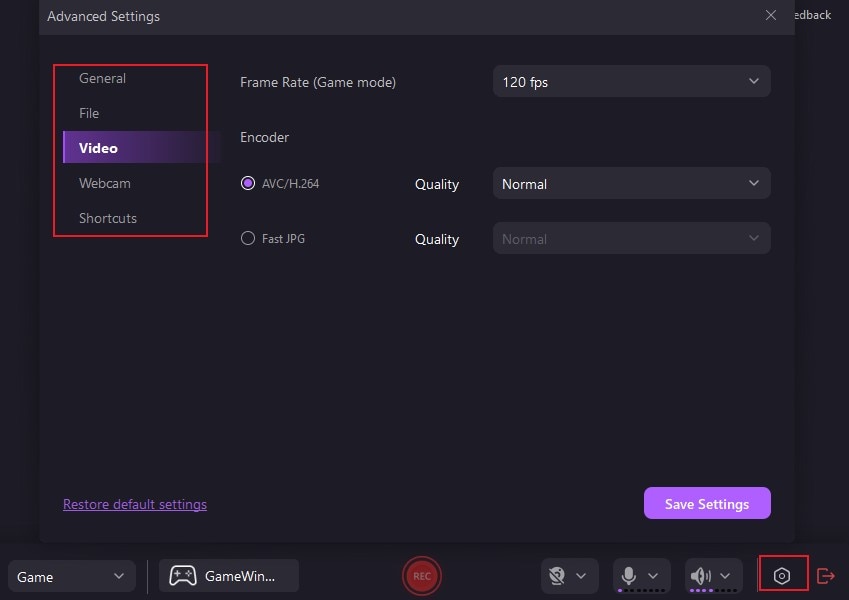
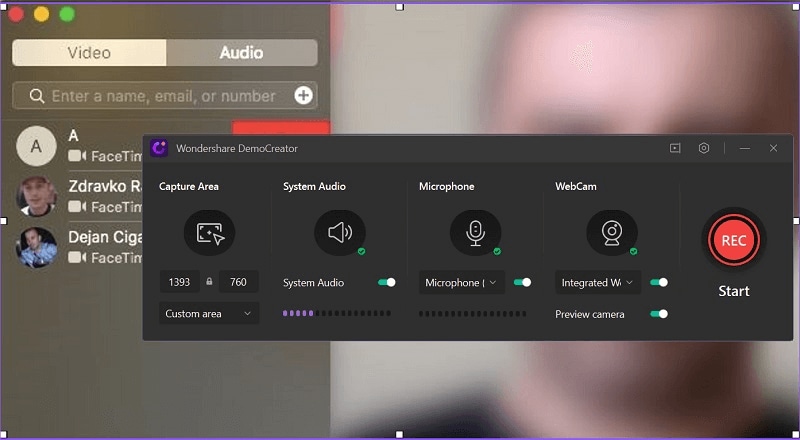
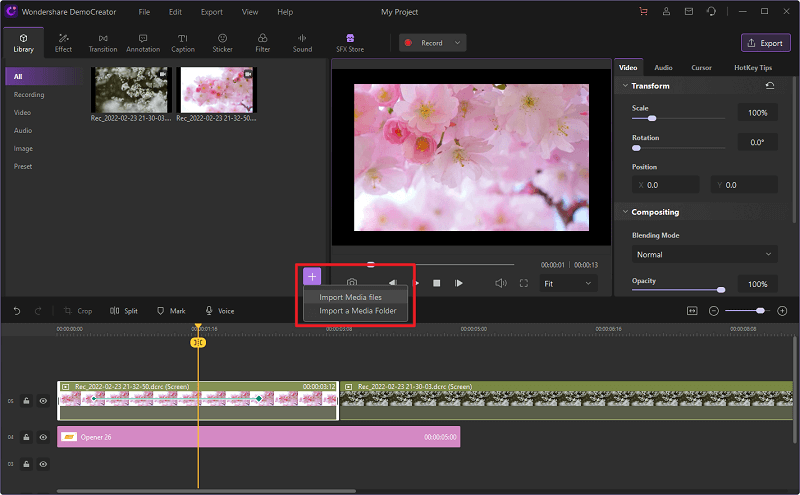
Step 2: Adjust the recording settings, including capture area, video quality, frame rate, and audio input. Click the "Rec" button to start capturing your screen.
For Windows:
For Mac:
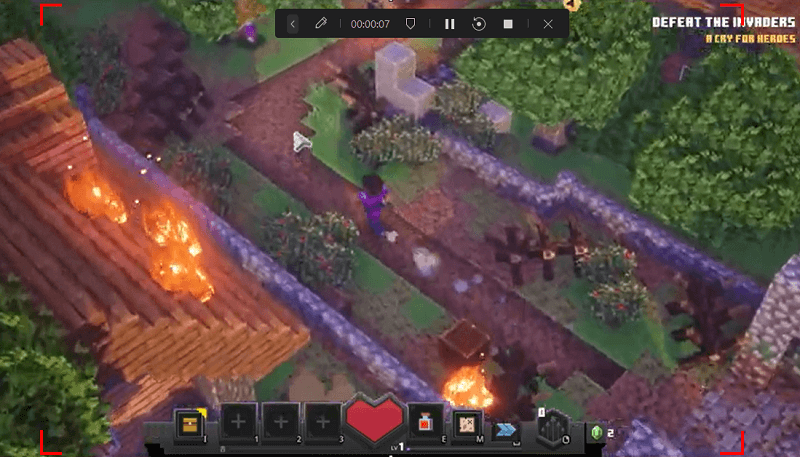
Step 3: While recording, you can use the annotation tools to highlight specific areas or add text and shapes. Once you're done recording, click the "Stop" button.
Step 4: Review your recording and make any necessary edits using the built-in video editor.
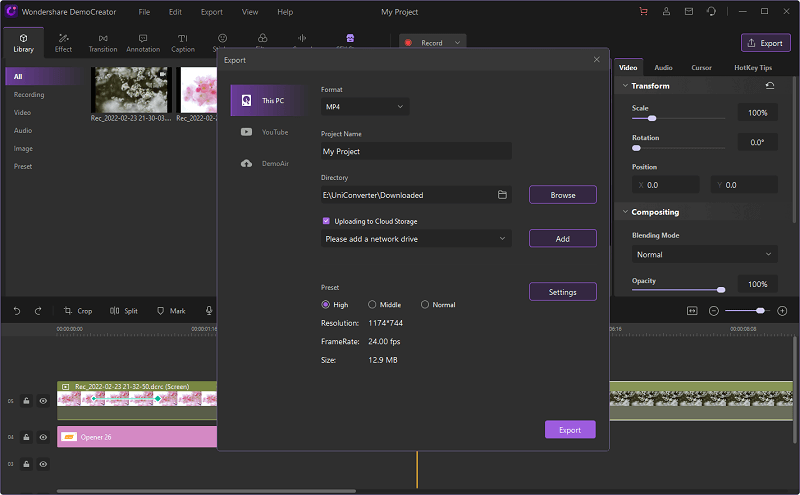
Step 5: Export your video in the desired format, optimized for YouTube.
The best part about using DemoCreator? It won't make your head spin with confusing menus and options. The interface is simple and intuitive, so you can start recording amazing videos right away without any headaches. Making great YouTube videos has never been easier!
- Record customized screens with audio and edit them in different tracks.
- Capture gaming videos, tutorials, and presentations and then edit them in one tool.
- Built-in unlimited editing templates, special effects, and other sources.
- Supported export to MP4, MOV, MKV, GIF, and other formats.

Method 2: How to Record YouTube Videos Using An Online Tool
If you prefer a web-based solution, the DemoAir Online tool is an excellent option for how do you record a video for YouTube. This tool allows you to record your screen directly from your web browser, without the need for any software installation.
Here's how to use it:
Step 1: Go to the DemoCreator Online website. DemoAir offers various recording modes: Screen, Webcam Only, Screen and Webcam and Audio Only. Choose the preferred recording mode and then click the “Start Recording" button to start recording your YouTube video.

Step 2: Play the YouTube video you wish to record. Once done, press the “Stop Recording” button when you're done recording. Your video will automatically process and be ready to download
DemoAir is really cool because it works right in your web browser without installing anything. Just open a new tab, go to the site, and start recording in seconds! The online tool is totally free to use too.
Method 3: How to Record YouTube Videos on iPhone and Android
If you prefer to record YouTube videos directly from your mobile device, both iOS and Android offer built-in screen recording features. Here's how to how to record a video in YouTube using these features:
For iOS:
Step 1: Add the Screen Recording control to the Control Center by going to Settings > Control Center > Customize Controls > Screen Recording.

Step 2: Open the YouTube app and navigate to the video you want to record. Swipe down from the top-right corner of your screen to open the Control Center. Tap the Screen Recording button (it looks like a solid circle with a circle around it).

Step 3: Tap the "Start Recording" button and wait for the countdown to begin recording.

Step 4: Once you're done recording, tap the red status bar at the top of your screen and select "Stop Recording." Your recorded video will be saved in the Photos app.
For Android:
Step 1: Swipe down from the top of your screen to open the Quick Settings menu. Look for the Screen Recorder icon (it may be hidden under the "..." menu). Tap the Screen Recorder icon to open the recording settings.

Step 2: Adjust the settings as desired, such as video quality and audio source. Tap the "Start" button.

Step 3: Open the YouTube app, and select the video to record. To stop recording, just swipe down from the top of your screen and tap on the notification labeled "Screen recorder."
Part 3: Tips to Keep in Mind While Recording YouTube Videos
Now that you know how to record for YouTube videos, it's important to keep a few tips in mind to ensure your recordings are of high quality and engaging for your audience.
- Prepare a script or outline: Having a well-structured script or outline can help you stay focused and deliver your content in a clear and concise manner.
- Pay attention to lighting: Proper lighting can make a significant difference in the quality of your videos. Natural light is ideal, but if you're recording indoors, invest in some affordable lighting equipment.
- Optimize your audio: Poor audio quality can be a dealbreaker for your viewers. Use an external microphone or ensure your recording environment is free from background noise.
- Engage with your audience: Maintain eye contact with the camera and speak directly to your viewers. Encourage them to like, comment, and subscribe to your channel.
- Edit and polish your videos: To record YouTube video is just the first step. Use video editing software to trim unnecessary footage, add transitions, and enhance the overall quality of your videos.
- Promote your videos: Once your video is uploaded, actively promote it on social media platforms, forums, and relevant communities to increase visibility and attract potential subscribers.
- Analyze your analytics: Pay attention to your video analytics, such as view count, watch time, and audience retention. Use this data to identify areas for improvement and create content that resonates with your audience.
Conclusion
Recording high-quality YouTube videos may seem daunting at first, but with the right tools, techniques, and practice, it can become a highly rewarding and enjoyable experience. Whether you choose to record YouTube videos using screen recording software, web-based tools, or your mobile device's built-in features, the key is to experiment and find the method that works best for you.
Remember, consistency and perseverance are crucial when building a successful YouTube channel. Don't be discouraged if your initial videos don't garner the attention you anticipated. Learn from your mistakes, continuously improve your craft, and stay true to your passion. With dedication and a commitment to creating valuable content, you can how do you record a YouTube video that captivates and inspires your audience.
FAQ
-
How can I record a video from YouTube without violating copyright laws?
While it is possible to record videos from YouTube, it's important to respect copyright laws. You should only record and use content that you have permission to use or that falls under fair use guidelines. If you're unsure, it's best to seek legal advice or use royalty-free content. -
What video format is best for uploading to YouTube?
YouTube recommends uploading videos in MP4 format with H.264 video codec and AAC audio codec. This format provides a good balance between video quality and file size, ensuring smooth playback for viewers. -
How long should my YouTube videos be?
There is no definitive answer, as the ideal video length can vary depending on your content and target audience. However, most successful YouTubers aim for videos between 5 and 15 minutes long, as this range tends to maintain viewer engagement and attention spans.


