

Mac devices are convenient since you can connect your phone with an all-in-one device. You no longer have to search for your phone to answer messages or perform other needed actions. However, if you're new to the Apple world, you may wonder how to mirror from iPhone to Mac, which is why we're here to help.
Today, we'll present the best methods for iPhone screen mirroring on Mac, and you can choose the one that best fits your preferences. You can check out the table below for a short overview and learn how to use each tool below.
| Method | Built-in | Wi-Fi/USB | Efficiency |
| AirPlay | Yes | Wi-Fi | Low - the program may lag sometimes and impact the mirroring quality. |
| Dr.Fone Air | No | Without Wi-Fi/USB | High - it's a lightweight tool that won't affect the quality and the experience. |
| Anymiro | No | Wi-Fi and USB | Medium - you may experience lower-quality casts if your iPhone is connected to a Mac for longer periods. |
| Airdroid Cast | No | Without Wi-Fi/USB | Medium - the application may sometimes crash and impact the mirroring quality. |
| QuickTime | Yes | USB | High - it'll mirror your screen in original quality and prevent bugs and lags. |
| Reflector | No | Wi-Fi | Medium - it's similar to AirPlay but doesn't have as many lags and bugs. |
| Airserver | No | Wi-Fi | High - AirServer will present true colors and iPhone screen quality. |
How To Mirror iPhone Screen to a Mac Using Airplay
AirPlay was developed by Apple back in 2010. The primary purpose of this application is to allow you to connect your Apple devices to one another and effortlessly stream music, show photos, and cast your devices.
It's easy to use - you only need a stable internet connection to use AirPlay, so check whether both your Mac and iPhone are connected to the same network and follow the steps below to learn how to Airplay from iPhone to Mac.
Before we jump to the guide, you must check whether your devices fulfill the requirements for running AirPlay:
| iOS 14 or later | macOS Monterey or later |
| iPhone 7 or later iPad Pro (2nd generation or later) iPad (6th generation or later) iPad Air (3rd generation or later) iPad Mini (5th generation or later) |
Macbooks (2018 and newer) Macbook Pro (2018 or newer) Macbook Air (2018 or newer) Macbook Mini (2020 or newer) iMac (2019 or newer) iMac Pro Mac Pro (2019 or newer) Mac Studio |
- Make sure your iPhone and Mac are connected to the same Wi-Fi.
- Unlock your iPhone and swipe up to reveal the Control Centre.
- Tap on the Screen Mirroring icon.

- Select your Mac from the available options.
And just like that, your iPhone screen will appear on your desktop device.
How To Mirror iPhone Screen to a Mac Using Dr.Fone Air
Wondershare Dr.Fone is the most universal phone management tool on the market. Aside from the screen mirroring feature, you can recover lost data, transfer data from one device to another, and more in just a few minutes.
Wondershare Dr.Fone can make your iPhone management journey easier by providing access to numerous advanced features. Thus, this screen mirroring solution may be the most efficient since you can continue using it for various purposes. The best part is that you can share your iPhone screen to Mac without Wi-Fi and USB cable. Additionally, it's also easy to mirror your iPhone screen to a PC using Dr.Fone.
Even though it's an online screen mirroring tool for the iPhone, no ads will stand in your way. Here's how to use it:
- Head to the Dr.Fone Air website on your Mac device.
- As soon as you open the website, a QR code will appear. Scan the code with your iPhone to download the Dr.Fone Link application.
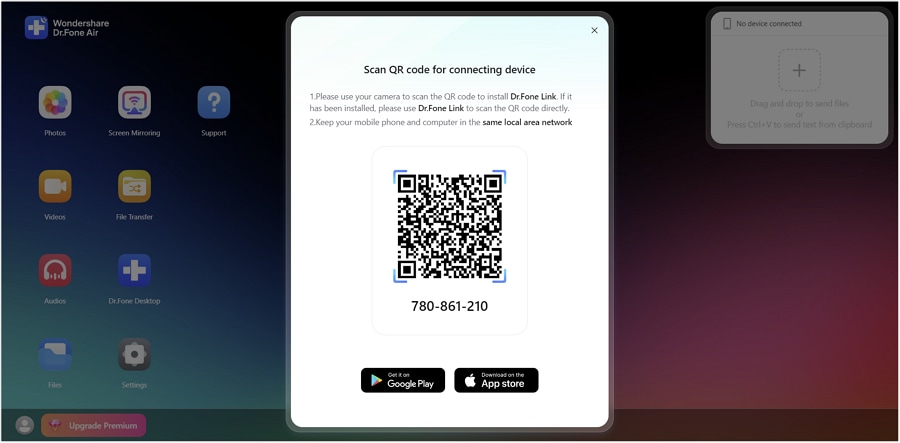
- After downloading, access the app on your iPhone and scan the QR code again. You can also input the passcode that will appear on the screen.

- Click Allow on your Mac to complete the process.

And voila! You've connected your iPhone to the Mac without lags or issues.
How To Mirror iPhone Screen to a Mac Using Anymiro
As you can guess from the name, Anymiro is an application designed to help you mirror all devices regardless of your needs and preferences.
The program was initially designed for gamers since it'll provide a clear image with no color differences. Moreover, Anymiro can support 120Hz refresh rates, making it ideal for iPhone to Mac screen mirroring purposes. Anymiro supports Wi-Fi and USB cable connections, so you can use the tool if you don't have a stable network.
Using Anymiro is simple. The first thing you should do is head to the official website and download the application to your Mac device. Then, follow the steps presented below:
- Open the program on your Mac and select iOS/iPadOS from the main menu.

- Next, select WiFi.

- Ensure your iPhone and Mac are connected to the same network.

- Open the Control Centre on your iPhone and select Screen Mirroring.
- Choose AnyMiro from the available options.

When you select AnyMiro, your iPhone screen will appear on your desktop, and you can start your mirroring experience.
How To Mirror iPhone Screen to a Mac Using Airdroid Cast
AirDroid cast is an application designed to provide a smooth screen mirroring experience for all devices. It's compatible with Macs, iPhones, Androids, and Windows devices.
It's among the most versatile solutions available. But first, you must download applications to your Mac and iPhone devices to start the screen mirroring journey. After installing the apps, follow these steps to enable the screen-casting feature:
- Open the applications on your iPhone and Mac devices.
- Scan the QR code that will appear on your Mac using your iPhone application. You can also input the passcode, as presented in the image below.

Once you complete these steps, you'll see your iPhone screen on the preferred Mac device.
How To Mirror iPhone Screen to a Mac Using Quicktime
QuickTime is a built-in screen recorder for Mac and iOS devices. Many people don't know that they can use this application to screen-mirror their iPhone devices to Mac. The process is simple, but the downside is that you'll need a USB cable to connect your iPhone.
You won't be able to walk around with your phone if you select this screen mirroring method. Let's see how to use QuickTime to mirror an iPhone to Mac with a cable.
- Connect your iPhone to the Mac device using the original cable.
- Next, open the QuickTime player application on your Mac.

- From the top bar, head to File > New Movie Recording.

- Click on the arrow next to the Record button in the pop-up window.
- Select your iPhone device from the available options.

After you select your phone, the iPhone screen should appear on your Mac.
How To Mirror iPhone Screen to a Mac Using Reflector
Reflector is an application that functions similarly to AirPlay. However, the connection is much more stable, and you can choose who can access your Mac device. The initial user interface may be overwhelming, but you'll quickly get the hang of the Reflector application.
All you have to do is download the app to your Mac from the official source and follow the steps below to display your iPhone screen on your Mac.
- Open the Reflector application on your Mac.
- Ensure your Mac and iPhone devices are connected to the same WiFi network.
- Next, swipe up on your iPhone to reveal the Control Centre. From the available icons, select Screen Mirroring.
- Select Reflector from the available options.
- A passcode will appear on your Mac device, and you should input it into your iPhone and tap OK to proceed.

After inputting the passcode, you'll successfully connect your iPhone to the Mac and start your screen mirroring experience.
How To Mirror iPhone Screen to a Mac Using Airserver
AirServer is a physical receiver that connects multiple devices and gets instant screen mirroring results. These devices are usually used if you don't have a stable connection or your AirPlay feature isn't working well.
Airserver can mirror your screen in up to 4K quality, so you'll get consistent results and high-quality casts. If you already have this device in your connection, follow the guide below to learn how to use it:
- Connect the iPhone and the Mac to the same network.
- Swipe up on your iPhone and select Screen Mirroring from the available icons.

- Choose AirServer for the casing experience.
After selecting AirServer, the iPhone will automatically connect to your Mac and start casting high-quality images.
Troubleshooting If iPhone Screen Mirroring to Mac Not Working
Sometimes, you may encounter issues when connecting your iPhone to the Mac device. We'll present how you can troubleshoot and resolve such issues below:
- Check device requirements — some methods will have strict system and device requirements, so the screen mirroring experience may not work. For instance, AirPlay requires iOS 15 or later and macOS Monterey or later.
- Ensure your devices are connected to the same network — one of the main reasons your screen mirroring isn't working is that the devices use different networks. Check the connections and try again.
- Restart both devices — in most cases, random bugs and lags lead to connectivity issues, so you can try restarting both devices before proceeding with screen mirroring.
- Update software — outdated operating systems and software can lead to numerous issues, including screen mirroring. If this feature doesn't work, try updating the software.
Conclusion
Screen mirroring can come in handy in numerous scenarios and day-to-day workflows. If you're searching for the best way to share your iPhone screen with a Mac device, we've got you covered. We've presented detailed guides for all our top solutions above, like QuickTime, AirPlay, AirServer, Anymiro, and more.
If you're searching for the most universal and efficient method out of the bunch, we advise you to check out Wondershare Dr. Fone Air. It contains all the advanced features you need while being one of the most lightweight tools possible.
Share iPhone Screen on Mac FAQs
-
Can I screen mirror my iPhone to my Mac?
Yes, you can discover numerous screen mirroring methods like AirPlay, Wondershare Dr. Fone, QuickTime Player, and more. Some require a stable internet connection, while others allow you to connect your iPhone to the Mac with a USB and proceed to the screen mirroring experience. -
How to mirror an iPhone to a Mac without Wi-Fi?
You can use applications like Anymiro that allow you to connect your phone to the Mac with a USB cable. Anymiro supports both Wi-Fi and USB connections, so you can choose your experience and not depend on an internet connection. Here's a short guide on how to use the Anymiro application to share your iPhone's screen on Mac:- Open Anymiro on your Mac and select iOS from the main menu.
- Next, click on the USB option and connect your iPhone to the Mac.
- Tap the Trust button on your iPhone to finish the process.
-
How do you share an iPhone screen to a laptop?
The best way to share an iPhone screen with a laptop is through online screen mirroring tools like Wondershare Dr.Fone Air. Here's how to use it:- Head to the official Dr.Fone Air website and scan the QR code with your iPhone to download the application.
- Next, scan the QR code again with the installed application and watch the magic happen.
-
How do you show the iPhone screen on Mac QuickTime?
QuickTime Player is a built-in Mac feature you can use to mirror your iPhone screen. All you need is a cable to connect your iPhone. Here's a guide on how to do it:- Connect your iPhone to the Mac and open the QuickTime Player application.
- Head to File > New Movie Recording.
- Click on the arrow next to the recording button and select your iPhone.
- After completing these steps, your phone's screen will appear on Mac.
-
Why can't I mirror my iPhone to my Mac?
Numerous reasons may lead to connectivity issues, such as different networks, outdated software, incompatible devices/requirements, etc. We advise you to check these aspects before contacting Apple support.


