

Let's guess. You need to record your screen for an online tutorial, work presentation, or to show your gameplay, but QuickTime Player won't capture sound on your Mac? That's a common problem for Mac users. QuickTime creates great screen recordings, but the audio is missing.
Is it possible to record the screen with audio on Mac using QuickTime, or do you need to look for a better alternative? We are ready to answer all your questions. Here's how to use QuickTime screen capture with audio, what limitations to expect, and which alternatives to try.
Table of Content
Can QuickTime Record Screen With Audio?
Does QuickTime record audio? The short answer is yes, but it's complicated. Apple's "multimedia framework," as it is usually defined, is, first and foremost, a video and audio player. On top of that, QuickTime offers basic video editing tools such as rotating, trimming, and flipping.
But what if you want to screen record with audio using QuickTime? You cannot do this automatically because QuickTime doesn't record videos with audio by default for security reasons. So, you need to turn the microphone on manually or install a third-party recorder.
Things to do Before You Can Record Video and Audio With QuickTime
We won't deny it - QuickTime screen recording with audio could be confusing. So why even try, then? Many Apple users are still willing to use it because QuickTime is already built into their OS, and it comes for free. If this is you, the least we can do is help you get it right.
Before you can use QuickTime player screen recording with audio, you need to download a plugin that makes it all possible. Called Soundflower, this plugin is basically a system extension for macOS that lets you pass sound between applications by creating a virtual audio device.
What follows is a step-by-step guide for installing and configuring Soundflower:
Download and Install Soundflower
Downloading and installing Soundflower is a simple process that doesn't last long:
- Start by downloading Soundflower from the official MacUpdate page.
- To run the installer, click on the Soundflower DMG file at the bottom left corner of your browser window.

- Complete the installation process by following the instructions.
- When the installation is complete, restart your computer.
Configure Soundflower
Sunflower is not ready to start recording audio just yet. First, you must configure it:
- Open Finder and head to the Applications folder. Scroll down to Utilities.
- Find the Audio MIDI Setup app and click on it.

- Click the . icon at the bottom left corner of the window and choose the Create Multi-Output Device option.

- When you see the list of audio devices, check the box next to Soundflower (2ch).

- Under Drift Correction on the right, uncheck all boxes except for Built-in Output.

- Click on the Settings icon at the bottom left corner of the window and select Use this for Sound Output.

Configuring Soundflower doesn't automatically turn on QuickTime audio and screen recording, but it gets you halfway there. Move on to the next section when you're ready to proceed.
How To Record Your Screen With Audio Using QuickTime
Presuming you've successfully completed the pre-steps, the instructions below will show you how to start using QuickTime player screen recording with audio. Let's dive right in.
- Open QuickTime Player from your Applications folder.
- Click on the File tab in the menu bar at the top of the window and select New Screen Recording from the drop-down menu.

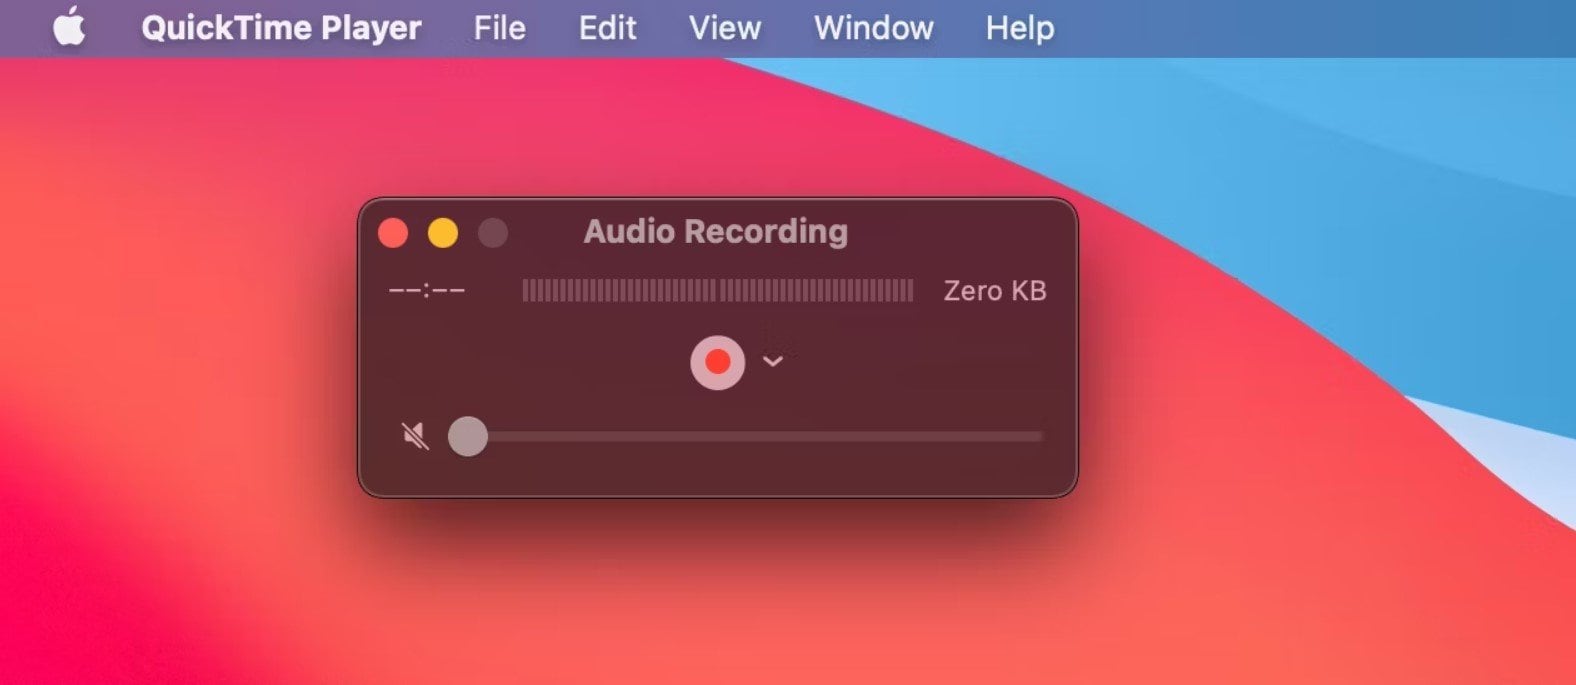
- QuickTime Player will initiate the screen recording mode with a toolbar at the bottom of the screen. Here, you can adjust the capture area and click on Options to reconfigure default settings.

- While in Options, you can select Microphone if you want QuickTime to capture your voice along with the screen.

- If you're using a MacOS version older than Mojave, you need to click the arrow next to the red Record button and choose Internal Microphone. That's how to narrate QuickTime screen recordings.

- Turning the microphone on will only record external audio. QuickTime won't capture any system sounds or sounds coming from the applications while recording until you connect it to Soundflower.
- To do this, you need to open Options and click Soundflower (2ch) instead of Microphone. (The picture shows an earlier version of Mac, but the step is the same for all Macs before and after Mojave.)

- If you're done customizing options, click Record to start capturing the screen.
- When you're finished recording the screen, click the Stop button.
After this, your QuickTime screen recording with audio will be automatically saved to your Mac. On the off chance that you can't find your saved recording, the next section is for you.
Where Are QuickTime Video Recordings Stored?
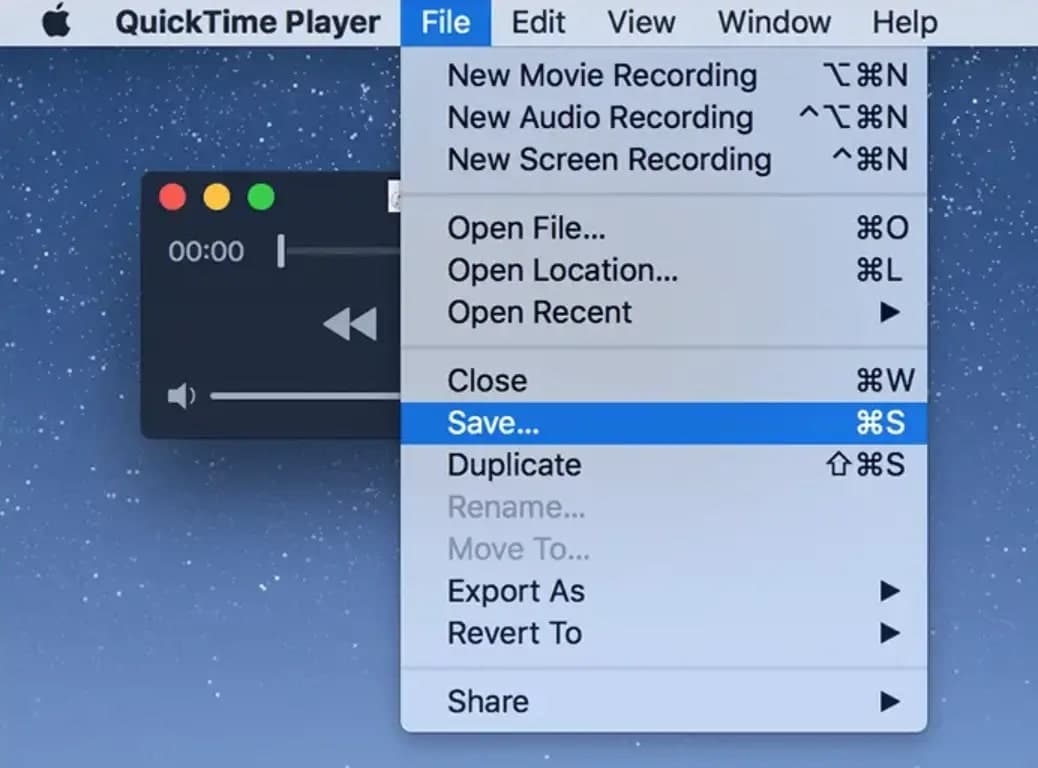
By default, your QuickTime screen recording with sound will be waiting for you in the Documents folder on your Mac. That's where the QuickTime Player automatically saves all screen and audio recordings. You can change the default location if you want to use a different folder.
It's easy to do. Remember where Options are in the recording menu bar. Click here and choose Other Location… then pick a folder where you want to store QuickTime Player audio and screen recordings from now. Also, you can manually save your recordings by clicking on File > Save.
Limitations of Using QuickTime to Record Video and Audio

Using QuickTime to record screen and audio is convenient for Mac users who want to record only external sound. Anything more than that requires you to go through additional steps. You must download and install Soundflower, configure it, and change QuickTime options.
As Mac users, we would probably be fine with this if there weren't other limitations to using QuickTime for screen recording with audio on Mac. Here's what we mean:
- QuickTime can't record screen and audio in 4K quality.
- The output file can only be exported in MOV format.
- You will need third-party software for advanced editing.
- Since 2016, QuickTime Player has been available for MacOS only.
All these things considered, there are better solutions for recording your screen and sound on a Mac. QuickTime's inability to capture internal audio without the help of a plugin like Soundflower doesn't make it very user-friendly, nor does its limited output quality and format support.
Best Alternative to Consider: Wondershare DemoCreator
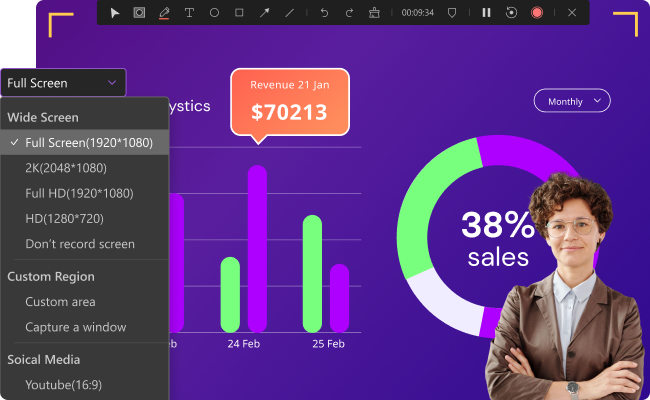
Are you looking for a simpler way of recording your Mac screen with system sound or microphone? Try Wondershare DemoCreator. Unlike QuickTime Player, DemoCreator can capture your screen in 4K resolution with both internal and external sound - and save recordings in over ten popular formats.
In addition to its Screen Recording mode with window capture presets for popular platforms like YouTube and Vimeo, DemoCreator has additional modes and options for recording with webcams and other external devices, as well as dual monitor and gameplay recording modes.
One of DemoCreator's advantages is its video and sound editor with a beginner-friendly interface and powerful features for taking your screen captures to another level, such as:
- Drag-and-drop tools for technical editing (cropping, rearranging, trimming, and more);
- Tools and templates for creative editing (transitions, effects, animations, green screen…);
- Useful tools for sound editing and mixing (including AI denoise and voice changer);
- Tools and presets for video presentations (PPT converter, beauty mode, and AI presenters);
- Live streaming options for YouTube, Vimeo, Zoom meetings, Discord, and more.
In short, DemoCreator is a one-stop solution that can help you capture and edit screen recordings with sound for anything from online courses and tutorials to business presentations. It can also turn your screen into viral content for gaming fans, science geeks, or anyone in between.
Plus, Wondershare DemoCreator can be used on both Mac and Windows OS.
How to Use DemoCreator to Record Videos With Sound
You don't need special plugins, configurations, or technical skills to use DemoCreator. The following steps will demonstrate how to record video with sound using DemoCreator Screen Recorder. We will also show you how to use advanced editing tools, share your videos, and more:
- Download DemoCreator from the official website and install it on your Mac.
- Start the program and choose DemoCreator Video Recorder.

- Next, set your recording preferences. Specify the screen area that you want to capture. The mic and system audio are enabled by default. You can click on the Microphone and Speaker icons on the right to make sure they are on.

- Click on the red REC button to start recording.
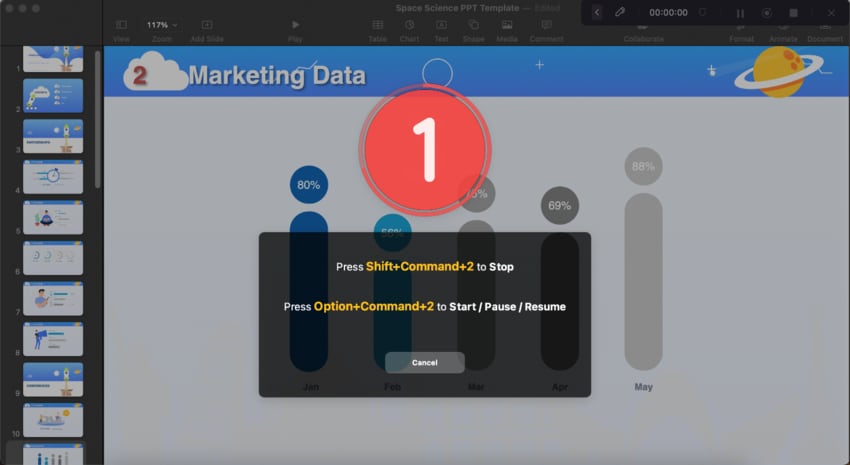
- During the recording, you can use the screen drawing tools to highlight the important sections. When you're done recording your screen, click the Stop button at the top right corner.
- Click Quick Export to download the screen recording with audio to your Mac or hit Share to directly post it online.
- Alternatively, click Advanced Editing to keep editing your screen recording and choose custom export format.
Conclusion
QuickTime Player can record a screen with audio, but only if you enable the microphone or install a plugin called Soundflower. Doing this allows you to capture your Mac screen with both internal and external sound, but then you have to jump through more hoops than is necessary.
Recording screen and audio with QuickTime has other limitations, like resolution quality and format support. QuickTime also lacks advanced editing features. If these are deal-breakers for you, switch to a more user-friendly and powerful screen recorder like Wondershare DemoCreator.


