Transcript
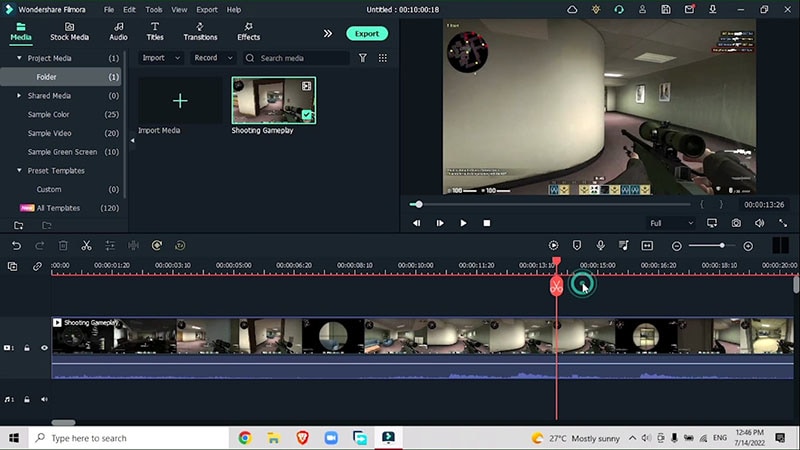
Learn a technique in which you can turn the night into day and day into night. You can get this effect by importing a footage from the internet or recording it yourself and dragging it to the Filmora 11 timeline. Let’s see how to get this effect.
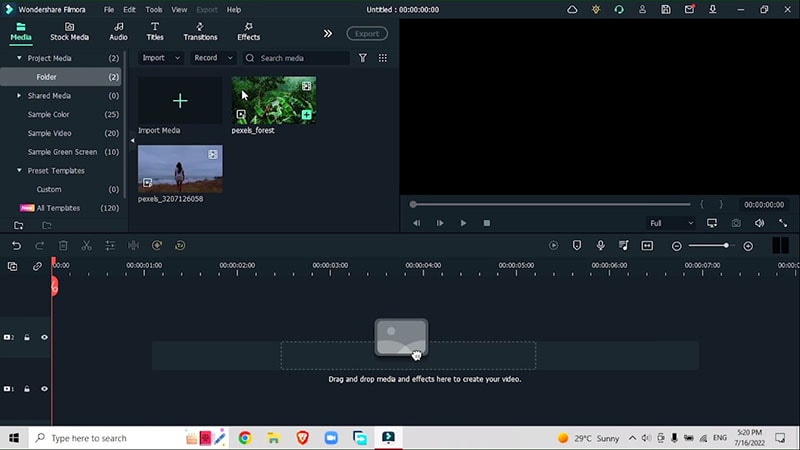
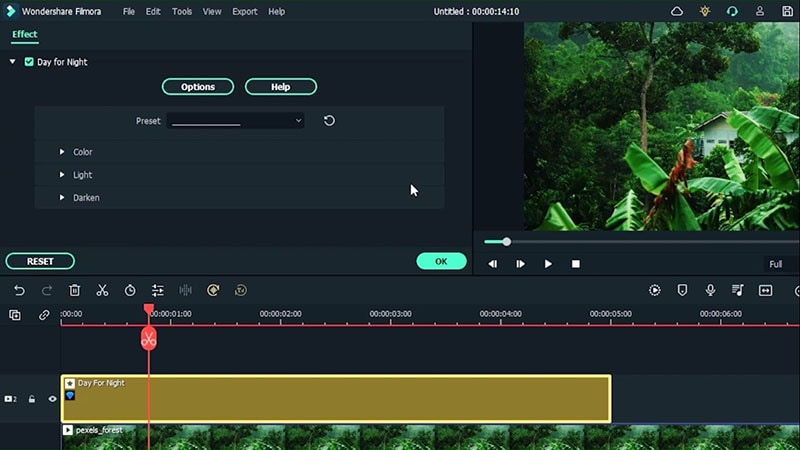
Import your footage onto the project and drag your first video which is a rainforest, onto the timeline. Move to the effect menu where you can find some effects from Boris FX effects. Place the day for night effect right above your video. You will get the light settings like it is night with this effect.
In the pre-set section, go to the drop-down menu and choose a pre-set. Go with the light which looks a little intense so work with the sliders. Open up the color section and see how it works with different settings. Increase the blur color tint for a night effect.
To make the colors vibrant, desaturate color from the settings. In the light section, adjust brightness and contrast.
In the darken section, set the darkness, sensitivity and soften the video accordingly.
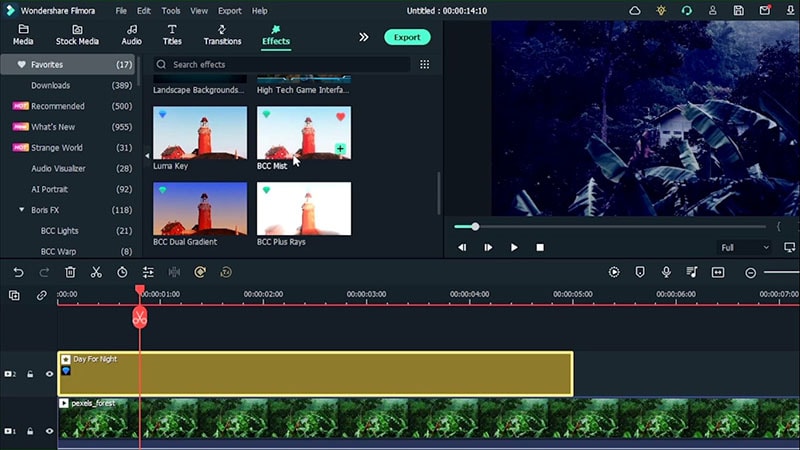
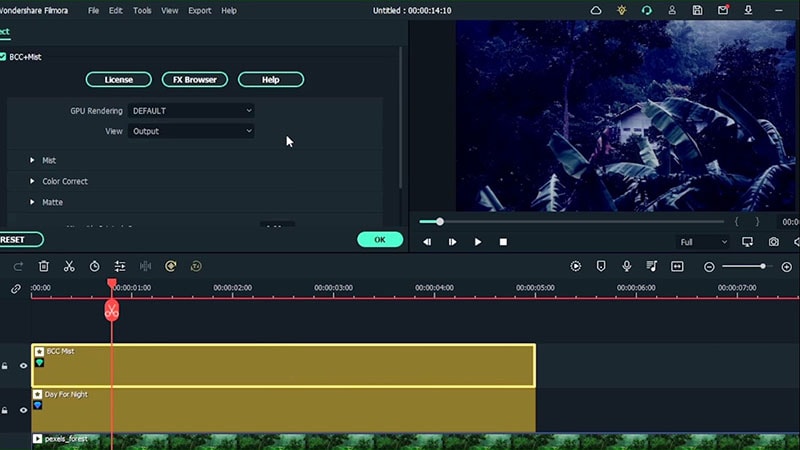
For second effect, use BCC Mist effect and place it right on the top track. Double click to explore the options.
In the Mist section, work with the brightness, Blur X and Y. Also adjust the color accordingly. In the Matte section, work with ‘Mix with original option’. Now the video gives a night effect.
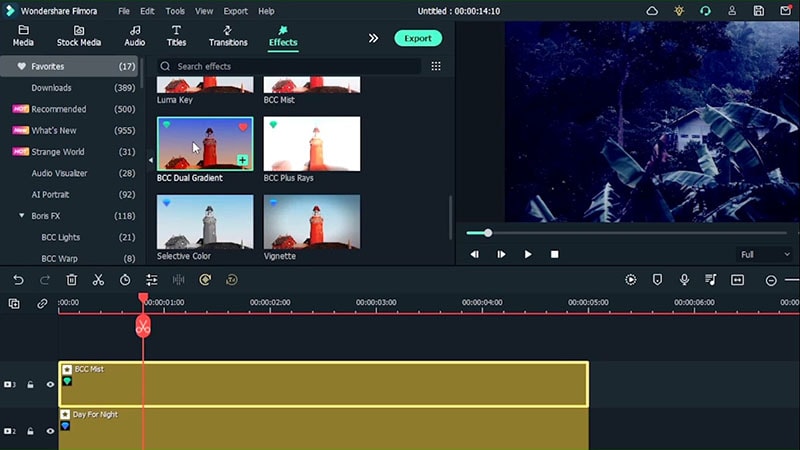
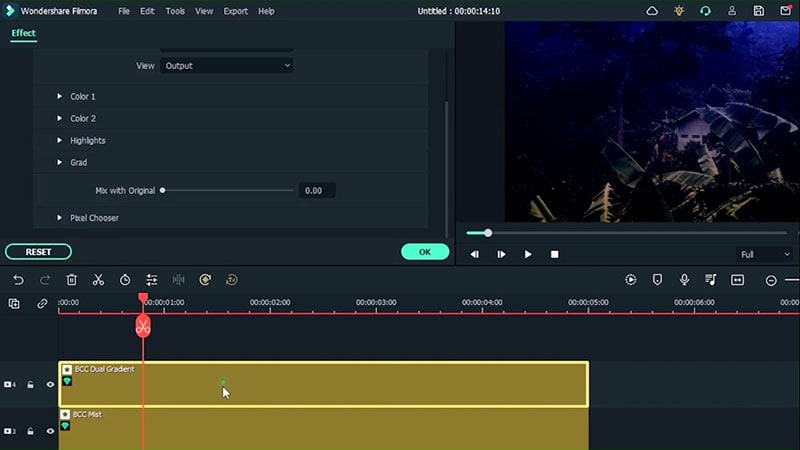
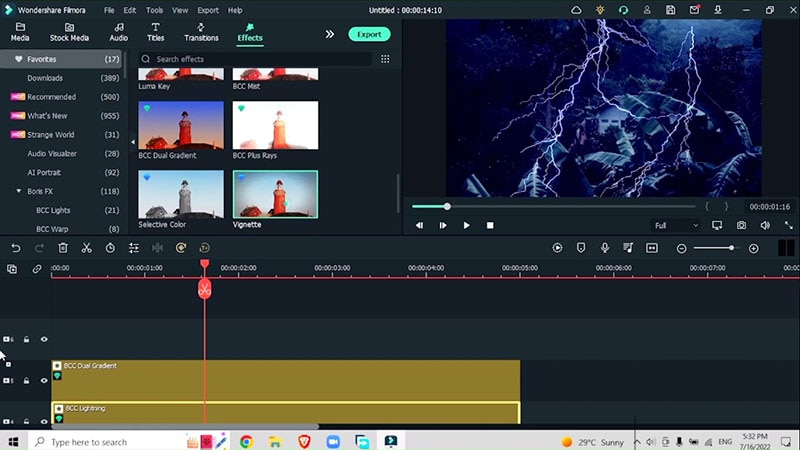
Grab the BCC Dual Gradient effect and put it on the top track. Double click to explore options. Change the color settings in color 1 and color sections. To work with the intensity of the colors, drag the opacity sliders.
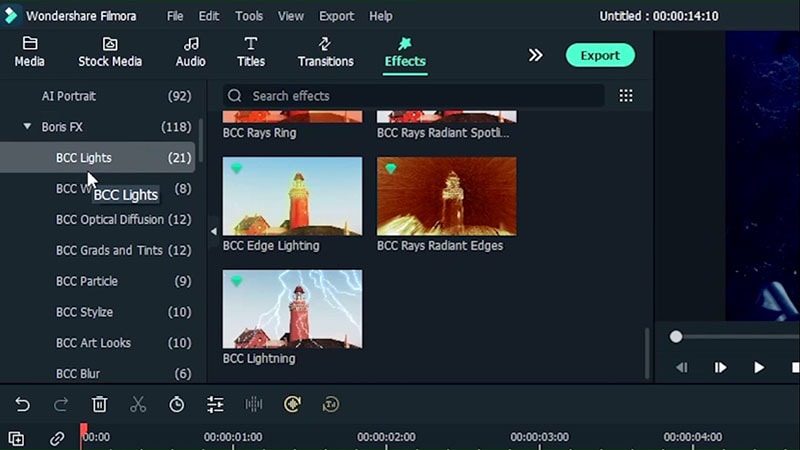
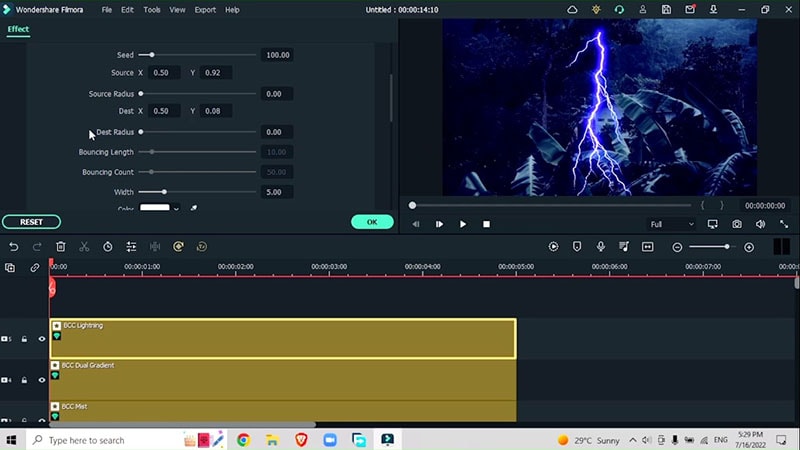
In the Boris FX effect, go to BCC lights and add BCC lightening effect. Add lightening to the rainforest footage. Double click on this effect and choose a pre-set, the number of lightning, number of seed, mix with the original and many other options.
Add simple Vignette effect to intensify the outer ends of the video. Choose Vignette effect and add it to the video.
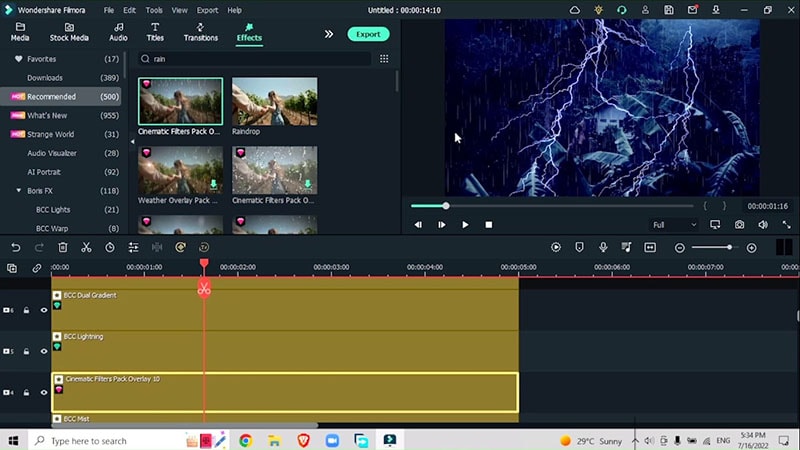
Type ‘rain’ in the effects menu. Do not add rain effect on the top of each video, instead insert this underneath so a lot of mixing of filters can be avoided. Also add lightning effect at intervals to give a dramatic look and export the video.
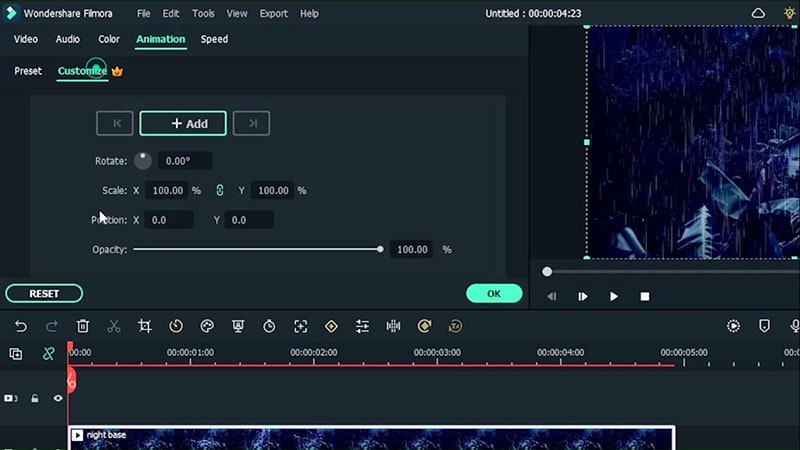
Clear the timeline except the base video. Place your exported video right above the base video. Go to animation, customize and add key frames. By reversing the key frames, you will get a night to day transition.
Now take another footage as a sample. This video contains a subject and you want to turn the day into night. Go back to the effects menu. Use the effects that you used earlier. Find some effects from Boris FX effects. Place the day for night effect right above your video. You will get the light settings like it is night with this effect. Double click and choose a pre-set. For example we use dark sky pre-set.
Go to the colour settings, work with the darkness, sensitivity and soften the video. Select reverse to focus on dark parts of the video rather than focusing on the bright parts which is great because at night time there isn’t any light to illuminate the sky.
Bring your video into the timeline once again and place it under the Day for Night effect. Don’t forget to leave an empty space between these two clips so another effect can be dragged down here.
Go to Effects menu and type Luma Key. Drag this effect onto the duplicate of our imported video. Hide the day for night effect. Go to effect, choose a pre-set and drag the sliders to change the threshold, contrast and also soften the video. You can also hide the original video so you can see how this effect looks on your video.
Hit OK and move to the stock media menu. In the Pixabay section, search for night sky video. Drag your night sky video underneath and replace the white sky with the night sky which we need. Double click on the sky video, go to Mask and choose a single line mask.
Rotate the single line mask so that we have a straight line. Move it downwards and accordingly where the sky appears to end. Invert the mask and now you will only see the sky. Bring back the original video and see how the night sky has replaced the original sky in the video.
Make sure to increase the blur strength so everything mixes with the background. Since the video is hand held, you can create key frames and if needed, you can also move the sky into different position by scaling it by X and Y positions.
Decorate this video and darken your subject more, therefore bringing all the attention to night sky. Go to the effects, choose a LUT. Bring back the day for night effect, bring in another effect from the LUT called Blue Moon effect. Place it at the top track.
To make things a little bluer, double click the effect and increase the color blue intensity by dragging the slider. Go back to the original effect, and use the sliders to adjust the color and contrast settings.
You are finished with the effect. Don’t forget to see the effect in full screen to spot any additional changes required.
Related Templates For You to Try


Hoe maak je een dag-naar-nacht video-effect
Wat je moet voorbereiden om het dag-naar-nacht-effect te bereiken:
- Een computer (Windows of macOS)
- Jouw videomateriaal.
- Filmora videobewerkingsprogramma
Download en Installeer Filmora
Om te beginnen heb je een krachtige dag-naar-nacht-effect-converter nodig. Je moet de nieuwste versie van de software op je systeem installeren. Of je nu Windows of Mac gebruikt, Filmora ondersteunt beide toonaangevende besturingssystemen.

Importeer het Filmmateriaal
Importeer de clip waarin je het effect van nacht naar dag of dag naar nacht wilt toepassen en voeg deze toe aan de Filmora-tijdlijn om door te gaan met het toevoegen van effecten.
Voeg het Eerste Effect Toe
Nadat je het filmmateriaal hebt toegevoegd aan de tijdlijn, kun je beginnen met het toepassen van verschillende dag- en nachteffecten om je video te transformeren naar dag of nacht. In het voorbeeldmateriaal gaan we dit omzetten van dag naar nacht met sommige effecten.
Ga naar effecten > Boris FX > Dag-naar-Nacht-effect
In de pre-set sectie, ga naar het uitklapmenu en kies een pre-set. Kies het licht dat wat intenser lijkt, zodat je met de sliders kunt werken. Open het kleurengedeelte en ontdek hoe het werkt onder verschillende instellingen. Verhoog de blur kleurtint voor een nachteffect.
Pas de instellingen aan voor drie secties: Kleur, Licht en Donkerder om het effect er natuurlijker uit te laten zien.
Voeg het Tweede Effect Toe
Voor de tweede overlay, ga naar effecten > BBC Mist Effect. Werk in de Mist-sectie met helderheid, Blur X en Y. Pas ook de kleur aan. In de Matte-sectie werk je met ‘Mix met origineel’. Nu krijgt de video een nachteffect.
Pas de instellingen aan in Mist, Kleurcontrast en Matte. Je kunt ook enkele pre-sets gebruiken en vergeet niet om te mixen met het origineel.
Voeg het Derde Effect Toe
Ga naar effecten > BBC Dual gradient effect en plaats deze boven de twee andere effecten.
Dubbelklik op het effect en werk met de instellingen in verschillende domeinen. Vergeet niet te mixen met het origineel voor een natuurlijke look.
Voeg het Vierde Effect Toe
Ga naar Effecten > Boris FX > BCC lichten > Voeg BCC bliksemeffect toe. Ga naar de kleurinstellingen, werk met de donkerheid, gevoeligheid en verzacht de video. Selecteer omkeren om op de donkere delen van de video te focussen in plaats van op de heldere delen, wat goed is omdat er 's nachts geen licht is om de hemel te verlichten.
Dubbelklik op het effect en werk met seed en andere presets.
Voeg het Vijfde Effect Toe
Ga naar Effecten > Vignet en voeg een eenvoudig vignet-effect toe om de randen van de video te verbeteren
Voeg meer Effecten Toe
Ga naar Effecten > Regen-effecten > Cinematic Filter Pack overlay
Exporteren en Keyframes Toevoegen
Exporteer de video en voeg keyframes toe.
Ga naar Animatie > Aanpassen > Voeg keyframe toe > verlaag de transparantie tot nul
Gerelateerde Sjablonen om te Proberen
Het uitproberen van het dag-naar-nacht en nacht-naar-dag effect is echt leuk en binnen enkele minuten kun je het tijdstip van de dag manipuleren. Laat deze gids je helpen en beheers de vaardigheid om deze meerdere effecten in een paar minuten toe te passen.
Speak Your Mind