คิดให้ใหญ่ขึ้นจากคู่มือผู้ใช้ Filmora
-
ข้อกำหนดความต้องการของระบบ
-
คุณสมบัติใหม่
-
คุณสมบัติเอไอ
- AI แปลงข้อความเป็นวิดีโอสำหรับ Windows
- การแก้ไข AI Copilot สำหรับ Windows
- เครื่องมือสร้างภาพขนาดย่อ AI สำหรับ Windows
- AI ตัวกำจัดเสียงร้องสำหรับ Windows
- การแก้ไขข้อความ AI สำหรับ Windows
- การปกป้องโทนสีผิว AI สำหรับ Windows
- AI เครื่องสร้างเพลงสำหรับ Windows
- AI มาสก์อัจฉริยะสำหรับ Windows
- ไฮไลท์อัตโนมัติ
- เอฟเฟกต์ภาพบุคคล AI
- AI ลดเสียงรบกวนสำหรับ Windows
- AI การยืดเสียงสำหรับ Windows
- AI คัตเอาท์อัจฉริยะ
- ฟีเจอร์การตรวจจับฉาก
- ระบบลดเสียงอัตโนมัติ
- การลดเสียงอัตโนมัติใน Filmora X
- การทำให้เป็นมาตรฐานอัตโนมัติ
- การตรวจจับความเงียบ
- เอฟเฟกต์สติ๊กเกอร์ AR
- ซิงค์จังหวะอัตโนมัติ
- ปรับเฟรมวิดีโออัตโนมัติ
- ปลั๊กอิน ChatGPT - การเขียนคำโฆษณา AI
- รูปภาพ AI สำหรับ Windows
-
เริ่มต้นเลย
-
การสร้างโครงการ
-
การนำเข้าและการบันทึก
-
สื่อสำหรับการใช้งาน
-
คู่มือเสียง
- สื่อสำหรับการใช้งาน
-
-
การแก้ไข
-
การแก้ไขวิดีโอ
- เปิด / ปิดคลิปใน Windows
- การลบคลิปอัตโนมัติสำหรับ Windows
- การแก้ไขหลายคลิปสำหรับ Windows
- คลิปประกอบสำหรับ Windows
- ซูเปอร์สโลว์โมชันพร้อมออปติคัลโฟลว์สำหรับ Windows
- ทางลัดความเร็วในการเล่นสำหรับ Windows
- มาร์กเกอร์สำหรับ Windows
- ทำเครื่องหมายรายการโปรดสำหรับ Windows
- พื้นหลังที่ปรับแต่งได้สำหรับวิดีโอ และรูปภาพ
- การเร่งความเร็ว
- ความเร็วสม่ำเสมอ
- สร้างด้วยโหมดทันทีบน Mac
- การติดตามการเคลื่อนไหว
- เลเยอร์การปรับสำหรับ Windows
- ปุ่ม Chroma (จอเขียว)
- ระบบป้องกันภาพสั่นไหว
- คอมโพสิต
- การแปลง
- ตัวเลือกเส้นขอบ
- พรีเซตเทมเพลต
- ใช้การปรับแต่งอัตโนมัติ
- การใช้งานเงาตกกระทบ
- การใช้งานเฟรมค้าง
- เอฟเฟกต์ Face - Off
- เอฟเฟกต์ภาพเบลอแบบโมเสก
- สร้างวิดีโอแบบแยกหน้าจอ
- การสร้างเอฟเฟกต์ PIP
- การเล่นวิดีโอในแบบย้อนกลับ
- สแนปชอตวิดีโอ
- ใช้มาสก์กับวิดีโอ
- เปลี่ยนความเร็วในการเล่นวิดีโอ
- ครอบตัด แพน และซูมวิดีโอ
- แยก และตัดแต่งวิดีโอ
- การแก้ไขเลนส์
-
การแก้ไขเสียง
-
แก้ไขสี
-
-
ข้อความและคำบรรยาย
-
ภาพเคลื่อนไหวและคีย์เฟรม
-
เอฟเฟกต์และการเปลี่ยนภาพ
-
เอฟเฟกต์วิดีโอ
-
การเปลี่ยนผ่าน
-
-
สติ๊กเกอร์
-
การส่งออกและการสำรองข้อมูลบนคลาวด์
-
กำลังส่งออก
-
การสำรองข้อมูลบนคลาวด์
-
-
การทำงานร่วมกัน Win
-
การปรับปรุงประสิทธิภาพและการแก้ไขปัญหา
Video Editing Ruler – Windows
Filmora is known for providing ease to video editors on the overall scale. There are multiple video editing tools available that support ease of use and guide users to efficient video editing. However, for scaled editing across a video through rulers, there is a recent addition to Filmora, which helps with layout settings through such visual editing.
How To Use Video Editing Ruler in Filmora?
While working on your video editing project, if it comes to managing a specific layout within the video at different time instances, you might have to scale it thoroughly. Filmora provides a video editing ruler that helps create reference lines as guides for assisting with the layout. To figure out how it is done effectively, look through the step-by-step instructions provided:
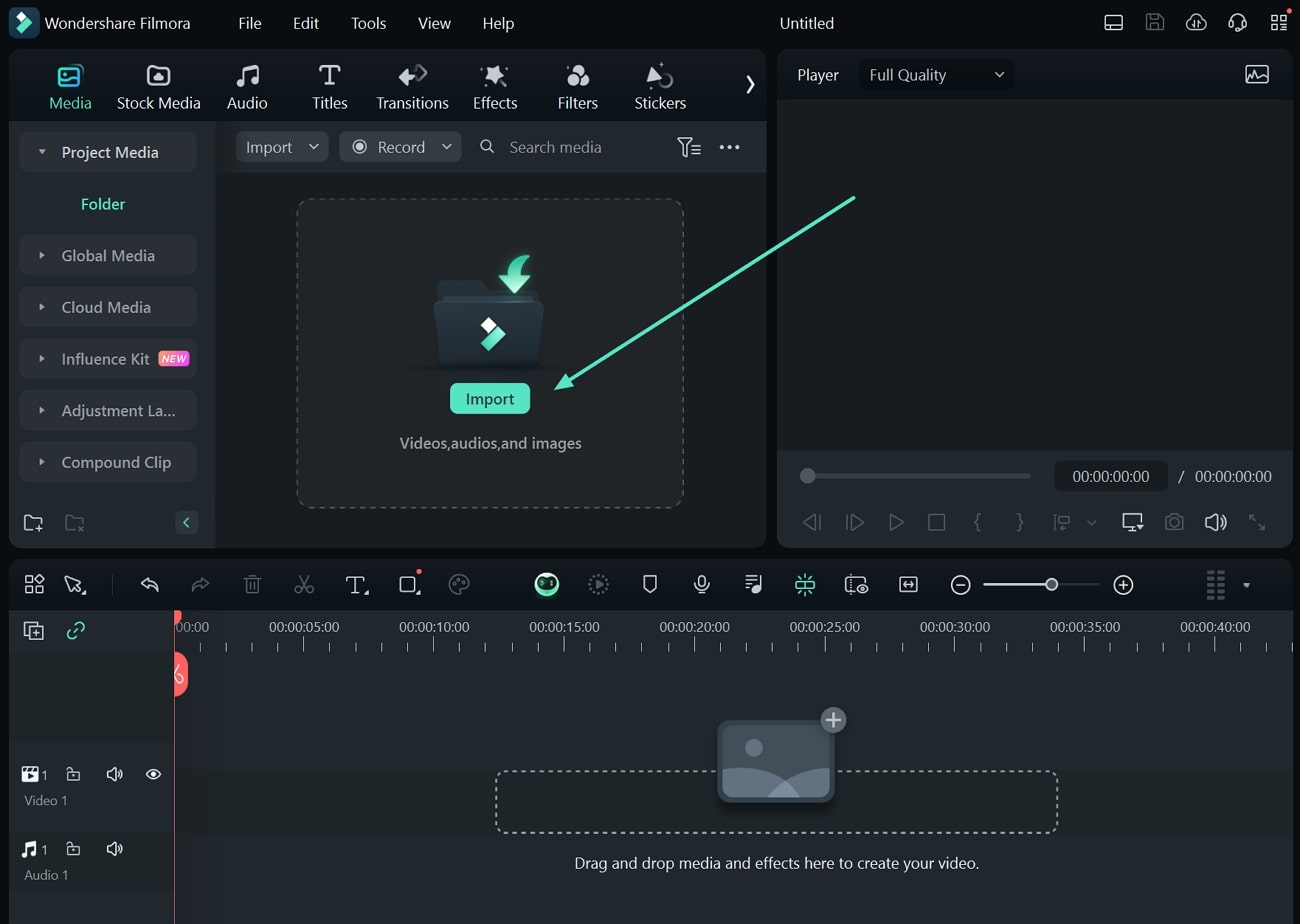
Step 1. Import Video To Filmora
As you initiate working on Filmora, set up a new video project using the "New Project" button. Proceed to the video editing interface and use the "Import" button to add your content.
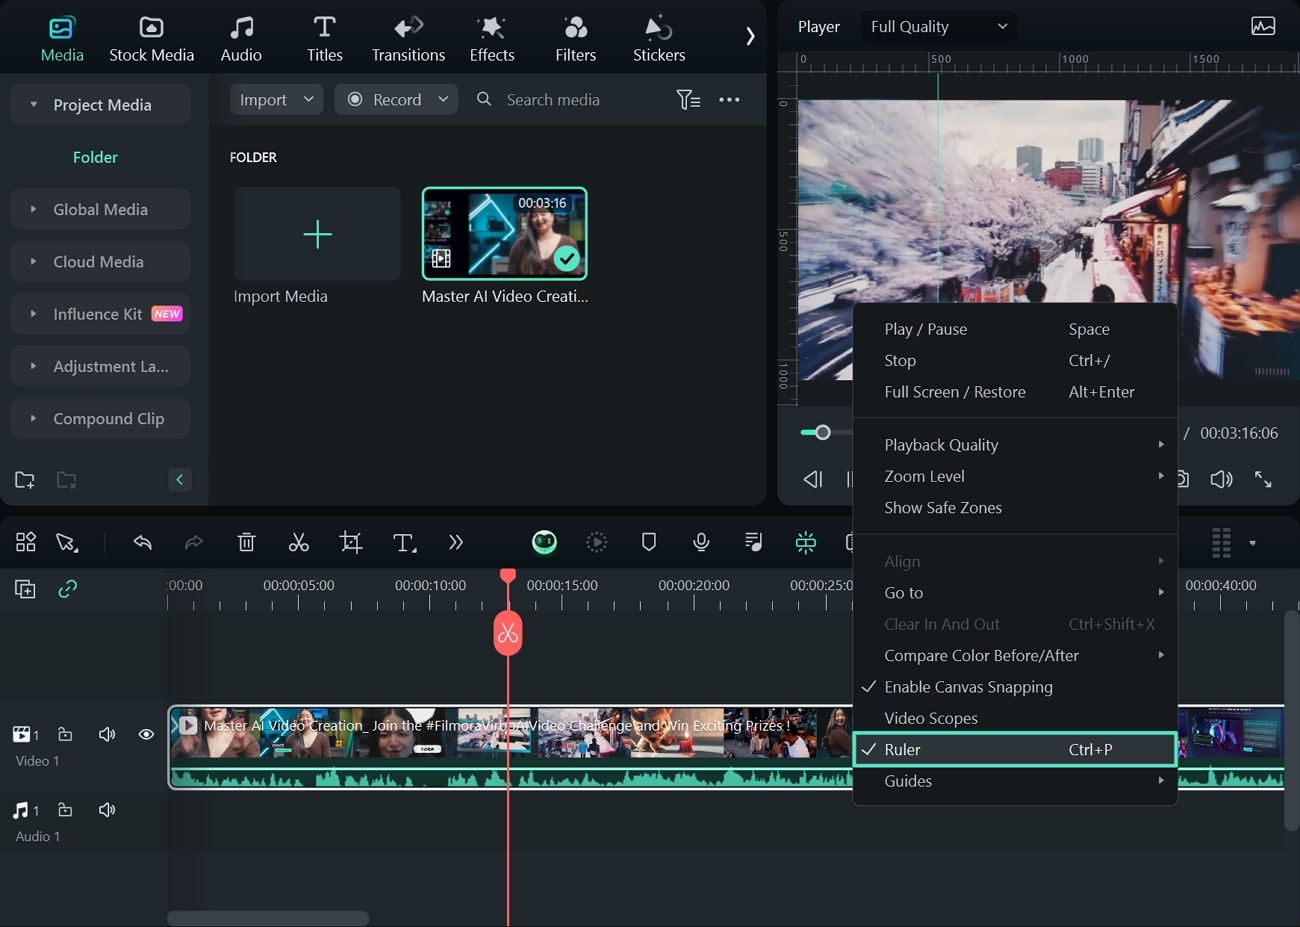
Step 2. Access Video Ruler on Filmora
With your video added to Filmora, drag it across the timeline for further editing. To access the video ruler, lead to the preview window within Filmora and right-click your mouse or trackpad. Look for the "Ruler" option in the drop-down menu and click to activate it. Similarly, you can use the "CTRL + P" shortcut key for activating this option. This will display the ruler across the preview window to act as reference lines.
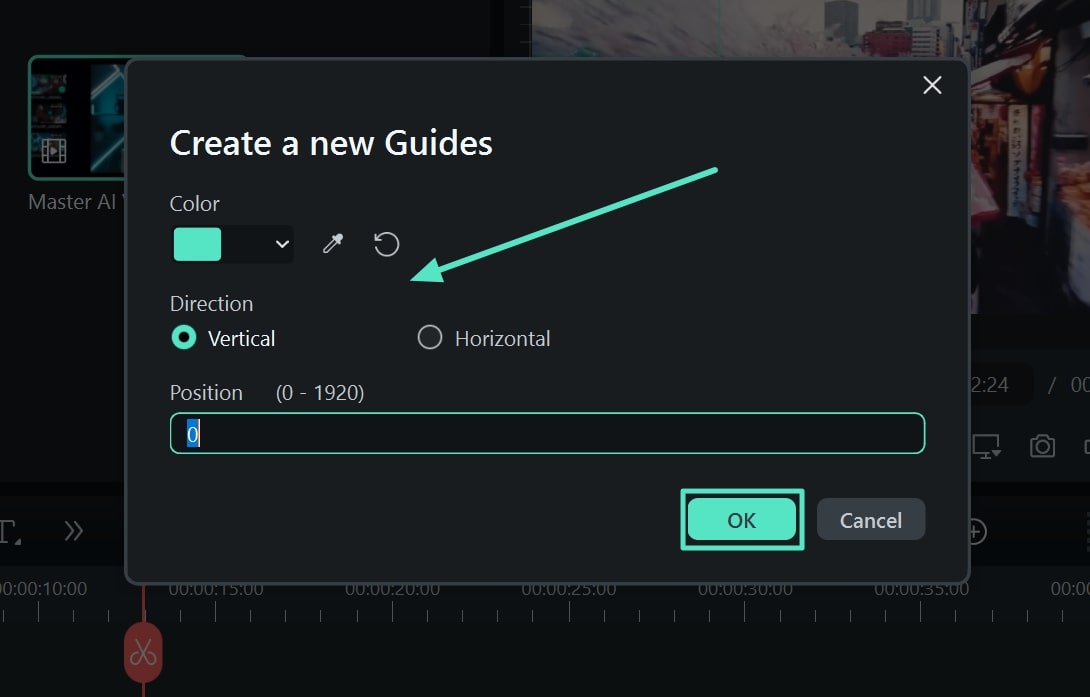
Step 3. Create a New Reference Line
To create new reference lines within your video preview, you can go to the same drop-down menu and find the "Guides" option. In the protruding menu ahead of it, click the "Add Guide" option to open a new pop-up window. You'll have to set up the "Color," "Direction," and "Position" of the reference line before clicking "OK."
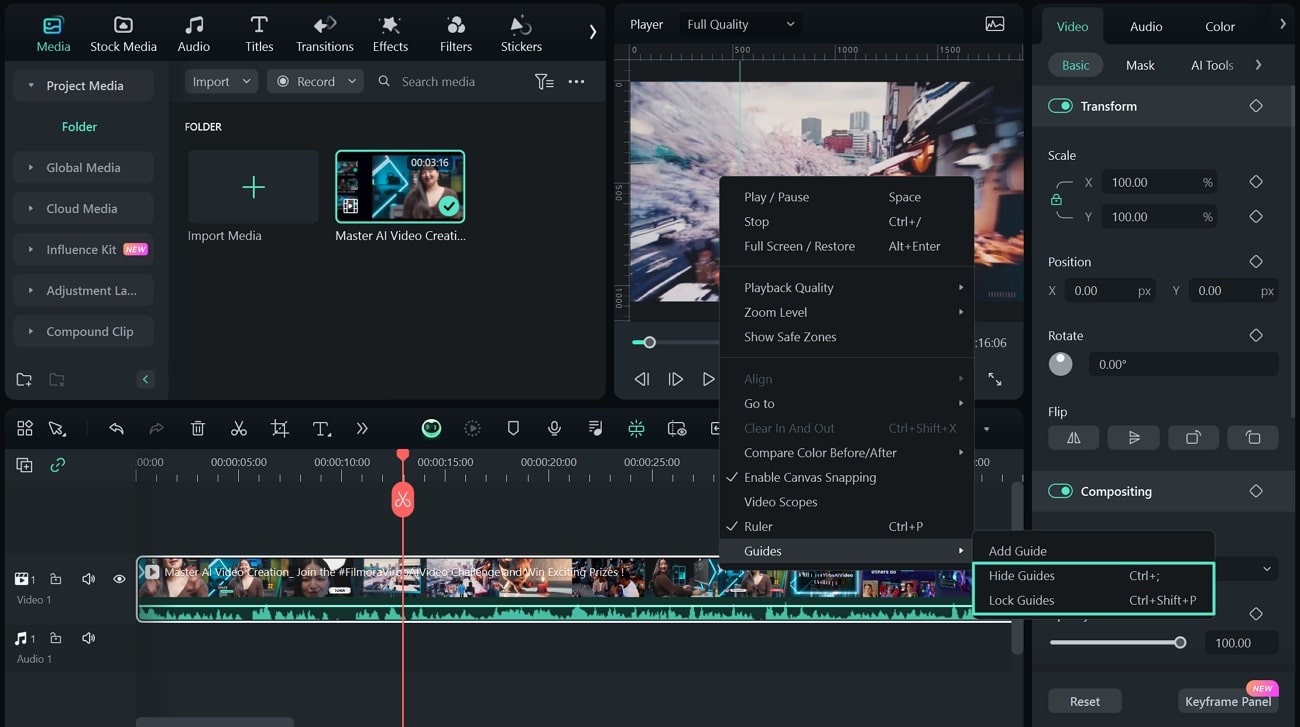
Step 4. Hide or Lock Reference Lines of Video Ruler
While creating new reference lines, there are multiple ways to manage them across Filmora. If you want to remove all reference lines from the display, use the “Hide Guides” option. Furthermore, if you have to restrict these reference lines across a specific point, the “Lock Guides" option would do the trick.