God Speed Anime effect is a chronicle of the Anime world where you can flash your movement at a micro level, making it hard to catch. Try out new ways to enhance your experience.
Transcript
A demo to the start including the requirements. Usually, you can kickstart with a camera, a tripod, and the Filmora that will make it suitable for the newbies as well.
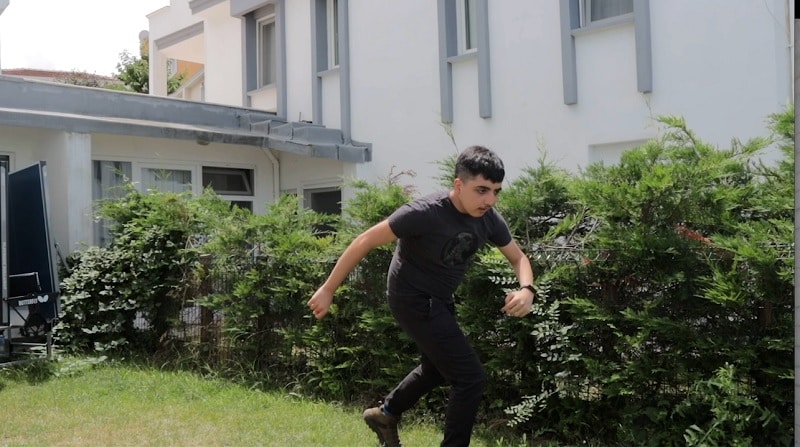
There will be the need for two videos where the first one is the empty shot and the other is the character moving to different locations to record the video for the effect. The character needs to pause for some moments during the recording.
Head towards the Filmora and import both videos. The import shall take a few moments and ask for the resolution to be adjusted. Go with the flow and add the videos to the timeline from the import window.
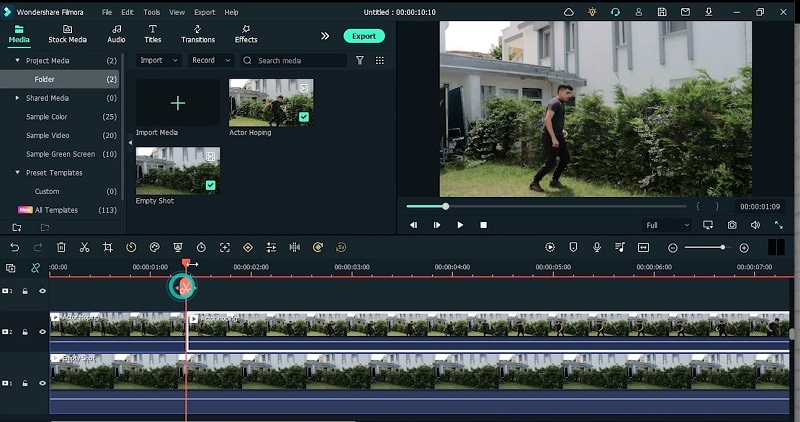
Adjust the video to make the clips from the video scenes. Continue for the different scenes with the character and then separate the clips from the main video. This will enlist the clips in the other video track.
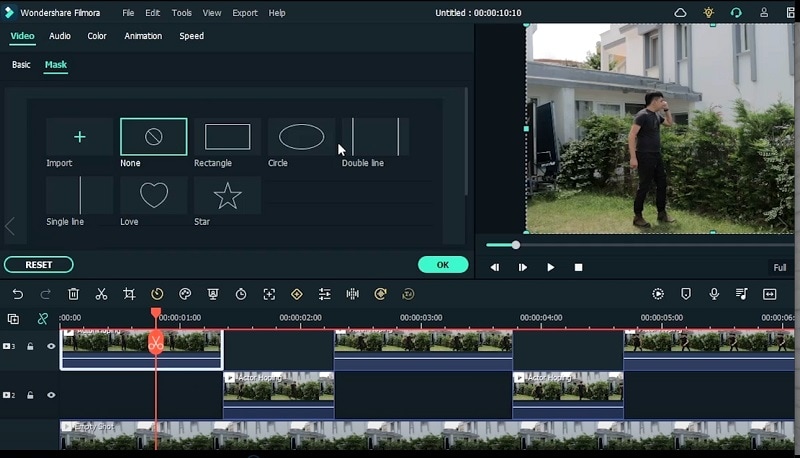
Masking is the way to separate the subject from the scenic video. This will remove the extra parts from the video frame. Head over to the Masking window and select the shape to include in the timeline.
Increase the blur strength to make it realistic for the character to move across the spots. This will make the video frames in lieu of the scenes and blur out any ambiguity from the main video. Adjust the slider to the required level and preview the video alongside.
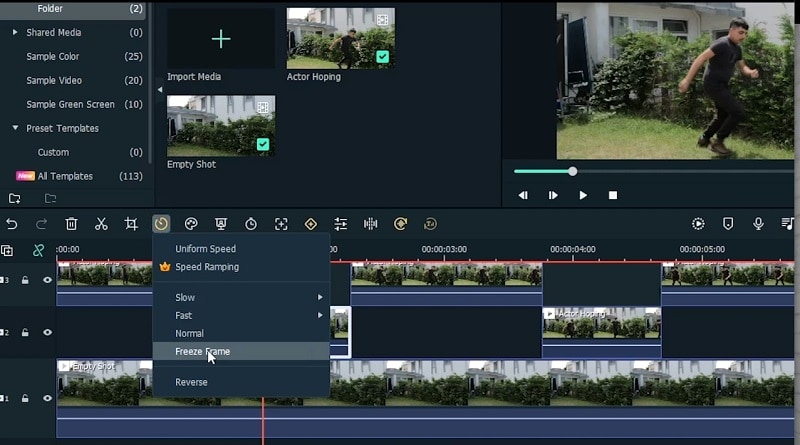
Go to the second video to freeze the frame of the video. You need to do the same with the other videos as well. However, you may need to speed up the process. Add the freeze videos to the secondary track of the videos.
Mask out the subject in all the video segments. Select the video and open the mask window by doble0clicking on the video. Also, add the blur strength and do this to all the other videos as well. After that, lock the tracks as well.
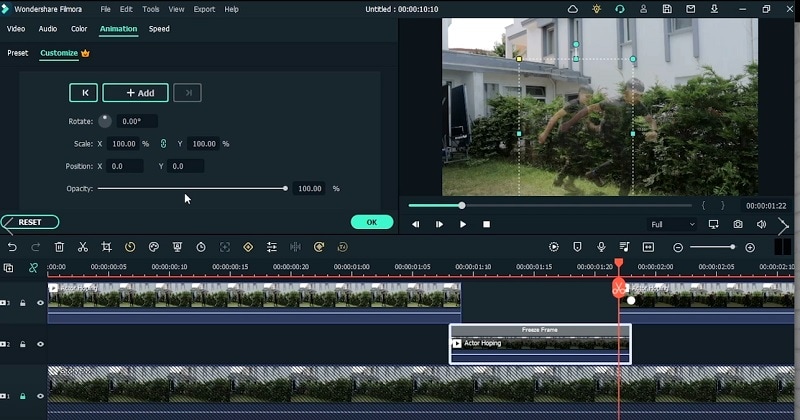
Add keyframes to the videos to make the video smooth. In order to do that, add the freeze frames duration to overlap with the main video. Head to the animation tab to add the keyframes to the videos respectively.
Customize the keyframes using the Customize tab. Here you can scale as well as Position to match it with the other video. This will also give you the Opacity option to make the character movement looks smooth.
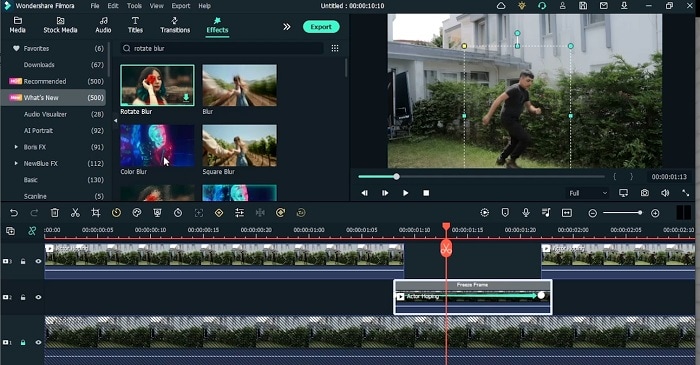
Go to the effects menu to go for the Blur effect. This will add a real touch to the video featuring the character. Add the Blur effect to the character clip in the timeline. Finish the Blur effect customization with the options it provides.
The keyframing video is a bit too slow and in order to make it shorter, drag the keyframe slider within the video track and make it shorter. Now adjust the next layered video on top of it as well so it will get in sync with the character clip.
For the final video, add the keyframe to the beginning and end of the character video in track 2. After adding the keyframe, adjust the slider by dragging the keyframe to the left which will squeeze the slider.
For making the effect smooth further, use the Transition effects on the videos. Visit the Transition menu and add the Dissolve transition to both the beginning and end of the videos in the video tracks. This will smooth out the overall video as you can see in the preview window.
Add the color grading to highlight the colors and correct the color disruptions within the videos. You can use the black and white filter to make it more dramatic. Search for the desired filter from the list and drag it over to the video.
You can also add as many effects as you want. In addition, you can add LUTs to make it more interesting. Drag and drop the effects on the character video and preview the effect. You can also customize them according to the scene.
Finish the editing and preview the final video which is inclusive of all the effects and the filters. You can preview the editing from start to end and easily add this anime effect to your video using Filmora.
How to Make an Anime Inspired God Speed Effect
What you need to prepare:
- A computer (Windows or macOS)
- Your video materials.
- Filmora video editor
Record the Raw Footage
Before you proceed with the making of the God Speed Anime effect, you would need to pre-record footage with your camera so you can create your effect with the editor in the next step. Make sure you follow the transcript to record your footage in lieu of this anime effect.
Download and Install the Filmora
Before using this Anime face movie creator, the first and most important step is to download and install Filmora, which is a useful application even for novices. You may access the.exe file for this program by clicking the link below, which will take you there. You may download and install the needed version without bothering about Windows or Mac OS.
Import Videos to Filmora
Go to the Import section of the video editor once you've opened it in order to import your captured video to Filmora. You may Import your footage with the required resolution for the video regardless of the format.
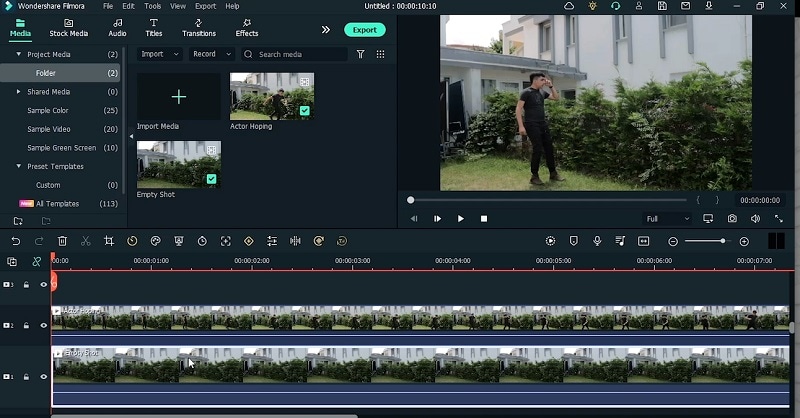
Add and Split Videos in Timeline
You may see the video material straight immediately after the successful import of your videos if you drag the files to the timeline. If your films are all in one file, you may use the Split tool to precisely divide apart the scenes. To do this, click the Split Scissor while hovering over the video file where you wish to terminate the first scene. This will split the video from the main file. For a seamless experience, repeat the procedure for the remaining scenes and then remove the undesirable content.
Mask the Clips
Head over to the mask tab by double-clicking on the video. For a fast adjustment, go to the Mask menu and choose the form of your mask effect there. Drag it onto the video and drop it there, then adjust the boundaries to match the main video as seen here: Adjust the Blur Strength slider in the editing box to match the footage. Once you've created the smooth borders of your masking movie, be sure to preview it and save the adjustment.
Freeze the Frames
Head over to the time icon in the timeline and select the Freeze Frame from the list as shown here. You can also hover over the video and right-click on it to go to Speed> Add Freeze Frame and then customize the freeze frame manually.
Add Animation Keyframes
Extend the Freeze Frames to make them overlap the previous videos. Double-click on the video and refer to the Animation menu from the editor. Now, add the Keyframes at the start of the center video as shown here:
Add and Customize Effects
In the next step, go to the Effects menu and add the effects from the list. From there, you can drag and drop the effect over the video in the timeline track and customize it afterward.
Preview the Video and Export
In the last step, verify that all effects are in place by seeing your altered video in the Preview box. When you are happy with the outcome, click the Export option at the top to save your Superhero effect video to your mobile device. You may share your Anime effect to internet sites like YouTube, Vimeo, and others in addition to preserving it offline. Ensure that you are logged in to these platforms before clicking the Export option.
In a nutshell, for an Anime inspired God-speed effect, you don’t need to be an expert on the subject as you can create this effect with raw footage with the help of Wondershare Filmora editor. Install the toolkit on your system and dive in to create your anime effect single-handedly.
Speak Your Mind