


Want to capture images up to the very best of your ability? The first step to that is understanding and bonding with your camera. Cameras come in all shapes and sizes, but there are a few fundamentals that every aspiring photographer and content creator needs to know.
To help you get accommodated with your camera, we have compiled some camera basics for you to learn. These fundamentals of photography, such as shutter speed, frame rate, etc., might seem primal, but they form the essentials of a good photoshoot. Also, learn to make color corrections in your content using Wondershare Filmora’s remarkable features.
In this article
Part 1: 5 Camera Basics Function for Photography
Here are some photography essentials regarding your camera that you’d do well to remember.
1. Aperture
Aperture refers to an opening inside the lens of the camera, through which light passes. It is usually a set of blades or a diaphragm inside the lens. Aperture, along with the shutter speed and ISO, controls the brightness and exposure of an image. You will know what is ISO and shutter speed in the proceeding segments.

The aperture, also known as an f-stop, has a confusing numbering system, though. A higher number means a smaller aperture. Similarly, the smaller the number, the larger the aperture. So, an f-value of f/2.8 means a wider aperture than f/8. Lenses have maximum and minimum values of apertures, varying from f/1.2 to f/22.
Besides the brightness, aperture also determines the depth of field, which is a measure of the focus and sharpness of an image. A shallow depth of field means that only a small portion of the image is in focus while the rest is blurred. This is caused by wide apertures such as f/1.2. Images that are sharp throughout are caused by narrow apertures such as f/11.
2. Shutter Speed
Shutter speed is the duration of time for which the film or sensor of your camera is exposed to light. Shutter speed is usually measured in seconds or fractions of seconds. You can see the measurement of shutter speeds like 1/2s, 1/250s, 1/4000s, and more. Shutter speed determines the amount of light that falls on your frames and thus controls the image's overall brightness.
If you do not have the right shutter speed, you will not get sharp photos. Instead, you will end up with blurred and unclear images. The faster your shutter speed, the less light is captured by the sensor, the more crisp the shot. You will need a shorter shutter speed to control motion blur and capture sharper shots of fast-moving objects.
3. ISO
ISO is another important essential of photography that you need to master. ISO is related to the light sensitivity that your camera’s digital sensor can detect. It is a measure of the amount of sensitivity your camera needs to have regarding the amount of light present in your surroundings.

ISO is an important determinant of your image quality. The lower light you have in your vicinity, the more sensitive your camera will be to the light. Hence, the higher the ISO, the higher the brightness of the image. In combination with the aperture and the shutter speed, ISO determines the overall brightness or the exposure of your image.
However, it is important to note that a high ISO comes with a price. Large values of ISOs, say up to 1600 or 3200, usually create noise in the image. Also, in instances when you want to capture blurred motions using a slow shutter speed, a high ISO isn’t really your best friend. You might need less light sensitivity in such situations, and high ISO can cause distortion.
4. Frame Rate
Frame rate is a term specifically concerned with videos. It is a measure of the number of frames that are recorded in each second of the video. Frame rate or FPS (frames per second) is the speed at which your images (frames) are shown in the video, kind of like flipping through a book.
If a video is captured at 24fps, it means that 24 frames are being displayed in a single second. Frame rate greatly determines the quality of your video. A higher fps value means smooth motion with crisp details. When used correctly, frame rates can produce different results for your video. For videos involving fast motions, you can adjust the frame rate to produce a realistic effect.

5. White Balance
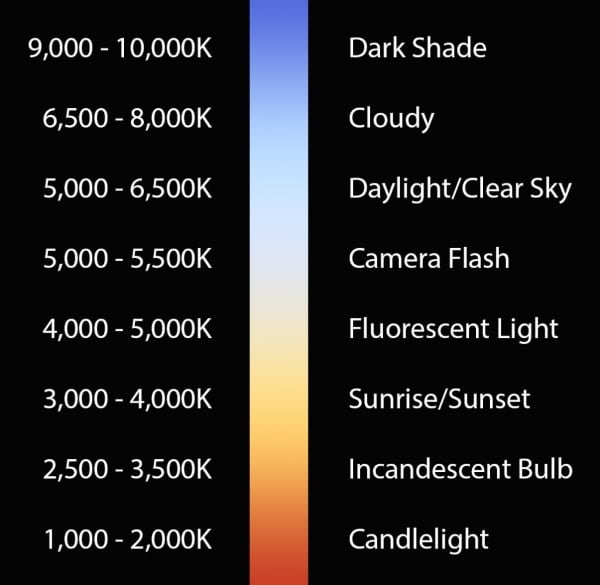
White balance deals with the color temperature of your images and videos. It also relates to the camera's digital sensor but determines the color of the light rather than its intensity. White balance is measured in the Kelvin scale, with each range having its own specific hue. Usually, the auto settings for white balance do a pretty good job, so you don’t have to shift to manual often.
Part 2: How to Make Color Correction in Filmora
Want to make color corrections in your videos? The quickest, easiest, and most reliable way to do that is through Wondershare Filmora.
Filmora is primarily a video editing software, which is redefining the ancient approaches to video editing. With its state-of-the-art features and interactive user interface, Filmora is providing an innovative platform to aspiring content creators. With all the essential tools at your hand, making the best out of your videos isn’t a hard task anymore.
Versatile Video Editor - Wondershare Filmora
An easy yet powerful editor
Numerous effects to choose from
Detailed tutorials provided by the official channel
Here is how you can correct video color in Filmora:
Step 1: Add Your Videos
Install and launch Filmora on your device. Select “New Project” and click on “Import” to add your files to the program’s interface. You can also drag and drop your videos into Filmora.

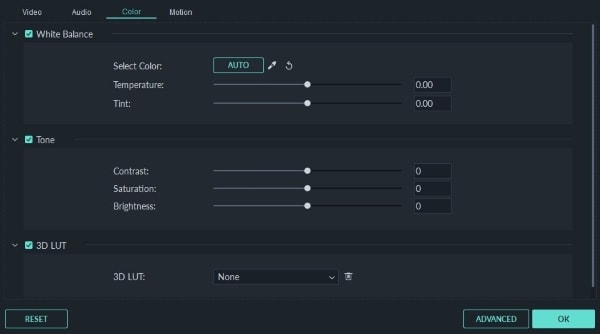
Step 2: Basic Color Corrections
Drop the video to the timeline and double-click to open the editing window. Under the "Color" panel, you will see multiple correcting options. You can adjust parameters such as saturation, contrast, brightness, and tint, etc., of your video. You can also use the 3D Lookup Tables to add some film-inspired color presets to your video.
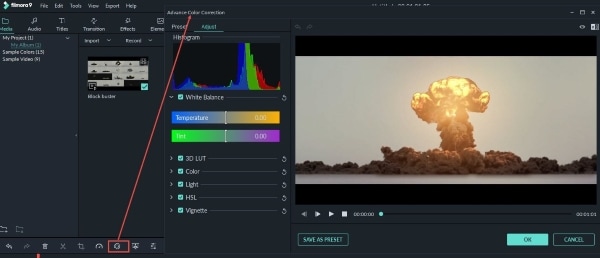
Step 3: Advanced Color Correction
From the toolbar, click on the “Advanced Color Tuning” icon to apply some advanced color corrections to your video. From the pop-up window, you can apply preset templates. In the “Adjust” tab, you can adjust the white balance of the video finely.
Step 4: Saving the Changes
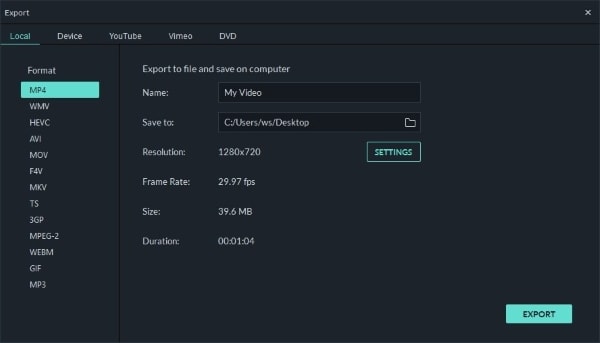
You can preview your video by pressing "Play." Click "Export" to go to the export window. Choose the location and output format for your video, and click on "Export."
Closing Words
If you are new to the photography world, the camera lens basics mentioned above will undoubtedly prove useful in the long run. These essential functions, such as shutter speed, aperture, and frame rate, etc., are considered the fundamentals of photography. You need to firmly grasp these concepts if you want to refine your photography skills.
If you want to make color corrections in your content, Wondershare Filmora is the go-to software. With top-tier tools and an easy-to-use interface, Filmora is one of the top leading video editing software in the market. You can follow the simple steps mentioned above to make efficient color corrections to your videos.
Wondershare Filmora
Get started easily with Filmora's powerful performance, intuitive interface, and countless effects!
