Transcript
It's always sad when our snacks finish. So, in this article, we are going to explore a way through which we can get endless snacks. This way you won’t have to worry about it finishing and you always get to enjoy it whenever you need it. Let’s see how we get this effect.
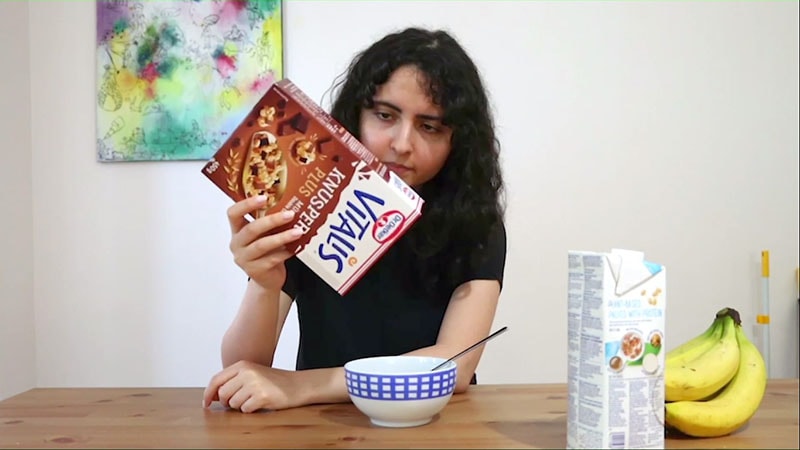
Film yourself sitting behind a table by placing the tripod directly in front of you. Film yourself as if you are enjoying a snack. Place your elbow on the table and tap on the box of snacks for a bunch of times. Ask someone to pass you the snack through a small tube. The snacks will be seen transferring from the opening of the tube into the box.
Also shoot an empty shot for this effect to help with masking. Along with the empty video, the other video shot will be your raw video in which you will act.
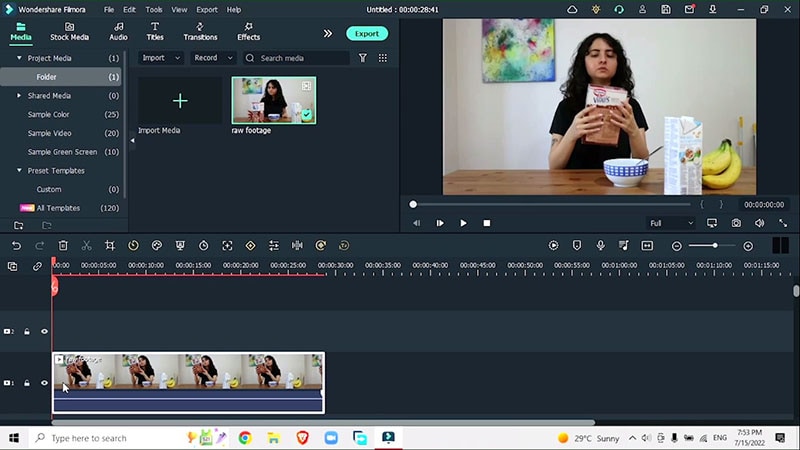
Import the video into project and then drag it onto the timeline.
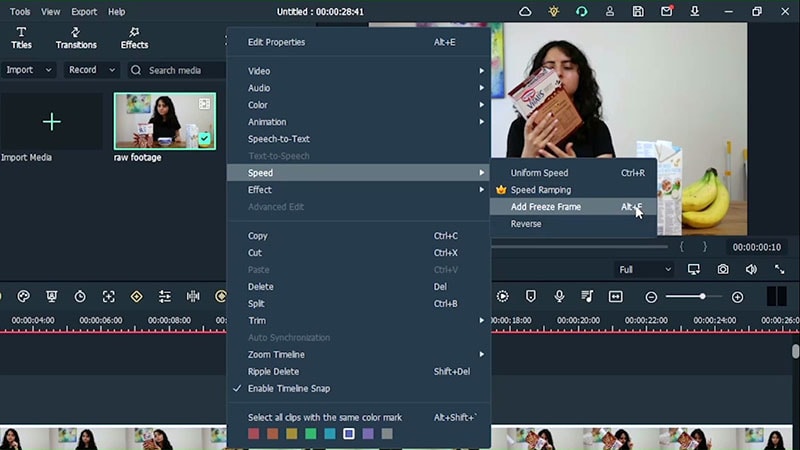
Tap on the box and your friend shows up with this tunnel which she is dropping the snack through. Go to Speed and add freeze frame. Make a cut in at the end of the face frame and then bring the normal footage back up. We can increase the length as much as we want because that’s how freeze frame works. Just make sure to drag the edge here so that you don’t get the normal video.
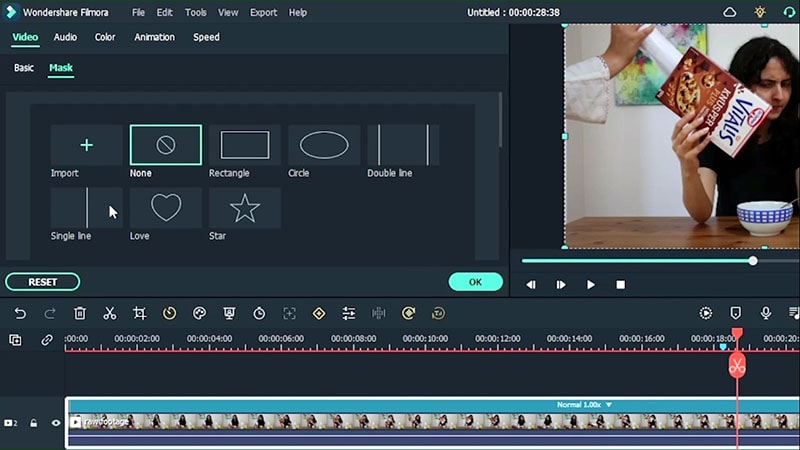
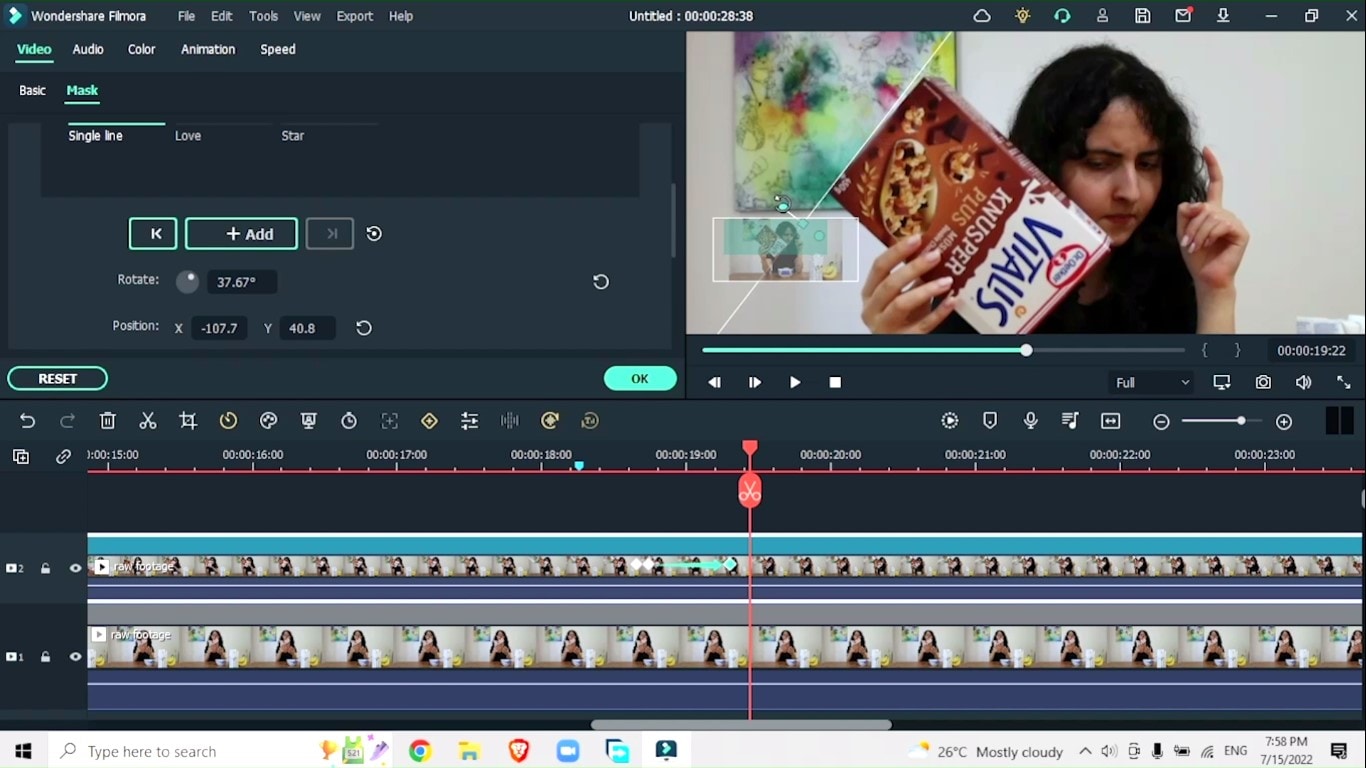
Once you are here, you can tap up on this video, go to mask. The reason why you are choosing this single line mask is because of the shape of your box. Your snack will have another shape and thing will get little complicated. So if you choose a snack where the box is pretty sharp then will good to go.
Click on the video once and just match it with the line. Trap behind the handle here and making just rotated until you are perfectly aligned with the box.
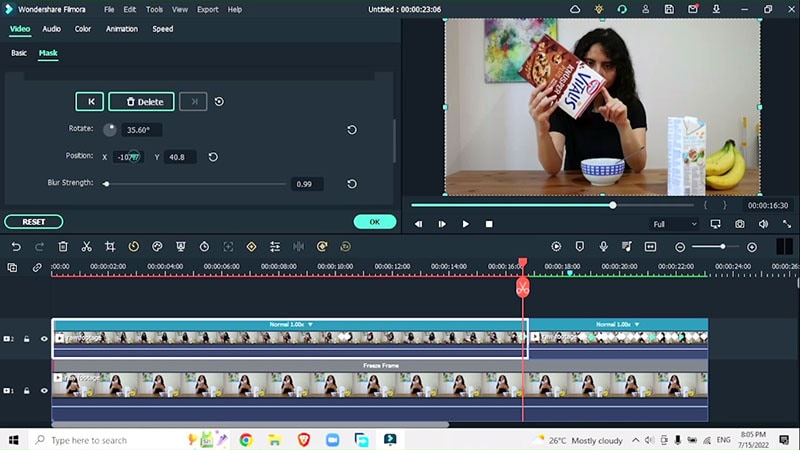
Zoom into your project. This way you can see exactly how much rotation you need. You can also select the mask and use your left and right error keys to make the more precise movements. Once you are aligned with the edge of the box, you can add a little bit of blur strength.
Keep frame with each of the mask position. This way you will be going to make the other side and the snack is suddenly showing up because we taped on it multiple times.
Now moving to your next frame and you will going to position the mask every time you move. Click on it once and use the handle. You don’t need to create key for every frame, just for the frames where the edge of the tunnel is showing up. Just create one key on the current position and in the next one you can just rotate it. So it’s not exactly a frame, it is mostly about the edge showing up. Click on the left and right error keys to make the perfect position. Do this until your snack is completely moved towards your bowl.
So now if you review your video, nothing is showing up from the other side. Before the point where you were actually pouring the cereal, you are going to make the cut and then just move the mask out of the way. So go to mask, you are just going to position the X. So now the mask will only show up when you are about to pour the cereal.
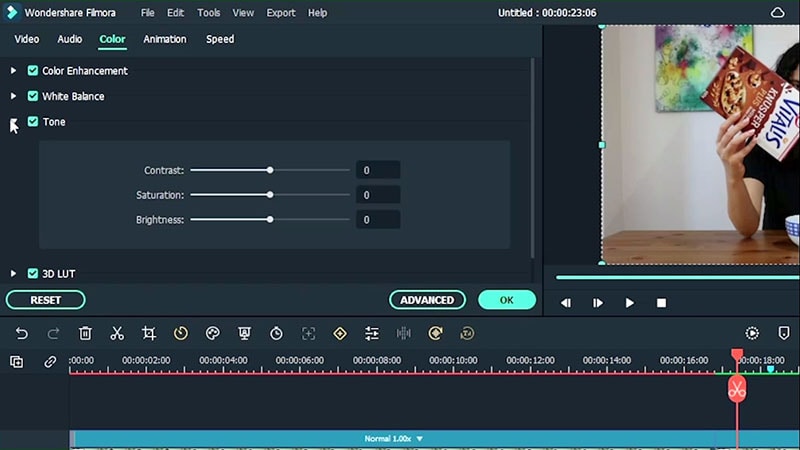
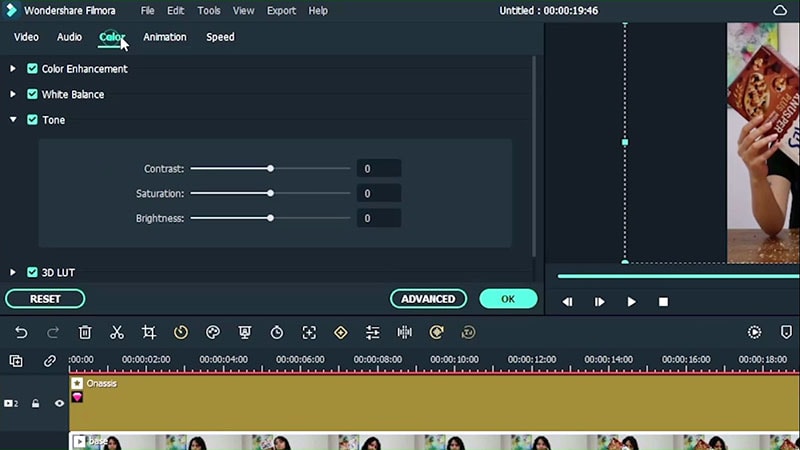
Go towards the frame where you can see the difference in the lining, then double click and you are just going to work with the color. Go to tone and reduce the brightness.
So once you have this effect, you are going to cut the video when the cereal has finished pouring.
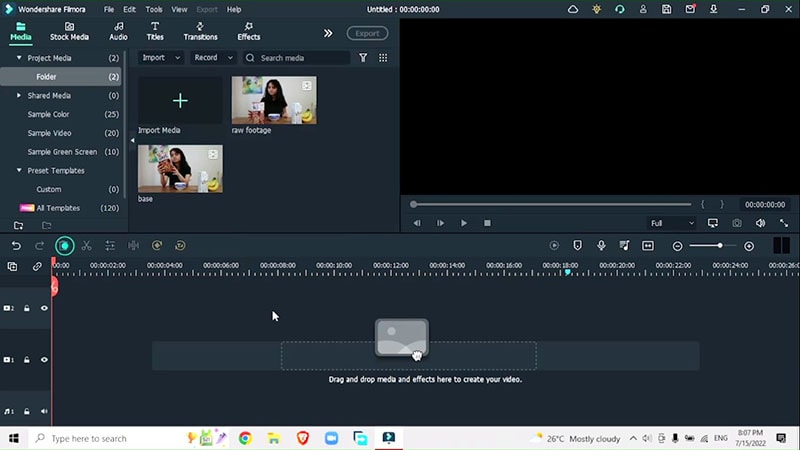
Now it’s time to export the video and that we can make the thing finished off by adding some additional effects. After exporting the video, bring it back to the project.
Now clear the timeline by adding recycle and get rid of the markers. Right click on any marker and delete all markers.
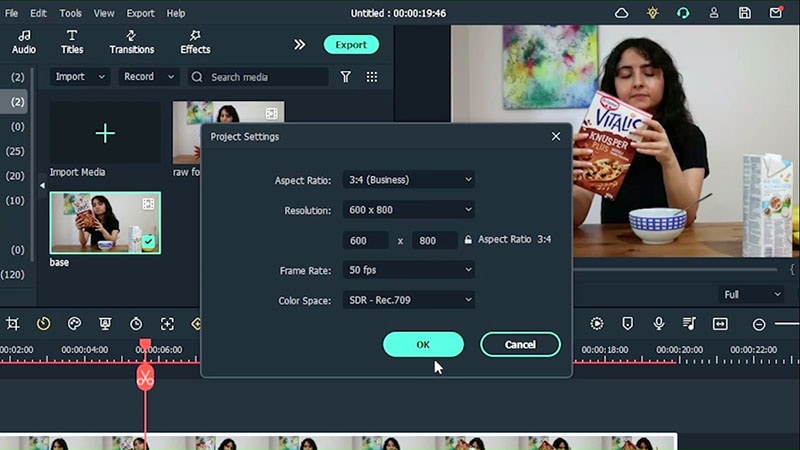
Change the dimension of your project. So go to file, project settings, change to business, click OK .
Tap up on your video, go to transform and increase the scale. Make sure that you are at the centre of the video the whole time. So if needed you can use position X to bring yourself towards the centre.
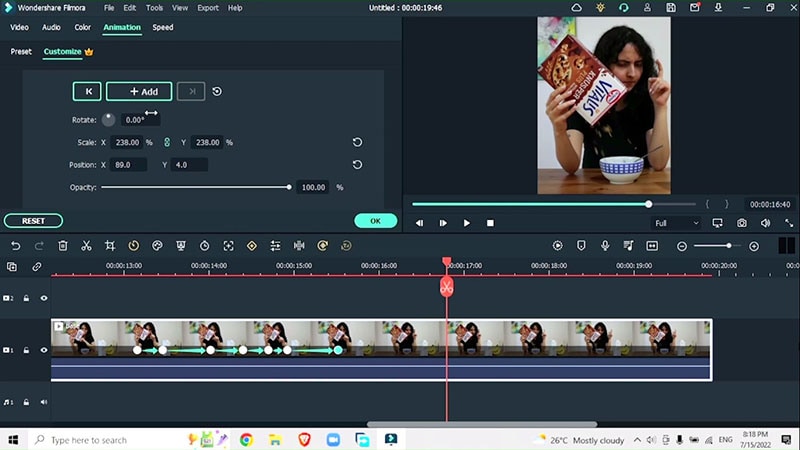
Double click on your video. Go to animation and move to the start of the timeline, customize and create the first key frame. Create different key frames.
Zoom it towards your belly, zoom in and use the position Y.
Once you grab on this real box you will going to zoom it right out and then bring your position Y back to the way it was.
Zoom in towards yourself. Rotate the video to add fun effect.
Right when you have your cereal at this angle, increase the scale and rotation. Rotate until you see there is nothing in the box.
When you are shaking the box you can use position Y to move the video up and down with the box.
Before shaking the box, you are going to zoom in, and create the key frame.
Now you will zoom in again but this time you will sink it with every tap that you do. When you are done tapping, just zoom out the original number. Add another key frame when the product is about to flow out.
Now go to the effects menu and bring some colors. Go to LUT section and place this right above. You can also change the color of your footage. Double click on your video and then go to color. Here you can just work with the contrast, brightness and all the other sliders. Here again once you are finished and you are done with the effect.
How to Create Endless Skittles Effect
What you need to prepare:
- A computer (Windows or macOS)
- Your video materials.
- Filmora video editor
Record Footages
Film two shots. One must be an empty shot and the other will be your acting shot. Adjust the camera on the tripod and set the settings on manual mode.
Download and Install Filmora
Go to the Google chrome, visit the official Wondershare website and download and install Filmora to get started with the effect. You can download it for Mac as well as for your Windows PC.

Import footages to timeline
Launch Filmora 11 and add the recorded footage into the timeline to add the endless skittles effect.
Image name: .jpg
Add Freeze Frame
Right click on the imported video, go to Speed > Add freeze frame. Make a cut in the freeze frame and bring the normal footage back up. Increase the length of the freeze frame.
Mask the Tube
Go to Video > Mask > Select Single line mask because that is the shape of our box. Zoom into the project to position and rotate the mask. Add a little bit to the blur strength.
Create Key Frames
Only create key frames where you require. Add the key frame to adjust and position the mask. So now, nothing is shown behind the box and we cannot see any tube from which the food is coming out.
Make a cut and move the mask out of the way. Go to Mask > Change the position X.
Correct the difference in lightening
If you see shadows or the differences in the background lightening, go to Colour > Adjust Tone, Saturation and Contrast.
Export the Video and Clear the Timeline
After you have export the video, import the base video back to the timeline and clear the timeline and also get rid of the markers.
Change the dimension of the project by going to File > Project settings > change aspect ratio into business.
Zoom in and revert the position to the original
Add Effects
Go to Effects and add colour grading. Go to the LUT section.
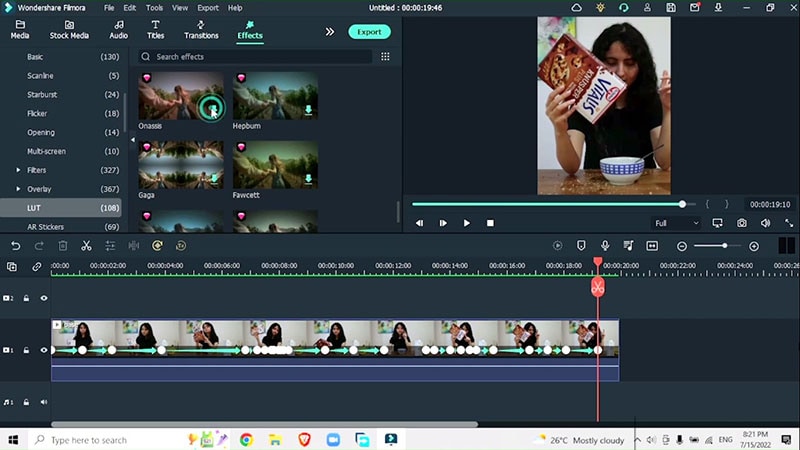
Also add colour grading by going to colour and adjust saturation, contrast and brightness.
Choosing to add fun effects like endless skittles, you can catch a lot of viewers within hours and can promote your brands more creatively with such outstanding effects. To explore how this effect works, this article is your best stop.

Speak Your Mind