Transcript
Meditation can take you in a different place. Well, that is certainly true because in this article, we are we are going to see how that works and how we can get this levitating effect using Filmora 11. Before we get into the editing, we actually need to film a few scenes. So, let’s grab your equipment and see what type of shots we need.
To shoot your video, you require a green cloth in the background. Attach the cloth to the wall behind and place a chair beneath the green cloth. Make sure that the surface of the cloth remains smooth.
Keep the shutter speed of your camera high and record on manual mode.
Avoid strong conditions for example strong wind or strong background noises. This can distort the audio of your footage.
You only need one video for this effect. So, that now you have it, go to Filmora 11 and see how you can put it altogether.
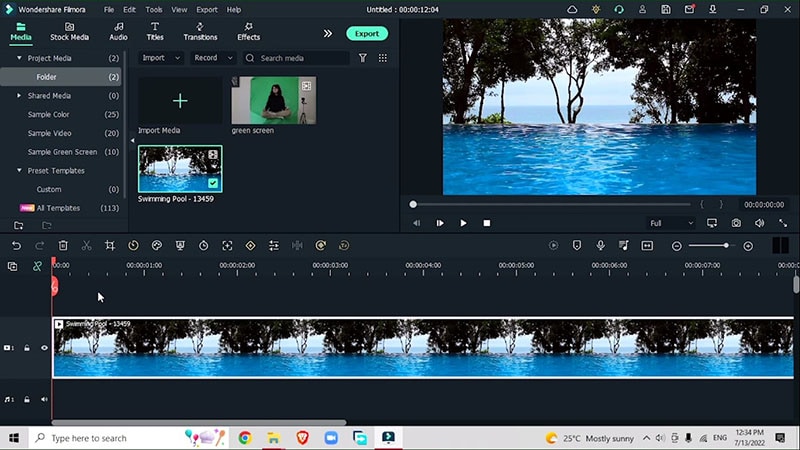
Import your background footage onto the timeline.
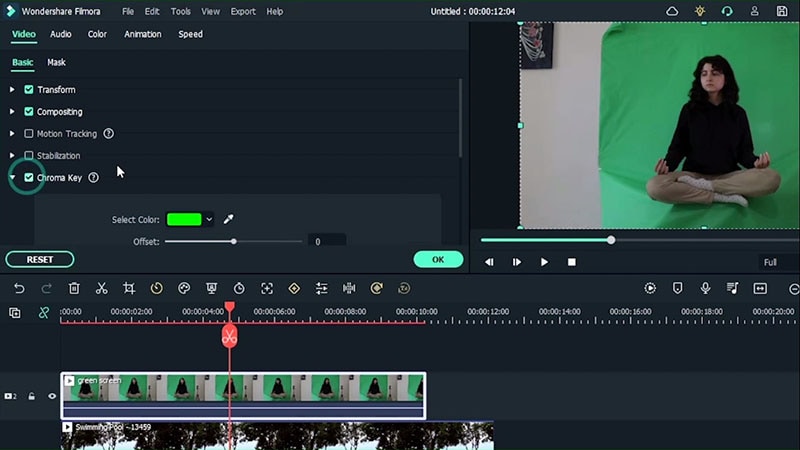
Now, bring in your green screen footage and place it right above the background footage. Double click the green screen footage and begin get rid of the green screen. Go to Video > Basic > check the Chroma key box. Once you have separated yourself from the green screen, you can work with the thickness and feather.
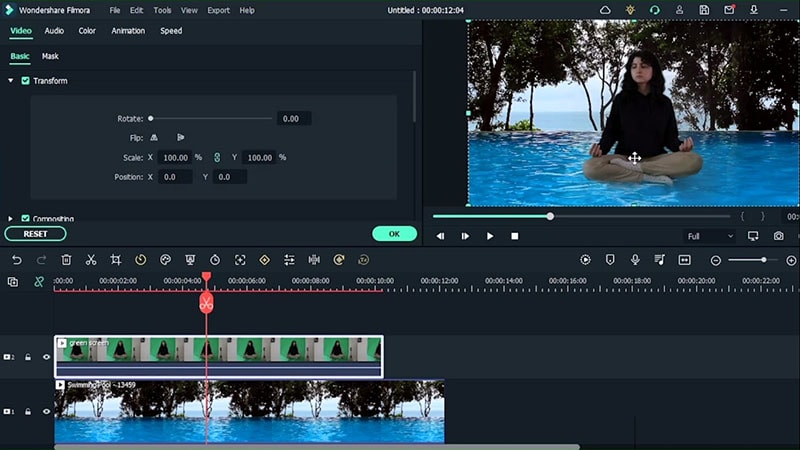
Get rid of the extra parts of your green screen footage. Go to Video > Mask and choose a rectangle mask, position it around yourself and once you’re finished, scroll down and increase the blur strength. Then go to the Basic section > Transform and resize yourself that you perfectly fit in that environment.
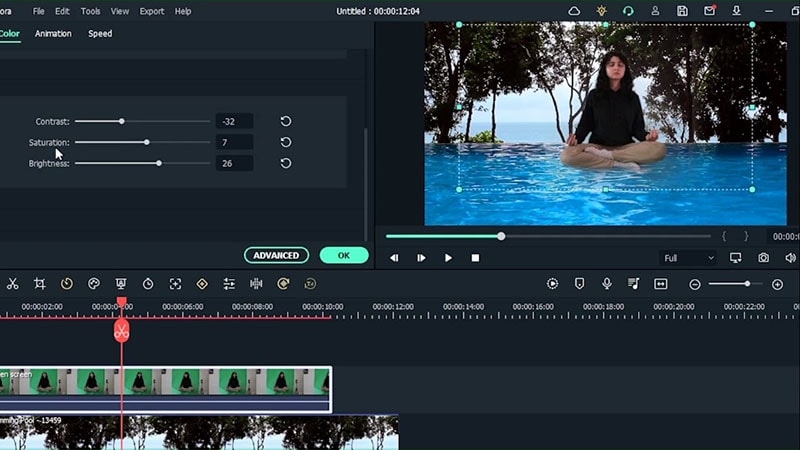
Now, work for the colour of the green screen and match it with the video that is behind you. Double click on the green screen video and go to Colour and open up the white balance section where you can just make the video a little warmer and then, add a magenta tint. Then go down to Tone, decrease the contrast, increase the saturation and brightness.
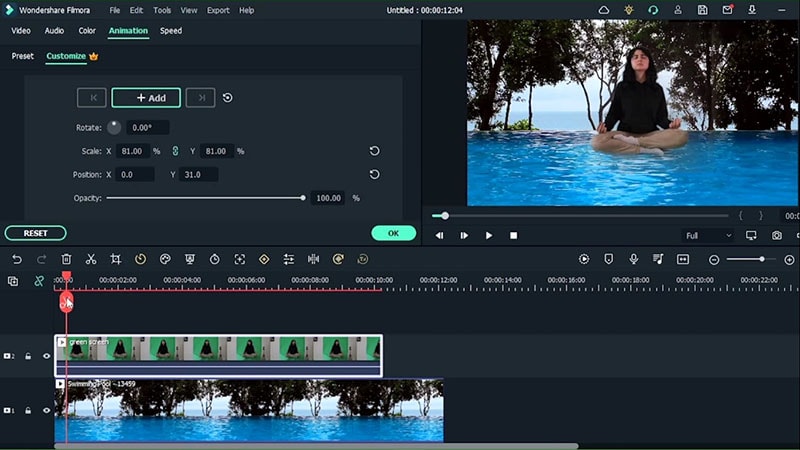
Now you need to move yourself. Double click on your green screen footage, go to the Animation section, customize and just make your frames up and down where you’re going but in a really smooth way. Add your first key frame and then move it through the new frames. Use position Y to go down and position Y to go back up. So now, you will see yourself going up and down really slowly.
Now to create shadow underneath yourself. Bring your green screen footage one track up at least and place black solid colour underneath the green screen footage. Now hide the green screen video. In the black sample colour, go to Mask and choose a circular shape. Bring down the height of this mask and place it down below.
Now bring back your green screen footage and place the circle right underneath yourself. Increase the blur strength and once you’re finished, go back to Basic and change the Blending mode to Multiple. Then go to Animation, and select customize and match the movements with the green screen key frames. Copy your green screen video and place to a side where you can just flip yourself.
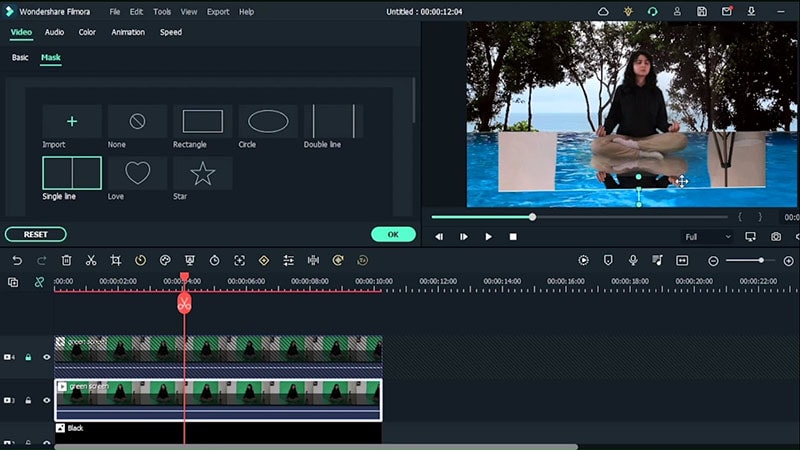
Bring the edited video right underneath and drag it so that it is matching with your knees. Choose the single line mask, then position it right above your knees. Then go down and increase the blur strength. Hit OK once you are finished.
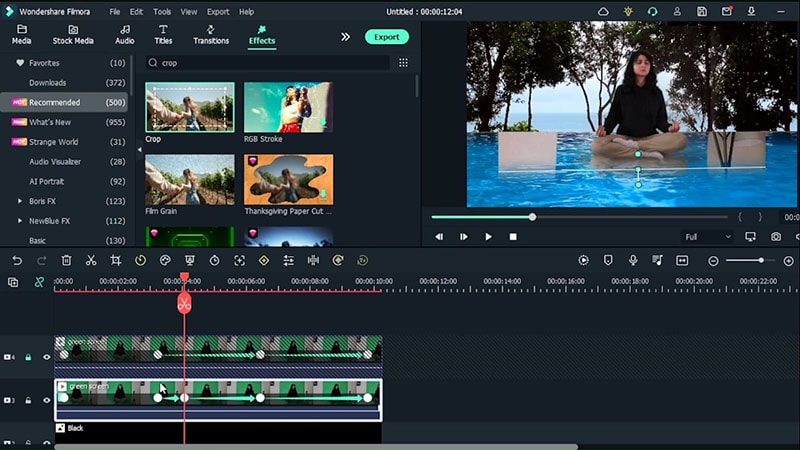
Go to the effects menu and search for ‘crop’. Try the crop effect onto the duplicate to get rid of the side areas by simply going to the effect section and increase the slider from the ‘left’ and ‘right’. Tick the ‘blur edges’ option so that you only have a small section for your reflection.
Now you just need to work with the key frames because you did flip the duplicate. Right click on the key frame and click ‘Clear all frames’. After that, you have to start key framing from the scratch by again taking a look at the key frames on your main green screen. So first, choose the position and then move in to the second key frame. Then, match the movement with your original green screen.
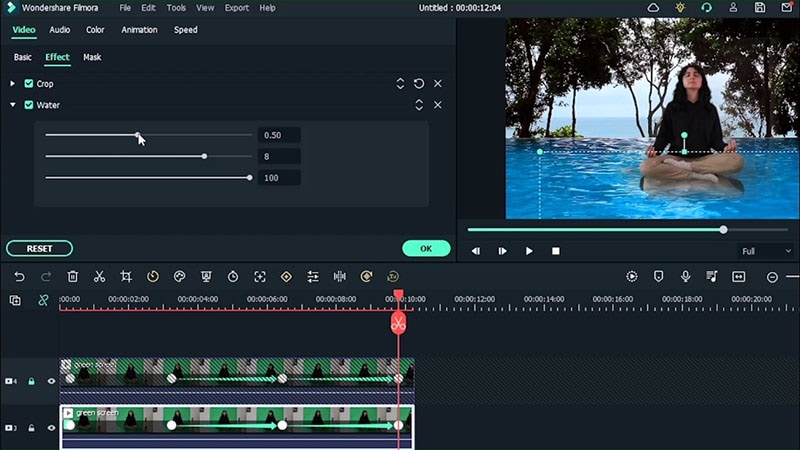
Next, you need to search for ‘water’ in the Effects section. Add the water effect directly into your reflection. Double click and work with the sliders. You can also go to the composition section in the Basic section for our reflection video and then just lower the opacity.
Go back to your key frames and every time that you go upwards, just scale out your reflections because you will be getting farther away from the water. Go the first key frame, right click and click ‘edit key frame’. In the next key frame, you need to copy the exact same values from your first scale. Make sure to change the position for the smaller reflection so that they’re closer to the water than the subject.
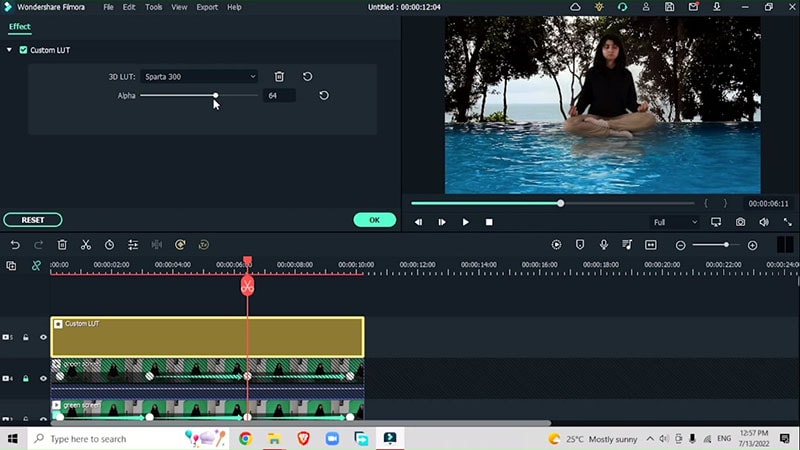
Finish the effect with an LED or a filter. In the Effects menu, scroll down to the LUT section. Search for ‘custom LUT’. Place this filter above all of your other tracks. Double click and then choose something that can bring everything together. Once you have chosen your LUT, you can drag the alpha slider and decide how much of this colouring you want in your video. Copy the background video and place it right above. Search ‘blue’ in the effects menu and add the square blur filter on the top background footage.
Lock all of the tracks related to the green screen. Double click on the duplicate background footage, go to Effect and work with the blur effect. Instead of 2, choose 1. Then go to Mask, and choose single line mask. Type 90 degree in rotate so that you can get a straight line and then invert the mask. This way, everything behind you can be blurred out because it is further away. Make sure to increase the blur strength to get a cleaner look.
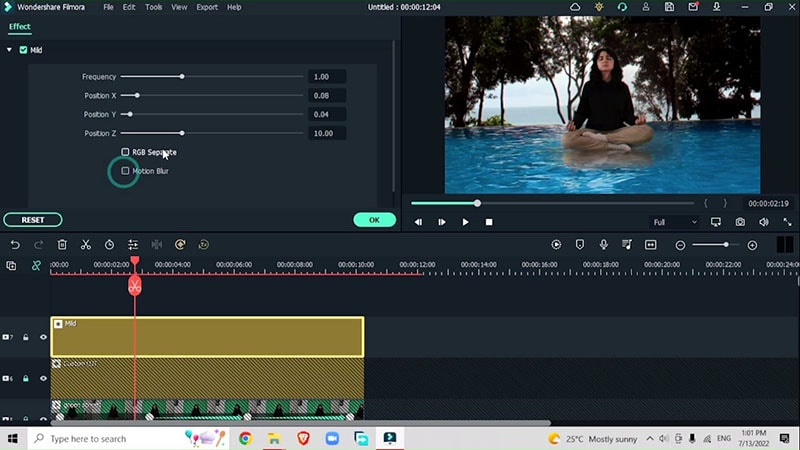
Add a mild shape effect. Make sure to unselect RGB separate and Motion blur. Reduce the frequency without moving a lot because you just need a slight movement to create a hand-held look for your video. Hit OK and you’re finished.
How to Create Impossible Pull- up Effect
What you need to prepare:
- A computer (Windows or macOS)
- Your video materials.
- Filmora video editor
Record the Footage
Film yourself in a meditating pose. Place an LED to balance the light on the both sides. Adjust the camera settings.
Launch Filmora Editor
Download and install Filmora. Launch the Filmora editor and you will reach the main timeline.

Add the Footages to Timeline
Atter installing Filmora, you will reach the timeline. Import your video shot from the camera and also the background footage which you want into the Filmora 11 timeline. Hit the import button for doing so and simple click + to add your videos to the timeline.
Get rid of the green screen
To get rid of the green screen, double click it and go to the Video section, click on Basic section and select the Chroma key box. Separate yourself from the green screen and work with the thickness and feather.
Get rid of the extra parts of your green screen footage
To get rid of the extra parts of the green screen footage, go to video, click Mask and choose a rectangle mask. Position the rectangle around yourself increase the blur strength.
Image name: add-mask-pull-up-video.jpg
To fit yourself perfectly into the environment, go to basic, click on transform and resize yourself accordingly.
Match colors with the background footage
To match the colour of your green screen video with the background footage, double click on the green screen video and go to colour > white balance section > make the video warmer by increasing or decreasing temperature and changing the tint.
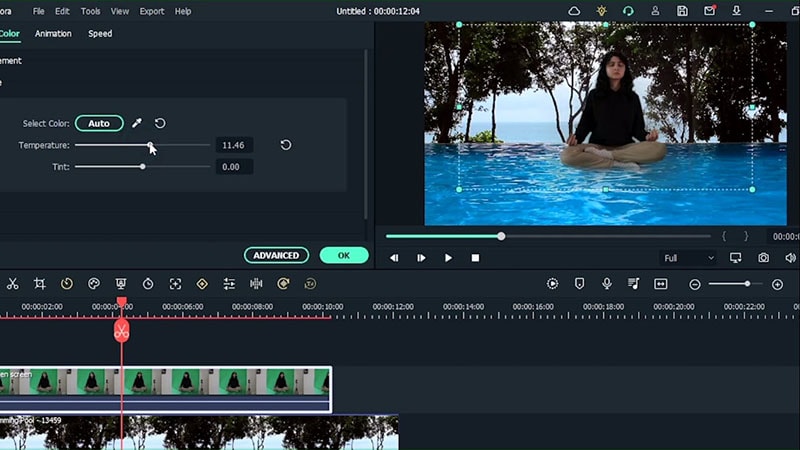
To set the overall colour balance, go to Tone > decrease the contrast > increase saturation > increase brightness.
Adjust the up and down movement
To make your video look original like you are meditating on the top of a swimming pool, you have to double click the green screen footage, go to Animation > customize > move your frames up and down smoothly by firstly adding your first key frame and moving it through the duplicate frames. Use position Y to first go down and again Y to move up to see yourself moving up and down slowly.
Add shadows
Create shadows by going to the Media menu > sample color > bring your green screen footage one track up and place solid color underneath. Hide the green screen. Go to Mask > choose circular shape > bring down the height of this mask accordingly underneath you.
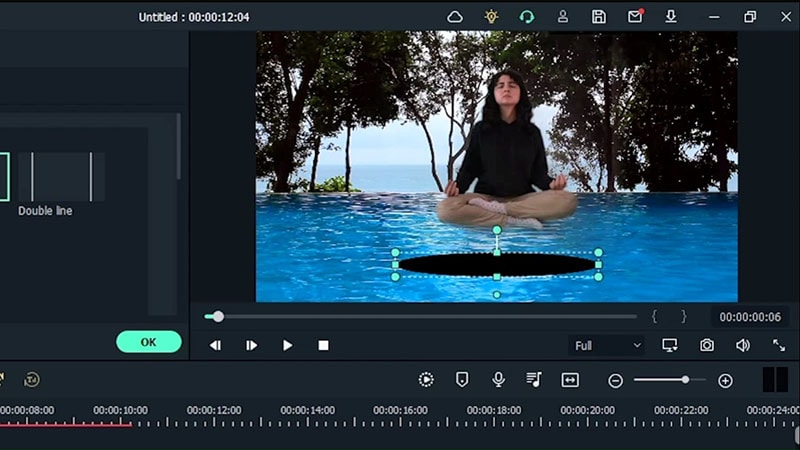
Increase the blur strength. Go back to Basic > change blending mode > multiple.

Go to animation > customize > match movements with green screen key frames. Flip yourself. Select single line mask and position it right above your knees. Scroll down and increase blur strength.
Get rid of the side areas by cropping. Adjust the left and right position and check the blur edges option.
Add Water Effect
Go to Video > Effect > Water and drag the sliders to adjust. Add a water effect in the Effects section directly onto your reflection. Go to Basic > composition > lower the opacity.
Scale your reflections by right clicking the first key frame and edit the key frame.

Add other Effects
Add LED effect by clicking on Effects > scroll down to LUT > search custom LUT > drag alpha slider and decide colouring which you want in your video. Place this filter above all tracks.
Go to Effects > Blur > add square blur filter on the background image for a blur effect. Go to Mask > single line mask > type 90 in the rotation > invert the mask. Increase blur strength.

To add a mild shape effect, unselect RGB separate and Motion blur. Reduce the frequency by slightly moving.
Even though it apparently sounds impossible, with this article above you can grab all the necessary expertise in mastering the skill of altering your simple videos by adorning them with a pull-up effect which can get you views more than you had expected. So don’t wait and download Filmora to get start with this cool effect.

Speak Your Mind