Transcript
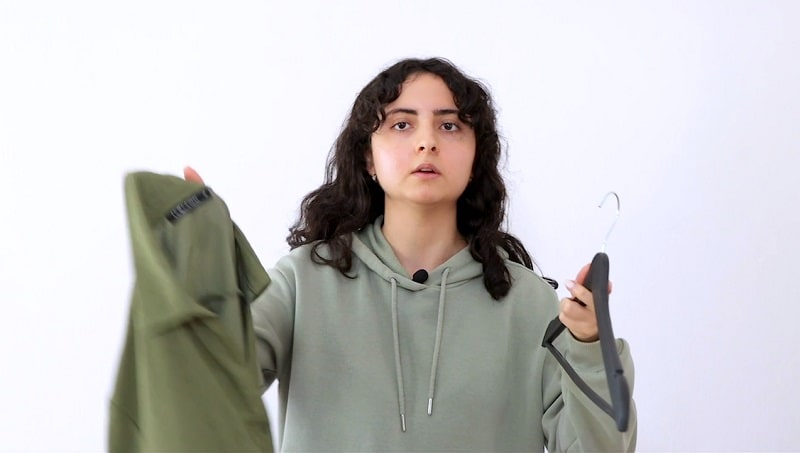
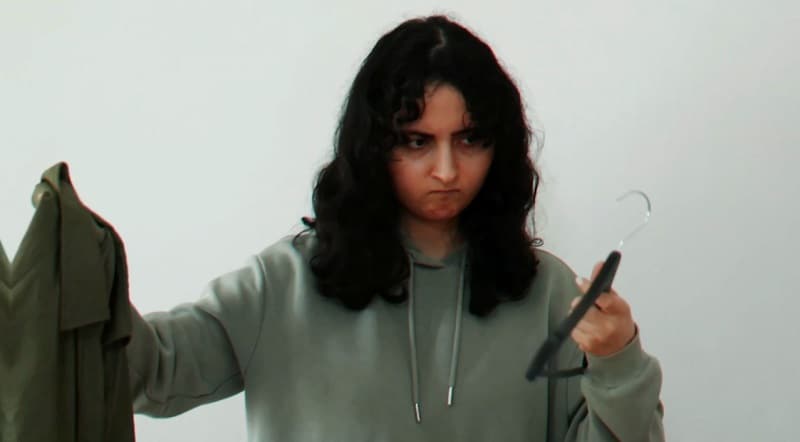
The demo of the video with the hanger cloth effect. The pretty fun effect needs you to have a white background and the focused camera with manual settings. You can try to be more creative with the recording process.
You would need three different styles to throw shirt on the hanger. The first where the hanger is in front. For the second style, you need to grab the shirt from collar and hang it and for the third one, you need to perform the hang from the base.
For filming process, you can use one of the styles and freeze the frame and someone would grab it from the character, pause and resume the video from the exact frame and do this process for the other styles as well.
It is really important to stay frozen within the frame before and after the switch of objects so after the recording is done, add the footage to Filmora. Go into Filmora video editor and import your raw footage onto the project and grab it into the timeline.
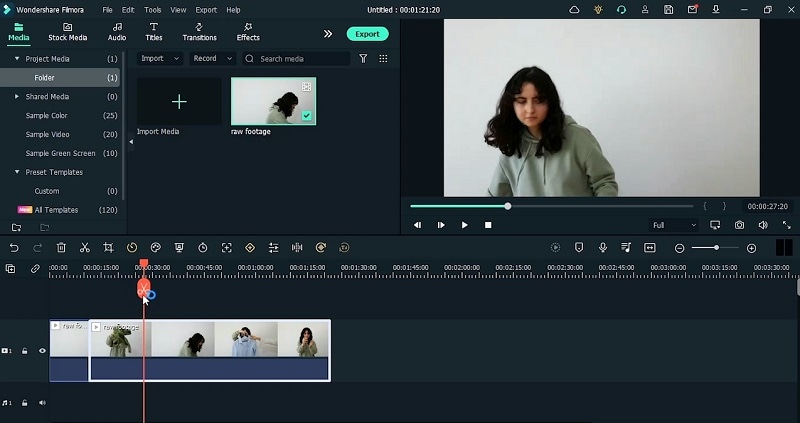
Find out exactly where you throw the shirt and make a cut. Then for the switching frame, also make another cut from that frame. Go frame by frame and you can see the cut from different frames.
Look for the second style clip, look for the motion blur and make a cut where the shirt was switched. Cut the video from there and get rid of the middle part where you’re frozen into the frame.
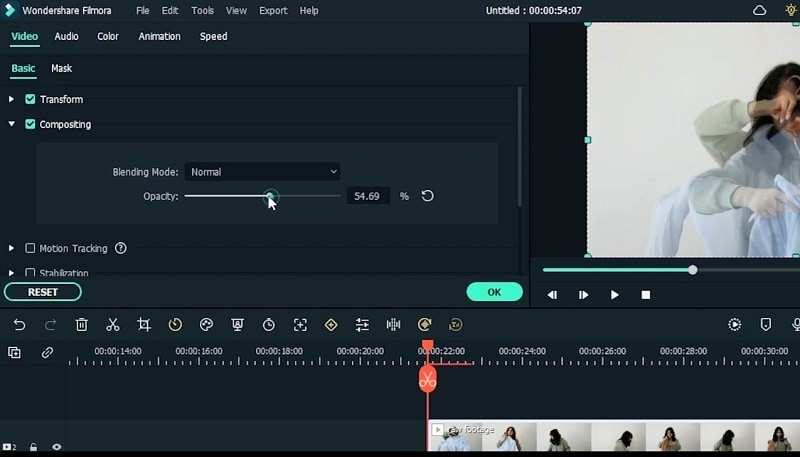
You can always drag it into the new tracks and lower the opacity to see the overlapping frame. Double click on the top video and go to the compositing. From there, you can lower the opacity slider and preview it.
Find a frame where you have a shape like the demo and cut the extra section and join the videos without the pause. Choose the frame where the blurriest frame and make a cut. Do the same for after the pause video as well.
Now go to the third effect and do the same editing. Make a cut on the blurriest frame and wait for the switch. Make a cut of this frame and move out of the frame. Make sure that you are not moved in the frame while the switch.
Once you are happy with the result you can then export this footage. After exporting, import this exported footage and drag it into the timeline.
Add the animation keyframes and go to Animation and Customize the video to zoom in using Scale and then put the manual vale of Scale X into the box. Add the keyframes and adjust them using the zoom in and Rotate within the keyframes.
Repeat the same animation keyframing for the last video and adjust the positions of the keyframes. Zoom within the frame and follow the movement to use Position X to move towards the other side of the frame.
Go to the Effect menu and add the effects to spruce up the video. Add the Mild effect from the list and customize it accordingly. Adjust the position of the effect using X Y and Z positioning of the effect.
The requirements of the video recording where you need to record your effect video. You will need a ping pong ball and one egg. Refer to the kitchen and then do the recommended actions for the recorded video.
After adding the effects and LUTs to the timeline, you can customize these effects as well. Double click on the track and make the necessary adjustments usings the effects sliders. You can use the intensity slider to carry out this task.
Finally, after you have done the adjustments, preview the video as soon as you are done with the customization. Make sure that every frame is in place and the video has no ambiguities. Hit Export when you are done with the video effect.
How to Make Viral Hang’Em Up Effect Video
What you need to prepare:
- A computer (Windows or macOS)
- Your video materials.
- Filmora video editor
Record the Footage
The most important part of this video effect is how to record your footage as per the effect. You need to select a background with a stable frame and a decent color so it will add more simplicity to the recording. After you have filmed the shots for the Hang’Em up effect, proceed to the next steps to begin creating this effect on the go.
Install and Launch Filmora
Download Filmora editor to start creating this effect. With Filmora, creating this effect is a handy task because of its user-friendly design and customizable effects. It also offers a list of cool features that are necessary for this Hang’Em up effect. You can visit the links below to download the program for free.

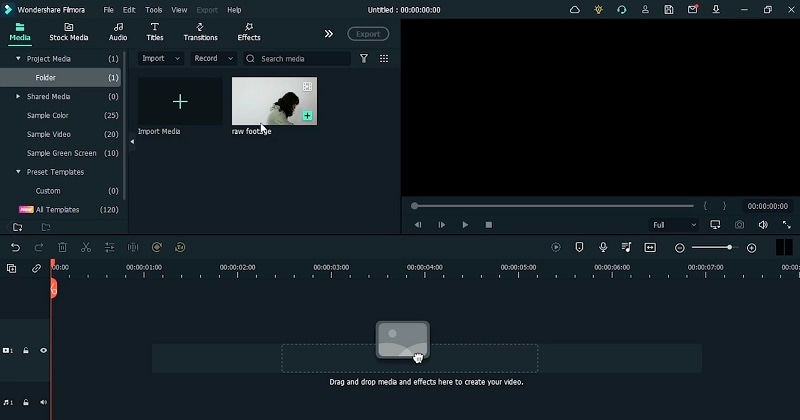
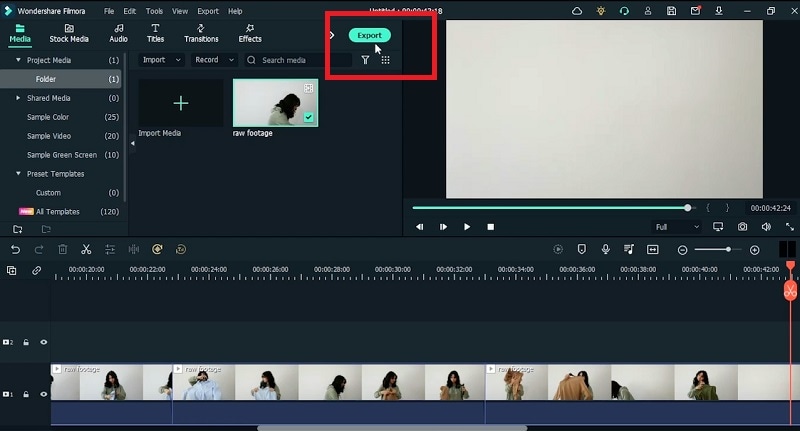
Import the Footages
Launch the software and head towards the Video Editor from the options. From there, you can now add your recorded footage to the timeline. Hit the Import button to select the files and then add them to the Media window as shown here:
Split the Video
Drag your footage to the timeline below and from there you can now preview the video for the scene cut. Preview the footage and look for the motion blur. At the points, use the Timeline split icon to cut the video and do the same for the other scenes to get rid of the blur frames. You can also view the frame of the videos by using the arrow keys.
Enable the Compositing
In the next step, double click on the video clip and go for the video editing setting. You can then enable the Compositing from the list and this will open up the slider options to customize the compositing as shown here. Expand the slider to adjust it for the video clips.
Re-Import the Saved Footage
As you’re done editing basic to the video, Export the footage to the PC and then re-import to save the previous settings you have made on the original video. This will combine all the edited clips into a single video. Afterwards, drag the newly imported footage to the timeline and start editing it further.
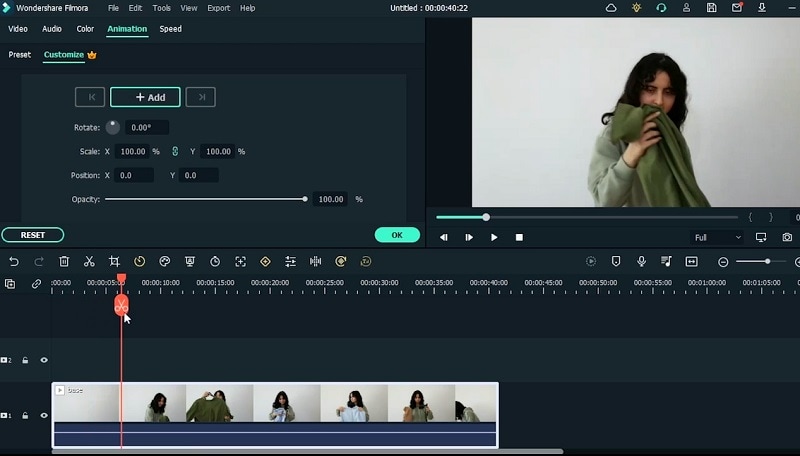
Add Animation
You need to add animation keyframes to align the video frames altogether. To do this, go to the Video and double click to add the settings. Refer to the Animation menu bar and then select the Add Keyframe button to insert a keyframe at the start of the video.
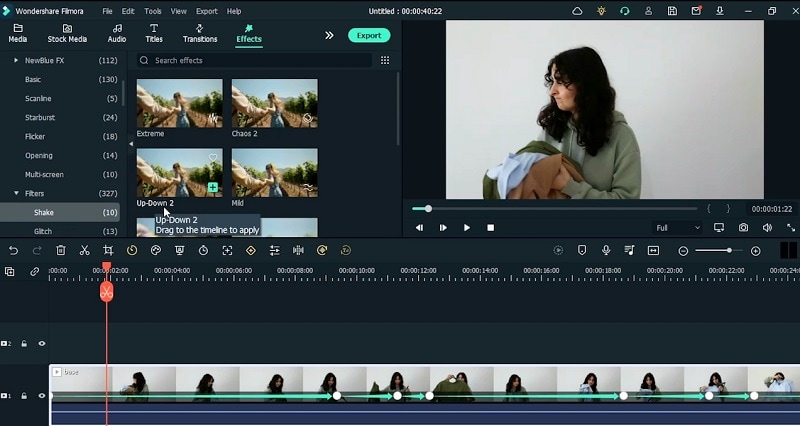
Add Effects
In the next step, go for the Effects menu and search for the Mild Effect from the list. Drag and drop this effect into the timeline and match the duration of the effect by adjusting it according to the main video. You can customize this effect by double clicking and changing the intensity of the effect.
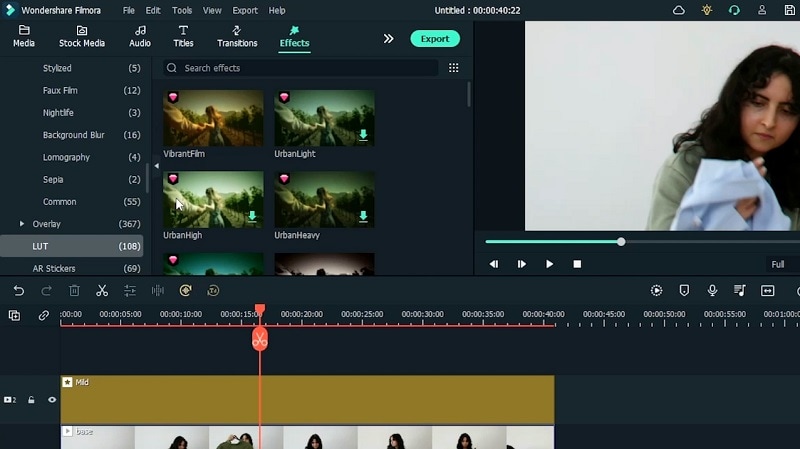
Add LUTs
After the effects, you can also add elements to the video. To do this, go to the Effects menu and refer to the LUT to select the Movie 4 LUT rom the list and drag it to the timeline to customize it further. Change the opacity and the filter strength using the sliders and hit Ok once you’re done.
Preview and Export
Now as everything is in place and you have achieved the Hang’Em up effect on your video, the final step to export it to the PC. This will be your final footage as you can preview it from start to end to check any ambiguity. Hit the Export button once you are finished analyzing the footage.
Working on this latest trend video effect is easier than you thought. Using this guide, you can now create your own Hang’Em Up effect with your raw footages. Plus, you can always get more creativity to it using the Filmora. Download the software from here and get started right away.


Speak Your Mind