- Home
- DIY Special Effects
- Create Slide Masking Effect Intro
Transcript
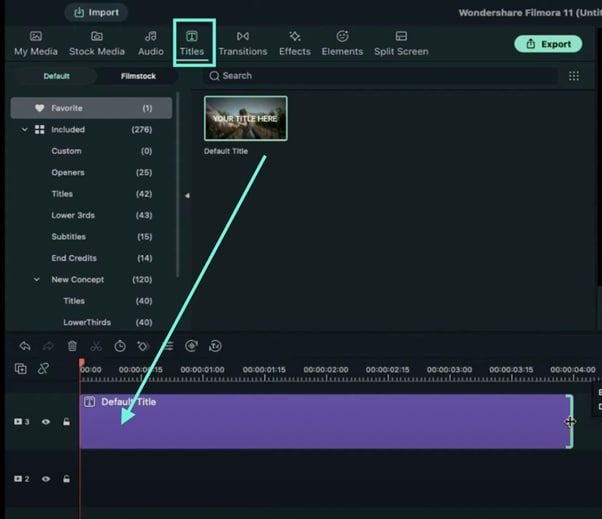
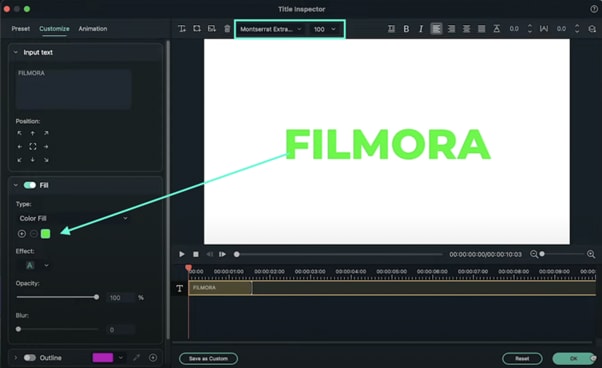
First, let's go to the titles tag. Drop a default title on track 3 and keep it 4 seconds long. Then, double click on the label and change the font to Bankir-Retro.
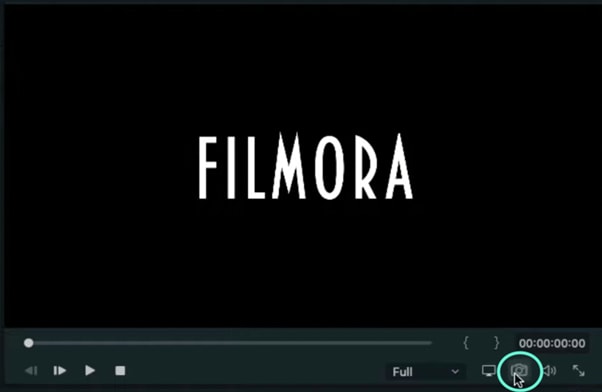
Adjust its size to 100, type your words, and change the text spacing. Finally, take a snapshot of this frame.
Next, make another snapshot. Double-click on the default title, change the text colour, and take a snapshot.
Bring out the advanced panel, click on Add Shape and select the rectangle shape. Meanwhile, switch off the Text Fill.
Change the shape fill colour to white. Adjust its shape, rotate it, and move its position. Then delete the text layer and go to the animation tab. Select round zooms out.
Locate the main editing window at the 5th frame and make it the start point of the default title clip.
Move the play head 3 frames further and drag the first snapshot clip on Track 1 at the play head position. Keep the snapshot clip 30 minutes and 20 seconds long.
Go to the sample colour, select the black colour, drop it on Track 2, and smaller the size of the sample colour. Rotate it and align it to create a mask for half snapshot. Decrease the duration to fix the clip.
Locate at the start of the snapshot clip. Change the X-axis position to make the text slide into the line and black colour.
Place the play head 10 frames further and reset the position values.
Go ahead to the position of 3 seconds and the 10th frame. To add another keyframe, place the play head at the end of the snapshot clip. Change the X-axis position.
Go back to the first frame and reduce the opacity to zero percent. This will create a sliding effect from right to left.
Export this clip at a higher rate. Select all pins on the timeline and move them to one track above. Meanwhile, drop the second snapshot on Track 2 and adjust its duration.
Select the black colour clip and change the black colour position from right to left. As the first snapshot, hide the clip-on Track 2 but make it slide from right to left.
Export this at a higher rate.
Drop the music clip on Track 1, then drops zero one clip on Track 2 and make it four seconds long only. Change the duration of the background clip to four seconds.
Now change the blending mode of zero one clip to lighten.
Copy it and take the play head further. Finally, ste the elements and align their position as per the line effect; to see the final preview click on the render preview.
Create Slide Masking Effect Intro【Filmora】
What you need to prepare:
- A computer (Windows or macOS)
- Your video materials.
- Filmora video editor
The first thing you want to do is download the Filmora video editor. Hit Install and allow the application to start automatically.
Once the program loads, head straight over to the Titles tab and drag the Basic Title to Track 3 on the Timeline.
Also, drag the clip from the right side towards the left to make it 4 seconds long.
Double-click on the Title clip in the Timeline and edit your Title’s font and size. A panel like this one should pop up when you double-click. When you’re done, click OK.
Now, take a snapshot of the new Title that you just created.
Next, we’re going to need a few more snapshots. But this time, double-click on the Title again and change its color to whichever one you like. Once you’ve changed its color, go ahead and click the same button as in Step 4 to take another snapshot.
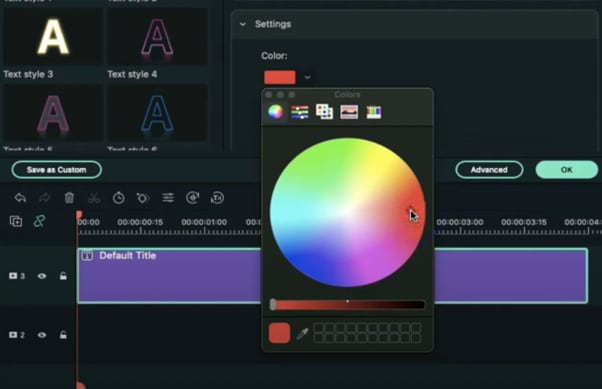
Next, double-click on the Title once again and go to “ADVANCED”. From there, go to Add Shape and select the Rectangle shape.
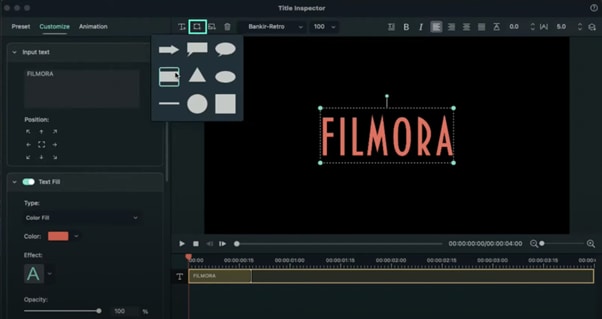
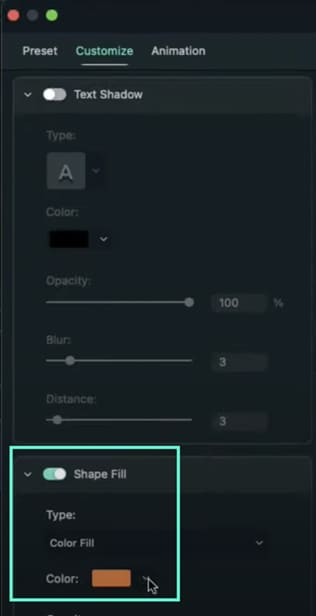
Look to the left side panel and switch OFF the Text Fill button. Then, scroll down to the bottom and change the Shape Fill color to White.
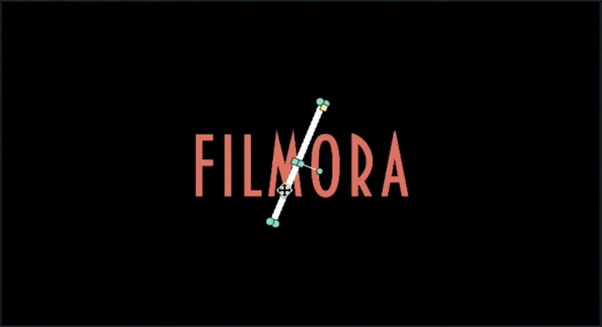
Now, adjust the rectangle’s shape to a thin line, rotate it, and move it into position like in the image.
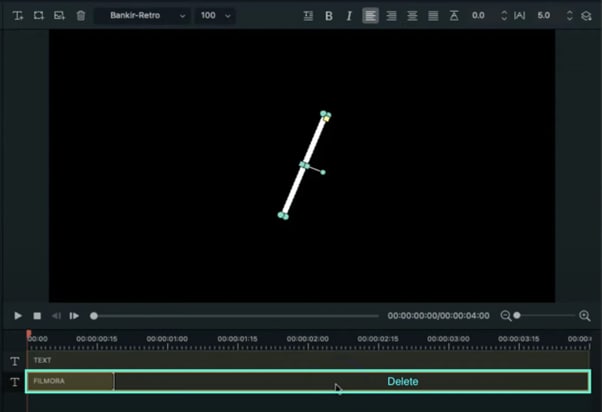
Delete the text layer from the Advanced panel.
The final step in the Advanced panel is to go to the Animation tab from the left side panel and select the Round Zoom Out animation preset. Then, click OK.
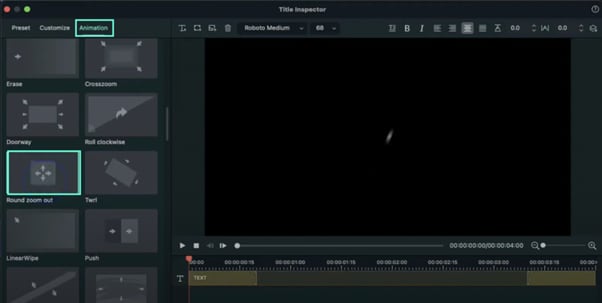
Now, it’s time to align the clips in the Timeline. First, move your Default Title clip 5 frames further. Then, drag the first snapshot to Track one and move it 8 frames forward.

Go to Sample Color and drag the Black color to Track 3 in the Timeline. Align it directly on top of where the clip in Track 1 starts. Then, double-click on the black color clip and align it like in the image here.
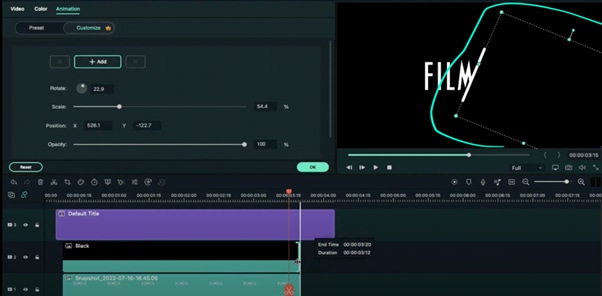
Now, place the Playhead at the beginning of the clip in Track 1. Then, double-click the snapshot clip in Track 1. Now, start increasing the value of the X-axis until it makes the text disappear, just as in this image here.
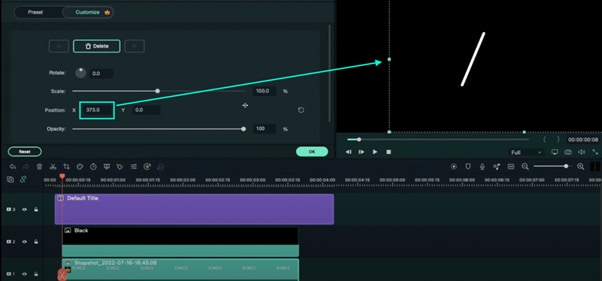
Next, move the Playhead 10 frames further. Then, reset the position values by clicking on this button.
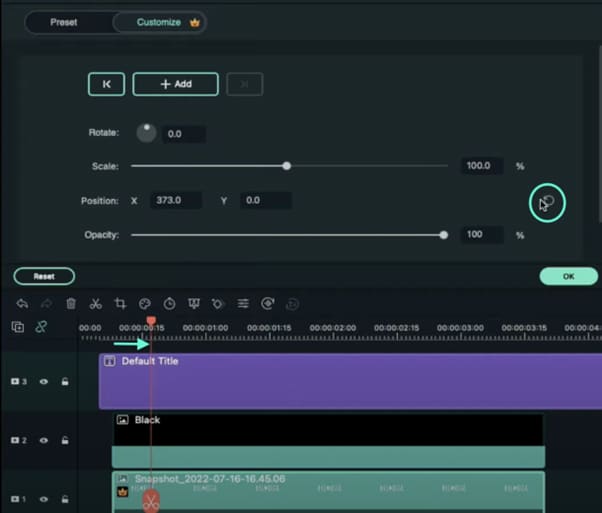
Now, move the Playhead once more and set it at 3 seconds and 10 frames. Then, click on the “+Add” button to add another keyframe.
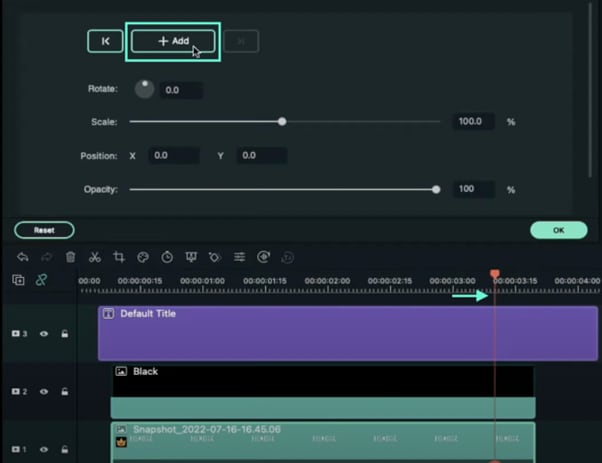
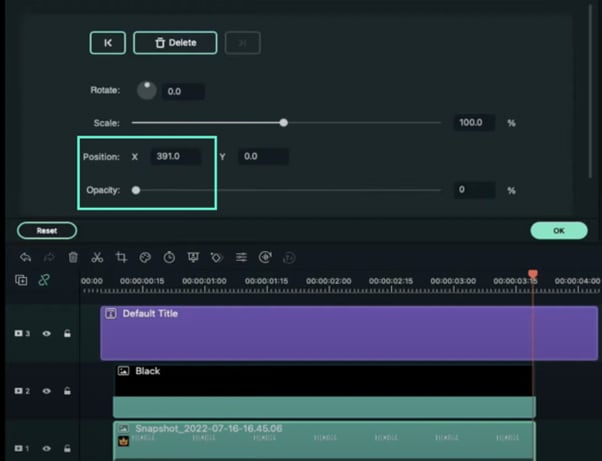
Move the Playhead to the end of the snapshot clip and set the value of the X axis to 391. Then, reduce the opacity to 0%. Move the Playhead at the start of the snapshot clip and reduce the opacity to 0% there as well.
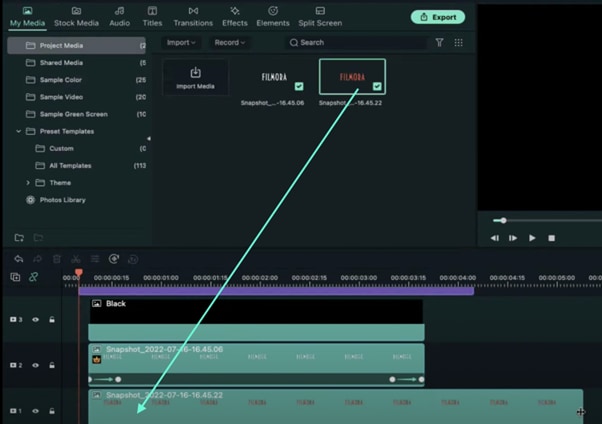
Next, Export the clip to your PC. Just hit the Export button near the top-center of the screen. Then, select all of your clips in the Timeline and move them one track above. Then, drag the second snapshot you took earlier to Track 1.
Select the Black Color clip once again and move the position of the Black box like this.
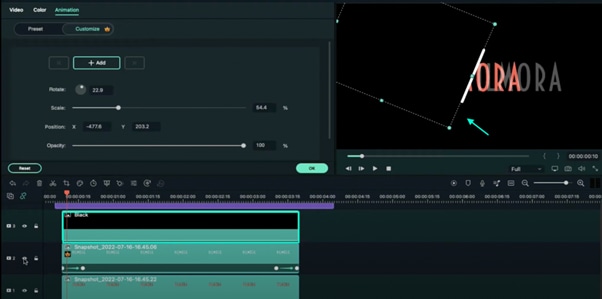
Now, hide the clip on Track 2 by pressing this button next to it.
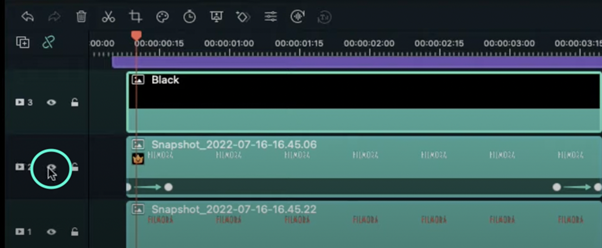
Click on the second snapshot clip located in Track 1. Then, repeat the process of adding keyframes just like we did with the first snapshot. Review the previous steps to get this right. This time, remember to slide the X axis to the LEFT instead of RIGHT. Just drag the values to the left.
Export this. Then, delete all the clips in the Timeline. Now, import both clips you exported earlier during these steps. Also, import a background video that you’d like to appear behind your slide masking text effect.
Next, drag the clips to Timeline and adjust each of them to be the same length. Four seconds is a good option.
Double-click on the first clip (not the background clip). Go to Video and under Blending Mode select Lighten.
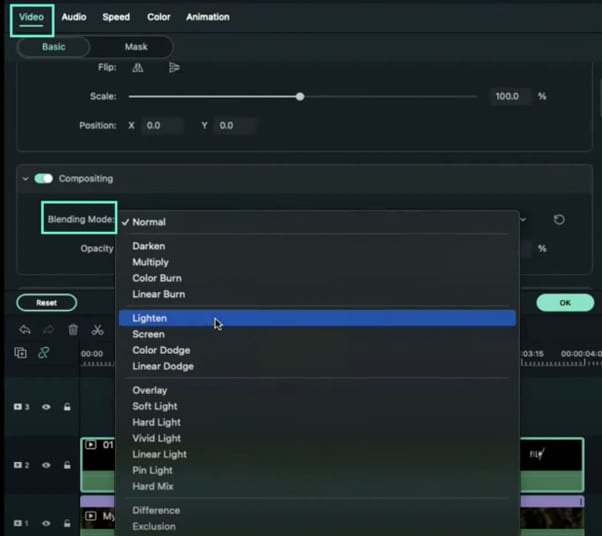
Drop your second clip to Track three and repeat the same edits for it.
Set the Playhead on frame three and drop the Motion Shape element from the Elements tab on Track 4.
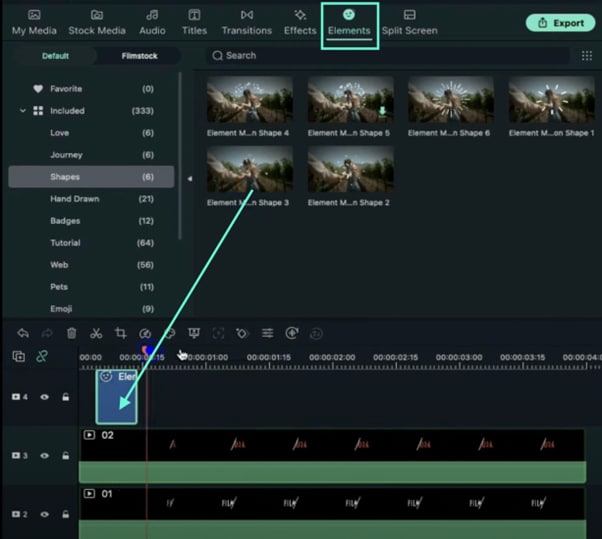
Finally, copy and paste the element near the end of the video and Render the project. Then, review your masterpiece. That’s it!

What you've learned:
- Create a slide masking effect intro in Filmora
- Customize masks in the Filmora video editor
- How to take snapshots and edit them thoroughly
- Add keyframes


Speak Your Mind