Transcript
Different types of music and transitions and so many other elements are used for editing sports videos so they look more intense and engage the audience when they are watching that video. You can edit sports videos by using the Wondershare Filmora.
You will have four different videos, each of them will be from a different angle. People in the video will be doing different things.
Have a close-up shot of a practicing. Take a shot of them playing the game. Take another shot with the team or use a headshot of the individual players. And finally, add another shot of the entire team.
Different angles will help to get you the best results.
You will also need some audio effects. So in the audio menu, you can have many options. For an intense video, you can have beat music or something which matches the energy in the video.
Choose a song of your own choice and mark the beats of the song. Right-click on the song and get the beat detection option which will detect the beats.
Track this onto your timeline and see the markers that will guide you exactly where there is a change in the beat.
Get rid of the first half, which is smooth, and move to the fast part. Go with the markers and adjust the position by clicking and dragging it to the other side.
You can change the position of the markers. When the audio waves are high, there will be a lot of beats going on. So we will have an introductory part and an integral part. Now pair up the videos with the markers. Go to the media and align the videos in whatever order you want.
Start with the introductory video. Now for the splitting use the speed ramping and transitions.
At the first marker, click on the speed ramping, go to customize, and add a frame light at the spot. Then jump on to the next marker and set the speed. In the middle add a keyframe, speeding up the video. Add two keyframes if you want.
Now continue with the speed ramping and match all the markers that you have created.
Right after the area that begins faster, you will bring it to the normal speed and then bring it down to a slower speed. Make a keyframe. Then go to another marker and slow that area. Grab the second keyframe and bring it down to the same level.
Just play around with the speed ramping until you have matched all the markers. Click OK. Split up the introduction video and then go for another video which is the video of the play.
Then go with the practice video. And then finally go with the last video. Do the same things as were done with the first one. Look at the markers and use speed ramping to either speed up or slow down.
After you finish speed ramping all your videos, it’s time to add some additional effects.
Go to the effects menu and type vintage. You can use different filters of your own choice. Then add it on top of your videos. Now you will get some nice colors and it’s a big theme which makes it look more serious.
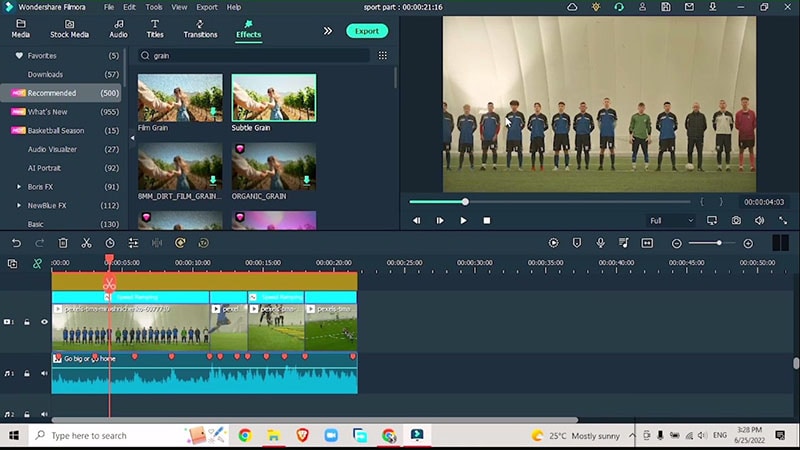
Now go to the effects menu and type grain, add it just to make it look more stylish. Make sure to match it with the videos. And if it is too much then just double-click on it to lower the opacity of the effect.
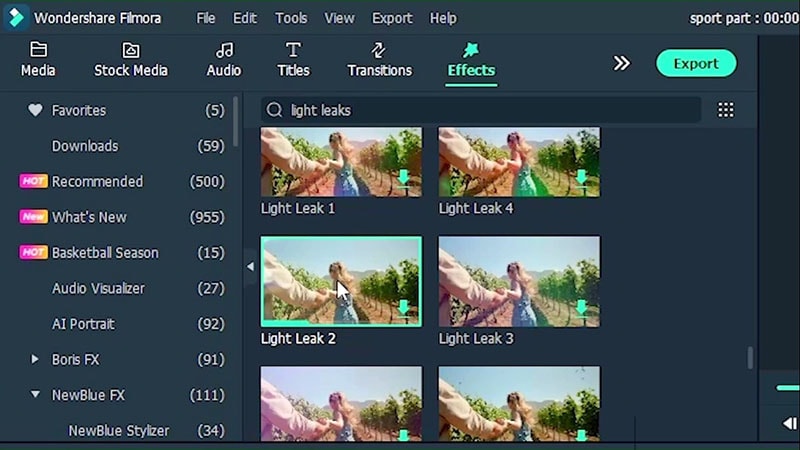
Finally you can go ahead and add some light leaks which will help especially in the video where there is no action. If you want to add some movements, a light leak is perfect for the players.
Click on the effects menu and type light leaks. You will have many options there. You can also add some transitions to make this effect looks cooler. Go for any transition that you want. Add this directly in between the two videos. That’s how you can get the effect.
Now the video looks a lot more engaging. Follow the same steps to make this effect.
Make Sports Highlights Effect Videos
What you need to prepare:
- A computer (Windows or macOS)
- Your video materials.
- Filmora video editor
Download and Install Filmora
To begin with, you need to install the latest version of the software on your system. Be it Windows or Mac, Filmora supports both the leading OS.

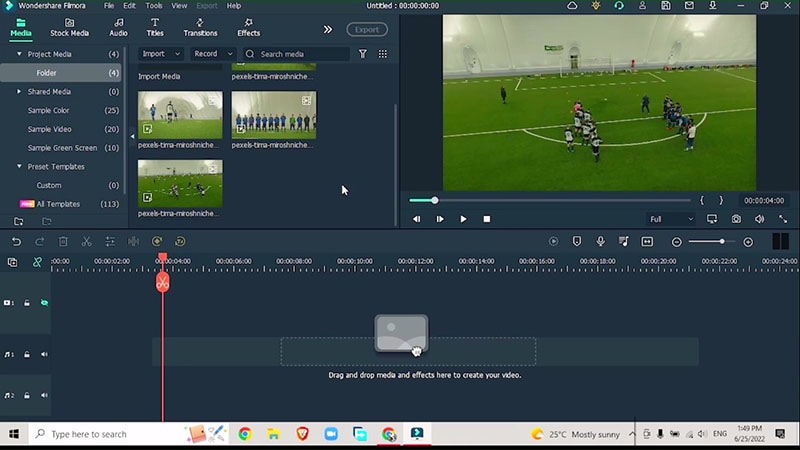
Import the Sports Videos
After installing, launch the Filmora timeline to get started with the sports video editing. Choose your favorite sports team videos and import them onto the Filmora 11 timeline.
Make sure the different videos are recorded from different angles.
Add Audio
You will need background audio for all of our footage so for that, you need to quickly add audio before dragging your videos down to the timeline. Because the sample videos are intense, so choose upbeat audio to match the music with the energy of the players in the sports video.
Go to Audio > Beat Music > Go big or go home (you can add your favorite audio considering the type of sports video you have imported onto your Filmora 11 timeline.
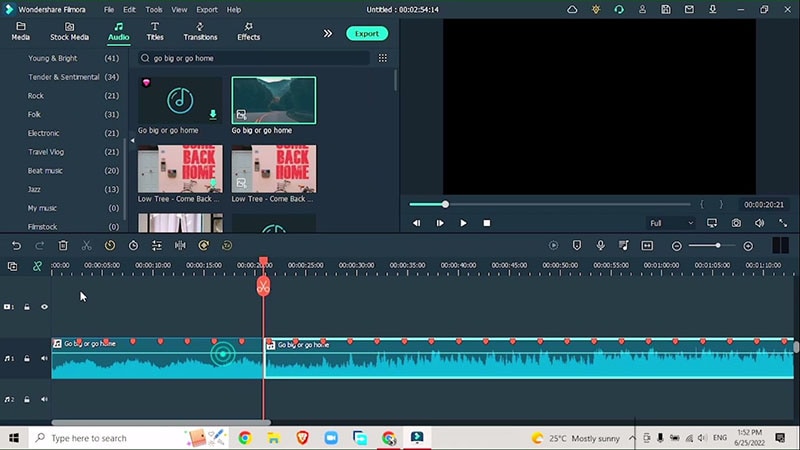
Right-click on the song, and hit beat detection. Drag it down onto your timeline. You will see red markers which show the beat detection points indicating a change in the beat.
Mark the introduction and beat drop parts in your audio so merge it with the imported video.
Adjust the Speed
Go to Media > Align the video. Drag the team introduction video down first, and adjust the speed ramping to merge the audio. Click on time > speed > speed ramping. Go to customize, and add a keyframe. Drag the keyframe to adjust the speed. You can increase the speed according to the audio beat.
Match all the markers and adjust the speed by increasing or decreasing the slider.
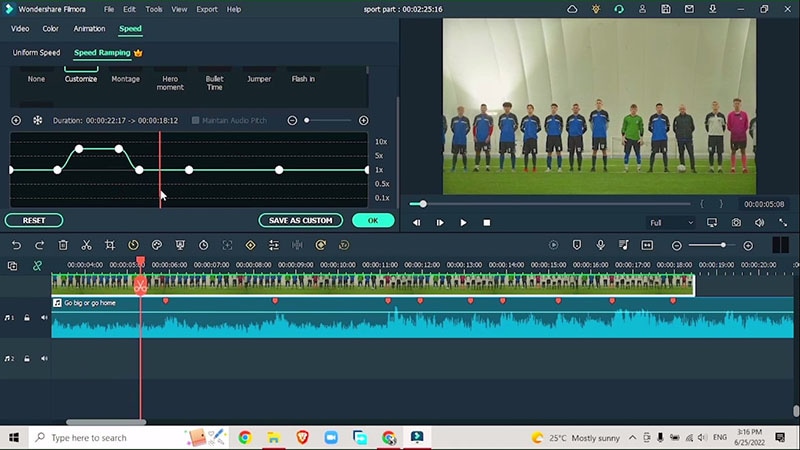
After the introduction video, drag down the other videos which include videos of the players playing. Adjust the speed similarly as demonstrated above. Drag the sliders in the speed ramping section to either slow down or fast the videos.
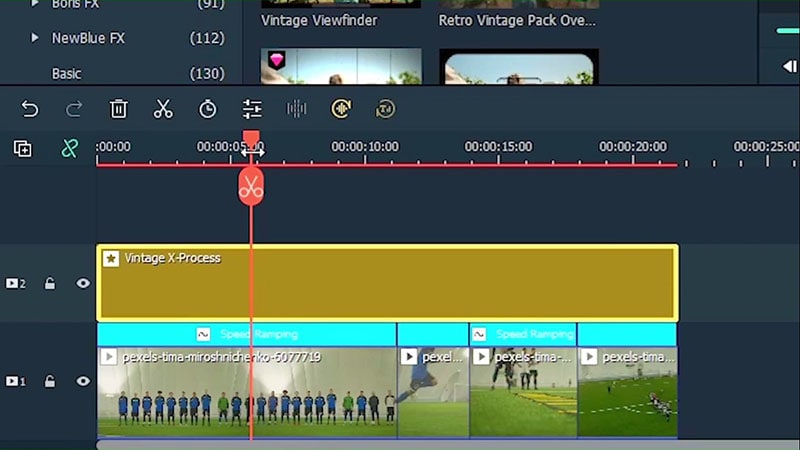
Add Additional Effects
After adjusting the speed ramping of all your imported footage, it’s time to add some additional effects to tie the sections together.
Go to Effects > Vintage > Vintage X process (you can choose any vintage effect of your choice). Add the effect on the top track to add some interesting colors.
Similarly, go to the Effects menu, search for grain effects and add a subtle grain effect to make the video look more natural. Place it on the top track above the vintage effect. Increase the length of the effect to match the video.
You can also adjust the intensity of the grain effect by double-clicking on the effect and lowering the slider towards the left.
Add Light Leaks
In the videos, where there is no action, it is suggested to add an interesting effect like a light leak which increases audience engagement in your videos. The light leaks also add some sort of creative digital movement to your videos.
Go to effects > Light Leaks > Light Leak 1 (or choose any light leak effect which you prefer according to your video).
Finish with Transitions
To make your videos look fancier, add transitions to tie the sections of your videos together. Go to the transition menu > Glitch > Glitch Intro effect (or you can add any glitch effect of your choice).
Don’t forget to add the glitch transition in between the sections of your video. Adjust the duration of the transition and you’re good to go.

The different sections of your sports videos are tied up together by professional editors by using multiple cool effects, transitions, and background audio effects. By adding these overlays, music, and transition, you can transform your sports video into professional highlights just exactly as are shown on the TV.


