Transcript
Create multiple hands illusion effect by using Wondershare Filmora11. All you need is a few clips and the toolkit that will do the trick with your footage.
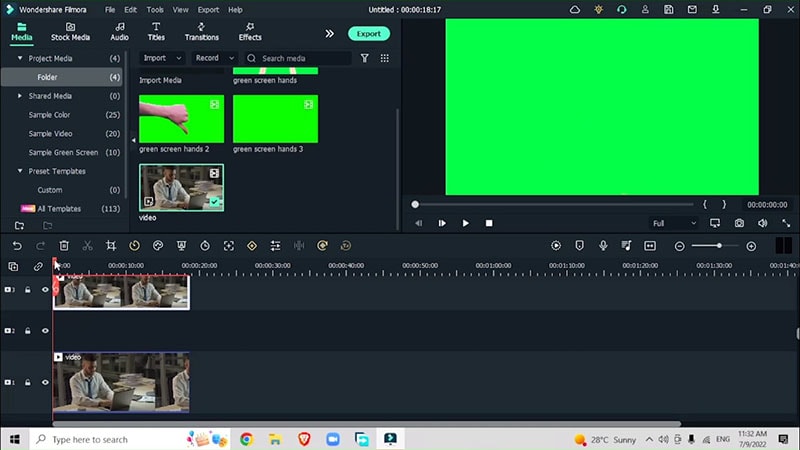
First of all, you will have a video of someone working on the computer and three green screen videos. In these green screen videos, you will have different hand gestures showing up and then they disappear from the screen. Use a few of these gestures to place behind the person in the video.
This will create an effect that will show that the person is working too hard and he is also being assisted by multiple hands simultaneously that are showing up from behind the person.
Track your video onto your timeline twice and on two different tracks, leaving a space in between the two videos.
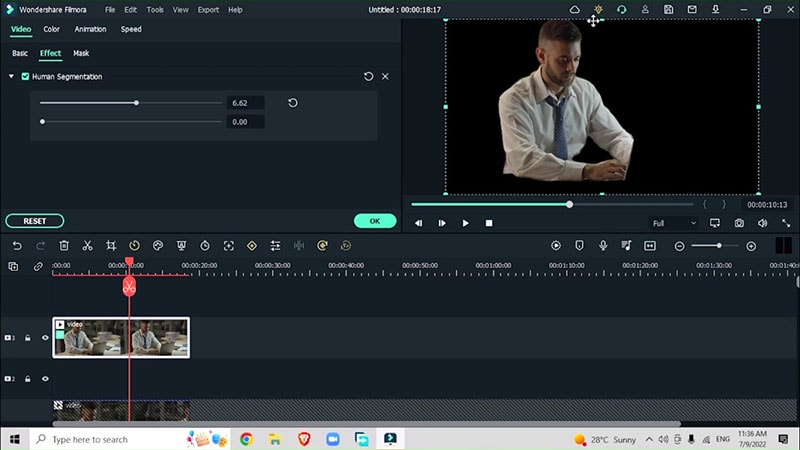
Leave the video on the first track as it is and then lock it to avoid accidentally adding the effect. When the second video will be on the third track, you will add the human segmentation effect.
Go to the effects menu, AI portraits, and add the effect that will separate your subject from the background. And if you hide the first video, then you will only have your subject. Use the first slider to add or remove from the human segmentation effect. This way you will have the entire body and face in the video.
If the edges are too harsh then you can use the second slider to blur out the edges and make them look a little softer.
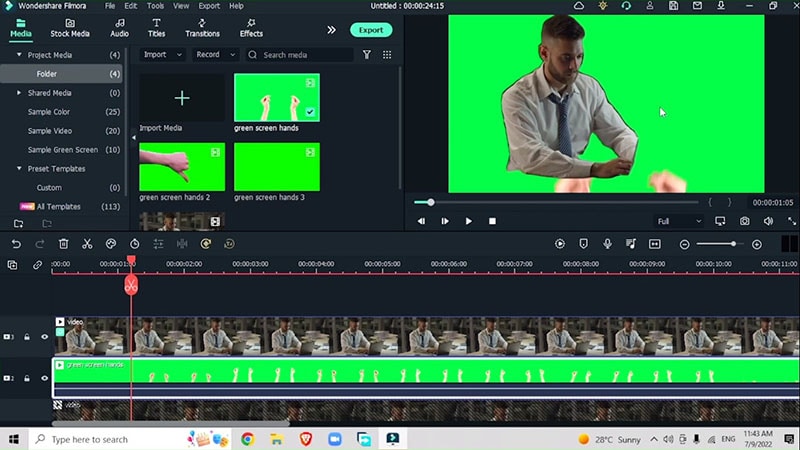
Now place the green screen videos underneath the third video track. Go to project media, and choose one of these green screens. Place each hand gesture video in a separate location.
Grab the first green screen, see through the video and find the gesture that you want to place behind your subject. The arms moving up, and snapping the fingers will be the first-hand movement gesture that will be placed behind the subject’s head.
Find another gesture and make sure that the start and end of the touch start with a flash green screen so you don’t get this at the start of your screen. Now you will have three different sections from the first video.
Now bring all three right underneath your video and zoom in onto your timeline. Now bring back your first track, unhide it and now remove the green background from the green screen.
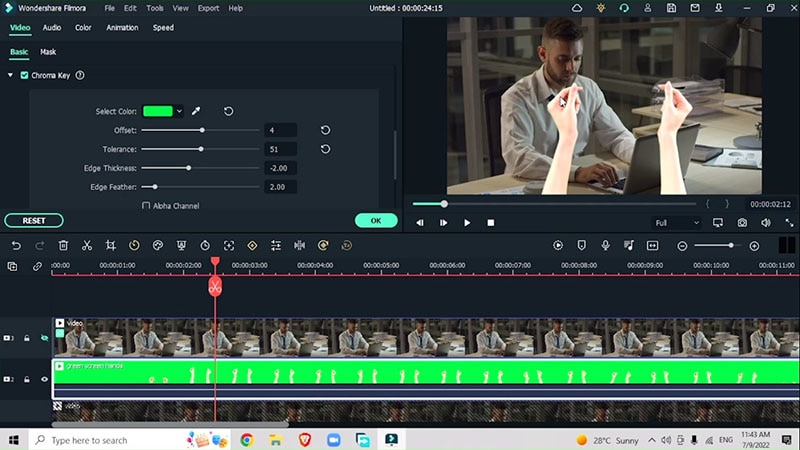
Hide the third track so that you can focus on the hands and then you can bring back that video. Select the first green screen, go to the Chroma key, choose a random color, and use the eyedropper tool to select the exact shade of green. Make sure that the selection is clean. You can also use the offset and tolerance sliders to make it better.
You can turn on the alpha channel to check whether you need to clean out the areas more. Turn it off when you are finished.
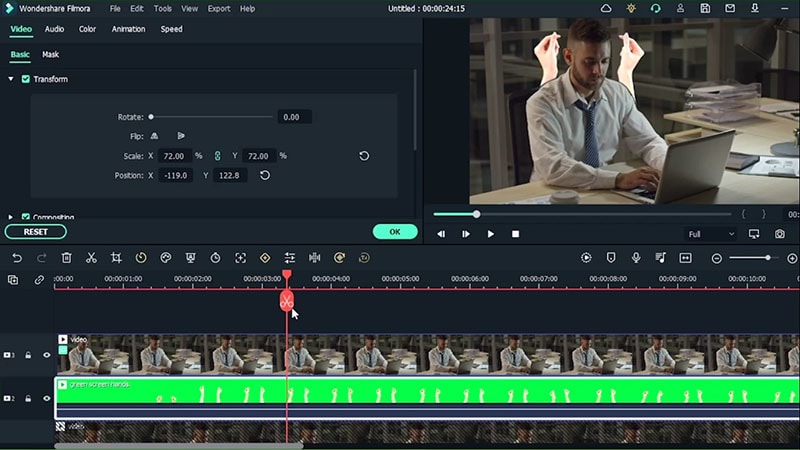
Close the Chroma key section, go to the transform section and re-position it behind your subject. Scale the position so it matches the subjects’ hands. Make sure that the hands don’t jump out of the subject’s shoulder. Bring back the third track and now the hands will be dancing behind your subject.
Go back to your top video and lower it from the first slider until you get a clean cut. Bring it up a track and create space for the second effect which is the person snapping the fingers. Bring it right above and this way you will have multiple green screens showing up from behind your subject.
Do the same with new green screens and separate the arm from the background. Go to the transform menu and position the hands in a nice spot.
Lock the other tracks and then select the video. Go to transform. Scale your hand video. Make sure the hand is the same size as the subject’s hand. Do the same thing for both hands. Flip the other hand so it shows from the other side.
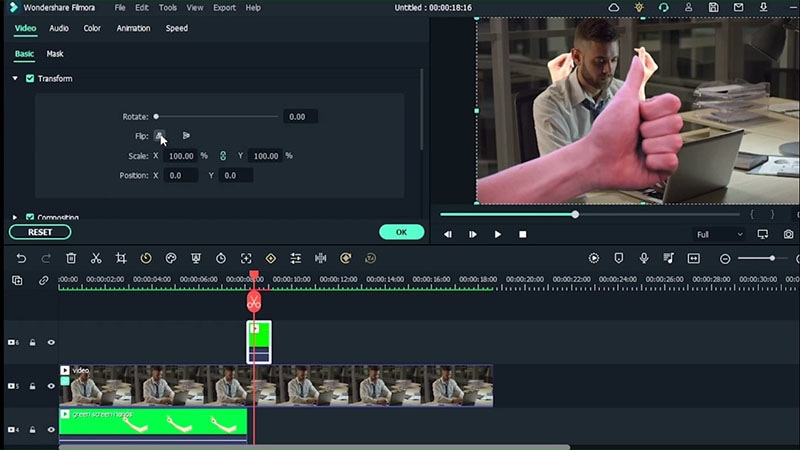
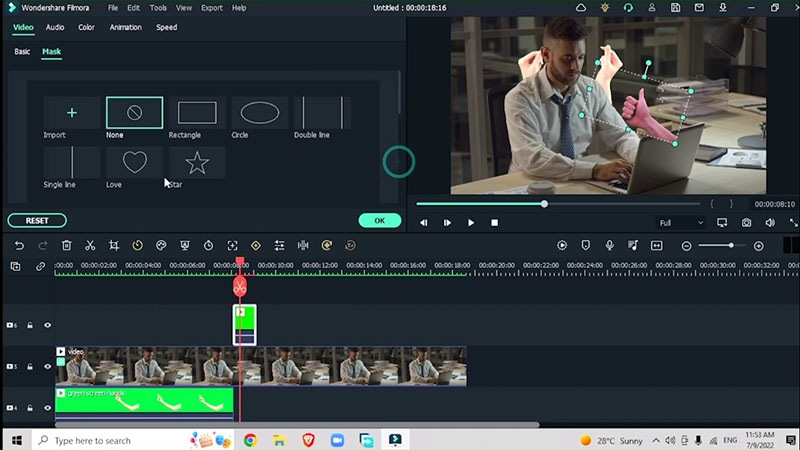
Bring the other hand video that is a 'thumbs up a hand. Drag it down onto the track and use the Chroma key to remove the background. Place this video above your top video. Position it as if it is showing up from the computer. Flip and adjust the position in the transform section. Use a single-line mask to hide the extra part of the hand.
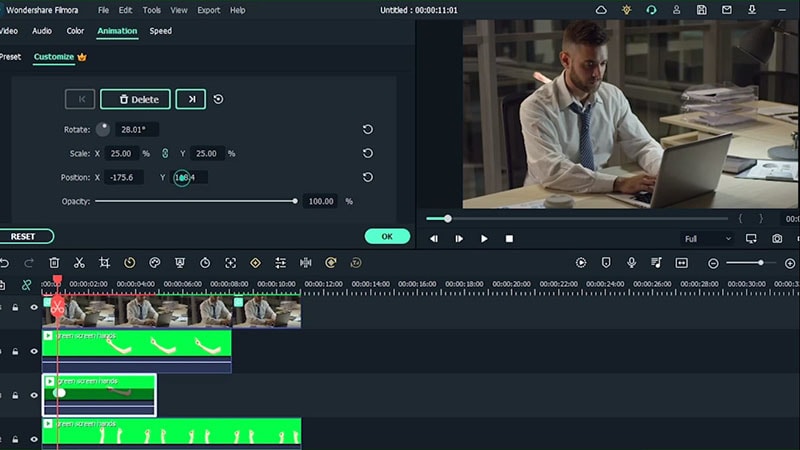
Go to the Animation, adjust the scale and position of the keyframes to get rid of the extra parts of the hands which look awkward in the video.
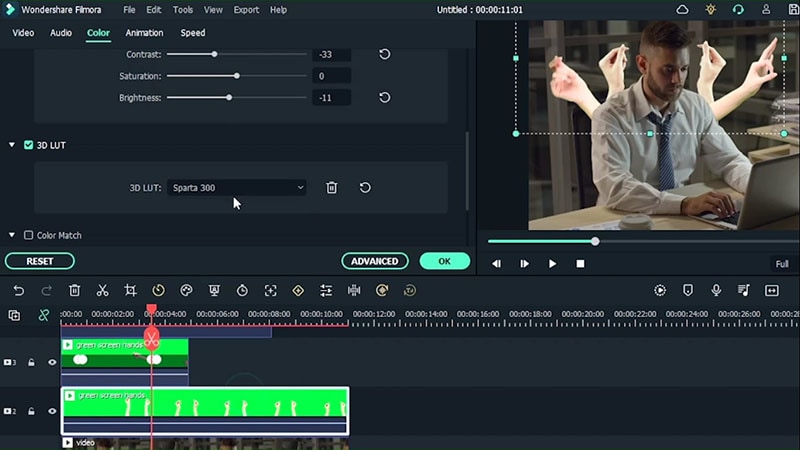
Color grade the video so the hands match with the subject video colors. Go to color correction, and decrease the contrast and the brightness. Add 3D LUT effects such as 'Sparta 300' and 'Contrast One' effects so the colors on the video match with the hands. Do the same for all green-screen videos.
Create Multiple Hands Illusions in Videos
What you need to prepare:
- A computer (Windows or macOS)
- Your video materials.
- Filmora video editor
Download and Install Filmora
To begin with, you need to install the latest version of the software on your system. Be it Windows or Mac, Filmora supports both the leading OS.

Import the Videos
After downloading Filmora, launch the editor for adding the multiple hand illusions effect and import 4 videos in total. One video will be of your subject working on the computer. The rest of the footage will be some different hand gestures with a green screen behind them which will later be removed.
Drag the main video of the subject working down to the timeline twice on two different tracks and leave a one-track space between these two tracks. Lock one of these videos and start working with the other one.
Add Effects
On the unlocked video, go to Effects > AI Portrait > Human Segmentation Effect to separate the subject from the background. Drag the sliders to add or remove from the human segmentation effect. Drag the second slider to blur the sharp edges.
Import Green Screen Videos
Import the green screen videos to the timeline one by one and place each video in a separate location. Cut the sections from the green screen videos which you want to appear behind your subject in the original video.
Now, remove the green background from your green screen footage. Go to the Chroma key, and choose the exact color by clicking on the eyedropper. Make sure that the selection is clean. If not, adjust the offset and tolerance sliders.
To re-position the hands, go to the transform section, scale the hands accordingly and adjust the size matching with the size of the hands of the subject. Use the X and Y scales to adjust the position of the hands and position the hands behind the subject by rotating or flipping wherever these adjustments are required.
Follow the same steps for scaling, positioning, and removing the background of the other green screen videos which include snapping the fingers and thumbing up the movement of the hands. Re-position them similarly and show them as if the hands are behind the subject and emerging from the computer.
Don’t forget to flip the hands in the transform section where needed. Always drag the original video up so the green screen videos are shown in the original video simultaneously.
For instance, in the below video, the thumbs-up hand will be placed as if it is emerging from the computer screen. Adjust it accordingly by first rotating it and then clicking Flip to re-position it.
Mask out Extra Parts
After adjusting the position of the hands in the original video, mask out the extra parts by inserting a single line mask from the Mask properties. Adjust and scale the mask so that the edges are not sharp.
To avoid the awkward cuts in the video, go to animation and insert keyframes. Re-position and adjust the keyframes so the cuts look original.
Adjust Color Grading
Go to the advanced color correction> decrease the contrast and brightness. Add a 3D LUT effect such as Sparta 300. Also, add other LUT effects such as Contrast 4 LUT to adjust the colors and contrast.
Add Other Effects and Export
Add effects to tie the video together and you’re good to go.
Multiple hands illusion adds digital assistants for your subject in the video. This way you will get a video that will creatively describe a situation where your workload is divided by some magical illusionary hands.


Speak Your Mind