- Home
- DIY Special Effects
- Perform Magic Door Editing
Transcript
You have heard of the magic doors but it’s quite troublesome when you get stuck in them. Firstly, you need to film a few clips and then you need to move into the filmora11 for editing the video.
Start from behind the door, walk right in, and then pretend that you have forgotten something. Go back and grab it. For the second time when you walk in, pretend that you have some problem with the door, then you will exit from that door one more time.
Make sure that you are not interacting with the door frames, pretend like you are solving some problem with your watch. Then finally you will walk in like the problem has been solved. Now jump into the Wondershare filmora11 to know how you can get this effect.
You will need two videos. The first one is the recorded footage and the second one will be a tech overlay or any overlay video/clip which you will be importing onto the Filmora 11 timeline. This overlay will be imported to the part in the video where you will tick your clock and pretend to do some tricks with it to open the magic door.
First grab the door footage onto the timeline. Count through the area where you are just existing the door.
Create a snapshot. Place the snapshot right above the screen. Mark the areas by heading M on your keyboard. Once you leave the door, hit M again so that the magic door effect will be active at these times.
Increase the length of your snapshot, then hide the original footage so that you can focus on your snapshot. Double-click on the snapshot, go to mask, click rectangle, invert mask, grab the mask and use the blue points to reposition it. You can also rotate it if you like. Add a little bit to the blur strength. Click OK.
Bring back the original track where you can see that you are a little stuck in that magic door. If you see that you are going past the door, then go back to mask and work with the width, height, and blur strength. Reduce the blur strength. Then click OK.
Now look for the part where you are using your magic watch to fix the problem. Increase the length of the snapshot until the problem is solved. And while working with your magic watch, add an overlay. Bring the snapshot one track up and find out where the overlay used to be.
While tapping on the watch, bring the high-tech overlay and place it right underneath. Double-click the overlay, increase the size, go to compositing, and change it to screen. You will get the blue lines on the video which shows that the door is perfectly high-tech.
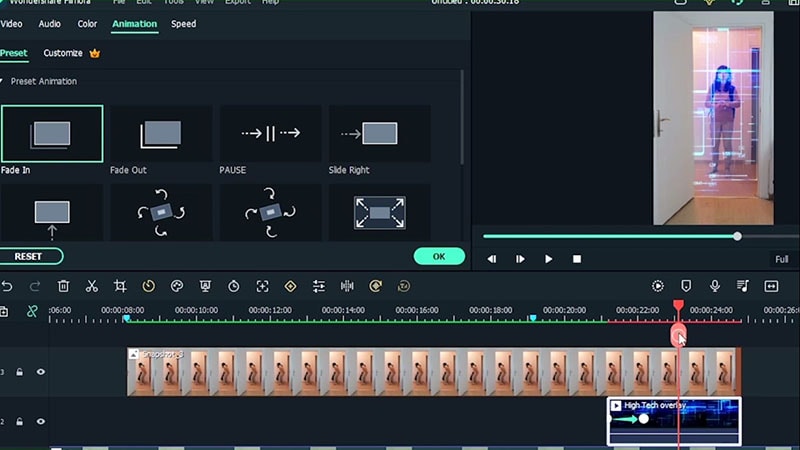
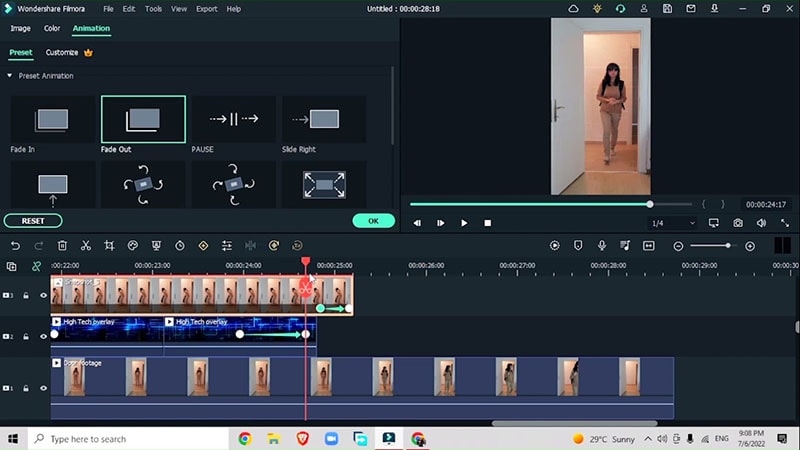
Go back to the snapshot mask, add to the radius to get sharp edges and increase the blur strength also. You can bring the high-tech overlay with the simple animation, double click on the fade in and fade out. Make a cut and use fade out for the other half.
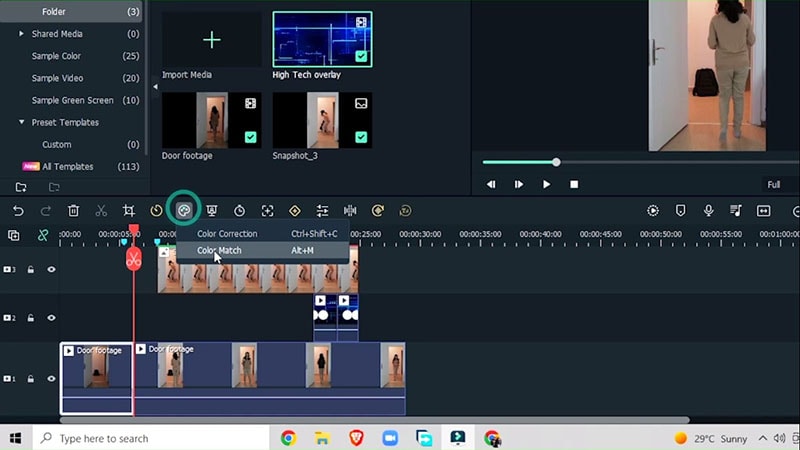
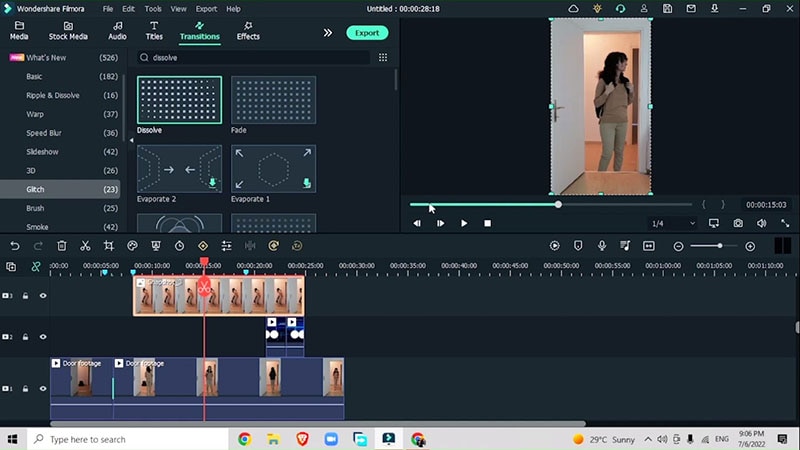
Drag the keyframes a little bit to the side. The closer they are, the faster the transition will be. Cut and fix the color for your first half. Go to color match and then choose the color frame where you have a good lining. Add a dissolve transition in between the two so that the color match is now invisible.
Before exporting your video, make sure to always check in the full screen. This way you will see the edges of the mask a lot better compared to the small preview panel. Make it to full screen and see what type of changes you need to make and then go back and re-adjust the sliders.
Now double-click on the snapshot, go to animation, use fade out, and move the keyframes to the end. If you want the fade out after the overlay fades out, so increase the duration of the snapshot right before in the video, you are about to take the first step. Re-arrange this accordingly to make sure that the overlay stays with the mask and not outside.
Preview your video in full screen and now you will be finished with your effect. Export the file and enjoy the effect on your video. This way you know how you feel if you are stuck behind a magic door. You can create a style to enter through a magic door by following these simple steps.
Filmed a lot of clips during your travel and your video still look boring after editing, here are some tips you can spice up your travel video.
How to Do Magic Door Editing
What you need to prepare:
- A computer (Windows or macOS)
- Your video materials.
- Filmora video editor
Download and Install Filmora
To begin with, you need to install the latest version of the software on your system. Be it Windows or Mac, Filmora supports both the leading OS.

Shoot Clips
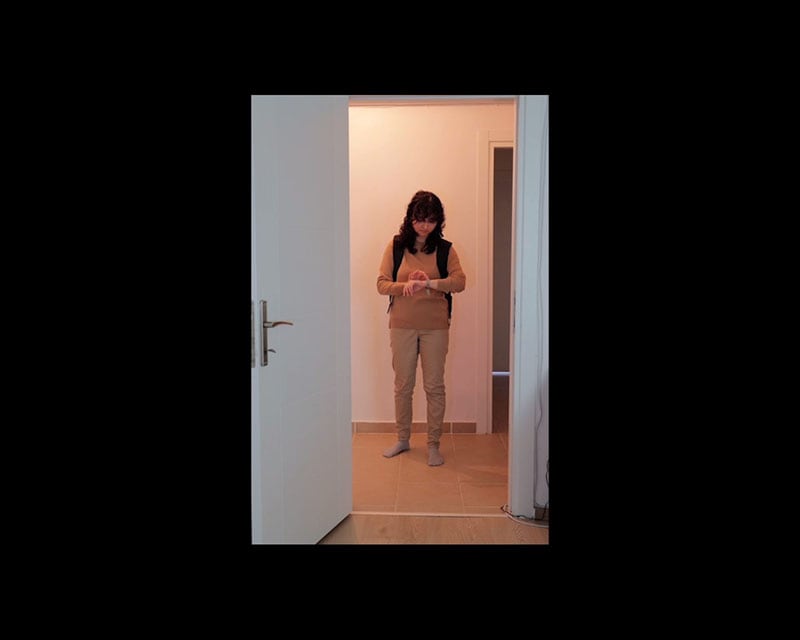
For filming the shots, you need a door through which you can pretend to enter and act as if you forgot something and then walk back.
For the second time, enter through the door and pretend there is a problem with the door and you cannot enter. Pretend like you are solving the problem with your watch, and then walk in through the door as if the problem has been resolved.
Import Clips
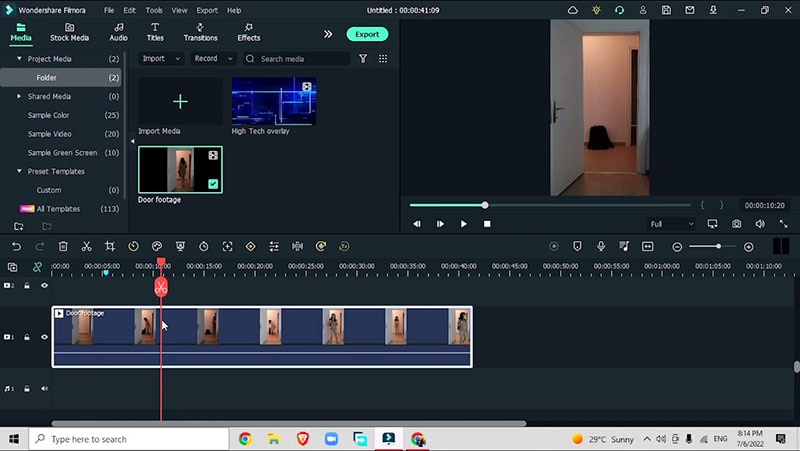
Launch Filmora 11 and import your shooting video and a tech overlay which you would drag onto the timeline when you will add an effect while you pretend to solve the problem with your magical watch. Drag the door footage onto the timeline.
Edit Video with Mask
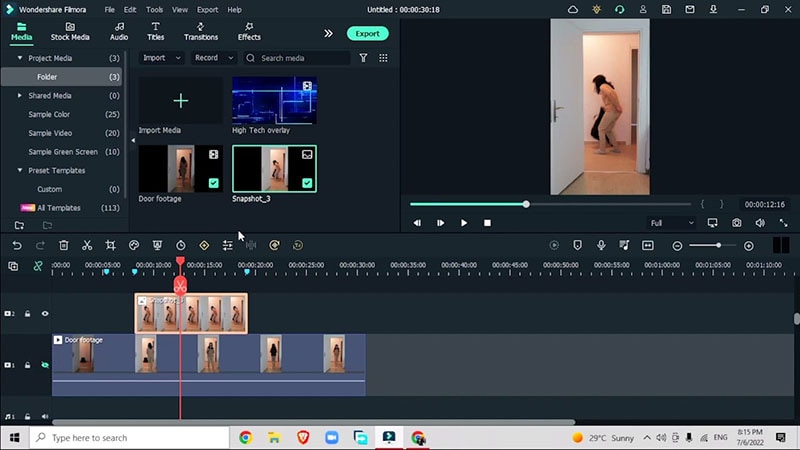
Create a snapshot in the video when you walk out of the door. Drag the snapshot on the top of the video and then mark the points when you want the magic door effect to appear. Increase the length of your snapshot and hide the original footage to focus on the snapshot.
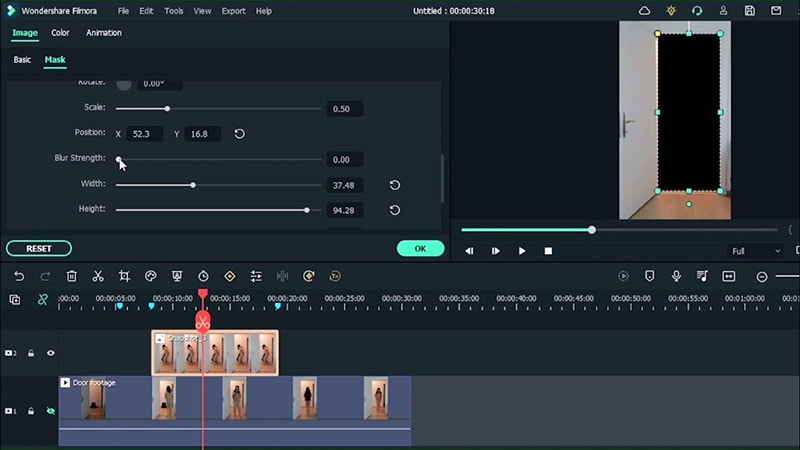
Double-click on the snapshot, go to Video > Mask > Rectangle Mask > Select Invert Mask
Reposition the mask and place it in the door frame area which you want to hide. Rotate and adjust the blur strength. After this, bring back your original footage and you will see yourself stuck behind the door.
Add Tech Overlay
After setting up the mask and positioning yourself as you are stuck behind the door, drag your video on the part where you pretend to do something with your magic watch and at this point, insert the tech overlay which you initially imported to the Filmora timeline.
Double-click on the overlay, and adjust the size of the overlay by changing the X and Y scale. Then go to Basic > Compositing > Change the blending mode to Screen which will merge the overlay with your background footage.
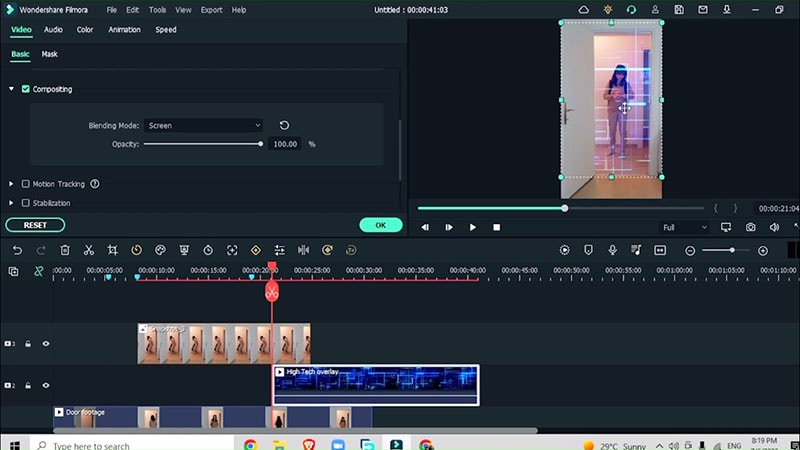
You can also drag the sliders to adjust the radius, width, height, and blur strength of the overlay.
Now you may want the overlay to disappear once you stop ticking the watch, so you must go to Animation > Presets > Fade in and Fade out transition. The closer the Fade in and Fade out keyframes are, the faster will be the transition.
Fix the Colors
To set the colors in the video sections so that all the sections appear as one same video, go to Color > Color Match. Choose the frame where you have good lighting to match it with the footage and choose the matching color.
Add more Transitions
Go to transitions > Dissolve transition
Add this transition so that the colors in the video sections match and align together as one. Add this effect in between the sections of the videos where you want the colors to match with each other.
Review the Changes and Export
One last step before finishing with the effect is to preview the video in full screen. In this way, you will get a better idea of the edges of your masks in the video and whether you need to reposition the mask and transitions or not.
Go to Animation > Presets > Fade out the transition to adjust the length of the fade out and also make sure that the overlay appears in our mask and not outside.
Follow these simple steps and you’re good to go.
Walking through the magic doors may be troublesome in real life but this magic door effect is a lifesaver when it comes to professional video editing. This step-by-step guide will lead you through how to get through imagining yourself entering a magic door with some magic tricks with your wristwatch.


