Transcript
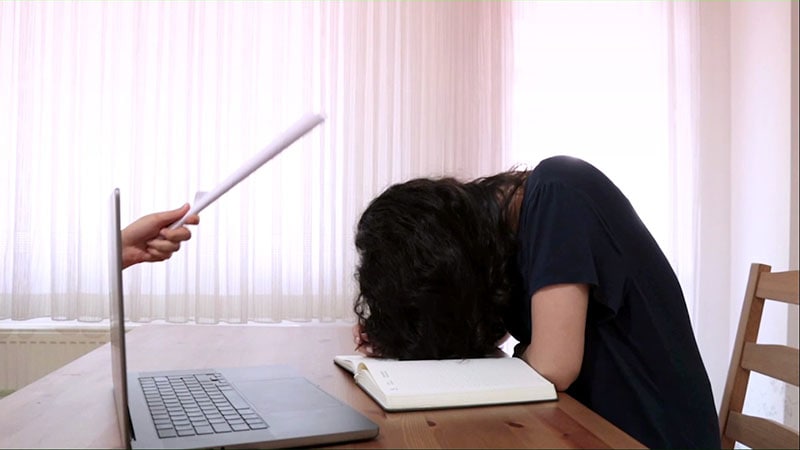
Make this video by filming yourself sitting on a chair with a laptop opened straight in front of you at a 90 degree angle so it easier to mask out the other side. Pretend like you’re going to doze off in a class and shoot a video in which an assistant’s hand comes from the direction of the laptop pointed towards you to tap us on the head and wake us up.
Another thing is to shoot this whole thing on a tripod and to have your camera on manual mode I do not want any auto settings turned on because if we do the lighting can change while we're filming.
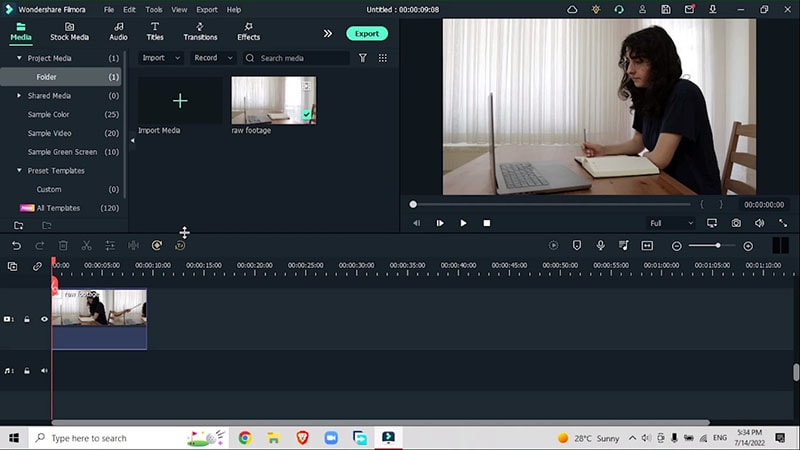
After shooting your video you can edit this affect. Drag your raw video onto the timeline. Just sit in front of the laptop pretending to listen to a teacher and about to doze off. Your friend will come and tap your head with some papers. Mask out the section of the hand so it looks like the hand is coming from the laptop.
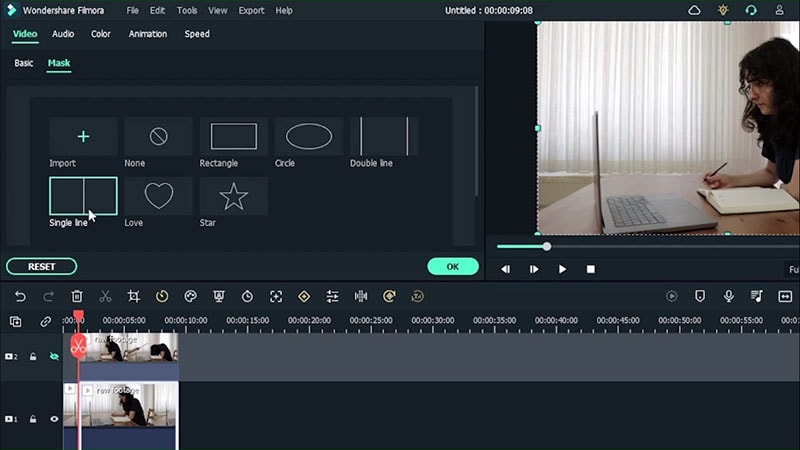
Go to the store to check for the hands and frame and make a cut. Select the longer half by clicking control C and then control V to copy that section. Place this section right above the original. Right click the bottom clip, go to video, mask and use this single line mask by the second track which will do our masking better.
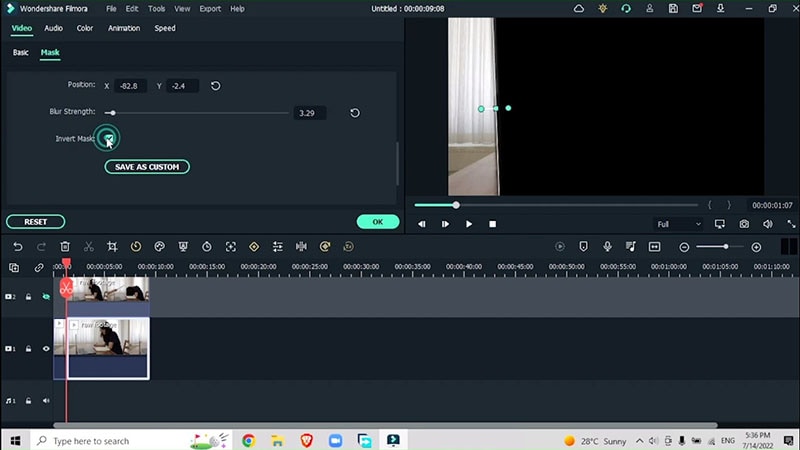
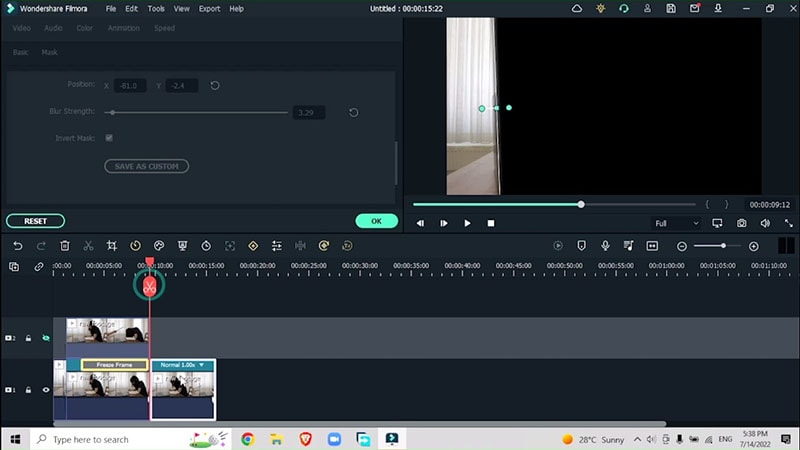
Select a single line mask and drag this over the edge of your laptop. Use the handle to rotate. This is why it's important to have your laptop at this angle. Once you have the right angle for your mask scroll down and increase the blur length. Invert this mask so you only have the other side. Now click on this mask once and then use your left and right arrow keys to move it to be in the perfect position. Hit OK.
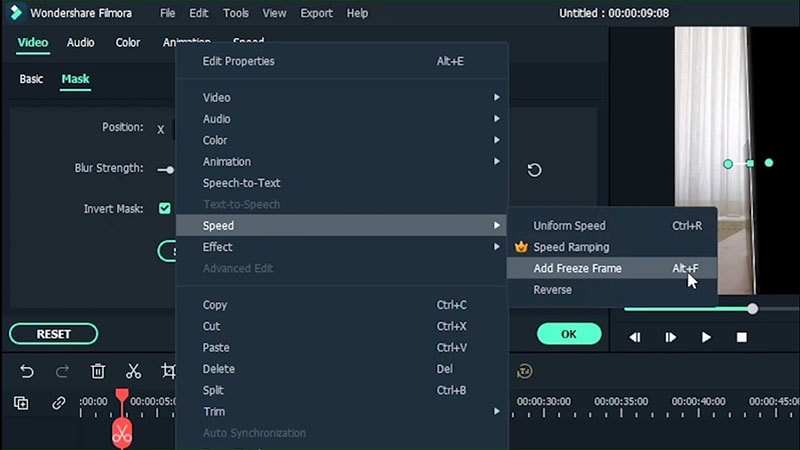
Go to the frame were you friends hand is not in the shot. Select the bottom click, right click and then go to speed and add freeze frame. This way you will have an empty shot without your friend coming in. increase the freeze frame length and match it with the end of your top video.
Get rid of the extra fit by selecting the scissor icon and getting rid of the normal fit. Be sure to match the start of the freeze frame so that we have one continuous frame underneath the duplicate video.
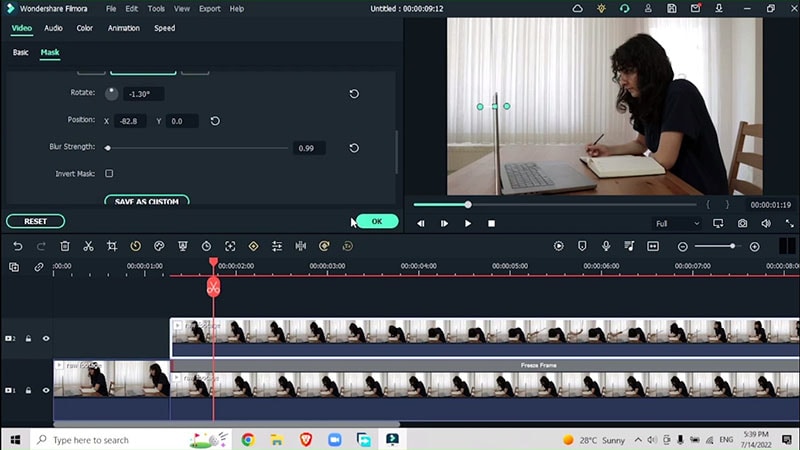
Now bring back the top video and we're going to do the same thing except this time we're going to not invert the mask. Double click the top footage, go to mask and then select a single line mask. Scroll down and then use the handle to rotate it in the right position. Select the mask once and then you turn left and right arrow keys to move it right or the left. Try to match it with the previous mask and increase blur strength.
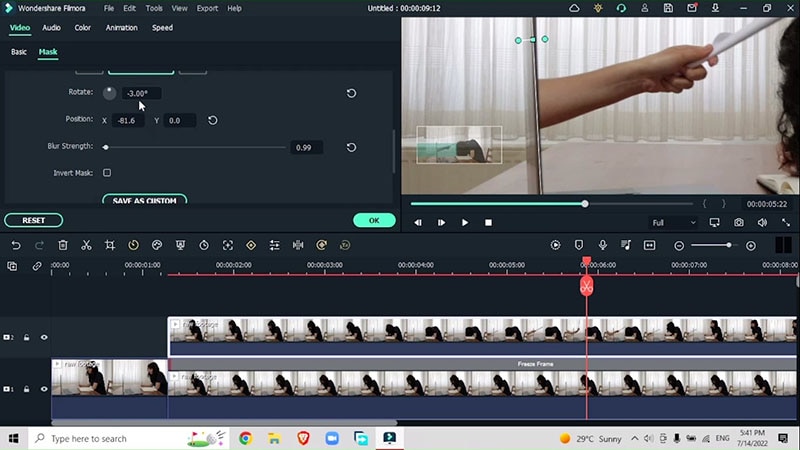
Go back to your video underneath and lower the blur strength amount so that you can get a seamless cut between two to mask. Hit OK. Now your friend’s hand is probably going to show up through the laptop. Re-adjust the blur strength. Change the position of the mask. -3 rotation will do nicely for this effect.
Zoom out and view in full screen. Lower blur strength if you see black lines.
Zoom out and export your video. Export your video and then bring it back into the project. Clear the timeline by selecting both videos and then hitting the trash icon. Place your exported footage onto the timeline.
Add a simple shake affect by adding some simple key frames. Create a comedic environment for this video by double-clicking your video going to animation, customize and create some simple key frames. Create your first and second key frame until you can see the hand.
Engage your audience by making the hand look like it is emerging from laptop. Increase the scale and position X and Y to bring it into center. Rotate the clip to give it a natural look. Move until the arm has fully extended out and then zoom out to the default. Keep 0 for X and Y and 0 for rotation. Do the same for the second footage.
Be sure to check the speed of your key frames by playing your video. Closer your key frames are, the faster the effect will be.
Finish the effect with a simple filter. Go to color correction section and grab any filter. Work with the opacity of the filter. Drag the sliders to finalize your video.
How to Create Free Stuff Effect Video
What you need to prepare:
- A computer (Windows or macOS)
- Your video materials.
- Filmora video editor
Record Footage
Film yourself through a camera fitted to a tripod, sitting on a chair pretending to hear the lecture and suddenly dozing off. Place your laptop in front of you. Record footage by pretending to wake up quickly as a result of an assistant’s hand waking you up with a bundle of papers.
Launch Filmora Editor
Download and install Filmora.

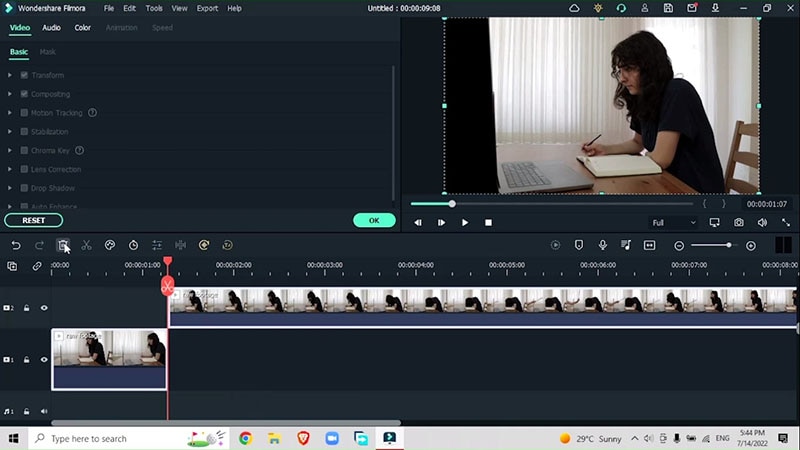
Add the Footages to Timeline
Launch Filmora 11 and drag your raw video onto the timeline.
Mask the Hand section
Mask out the section of the hand so it looks like the hand is coming from the laptop. Go to the start of the clip where the hand is not there and make a cut. Select the longer half and copy the section. Place the cut section above the original footage. Go to Video > Mask > Select single line mask and drag it over the edge of your laptop.
Rotate and Increase the Blur Strength
Once you have the right angle for your mask scroll down and increase the blur length. Invert this mask so you only have the other side. Now click on this mask once and then use your left and right arrow keys to move it to be in the perfect position. Hit OK.
Adjust Speed
Go to the frame where your friend’s hand is not in the shot. Select the bottom clip, right click and then go to speed and add freeze frame. This way you will have an empty shot without your friend coming in. Increase the freeze frame length and match it with the end of your top video.
Get rid of the extra fit by selecting the scissor icon and getting rid of the normal fit. Be sure to match the start of the freeze frame so that we have one continuous frame underneath the duplicate video.
Mask the top footage
Do not invert the mask this time. Double click the top footage, go to mask and then select a single line mask. Scroll down and then use the handle to rotate it in the right position. Select the mask once and then you turn left and right arrow keys to move it right or the left. Try to match it with the previous mask and increase blur strength.
Go back to your video underneath and lower the blur strength amount so that you can get a seamless cut between two to mask. Hit OK. Readjust the amount by using the slider. Change the position of the mask. -3 rotation will do nicely for this effect.
Export your video
Export your video and then bring it back into the project. Clear the timeline by selecting both videos and then hitting the trash icon. Place your exported footage onto the timeline.
06:45 Engage your audience by making the hand look like it is emerging from laptop. Increase the scale and position X and Y to bring it into center. Rotate the clip to give it a natural look. Move until the arm has fully extended out and then zoom out to the default. Keep 0 for X and Y and 0 for rotation. Do the same for the second footage.
08:20 be sure to check the speed of your key frames by playing your video. Closer your key frames are, the faster the effect will be.
08:56 Finish the effect with a simple filter. Go to color correction section and grab any filter. Work with the opacity of the filter. Drag the sliders to finalize your video.
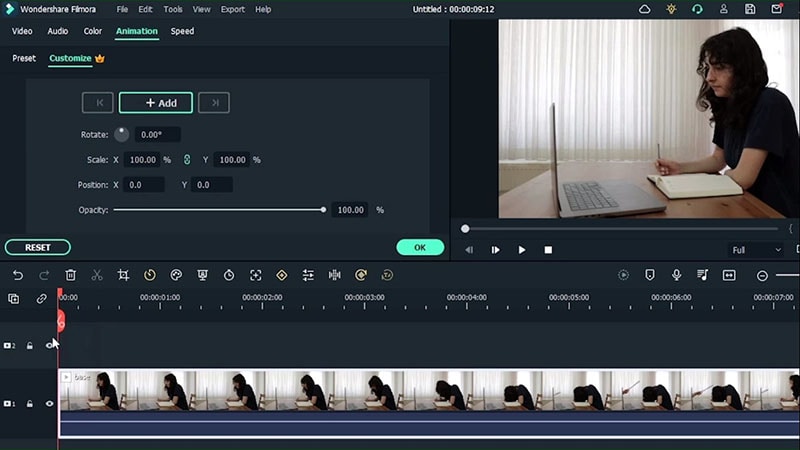
Add Simple Shake Effect
Add a simple shake affect by adding some simple key frames. Go to animation, customize and create some simple key frames. Create your first and second key frame until you can see the hand.
Scale and rotate the clip to give a more natural look.
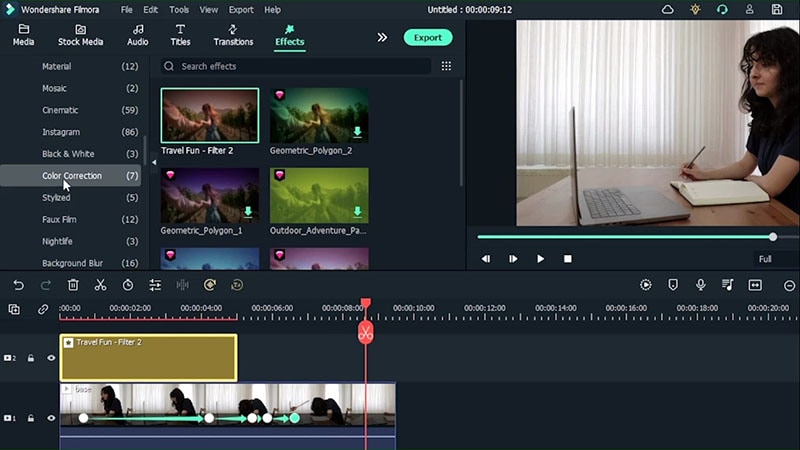
Add other Effects
Finish the effect with a simple filter. Go to color correction section and grab any filter. Work with the opacity of the filter. Drag the sliders to finalize your video.
Get your hands on this really cool effect by creating the desired effect in Filmora 11 by simply going through a set of these guides. Trust me, the output is worth the extract.


Speak Your Mind