- Home
- DIY Special Effects
- How to Make Foggy Text Reflection Effect
Transcript
First, let's go to the titles. Drop the default title on Track 1—double-click on it to open the custom panel. Here we change the font to Montserrat.
Take a snapshot. Delete the default title from the timeline, then drop the snapshot on Track 1.
Again, take another snapshot. Finally, delete the snapshot from the timeline. Next, we need to import the smoke clip to media, which you can download these clips from mixkit. Co.
Drop another smoke clip on track two and keep it six seconds long. Let's locate it at the starting point.
We need to add a keyframe at the five-second position of the timeline. Then place the play head at five seconds, twenty-third frame, and increase the opacity to a hundred percent.
Once again, drop the snapshot on Track 4. Make its duration the same as the last snapshot. Then, double-click on it, change the scale to 218, X-axis to negative 1022, and Y-axis to negative 205.
Now locate at the 17th frame and increase the opacity to six percent. Then move to five seconds and 23 edges and change the X-axis value.
Next, go to the sample color and drop the white paint on Track 6. Then, place the play head at the starting point on the white color.
Go to the animation, add a keyframe and compress the text in the preview window.
Again, drop the white color on Track 5. Adjust the duration to match the snapshot. Double-click on it, go to the video, click on the mask, import the flipped snapshot, then go to the animation.
Go back to the video tab. Now let's add a mask keyframe at the start. Place the play head at one second, and set blur strength to six percent.
Now change the opacity at the second keyframe on the fifth track clip to 40 percent and do the same on the third keyframe.
Last, drop the gradient four colours from sample color on Track 7. Increase the duration, double click on it, go to video basic, change blending mode to soft light and opacity to 42.
Finally, go to the Effect, drop the cinematic bar on Track 9, and adjust its duration to fix the whole video.
How to Make Foggy Text Reflection Effect
What you need to prepare:
- A computer (Windows or macOS)
- Your video materials.
- Filmora video editor
Download the Filmora video editor → run it → and click on “New Project”.
Go to Titles → drag the Default Title to the Timeline below. Double-click on the clip to open its settings. Here, type in your text → change the font to Montserrat Light. Scroll down and increase Text Spacing to 5.0. Now, select only the first word in the box where you typed your text. Then, change its font to Montserrat Bold. Click OK.

Take a Snapshot of the text you just created. Now, delete the Default Title clip from the Timeline and drag the Snapshot you took to the Timeline.

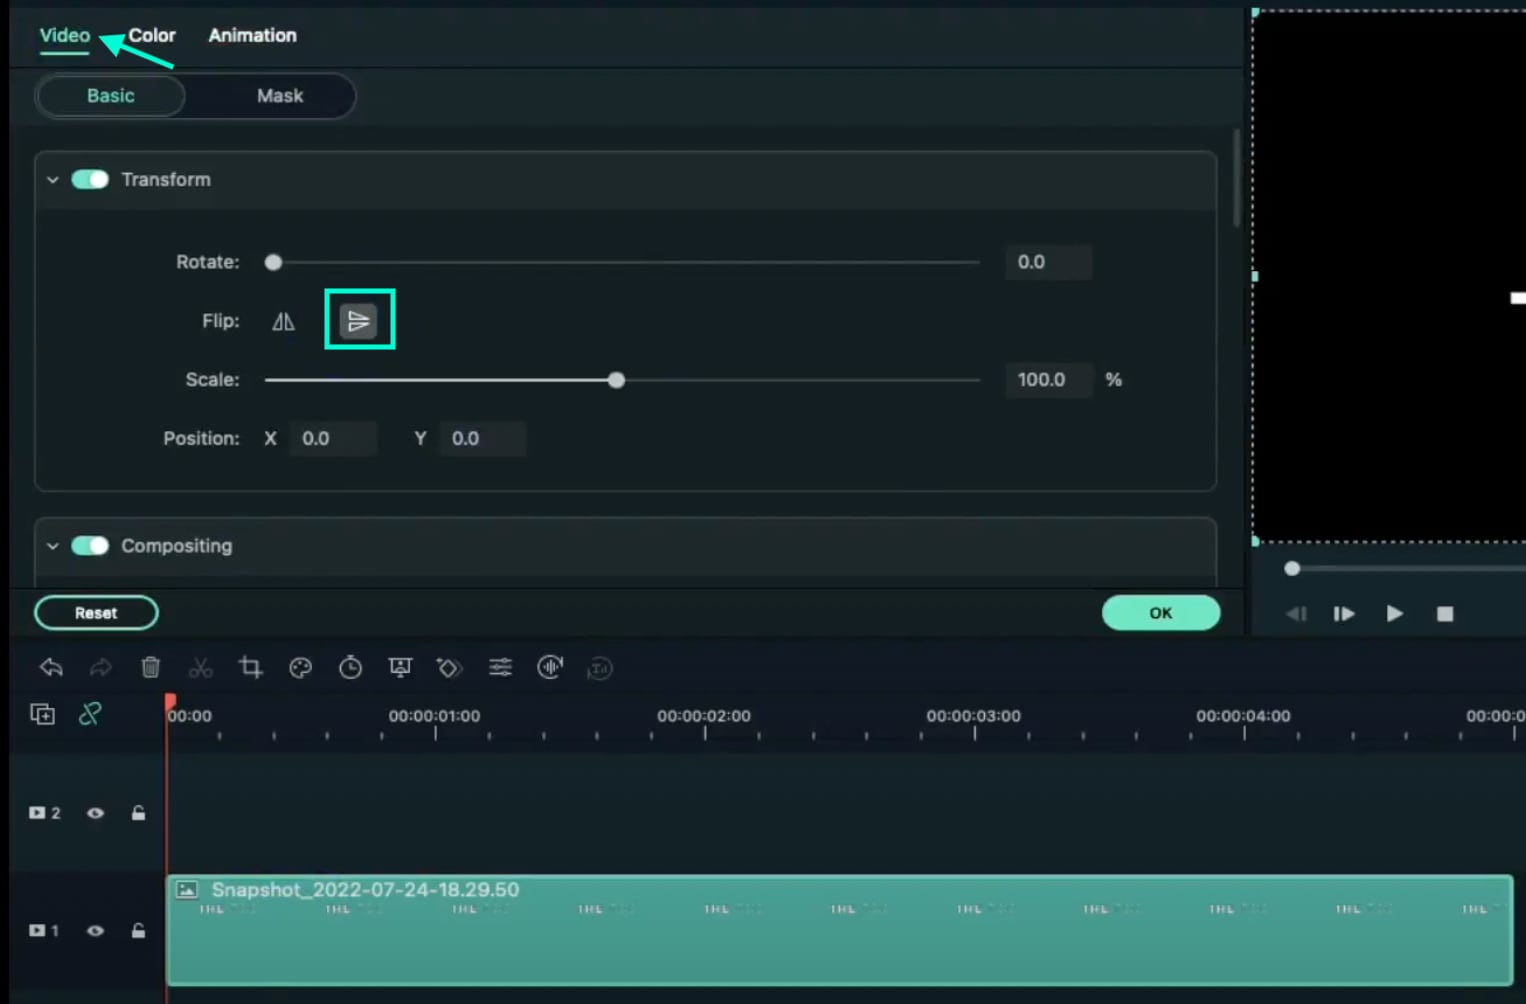
Double-click the Snapshot clip → go to the Video tab → click the highlighted button below to flip the text. Then, take a Snapshot of this flipped version of the text and delete the clip from the Timeline.
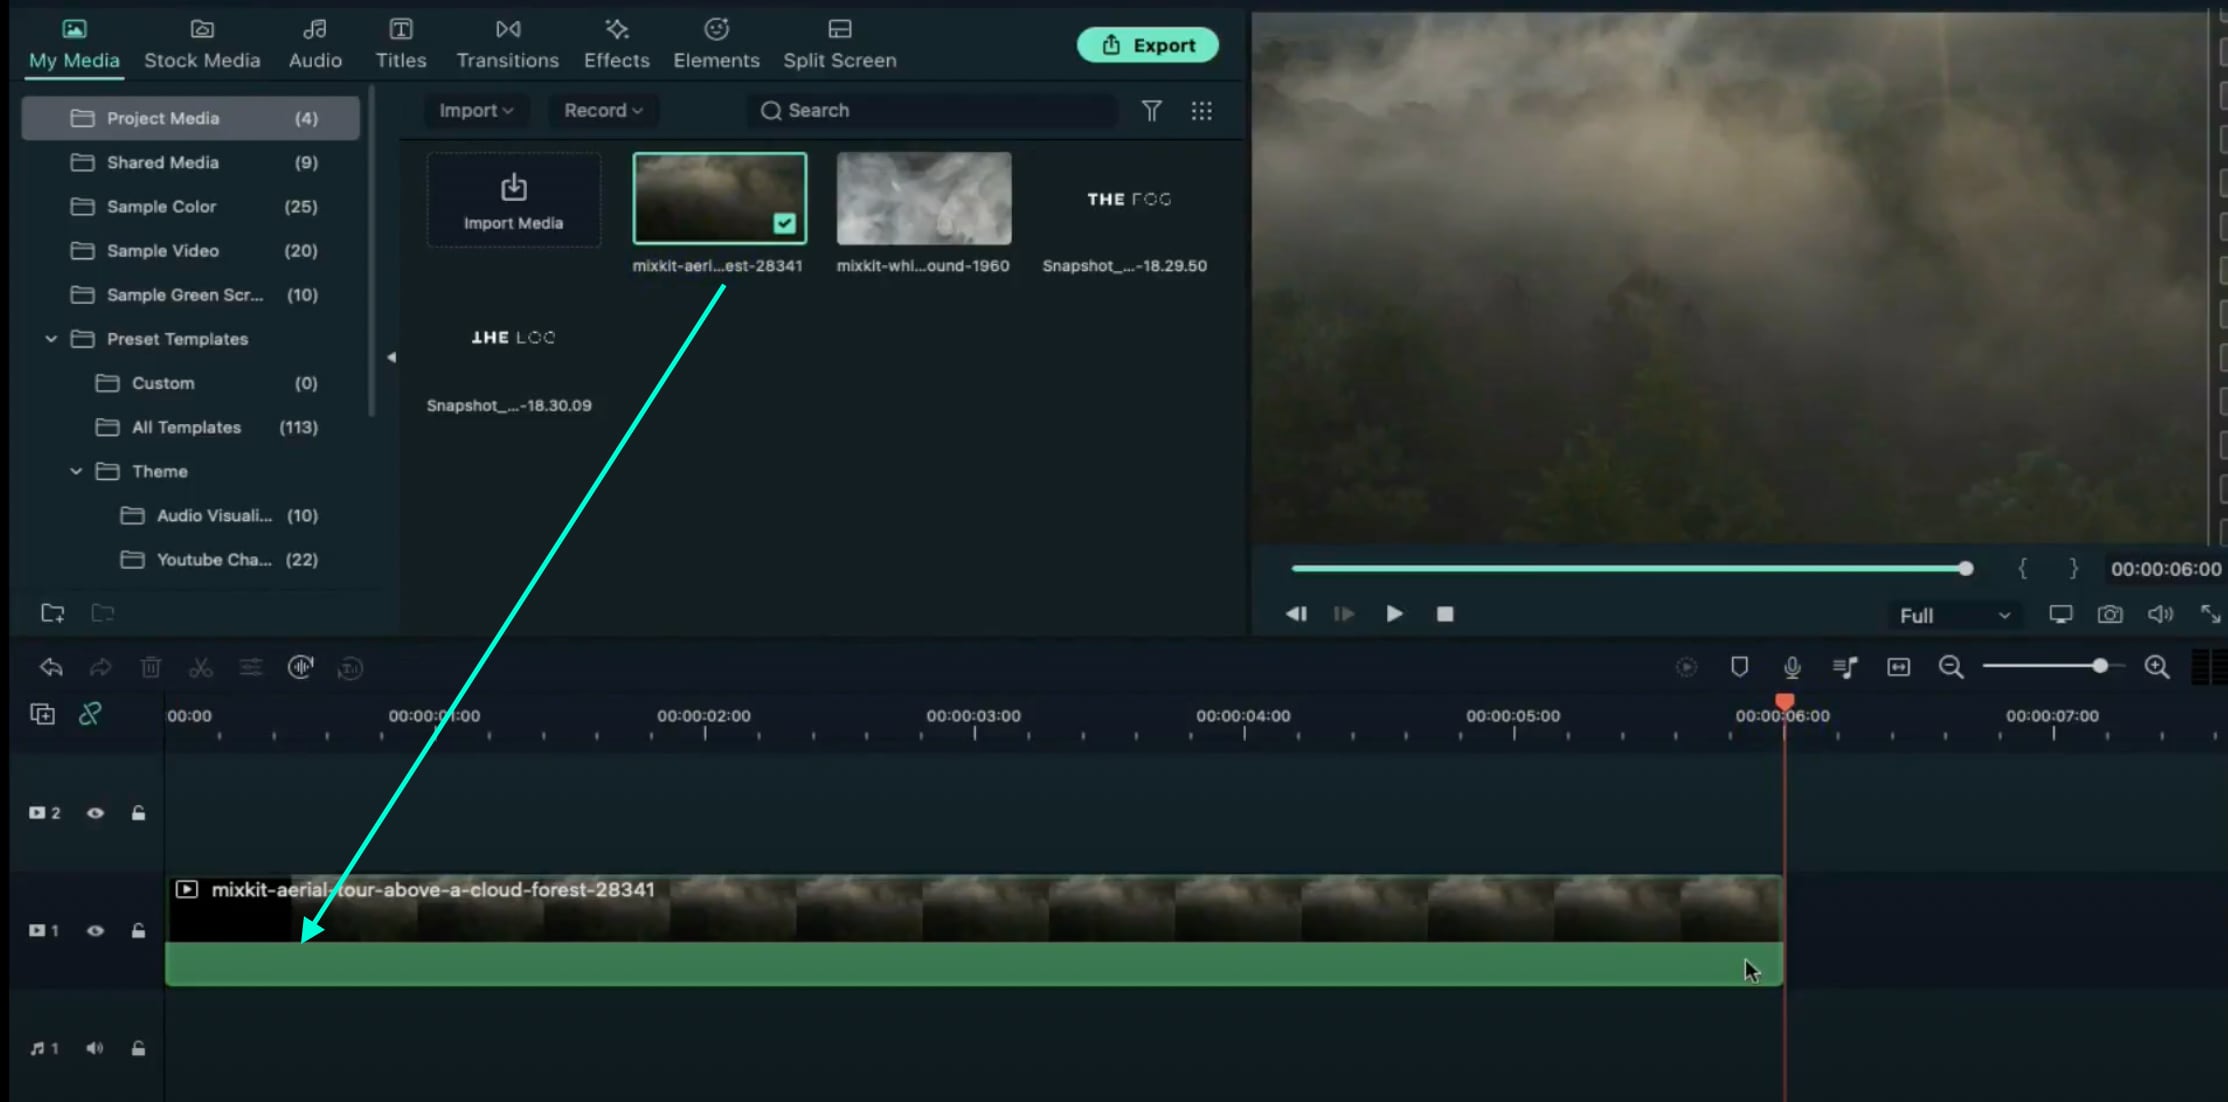
Visit the free stock footage site Mixkit and download any smoke or fog background video you like. Then, go to Filmora → My Media → Import Media → and select the footage you downloaded to import it into the video editor. Then, drag the Smoke clip to the Timeline and make it 6 seconds long.
Double-click on the clip → go to Color. Now, change Contrast to “49”, Saturation to “100”, and Brightness to “18”. Below, set the 3D LUT option to “Game of Thrones”. Click OK.

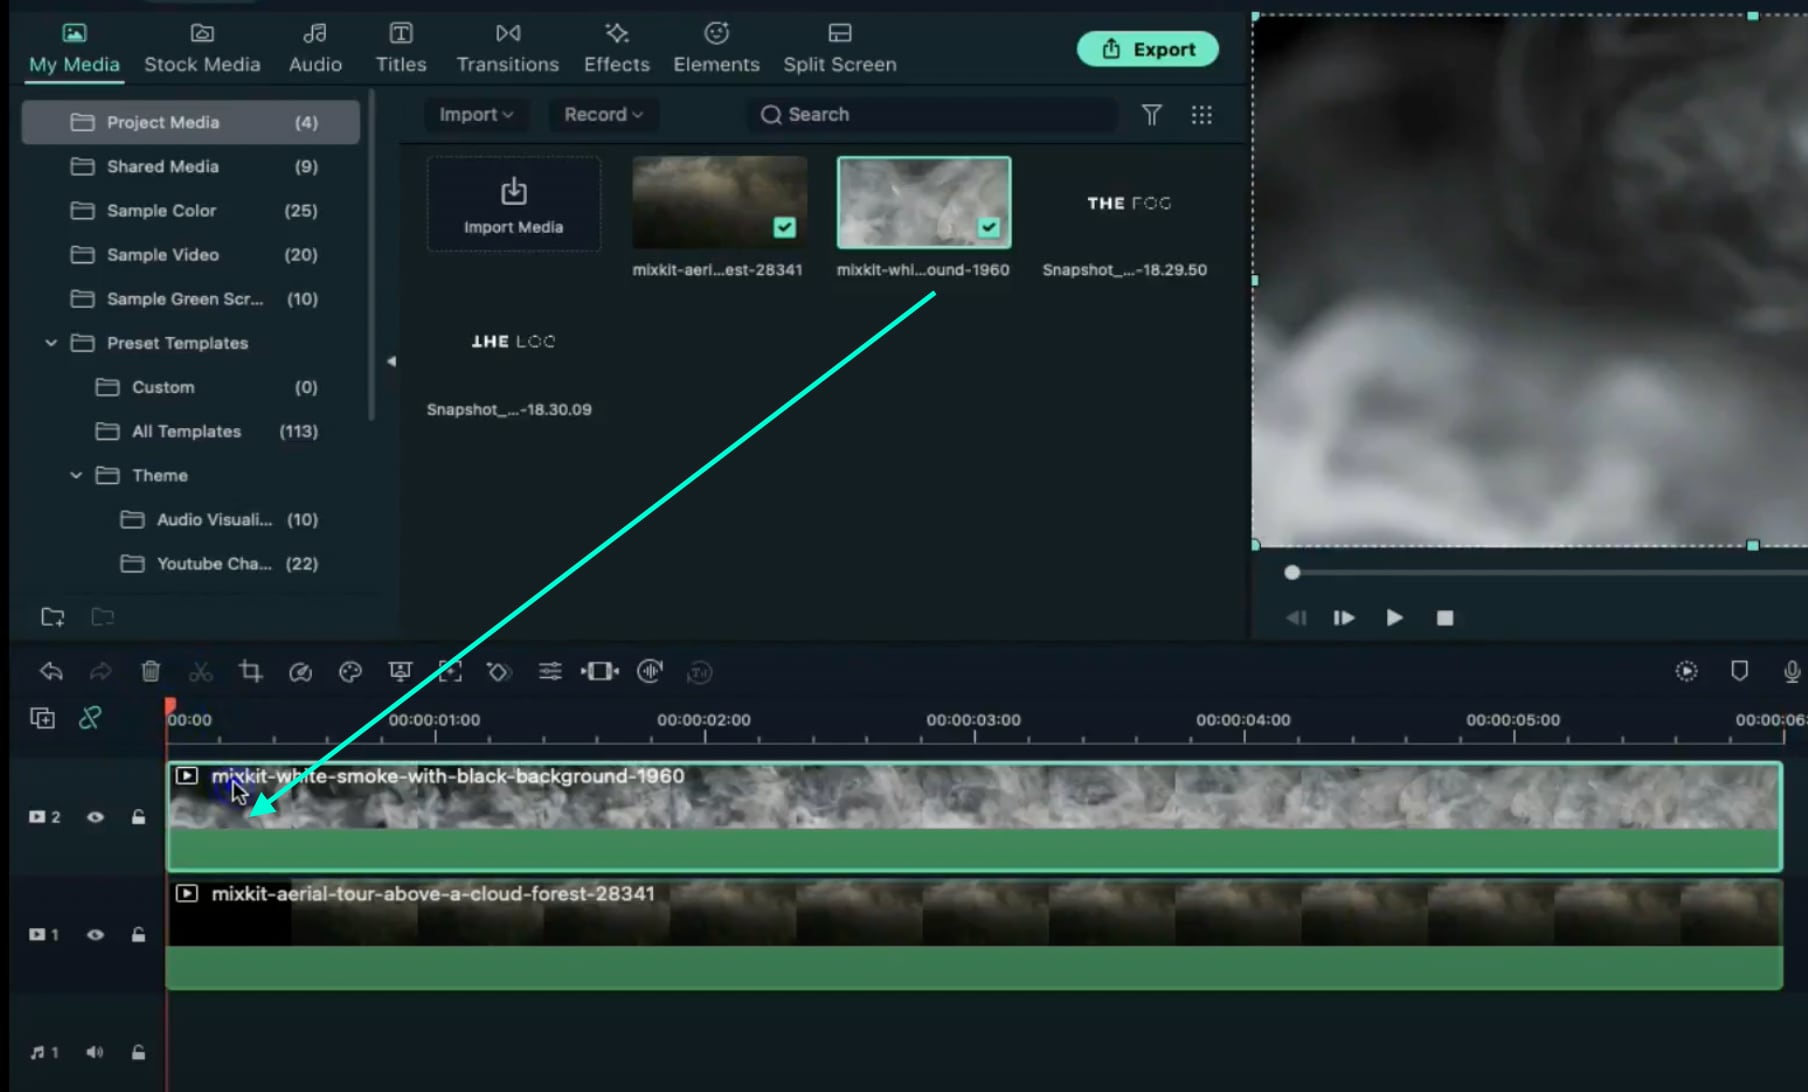
Drag the other Smoke clip to Track 2 of the Timeline. Make it 6 seconds long. Then, move the Playhead to the starting point of the video.
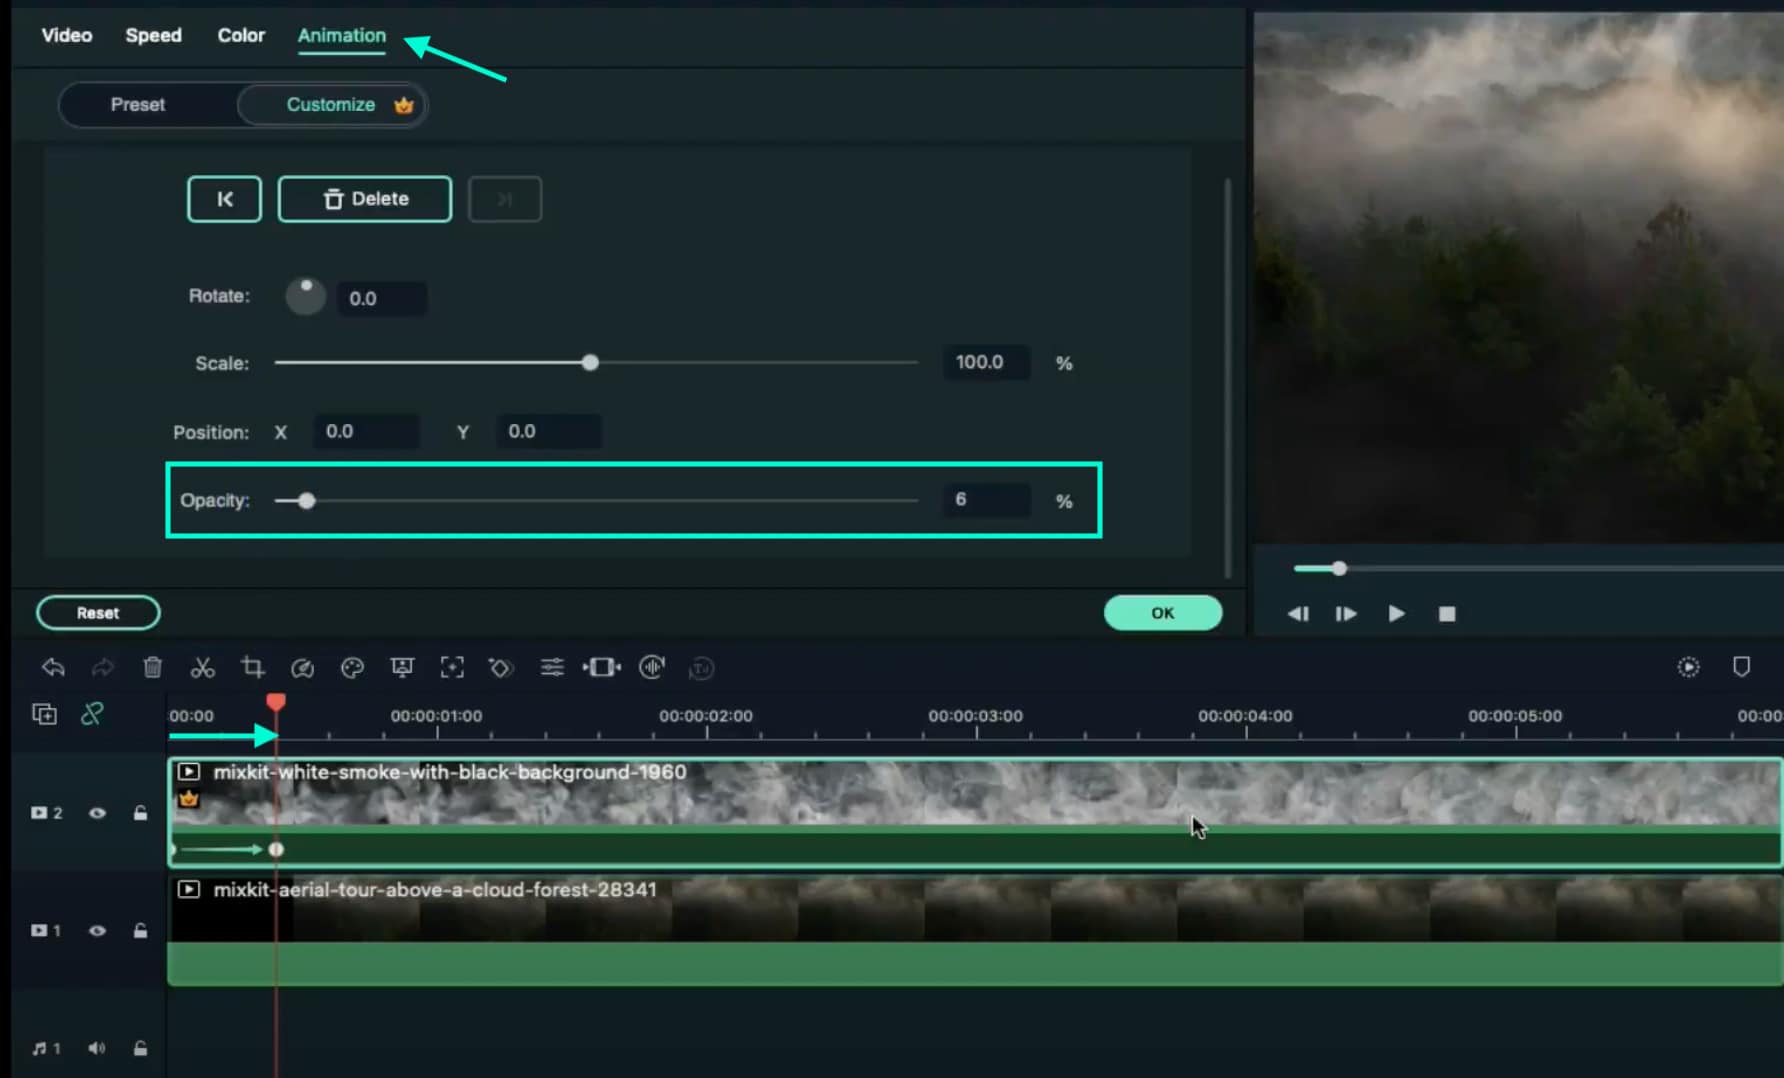
Double-click on the new smoke clip. Go to Animation. Decrease the Opacity to 0%. Move the Playhead 10 frames forward → increase the Opacity to 6%. Don’t click OK yet.
Move the Playhead to 5 seconds. Click on “+Add” to add a keyframe to the clip. Then, move the Playhead to the next-to-last frame and increase the Opacity to 100%. Click OK.

Set the Playhead to the second frame and drop the first Snapshot we took earlier at that starting point. Drag the clip to be 6 seconds long. Then, double-click on the clip and adjust the settings exactly as you see in this image here. Don’t click on OK yet.

Move the Playhead at the 17th frame → increase the Opacity to 6%. Move the Playhead to 5 seconds and 23rd frame → change the X-axis value to “1973”. Click OK.
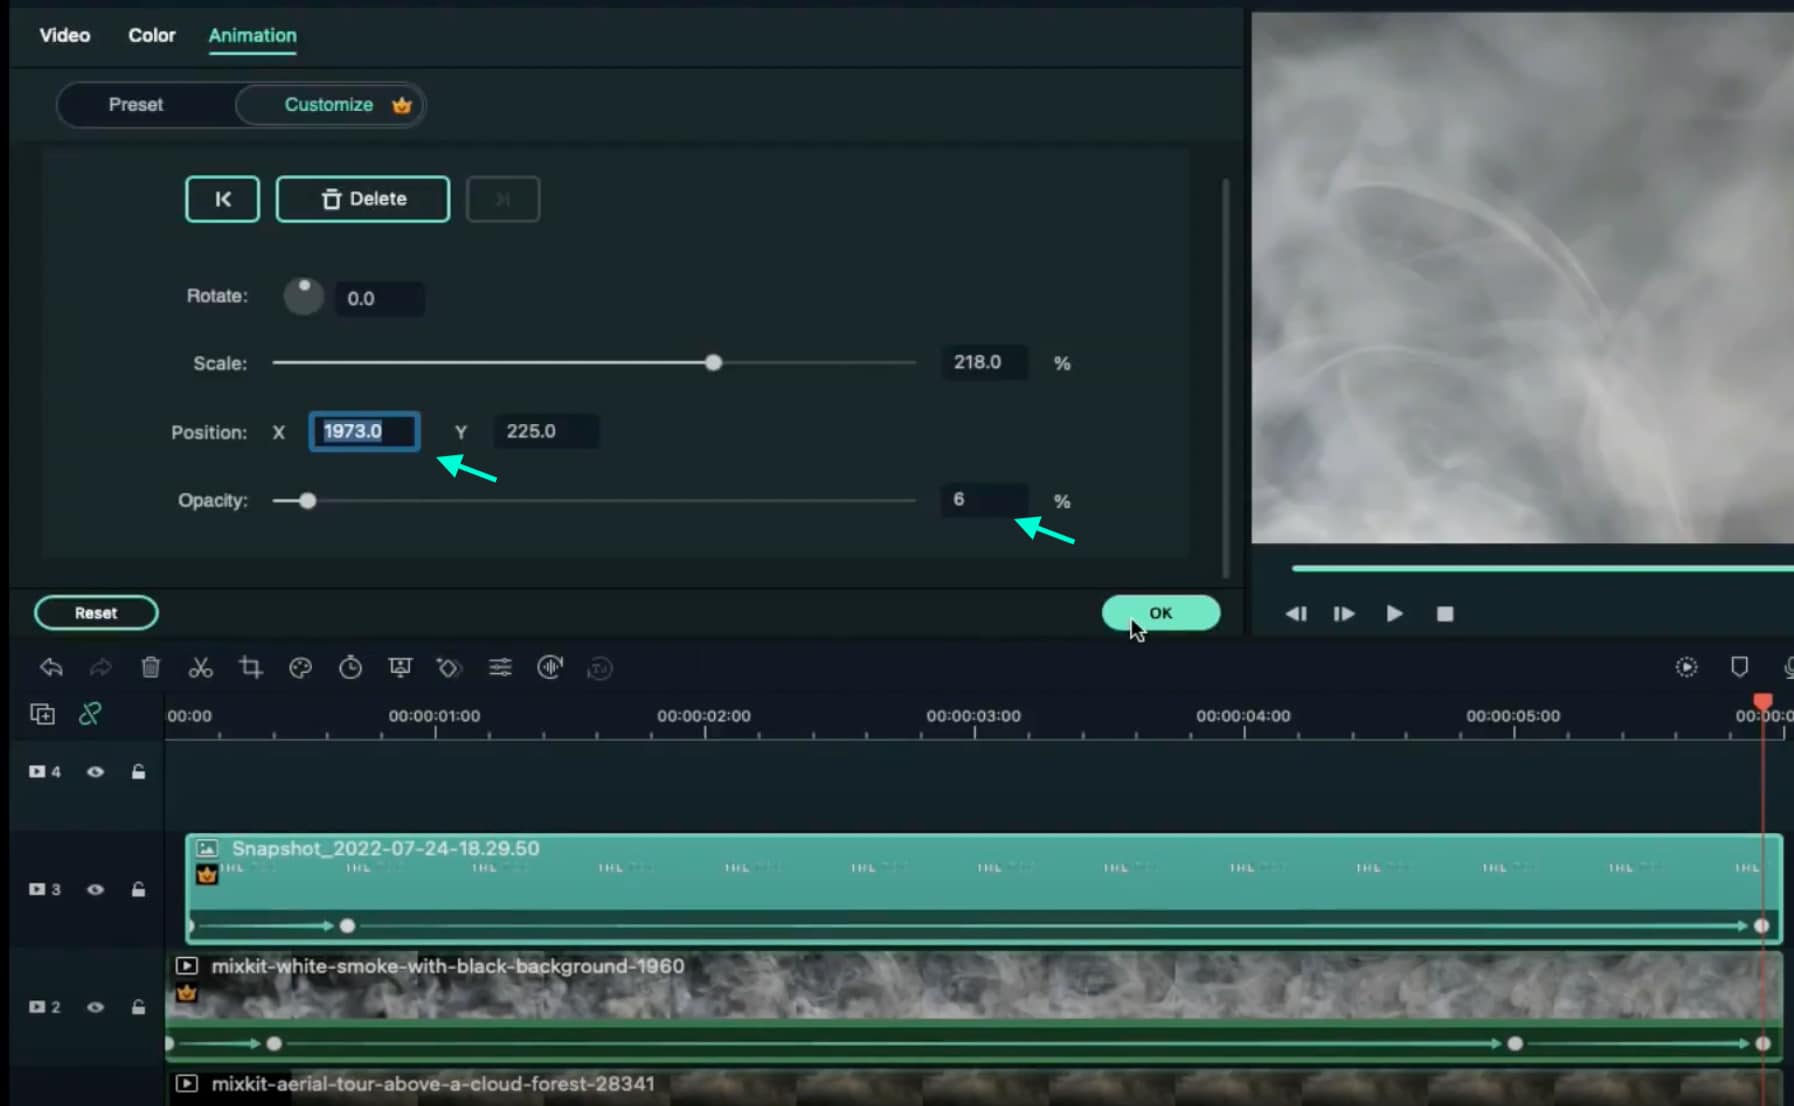
Drag the same Snapshot file to Track 4, directly on top of the clip in Track 3. Make its duration the same too. Now, double-click on this clip and apply the exact same settings as in the image here. Don’t click on OK yet.
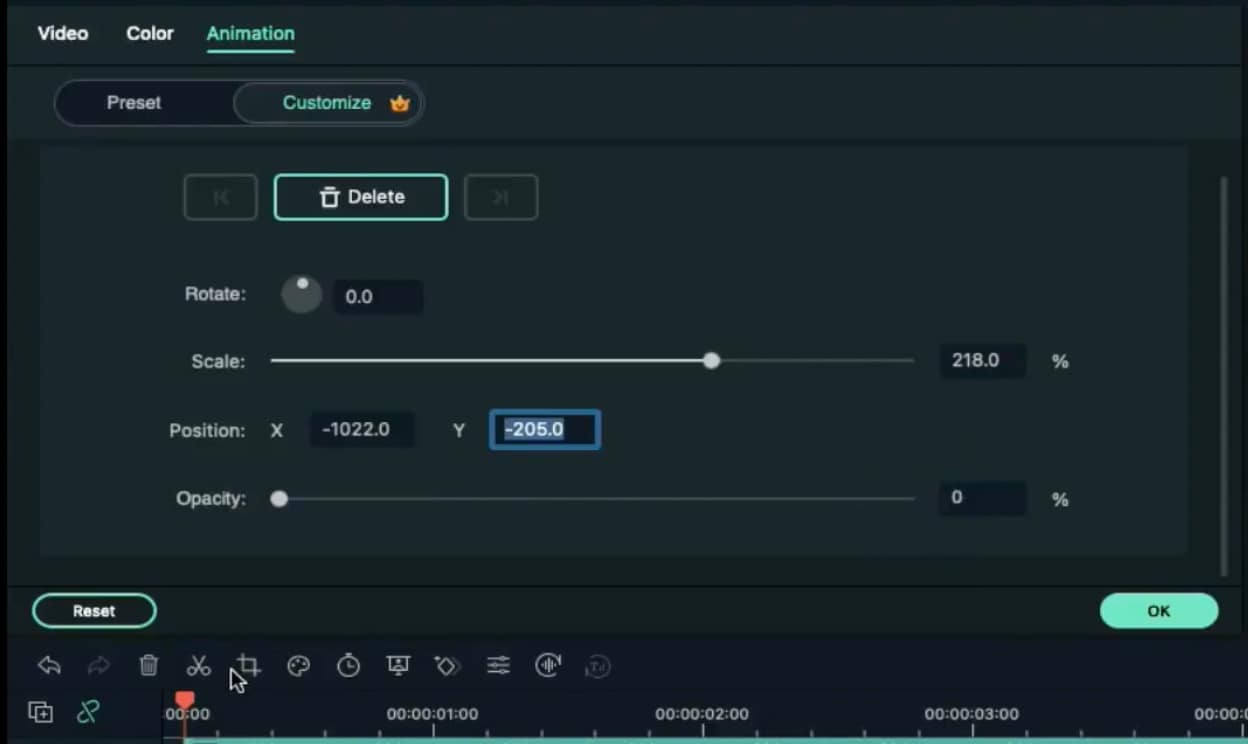
Move the Playhead to the 17th frame → increase the Opacity to 6%. Now, move the Playhead to 5 seconds and 23rd frame → change X-axis value to “-1944” and the Opacity to 0%. Click OK.
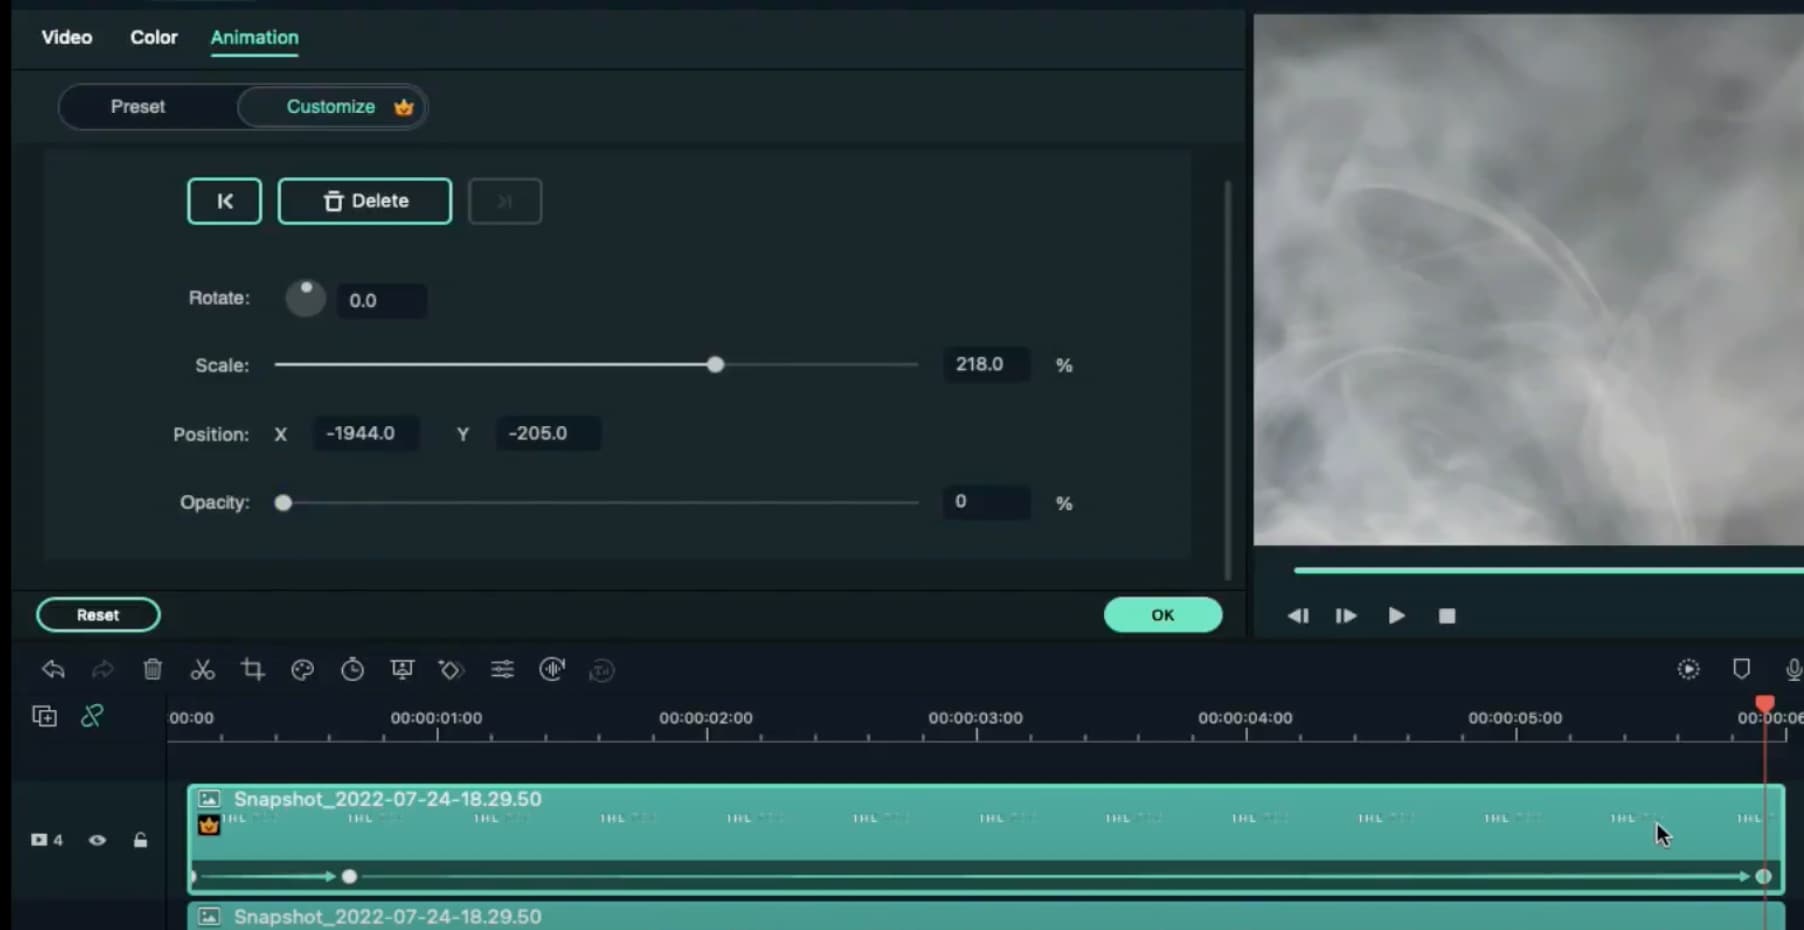
Go to Sample Color and drag the White color on Track 6 in the Timeline. Place this clip at the same starting point as the snapshots below it. Set its duration the same as the clips below too. Then, move the Playhead at its starting point.

Double-click on the Sample Color clip → go to Video → Mask → Import. Here, select the first Snapshot we created earlier in this tutorial.

Now, go straight to the Animation tab and click the “+Add” button to add a keyframe. Then, compress the text in the preview screen until it's not visible anymore on the screen.

Add keyframes at the 1-second position and at the 5-second position. Then, move the Playhead once more to the 5-second and 22nd frame. Reduce the Opacity to 1%. Click OK.
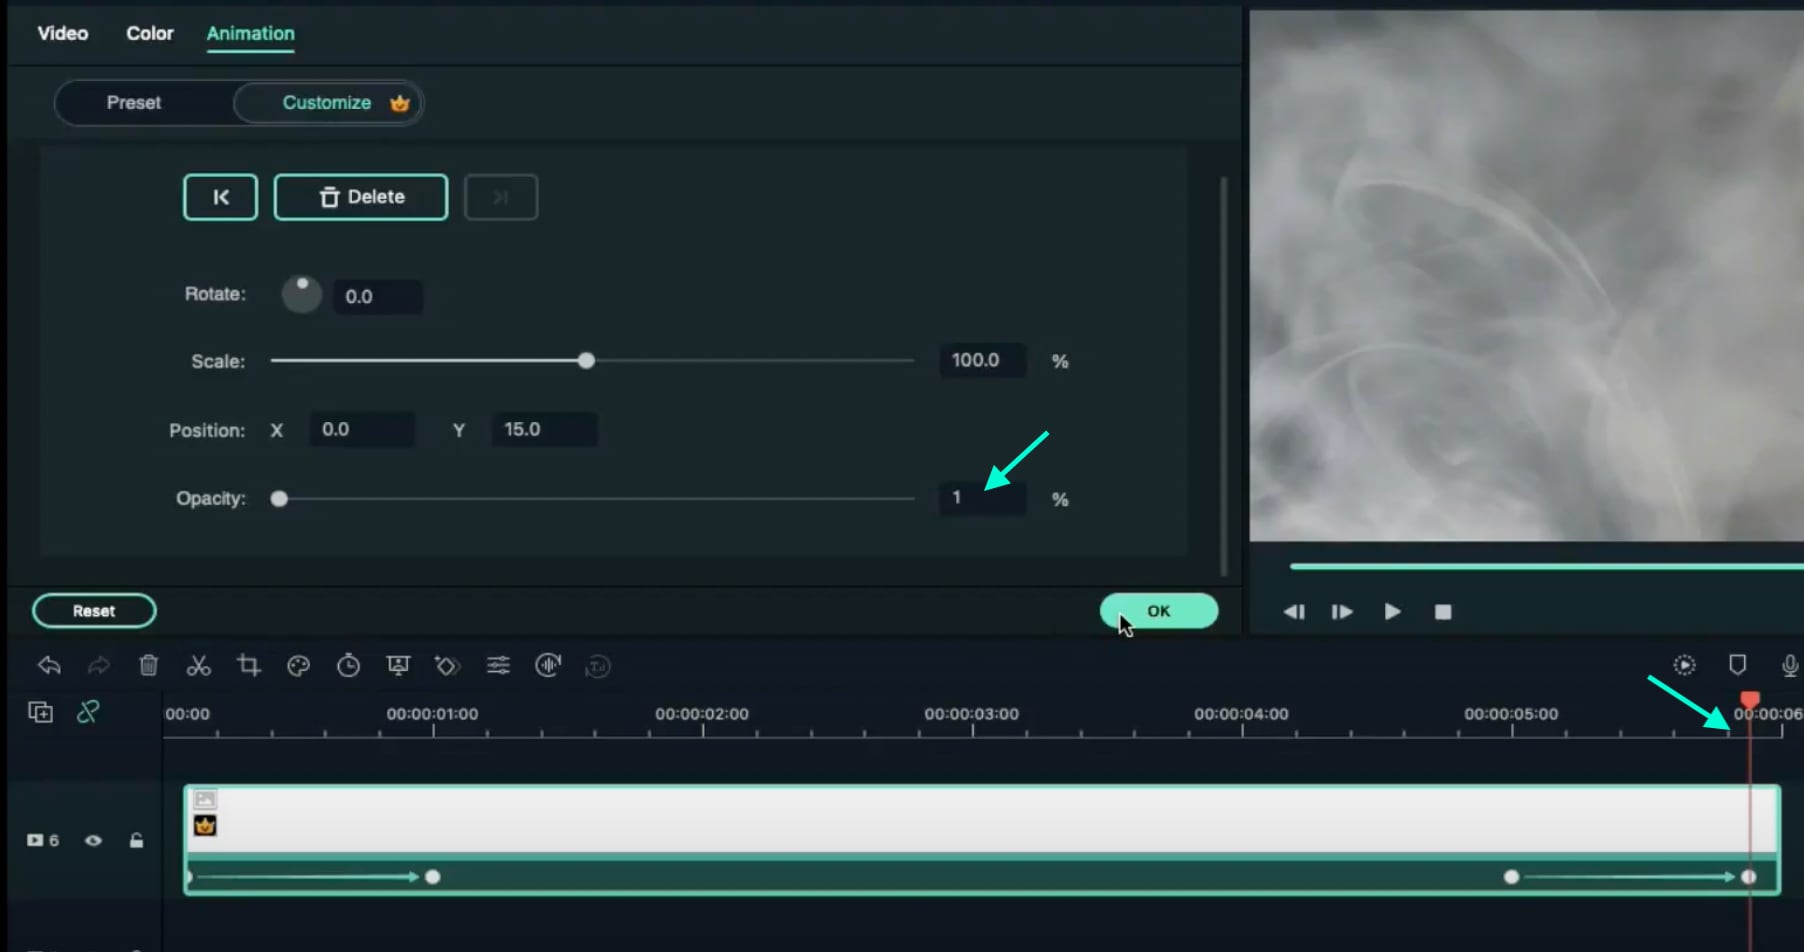
Drag another White Sample Color to Track 5 this time. Adjust its duration and starting point to be the same as the clip above it. Double-click on it → go to Video → Mask → Import. Here, select the flipped text Snapshot we created earlier.
Now, go to Animation and add a keyframe at the starting point. Then, compress the text on the preview screen exactly as we did before with the other one. Then, add a keyframe at the 1-second position of the clip. Then, adjust the Y-axis position to create a reflection effect, just like this.

Move the Playhead to the 5-second position and add a keyframe. Now, move the Playhead directly to 5-seconds and 22 frames. Here, reduce the Opacity to 0%.
Go back to the Video tab from the upper-left corner of the panel. Now, move the Playhead to the clip’s starting point. Select the Mask tab. Add a keyframe. Move the Playhead to 1 second and set the Blur Strength to 6%.

Move the Playhead to 3 seconds. Scroll down and set Vertical to 259%. Set Y-axis to “-157”. Then, increase Blur Strength to 25%. Click OK.

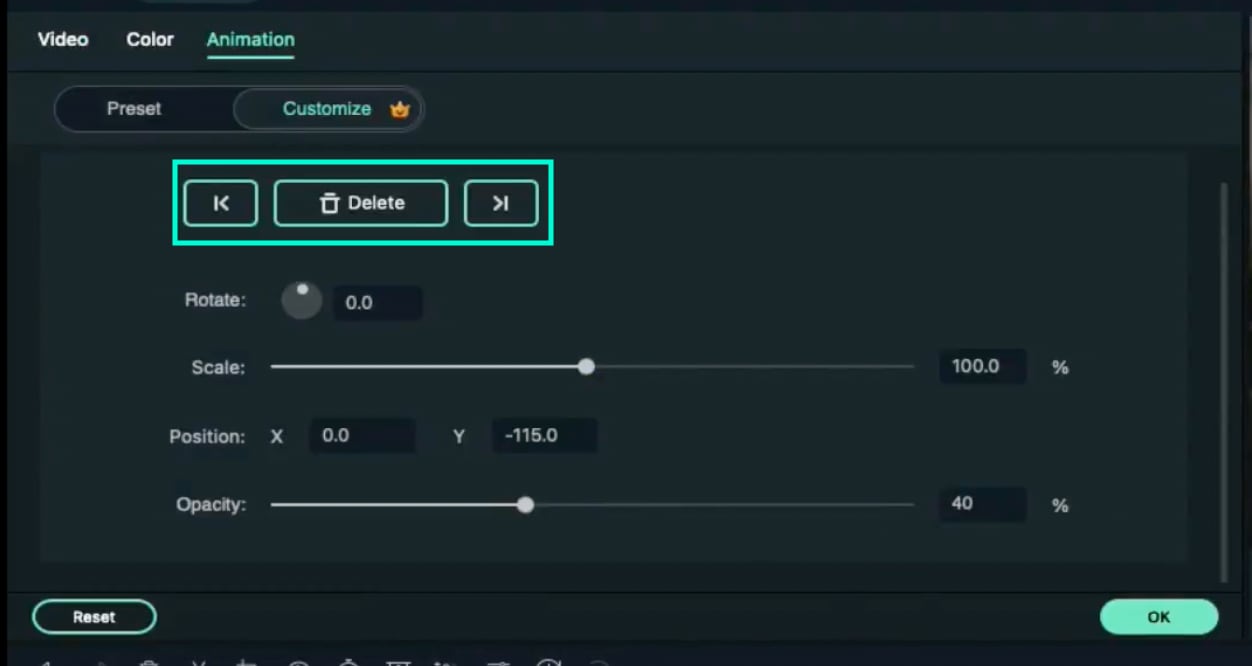
Click on the Sample Color in Track 5 and change the Opacity to 40% for the second and third keyframes. You can move between the keyframes on the arrows highlighted below. Click OK.
Go to Sample Color and drag the “Gradient 4” color to Track 7 on the Timeline. Allow this clip to start from the very beginning and adjust its end time to be the same as all the other clips.
Double-click on the Gradient 4 clip → go to Video → Basic. Change the Blending Mode to “Soft Light”. Reduce the Opacity to 42%. Click OK.

Go to Project Media and drag the white smoke clip on Track 8. Place the Playhead at the starting point and double-click on the clip.
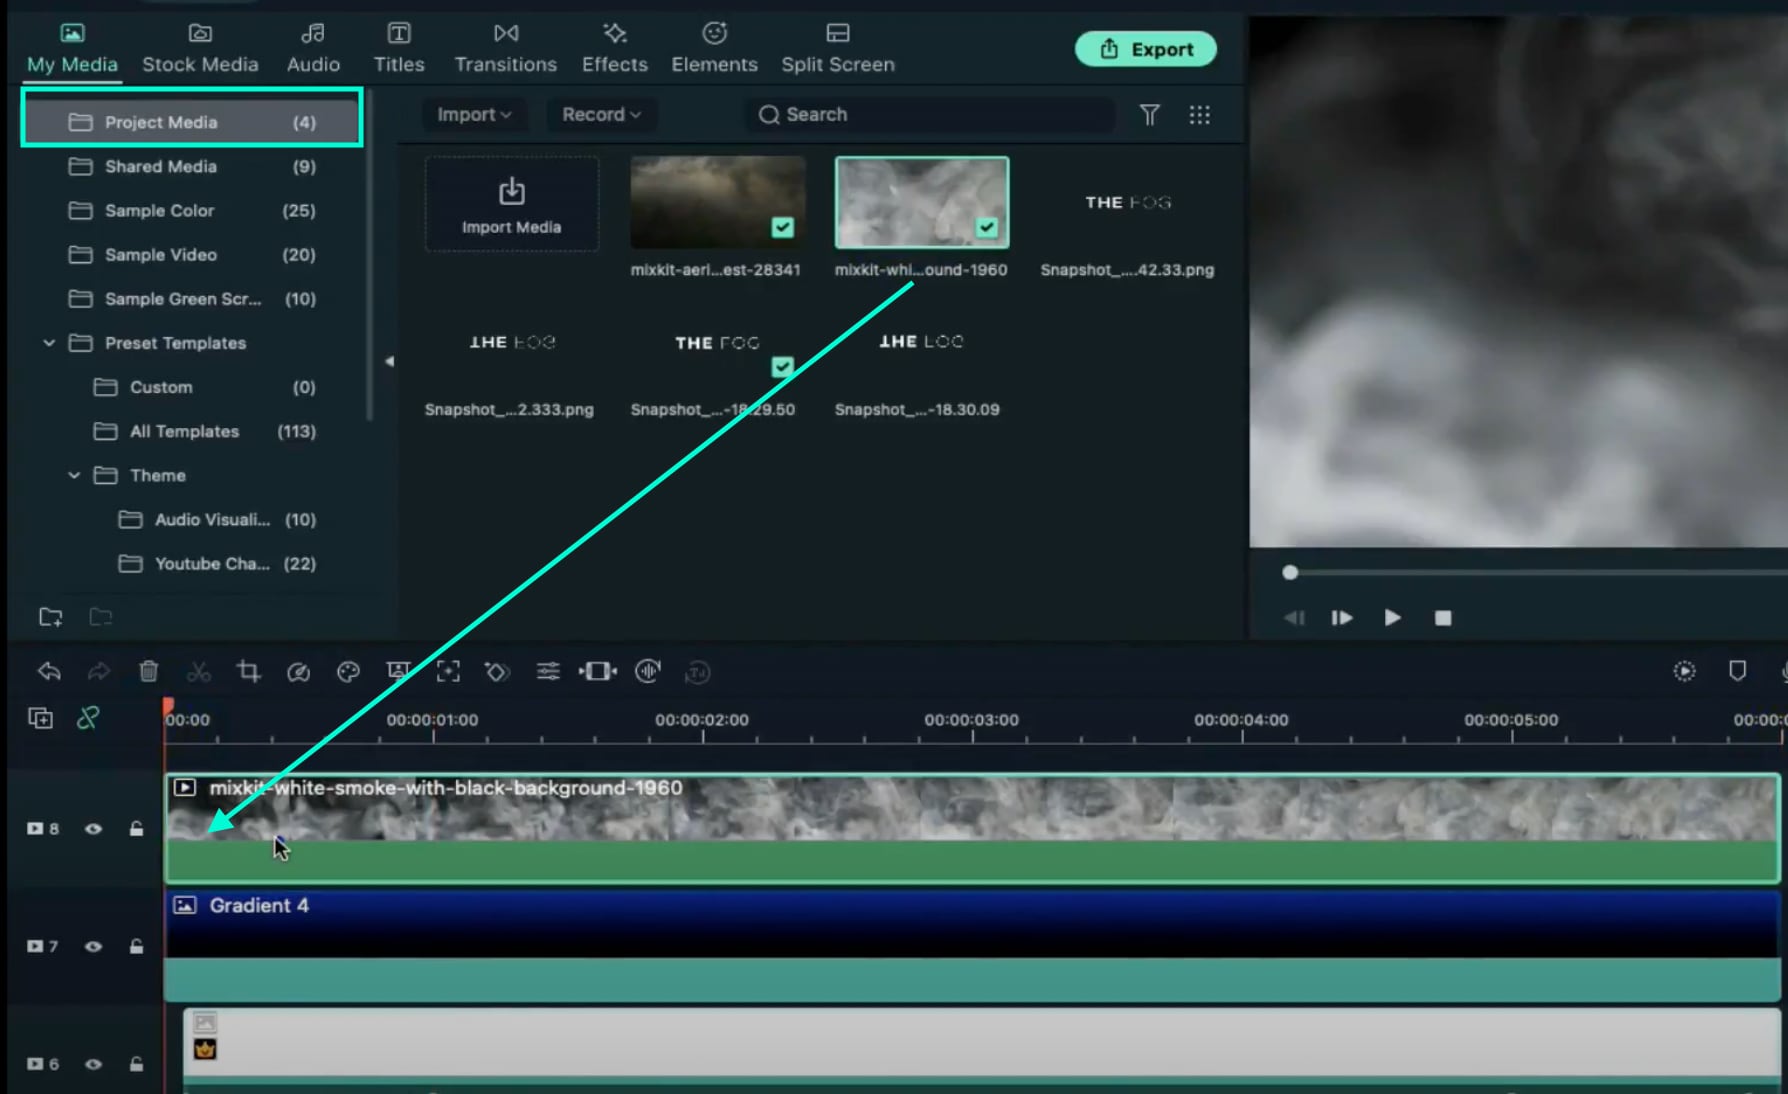
Change its Blending Mode to “Screen”. Go to the Animation tab and decrease the Opacity to 0%. Move the Playhead to frame 10 → increase Opacity to 12%. Move the Playhead to the 5-second position → add a keyframe. Then, move the Playhead at 5 seconds and 23rd frame → increase the Opacity back to 100%. Click OK.
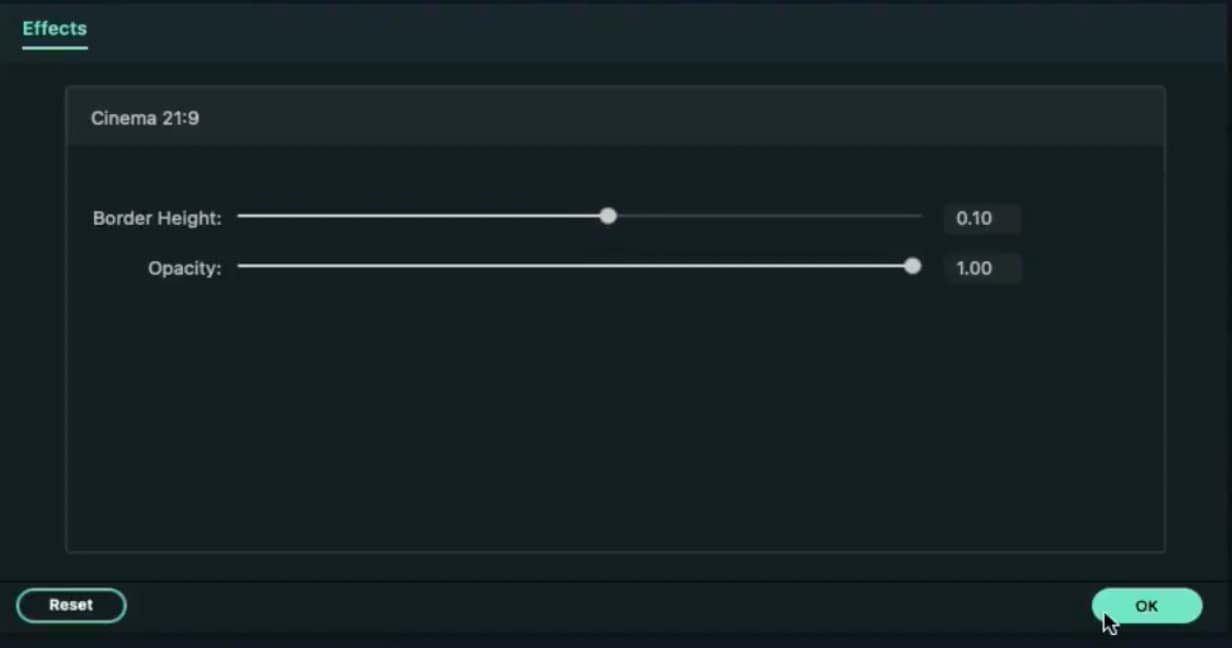
Go to Effects and drag the Cinema effect to Track 9. Adjust its duration to match all the other clips. Double-click on the clip and increase its Border Height to “0.10”. Click OK.
Finally, Render the video and watch the final result. You’re done! Congratulations on resting a foggy text reflection effect in Filmora.

What you've learned:
- Create a foggy text reflection effect in the Filmora video editor
- Add and adjust keyframes to clips
- Edit and customize text
- Take and edit snapshots


Speak Your Mind