Transcript
The demo of the video as the effect will look like the video is being recorded underwater. As shown in the demo. To use this effect, we are going to use the Filmora editor for making it handily.
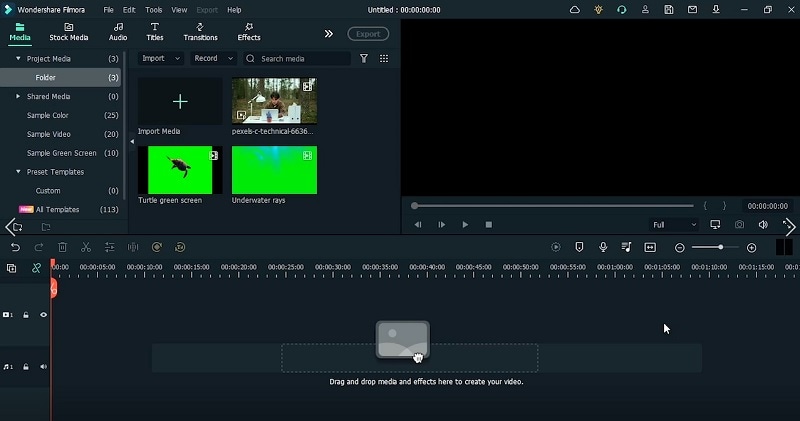
Choose video that catches your daily work routine and make sure you record it in a decent place and then jump into Filmora and add your videos to the software.
Drag the video to the timeline and preview it into the window. Make sure you have the main video recorded as per the instruction so it will be easier for you to make this effect using Filmora features.
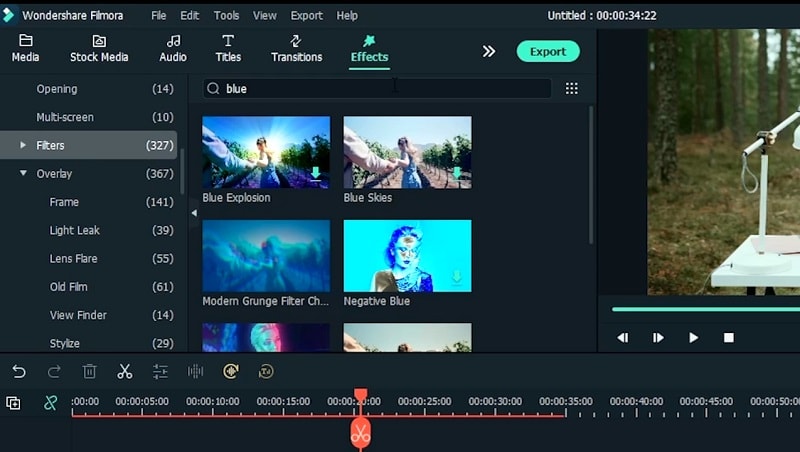
Go to the effect menu and use the Search menu to type in Blue and add the blue effects to your video. Select your favorite effect from the list and add it to the timeline. You can then adjust it by double clicking on the effect.
Then add the Blue Skies effect to the video within the timeline. You can now make it match the duration according to the main video so it will cover all the frames of the video to the end.
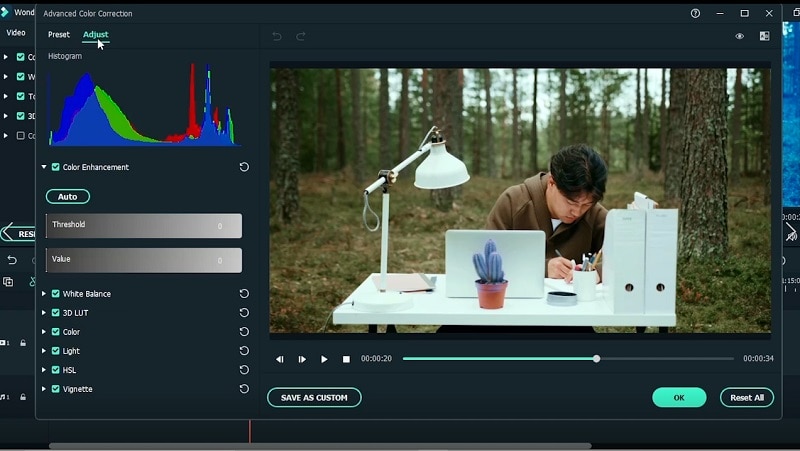
Customize the video using the Advanced color correction window. Go to color and use the Advanced button from the window. This will open up the new window with the advanced level color settings.
Go to adjust and add the color settings as per your video. Make sure to use the Exposure, Brightness, Contrast and preview the video accordingly. You can then finish the color editing by hitting Ok.
You can also adjust the Intensity of the top color effects by double clicking on the effects in the timeline. This will open up the Effect customization window and from there, move the Intensity slider to make the effect look epic.
In order to add filters to the video, go to the Filters to add the SinCity effect to the video and put it underneath the effect that you previously added. Customize by sliding the intensity of the effect.
Type in the water in the search box and add Water effect on top of the video tracks and adjust the way the video looks. Adjust the sliders using the realistic touch to your video. Use the Opacity slider as well.
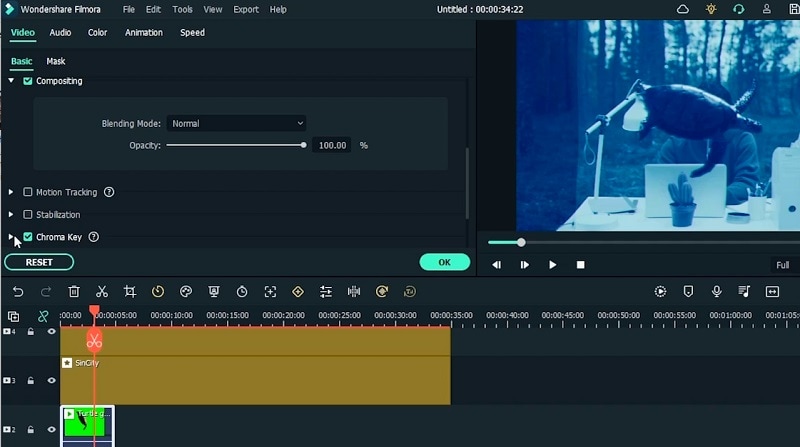
Move the effect above one track and add the next media to the timeline. Use chroma key feature by double clicking on the video and enabling Chroma Key. This will remove the background from this new video that you just introduced.
You can use the Mask to adjust the object video. However, add it in order to put it behind the original video. If you want to bring it above the main video then leave it as it is.
Add another object video from the Import Media Folder and add this to the timeline as well. Add the Slow speed function to adjust it match the duration. Also use the Chroma key to remove the background.
Trim the video and all the other effect and et rid of the extras. You can add more videos to the timeline. Make sure to re-scale the video to cover the entire frame.
Doble click on the added video and change the Blending Mode from normal to screen. This will isolate the subject from the video. You can preview the video now in order to make sure its epic.
Double click on the video to change its position and bring it to the idle position. You can preview the change and make sure the video looks realistic. For any ambiguities, make sure you correct it on the go.
Lastly, add the mask effect to make it look realistic. Put the single line mask on the object video and place it above the main video. Use the Blur strength to blend in into the video. That’s it and you can now preview your final effect video.
How to Make Rain Underwater Room Effect
What you need to prepare:
- A computer (Windows or macOS)
- Your video materials.
- Filmora video editor
Record the Footage
To begin with, you need some recorded footages of your character that will be then transformed to the Under water using the Filmora effect. To record your footage, make sure you choose a work-style place and perform some daily work routine tasks. This will look natural in your final effect video.

Download and Install Filmora
Now you need Filmora to take the lead from here. With Filmora, creating this effect is a handy task although it seems complicated. Refer to these links below to download and install Filmora to your PC. Launch the software once the installation is finished and you will be prompted to the following starting screen as shown here:

Import the Footages
As you’ve launched Filmora, go to the Video Editor. Now you need to add your recorded footage so you can start editing it. Hit the Import button icon and then select the footage from your PC. It will then be added directly.
Add Blue Sky Effect
Drag the footage to the timeline and then go for the Effects menu section to add some effects to the video. Search for Blue sky effect in the menu bar and then add it within the timeline to adjust the duration of the effect to the main video footage.
Use Advanced Color Settings
You can adjust the colors of your video. Double click on the effect you just added and then go for the Advanced button within the Editing window. This will open up the advanced level color editing window where you can do the color correction manually. You can also use the graph and adjust the colors of your video easily.
Add and Customize SinCity Effect
Go to the Effect menu and type in SinCity effect as shown here. This effect will make your video look like under the water with layering to and fro. After you introduced the effect to the timeline, double click on it to customize the intensity of the effect. Make sure you use the slider to adjust the effect.

Use Chroma Key
If you want to isolate the object from the background then Chroma key is your best bet. Enable the Chroma Key from the timeline and drag it on the object icons that you imported to the editor. Make sure to customize the Chroma Key as per the object background as shown here:
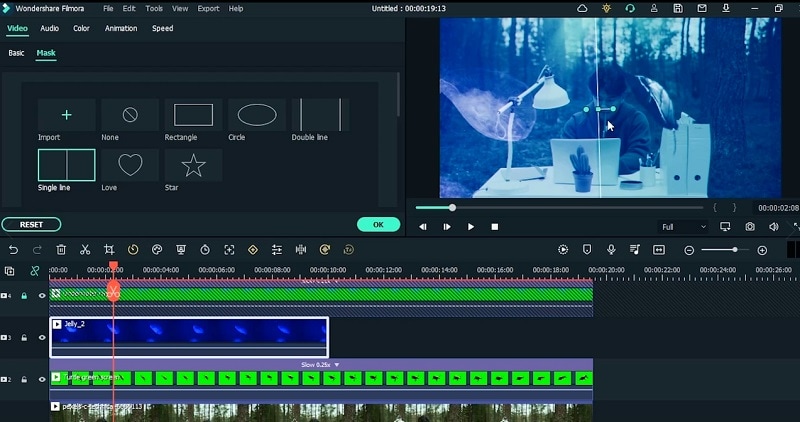
Add Masking
Use line mask to mask out the object from the background. To do this, go to the video editor and then Mask section to add preset mask from the list. Select the Line mask so it will affect the object in line only. Then you can increase blur strength to make it look realistic. Afterwards, re-position the Video Elements by dragging in the preview window.
Preview and Export Water Video Effect
Lastly, when everything is in place, now is the time to export your Under-water effect video. Preview the video once before rendering and then hit the Export button to share it across the platforms.

In a nutshell, creating underwater video effect is not illusionary anymore. You can always spruce up your room footage to add the underwater scene to it. However, this is all due to the features that Filmora provides. So, download and install this software and be creative with your recorded footage.


Speak Your Mind