Transcript
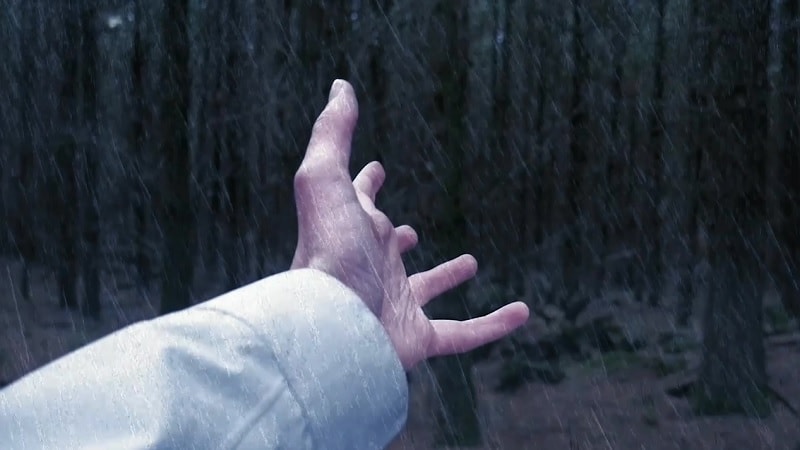
The demo of the effect where the video is shown with the pre-recoded footage. Make sure you’ve the recorded footage renames as the base video so it will be easy to spot-on the main video in the upcoming sections.
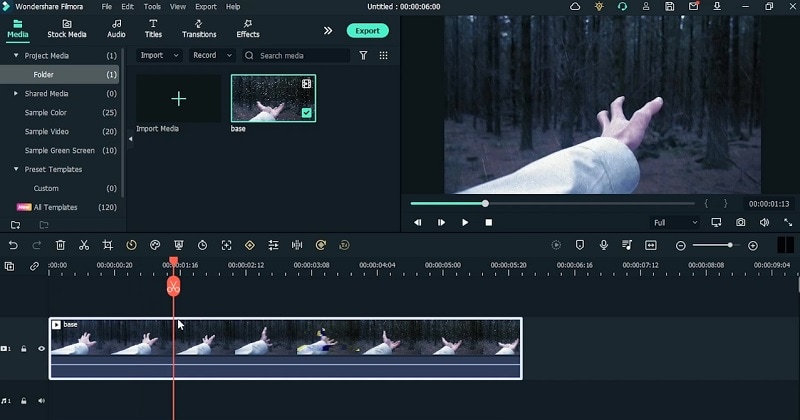
Launch Filmora and open up the Video Editor. Import the base video to the program and bring in the video to the timeline below. Now you can preview your base video in the preview window.
While you are previewing the video, hit a Pause where the arm is clearly visible in that video. At the same instance, add the base video one more time in the above video track so it will have the same frame of both the videos.
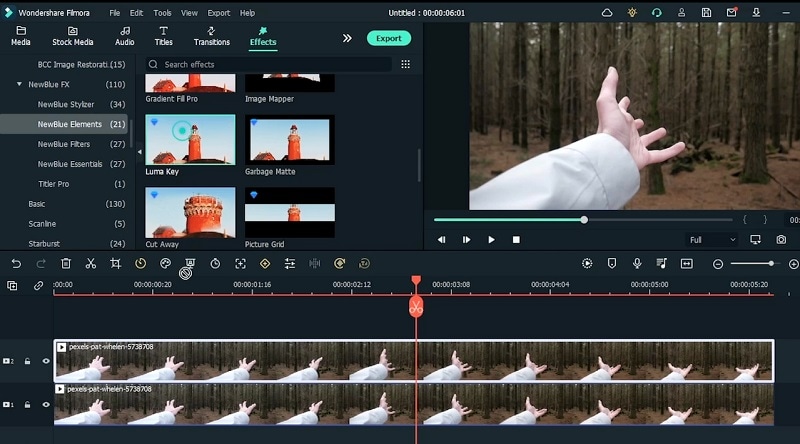
Go to the Effects to add Luma Key Effect and make sure to add this on the top track. Double click on the video and go the Effect section to customize the Effect. Use the Threshold slider to adjust the background image.
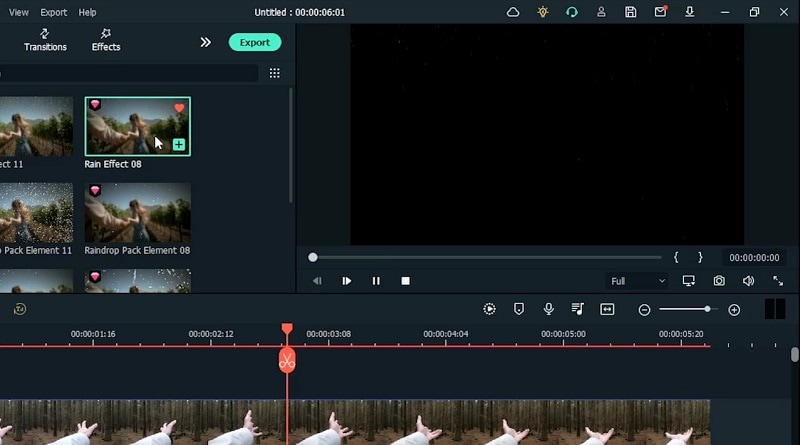
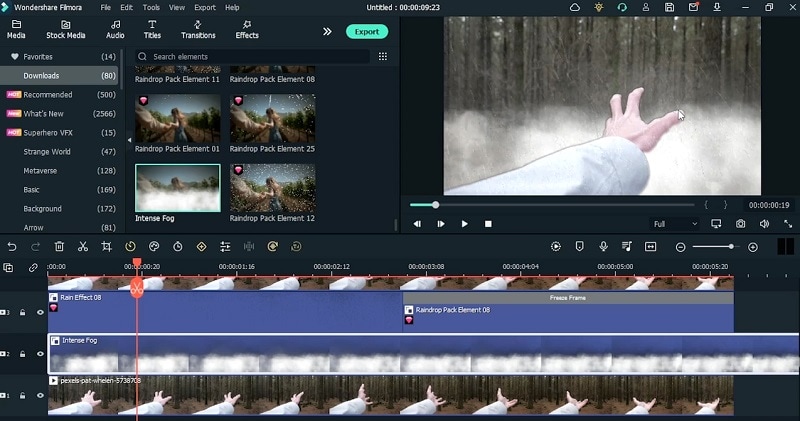
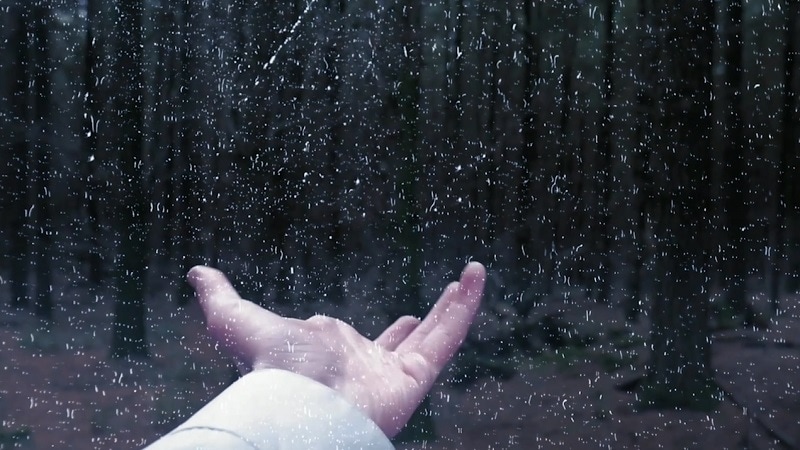
Go to the Elements menu to add rain effects. Go to the menu and use the Rain Effect 11 and Rain Effect 08 on the timeline. Preview the video to check it is behind the arm and not on above the hand.
Go to the Effect and flip the effect to make the rain effect in the one direction only. This is to correct the rain drops movement that is abrupted with the inclusion of another rain effect.
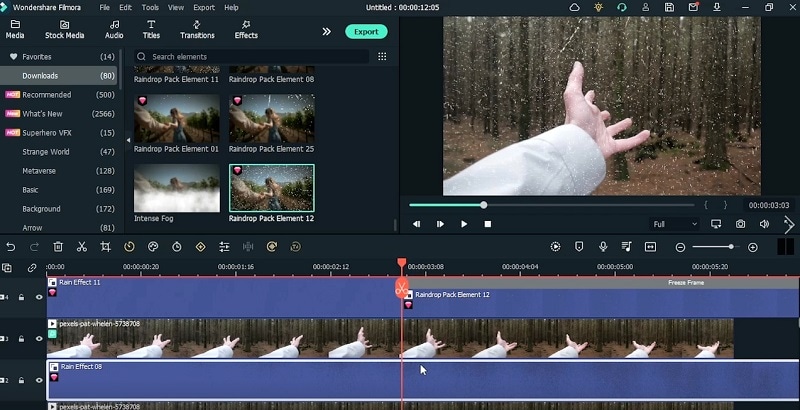
Right where the effect is visible clearly, make a cut on the rain effect using the Split key and get rid of the second half. Drag another effect element Rain Drop 12 to the timeline and customize it accordingly.
Find out when the rain drops show up and freeze the frame right over there. Get rid of the other part of this element effect. Repeat the process for the other video effect as well. Freeze the frame where the drops are clearly visible.
To add the forest effect, drag the video tracks one step up to make a space for effect track. Now go to the effects menu and add the fog effect from the effect list. Customize by lowering the opacity to make it look more realistic.
Add another fog effect on the top video as well. Double click on this video now and go to the Effect section where you can customize the Opacity. Use the Opacity slider to lower the effect’s opacity to this video as well.
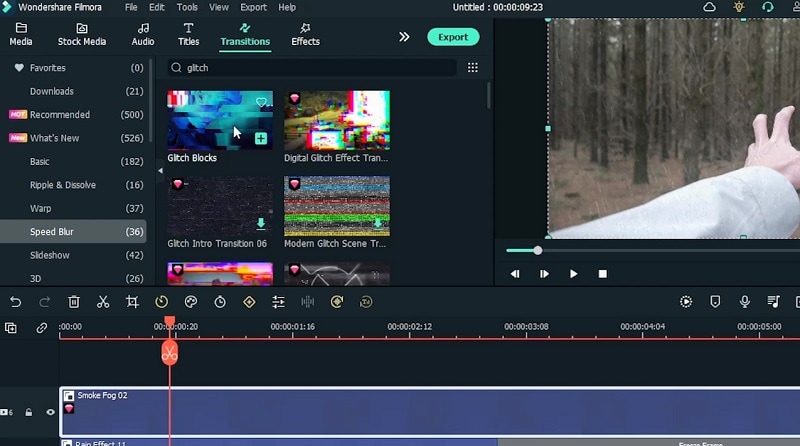
Go to the transition menu and type glitch to add the glitch transition between the two clips. Make sure the duration matches with the other tracks so it won’t affect the main video preview.
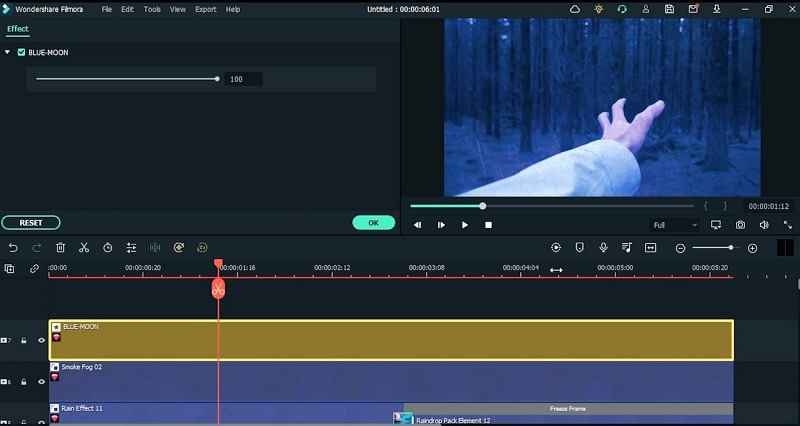
To finish off, add some color grading effects as well. Type in Blue and add the favorite effect to the timeline track. Adjust the blue from the footage. Also add the Dark Film to customize it further.
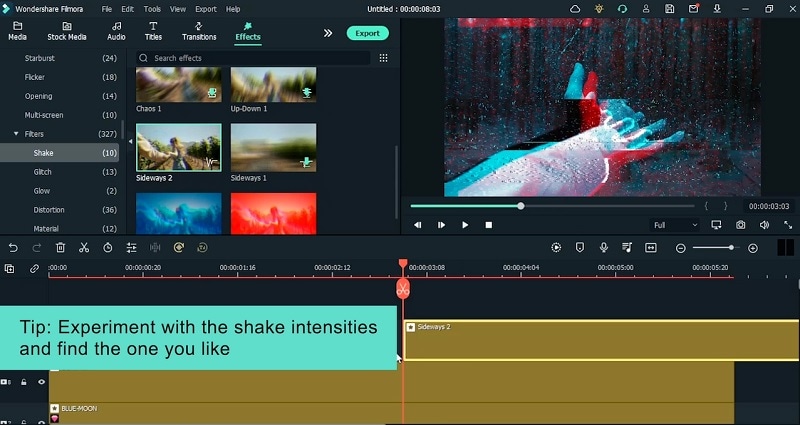
As soon as the glitch effect is started, go to the Filter section to add sideways shake to the other hand video. Make a cut when you want this effect to end and adjust it accordingly.
Export the current video and create a new project in the similar window. Now add the base video to the timeline and then customize the project.
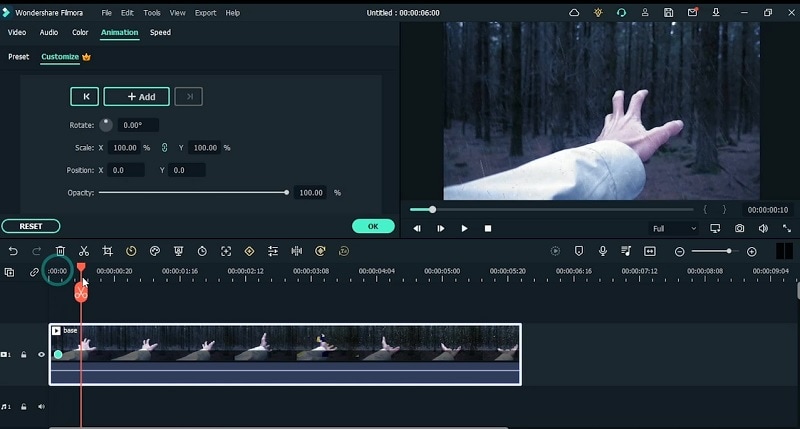
Add animations to create the keyframes to change the scale, rotation and the position of the hand. You can then customize the keyframes to match the movement to the camera movement and then hit Ok once you are done with the customization.
Right before the rain effect shows up, add another keyframe using the Add button and add another keyframe at the instance where the effect is finished. Now double click the video to adjust the animation key frames. Customize the scaling and the X, Y axis of the effect.
Add the customizations until you’re done with the final aim of your effect video. Preview the final video and make sure you do not miss your favorite effect that you want to use in your final preview video.
How to Make Rain Stop Video Effect
What you need to prepare:
- A computer (Windows or macOS)
- Your video materials.
- Filmora video editor
Get the Pre-Recorded Video
To start the process, you need a pre-recorded video footage of the hand. You can record on your own as shown here and then head towards the Filmora to kickstart the editing process.
Launch Filmora Editor
Visit the official site to download the latest version of Filmora and then install it right away. After installation is finished, launch the software and hit the Video Editor button to open up the editor as shown here:

Add New Blue Elements
Import the video to the software and then drag it to the timeline below. Make sure to add it one more time in the separate track for smooth editing and then go to the Effects menu to select the New Blue Elements from the list. Drag the Luma Key effect to the video. You can then customize and set See Through Shadows preset as shown here:
Add Rain Effects
After that effect, search the rain effect and add Rain Effect 11 to the top video track. Similarly, add the Rain Effect 08 underneath the main video within the timeline as shown here. Then you need to add another on top of the key effect and your video will look like this:
Add Rain Drop Elements
In the next step, go to the video and right click on it to go to Speed menu and add Freeze frame from there. Now, to get the rain drop element, this will freeze the main frame of the video and you can customize the effect hassle-free.
Add Fog Effects
Similarly, go again to the Effects menu and from there, search for the smoke effects. From the results, add Smoke Fog effect to the video within the timeline and double click on it to customize it further. You can also change the duration of the effect so it will show up according to the video.
Add Glitch Transitions
Go to the Transitions menu and type Glitch in the search box. You will then be able to choose Glitch Blocks Transition from the list and drag it to the elements within the timeline as shown here:
Add LUTs
To make your videos look epic, you can introduce LUTs to the video. Go to the Effects menu to add blue effects initially and then go to the LUTs section from the list to insert LUTs over the video. This will color correct the main video as you can preview it accordingly.
Add Filters
Now visit the Filters menu and add Sideways 2 from the Shake menu bar inside the Filters. Double click to adjust how much shake you want into the video. You can also edit this filter to further settings.
Export and Re-Import Base Video
Now to simplify the task, export the edited video to the PC and then add the base video to timeline to edit it further.
Add Keyframes
To adjust the framings of this base video. You can add Animations in form of keyframes. Add at different frames such as when the effect is started and when it is finished. Hit Ok once you’re done with the video.
Preview and Save
Finally, when you have done the editing, preview the video one final time and then hit the Export button to take it to the platforms of your choice. You can also share right away but make sure you have previewed the video to point out any mistakes within the main video. Then go ahead and export it to your desired location.
In a nutshell, editing your footage to make a customized rain stop video has never been this easy! Introduce Filmora for the simplicity and then kickstart the editing journey on the go!
