- Home
- DIY Special Effects
- Special Animated Transition Tutorial【SUPER EASY】
Transcript
Preparation: To top with, let's import the footage into Media. Drag the first footage to the timeline, move the Playhead to find the frame where you want to start transition. Take a snapshot of it, then split the footage and delete the rest part.
Drag the snapshot to the timeline and change the duration.
Now go to this URL: https://www.piscart.com/photo-effects/photo-to-cartoon. Upload the snapshot you made before and apply comic pre-set on it.
Export, download, and import the created image. Drag it to the timeline and change duration to 1 second. Repeat what has been mentioned above to the second footage.
To match the length from the previous snapshot, drags the normal snapshot to the timeline, match the length from the previous snapshot and attach the footage.
Now go to transition tab and place colour distance transition between the first snapshot. Right click Edit Properties, change duration to 1 second, place Transition between next to snapshot.
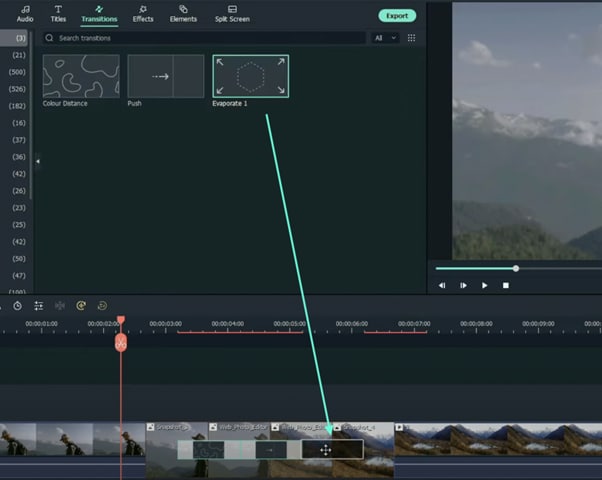
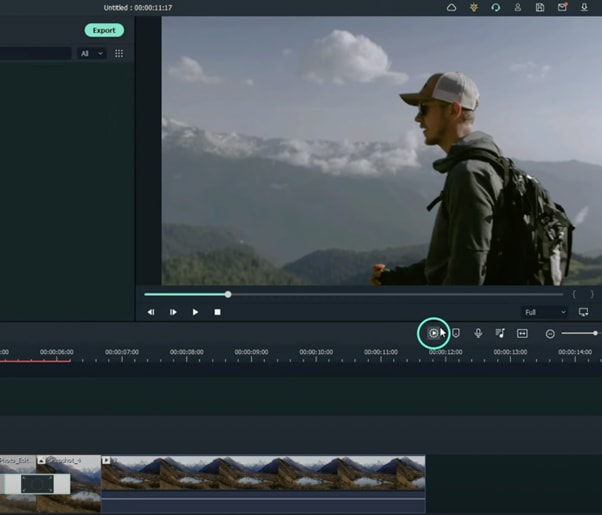
Finally, place Evaporate Transition between next to snapshot. Edit properties, change the duration, and place transition like this. Render it and we can see the preview.
Special Animated Transition Tutorial【SUPER EASY】
What you need to prepare:
- A computer (Windows or macOS)
- Your video materials.
- Filmora video editor
First off, download the Filmora video editor. After it downloads, click install and follow the provided steps.

After installing, the editor will start automatically. When it does, click on the “New Project” button to finally open the editor.

From the upper-left side of the screen, click the highlighted text to import media. This is where you insert your video files into the editor. Once the folder opens, select the videos you want to import and click “Open”.
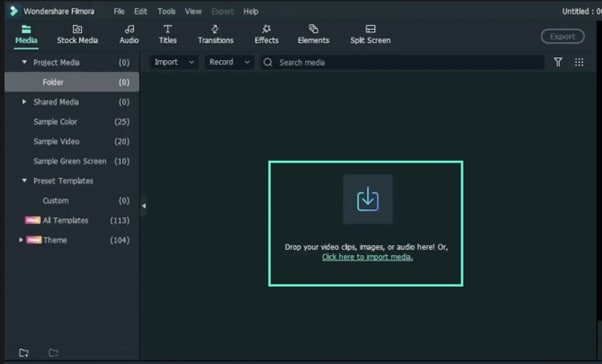
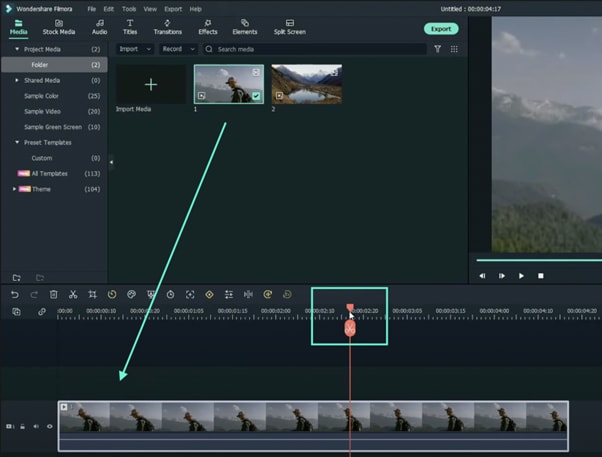
Drag your first clip to the timeline. Then, move the Playhead to where you want to start your transition.
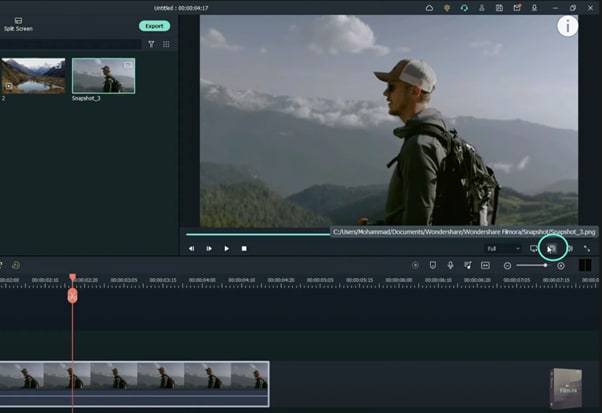
Take a snapshot of this frame.
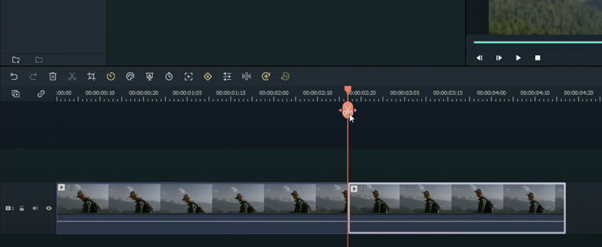
Split the footage and delete the part on the right side of the Playhead.
Without moving the Playhead, simply drag the snapshot you took earlier. Right-click on the snapshot in the timeline and click on “Duration”. Then, set the duration to 1 second. Finally, click “OK”.
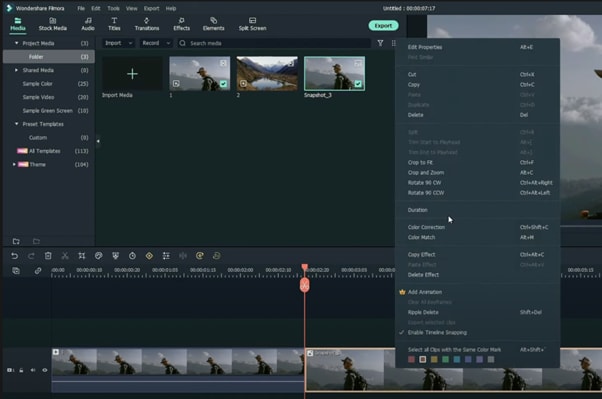
Open your browser and go to the Picsart photo effects editor. Upload the same snapshot we made in Filmora and apply the “Comic” preset on it. Then, download the photo and import it back into Filmora.
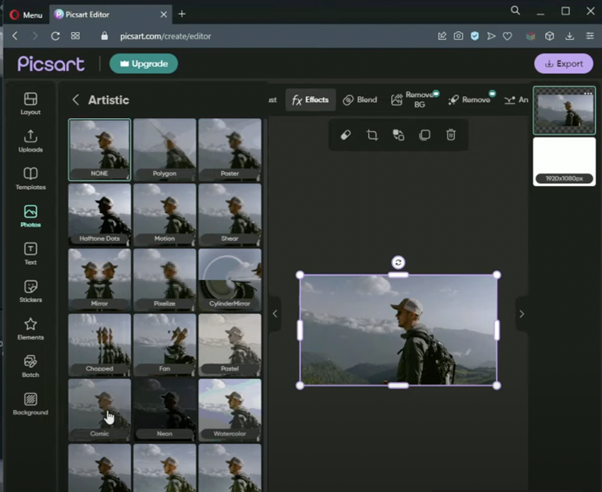
Drag the snapshot with the Comic preset to the Timeline and set its duration to 1 second as well.
Repeat the same process with the second clip. Take a snapshot, add the Comic effect, and import it back into Filmora. But this time, align the clips as follows: Add the snapshot with the comic preset first, then the snapshot without any effects, and then the video. It should look like this.

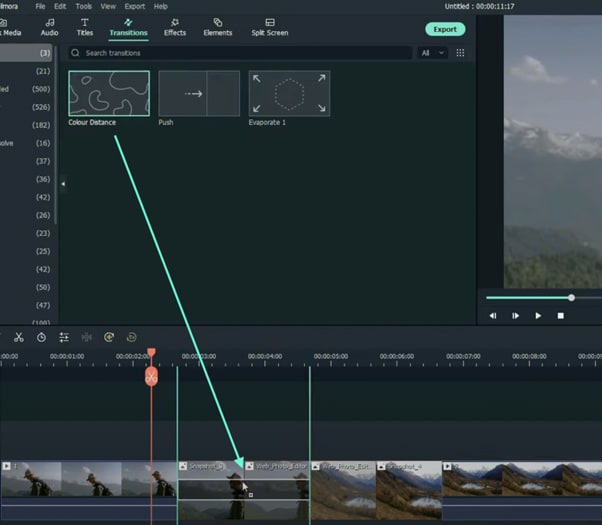
Go to the Transitions tab and drag the “Color Distance” transition between the first and second snapshot on your Timeline. Then, right-click on the transition box in the timeline and select “Edit Properties”. From there, change the duration of the transition to 1 second and click “OK”.
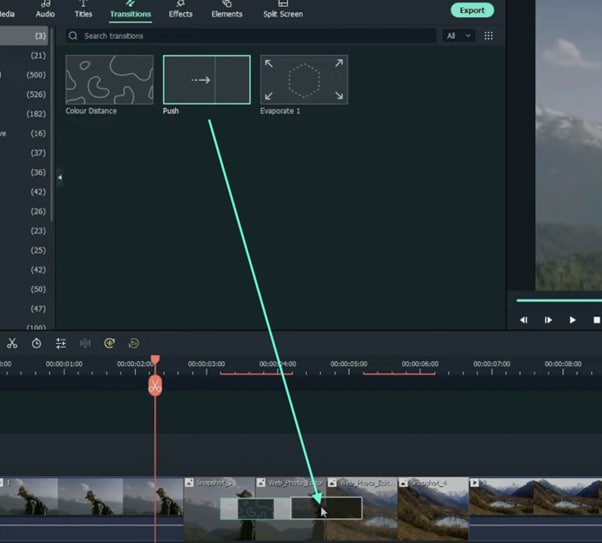
Drag the “Push” transition between the next two snapshots. Set its duration to 1 second as well by right clicking the transition and going to “Edit Properties”.
Place the last transition between the last two snapshots in your timeline. This time, we’re going to use the “Evaporate” transition. Set its duration to 1 second as well.
The final step is to render the video. Click this button and you will finally be done.
What you've learned:
- How to add any type of transition to video clips and images in Filmora
- How to take quick snapshots of any frame in Filmora
- A quick way to Render videos and watch the final preview
- Add custom effects to images


Speak Your Mind