Transcript
The equipments requirement for using this superhero effects are camera and a set of videos. It includes two videos, one of which is the scene video and the other one is jumping video of the character.
To make the effect, use the Filmora editor and launch the software to import both of these recorded videos to the software. After the import, add the background video into the timeline.
You can adjust the background video according to the scene and add another video on top of background within the timeline. This will make the scene video below the main character video.
Spot the frame where the main character is jumping in the air. For that, preview the main video of the character and spot the point where the character is in the air.
Make a cut of the both the scenes of the character where the person is in the air and where the person is landing on the ground. After spotting both the scenes, split the video featuring those frames and separate it from the main video.
Choose the frame where he is off the ground and freeze the frame. Make sure to freeze the frame at the right spot i-e., where the character is in the air and then use the freezing function on the video.
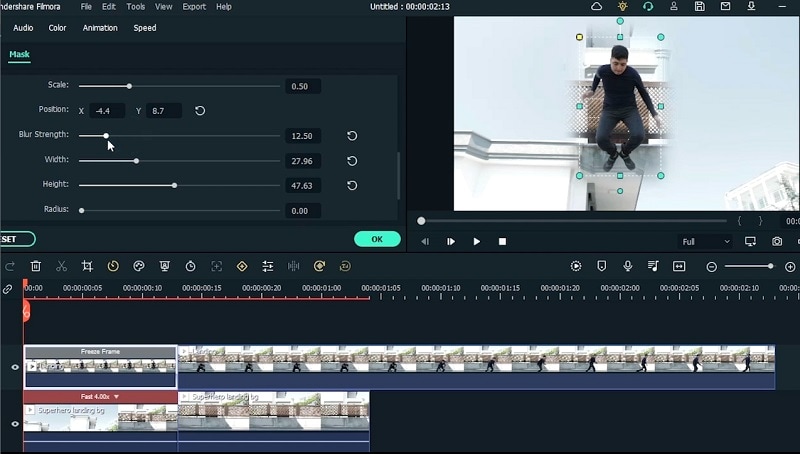
Mask out the access area around the subject. Visit the mask menu from video editor and from there, Grab a rectangular shape mask from the list. Drop the mask to the scene video and it will appear on the character that is jumping.
Blur the edges and adjust the width of the mask as well. The main character will be blurred a bit but it will be okay afterwards. Make sure it does not disturb the main character footage.
The mask shape will make the character video as an oval shape. Preview the oval shape of the subject and make sure there is no ambiguity within the main video that is going to be used for the effect.
Remove the added mask by using the animation keyframes. This will show the character falling from the sky. You can customize it either in upward or downward direction using the Animation keyframes.
Speed the animation for a faster movement by using the speed feature within the video. Right click on the video in the timeline and select the Speed from the list. Add a 2x or even 4x to the speed and preview it for a better experience.
Match the videos together using the animation keyframes. For that, use the keys to adjust the sliders of the keyframes and preview it accordingly. This will match the video duration for the keyframes as well as faster.
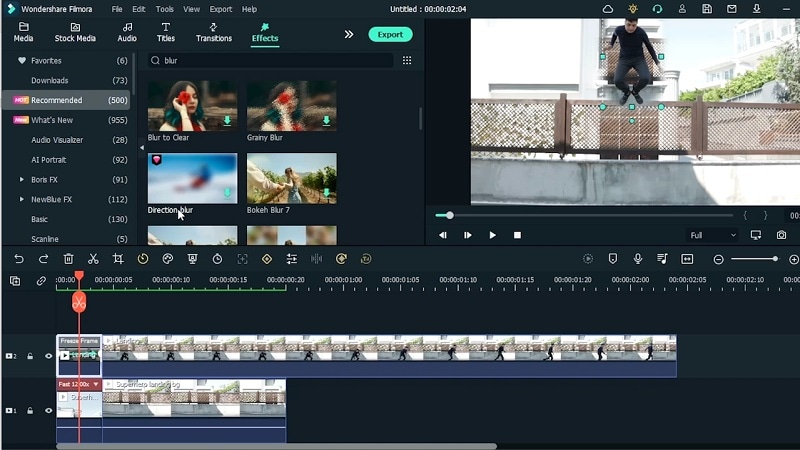
Blur out the subject while it is approaching the ground. Use the effect menu to include the blur effects. Use the Direction blur from the list and introduce it to the timeline on the video.
Intensify the effect by adding multiple versions of the effect. Adjust the effect from the menu and you can have it motion blur introduced to the main video. Preview the video.
You can slim the mask, as well as adjust the width, height, radius of the mask. For an even better experience, make it look realistic by adjusting the blur effect according to the masking. Hit Ok button afterwards.
You can also add some additional graphics as well. In order to do that, go to the elements menu and use the dust effects from the list. Drag and drop the effect from the elements and scale it up to the subject.
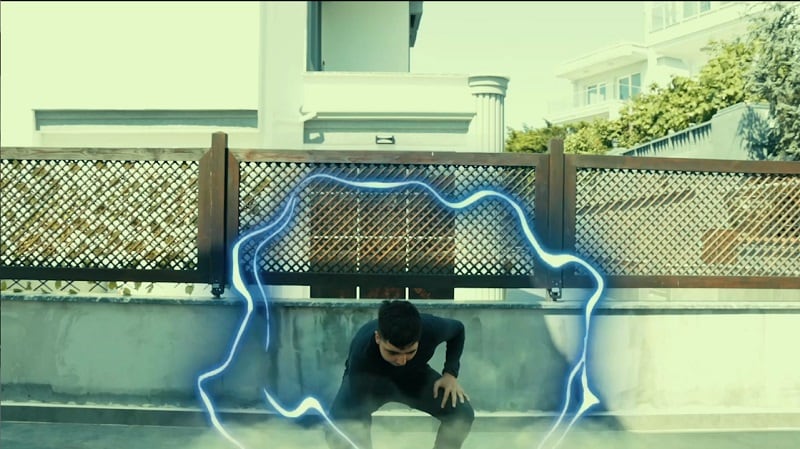
Now within the timeline, add up the smoke element to the main video and also add the electricity effect from the elements list. The electricity effect will add superhero effect on the character video that is falling from the sky.
Use the animation keyframes values to align it precisely into the main video. Note the keyframe values from the animation section and use them within the effect customization section as well. You can also LUT effects that will color correct the main video.
How to Make a Meme with Superhero Meme Effect
What you need to prepare:
- A computer (Windows or macOS)
- Your video materials.
- Filmora video editor
Record the Videos
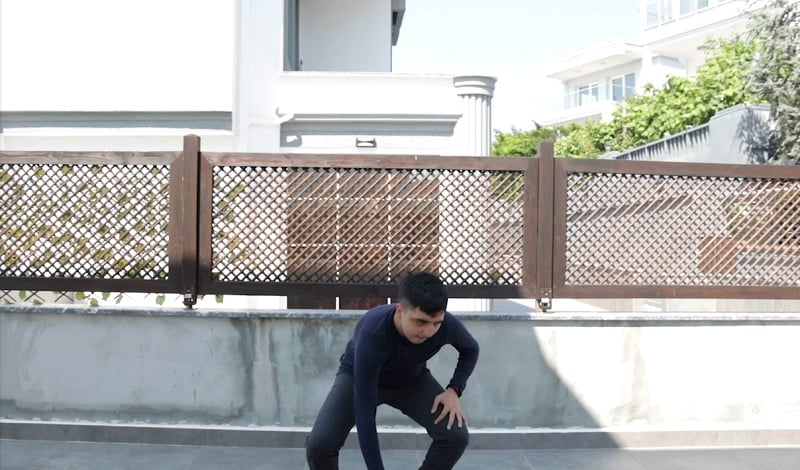
To begin creating your own effect, you would be required to have your prerequisites ready. Select a suitable spot like a top of a building and record the videos of your main character with the background.
Download and Install Filmora
Now download the Filmora editor because this will be your main component after the video recordings is done successfully. Downloading and installing Filmora is also easier than you thought. Just visit the following links to download for your PC version and after that, install the Filmora using the Default settings.
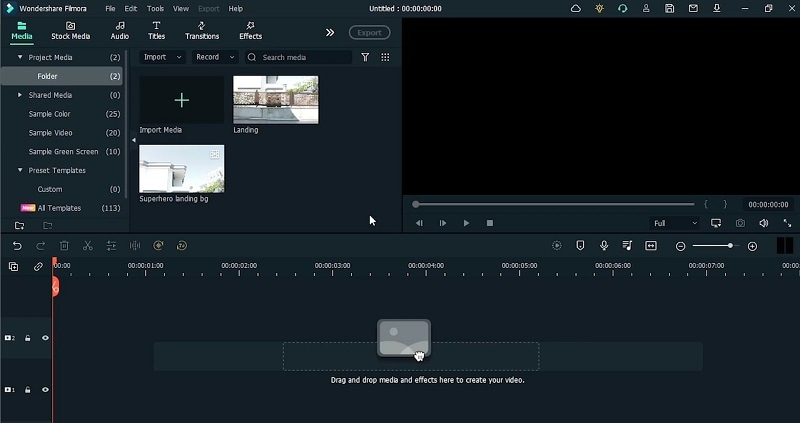
Import the Video to the Filmora
Once finished installing, launch eh Video editor and hit the Import button to add your recorded videos to the Software. You need not to worry about their formats as Filmora has a large format support.
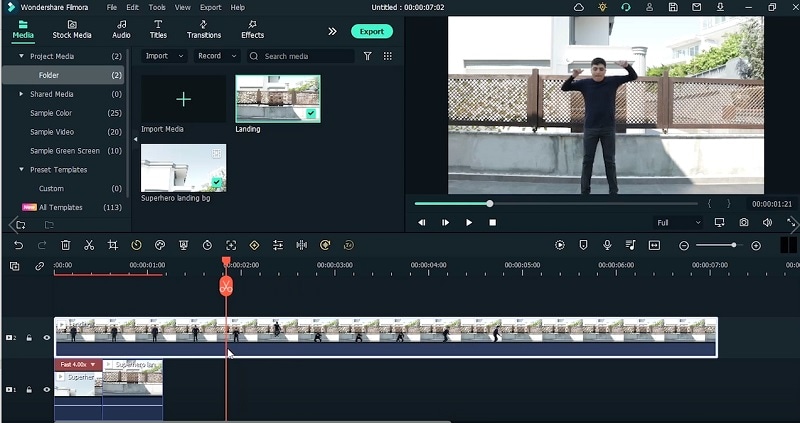
Drag and Customize the Scene Video in the Timeline
In the next step, drag your imported videos to the Timeline situated below and then adjust the videos in order to split the video for a better preview. Make sure you also freeze the action frames so you can add the Superhero effect to the video later on. You can speed up the video as per your requirement.
Use Masking to Adjust the Main Video
Now as you’ve adjusted your video within the timeline, add the main video to the timeline and place it on top of the background video using the Mask effect. You can use the Rectangle Shape of the Masking effect where you can also scale the masking area as per the feasibility.
Add Animation to the Video
After you’ve inserted Mask effect to the videos, add the keyframes of Animations to make it look realistic. You can do that by double-clicking on the video inside the timeline and then go to the Animation menu to add the keyframes of animation including softening of the edges as shown here.

Use Effects
In addition to the keyframes, you can also use the plethora of other effects to your videos including the Electricity effect and the Blur effects, wind effects, LUTs. These effects will give your Superhero effect video the cinematic touch and make it more appalling to the viewers.
Preview and Export
In the last step, when every effect is in place, make sure by previewing your edited video within the Preview window. Once you are satisfied with the result, Hit the Export button at the top and save your Superhero effect video on the go. In addition to saving, it offline, you can also share your video to online platforms such as YouTube, Vimeo and others. Make sure you are login to these platforms and hit the Export button afterwards.
To summarize the Superhero effect making process, we can say that it’s quite a handy task than one would have thought. You only need your recorded content with the perfect spot and Filmora to carry out the task hassle-free. Download the software for free and start making your favorite meme video on the go.


Speak Your Mind