- Home
- DIY Special Effects
- Text Animation Intro Tutorial in Filmora
Transcript
Firstly, go to the titles and drop the default title on the timeline.
Let's import the vignette PNG file, which you can download from any graphic website for free.
Go to the effects and drop square blur on track 4. Increase its duration and change the size to 4.
Drop the color snapshot on track 6, increase its duration, and place the play head at the starting point.
Now go to the titles and drop the default title on track 8. Increase the duration to 10 seconds.
Go back to the starting point of the second default title, add a keyframe here, then at the endpoint, change the X-axis position and make it travel from right to left.
Finally, go to the effects tab, apply the strong luma effect on track 10, and change the intensity to 10.
Now to see the final preview click on render preview.
Text Animation Intro Tutorial in Filmora
What you need to prepare:
- A computer (Windows or macOS)
- Your video materials.
- Filmora video editor
Download and Install the Filmora video editor. Then, click on New Project once the program starts.
Go to Titles and drag the Default Title to the Timeline. Then, double-click on the Default Title clip to open its settings. Here, type in your text → change the text color to Black → click OK → take a snapshot.

Double-click on the Default Title once more and simply change the text color to anything other than black this time. Then, click OK and take another snapshot. After this, delete the Default Title from the Timeline.
Next, go to Sample Color and drag the White color to the Timeline. Increase the White Color clip’s duration to 10 seconds by dragging the tail of the clip to the right.

For the next step, you need to download a simple Vignette png image. Then, import the Vignette image into Filmora. Go to My Media and click on Import Media. Import it and drag the image to the Timeline. Then, move that clip to Track 3.
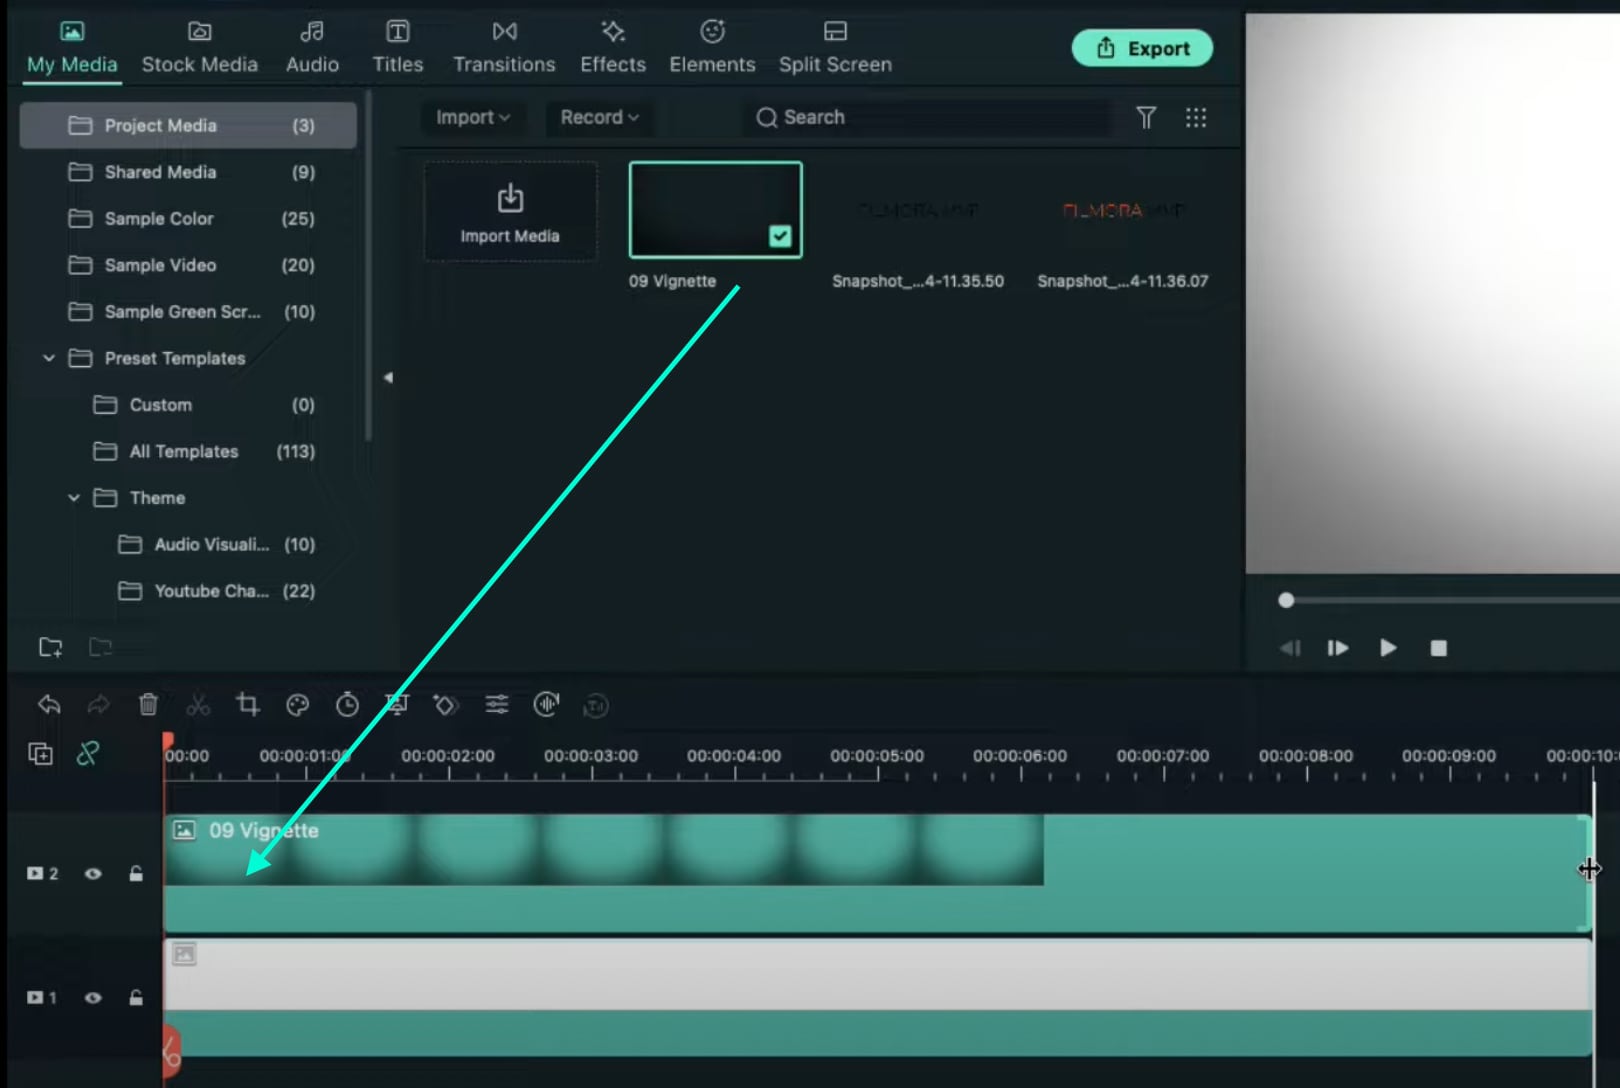
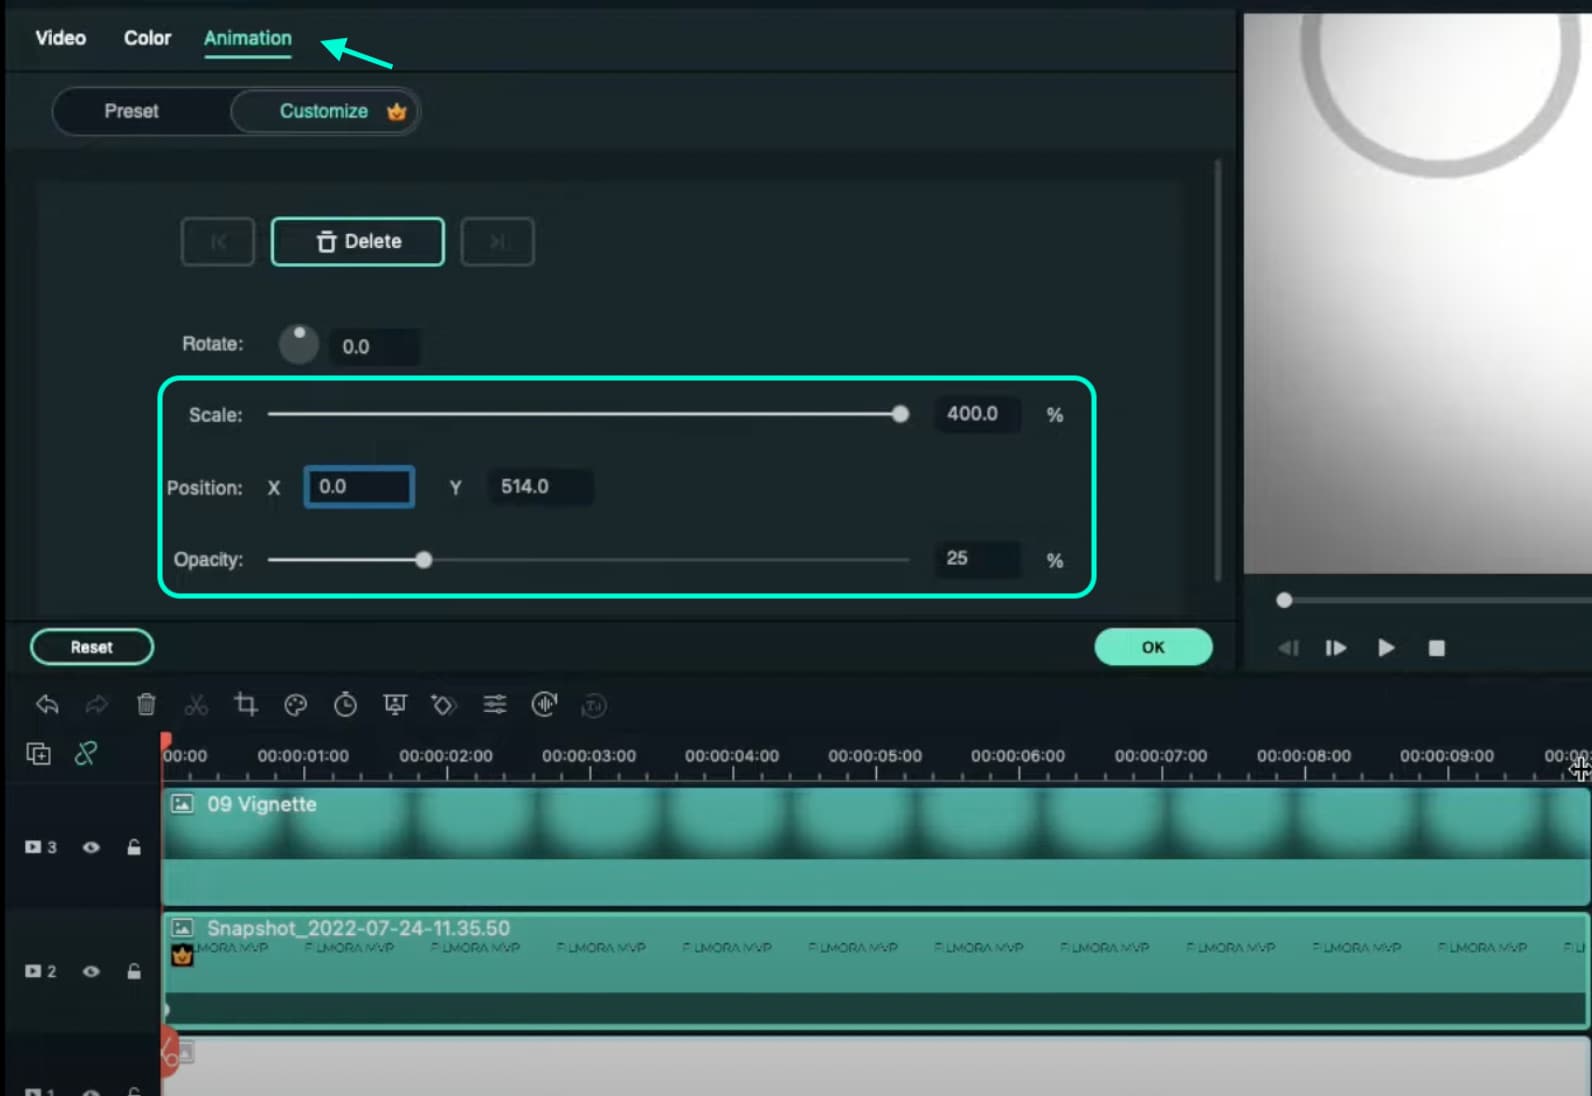
Drop the Black snapshot you took earlier to Track 2. Double-click on it, go to Animation, and apply these settings. After this, move the Playhead to the end of the clip and change the X-axis value to “-800”.
Go to Effects and drag the Square Blur effect to Track 4 on the Timeline. Increase its duration to match the other clips. Then, click on the effect and change its Size bar value to 4. Click OK.

Place the Playhead at the beginning of the clip. Go to My Media and drag the Black snapshot to Track 5. Double-click on it → go to Animation and change the settings to look like this. Then, move the Playhead to 9 seconds. Here, change the X-axis to “150” and the Scale to 75%.
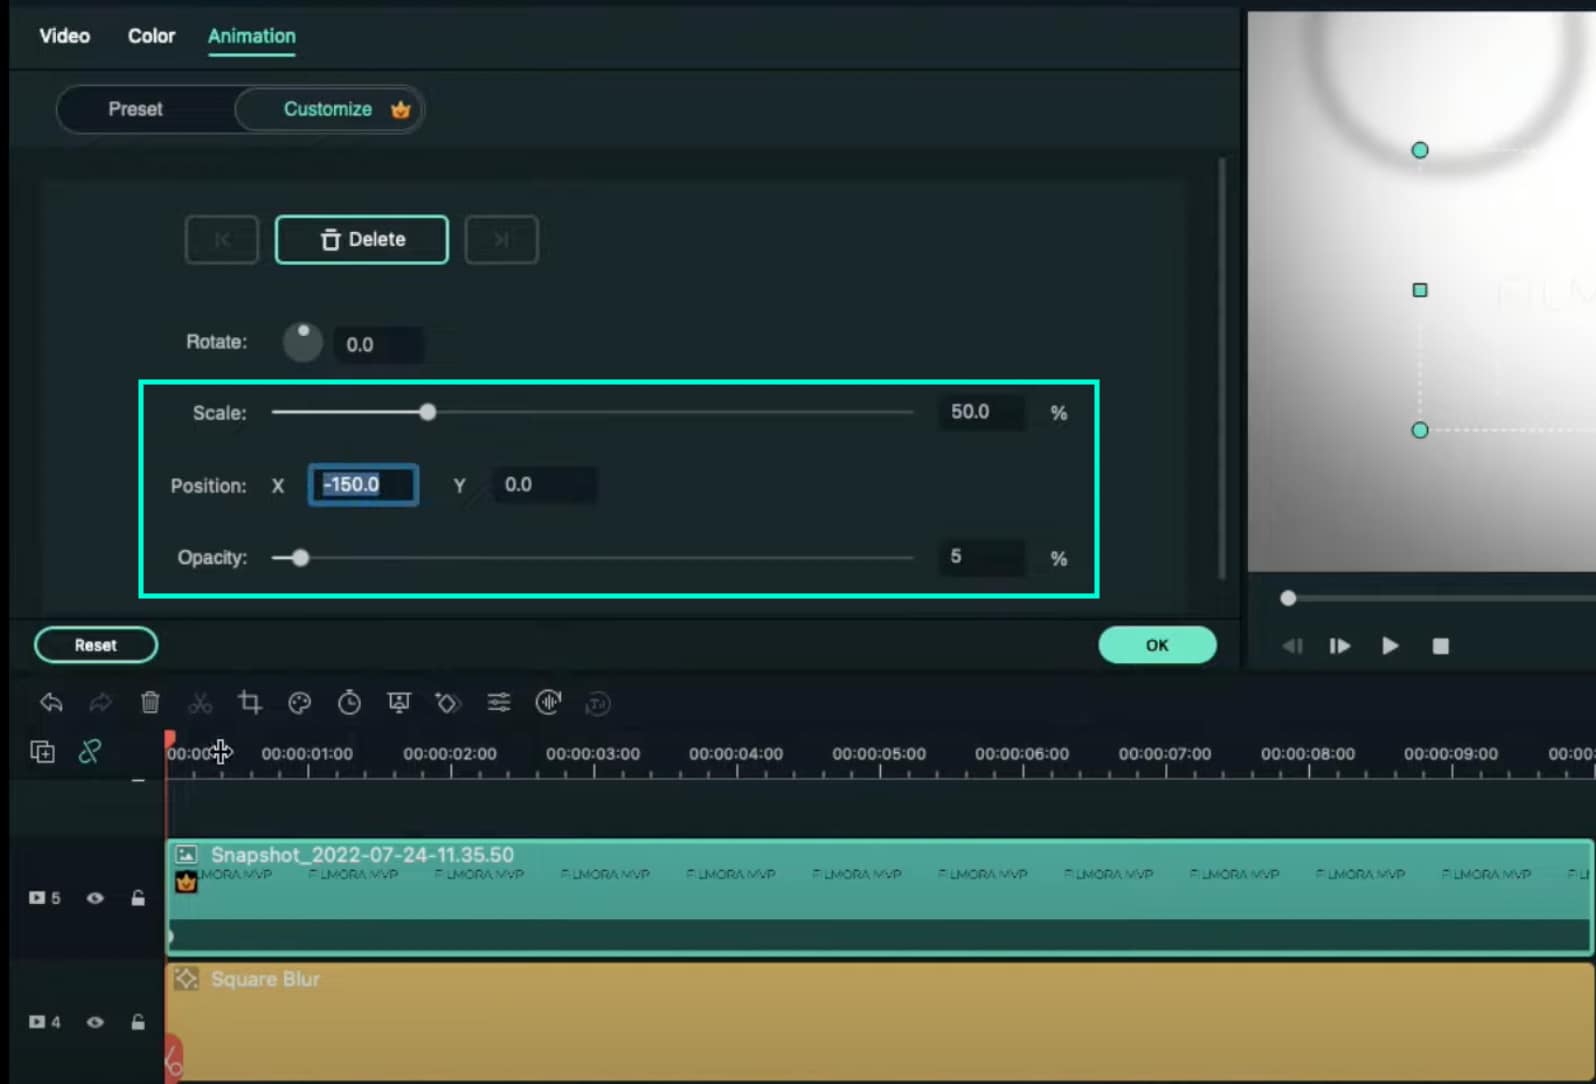
Now, place the Playhead at the starting point and drag the colored snapshot in Track 6. Double-click on it and change the Scale to 50%. Then, move the Playhead to 9 seconds again and change the Scale to 75%. Click OK.
Go to Sample Color and drag “Gradient 4” to Track 7 on the Timeline. Double-click on it → go to the Video tab → change the Blending Mode to Overlay → decrease the Opacity to 25%. Click OK.

Drag a Default Title to Track 8 and double-click on it to open its Advanced settings. From here, delete the yellow text clip located under the video. Then, insert a Line shape.
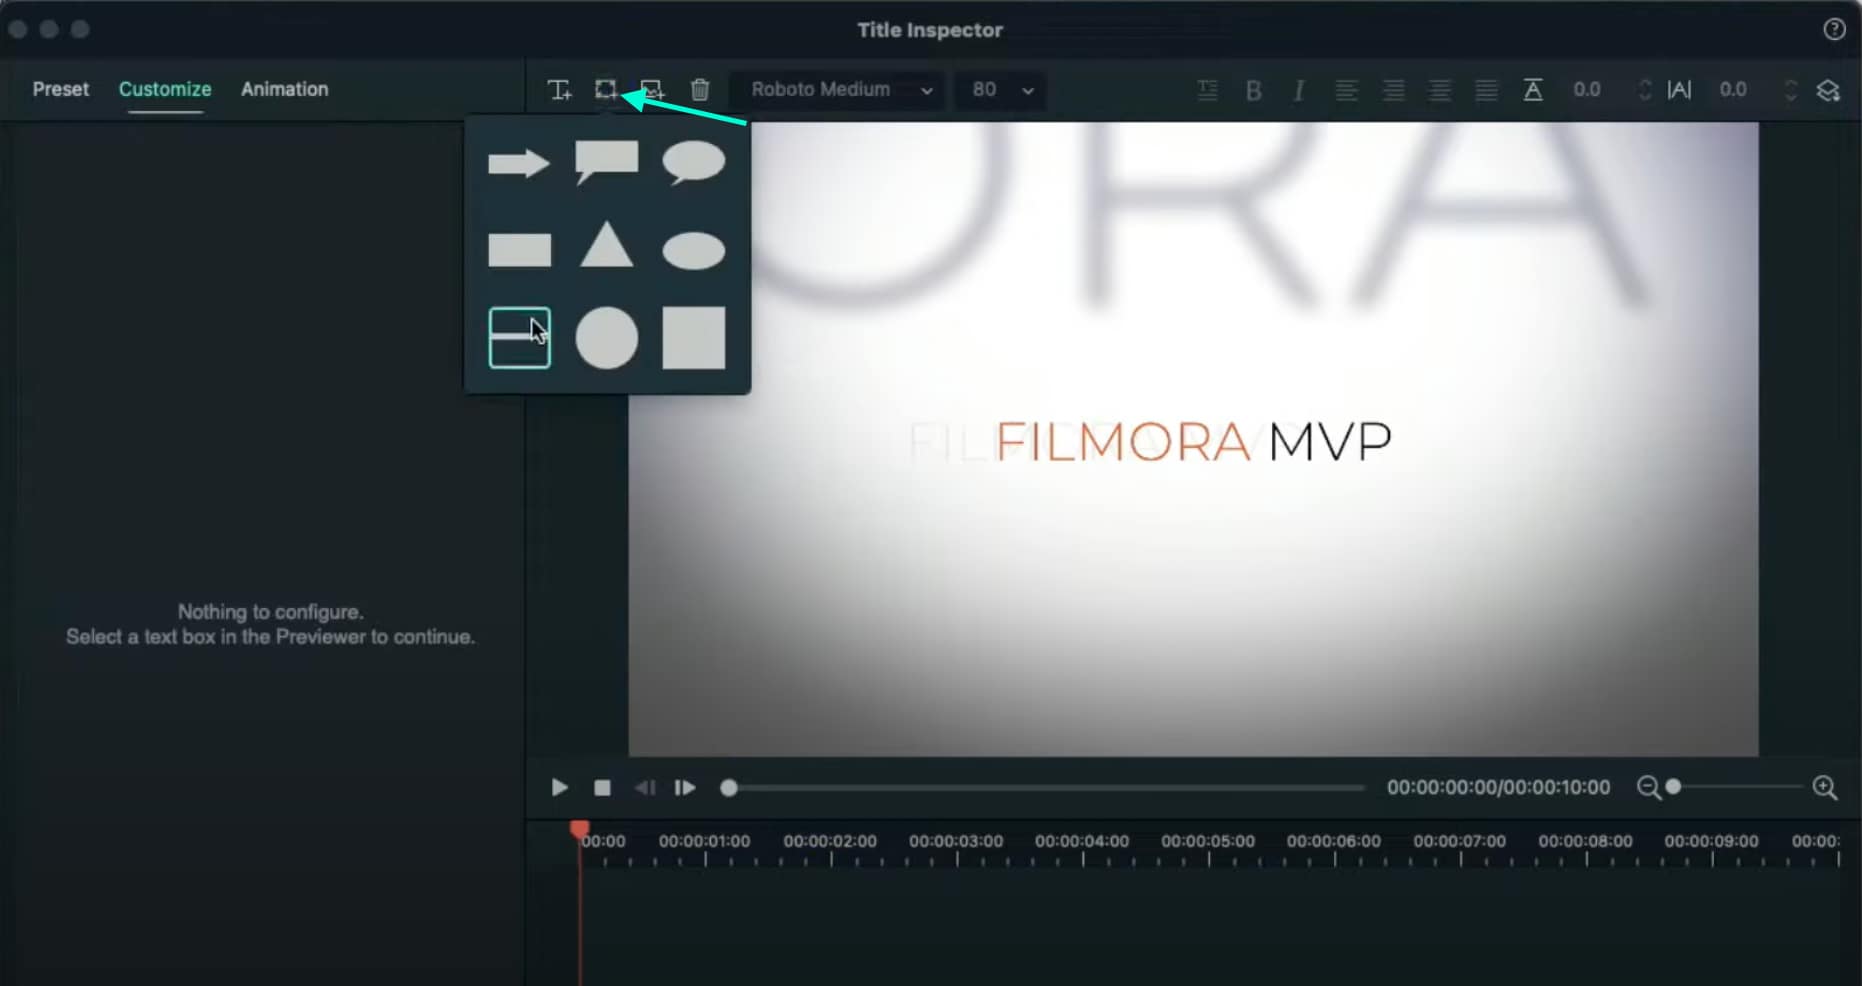
Increase the Line’s length to be almost as long as the screen. Then adjust its position until half of the Line is visible on the screen. Like this.
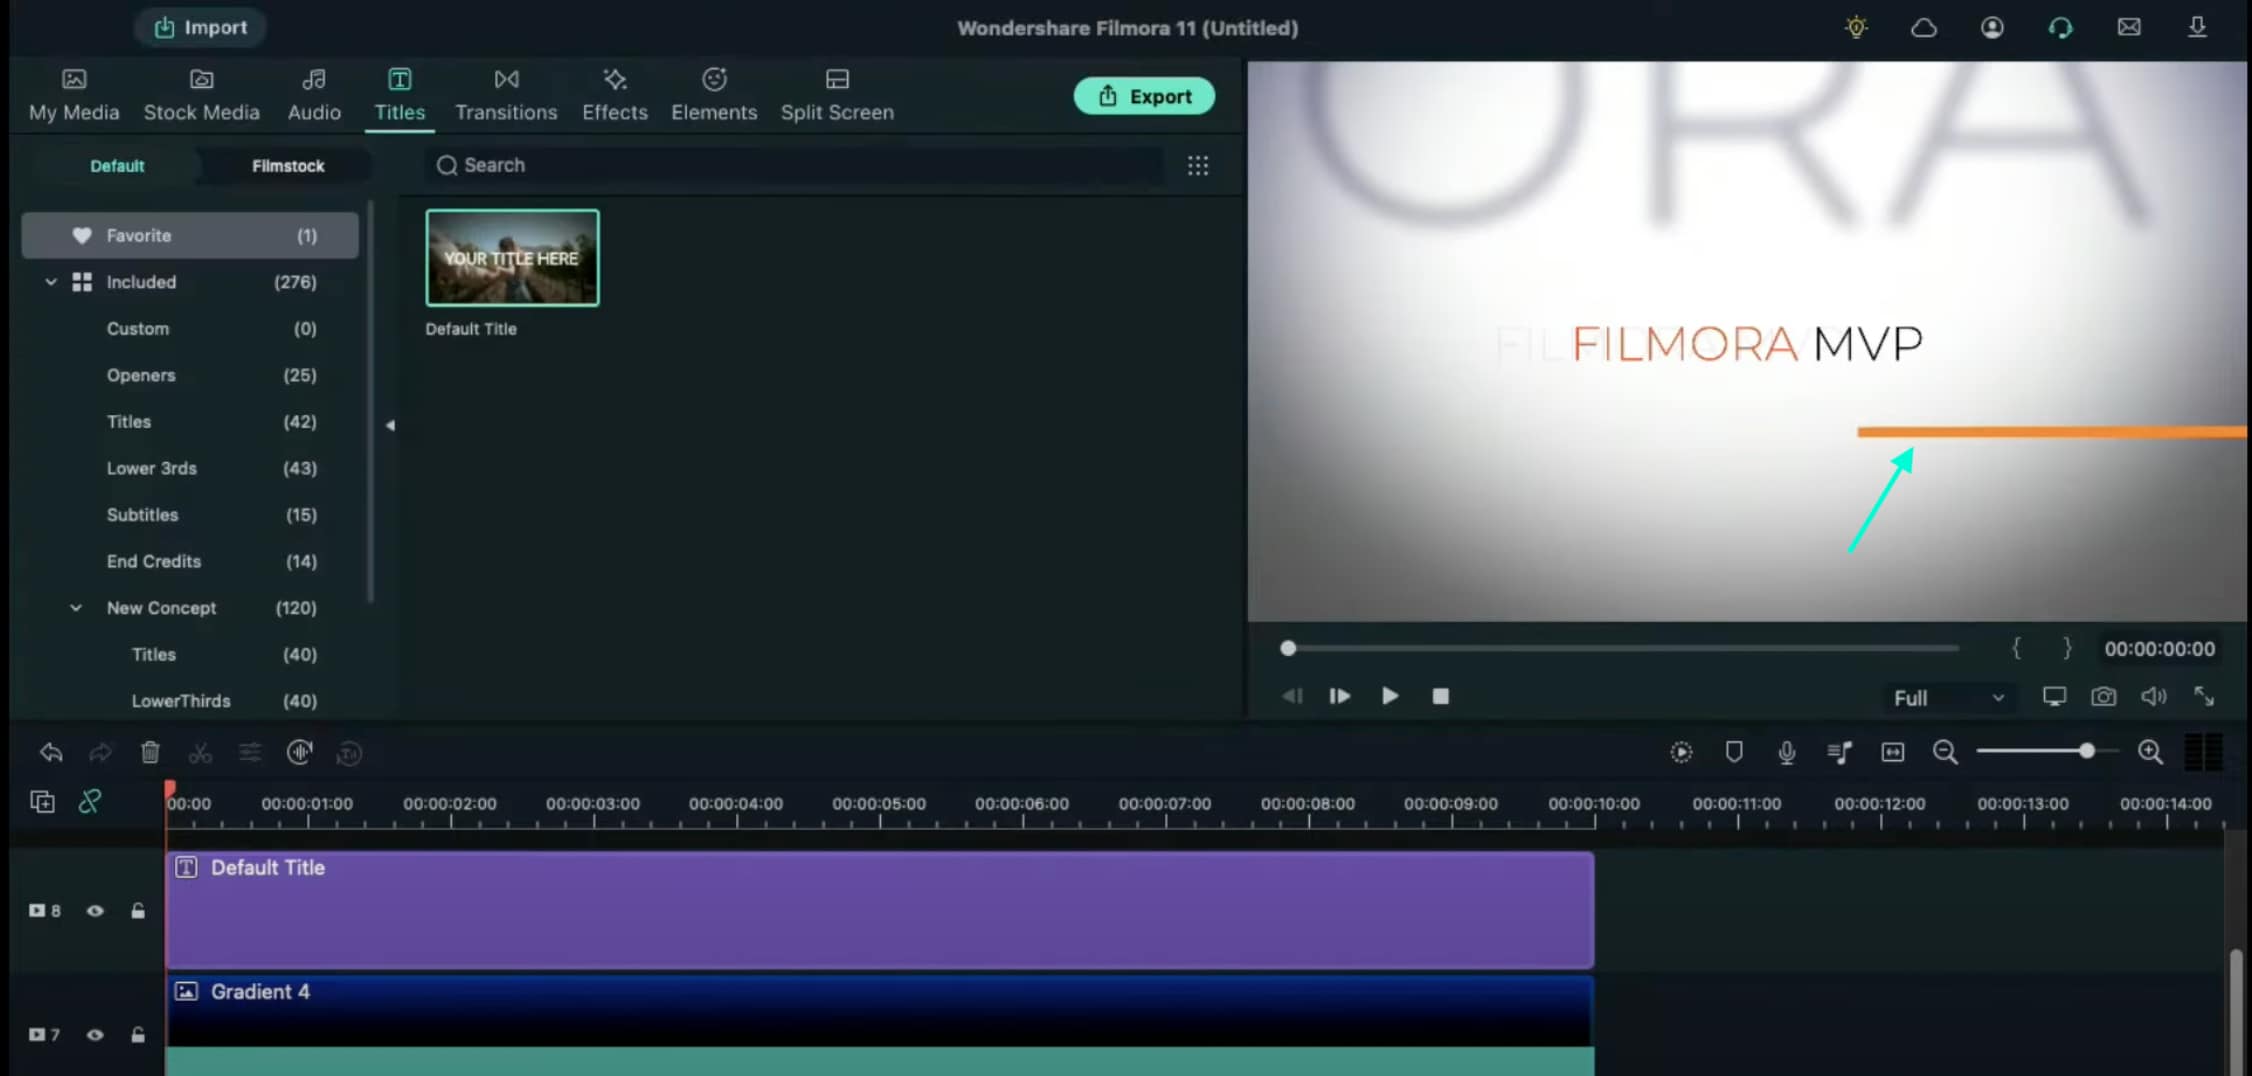
Copy this Default Title and paste it into Track 9. Open its Advanced settings and change the Line color to something different than the previous one. Then, move it to the other side of the screen, slightly above the previous line. Click OK.
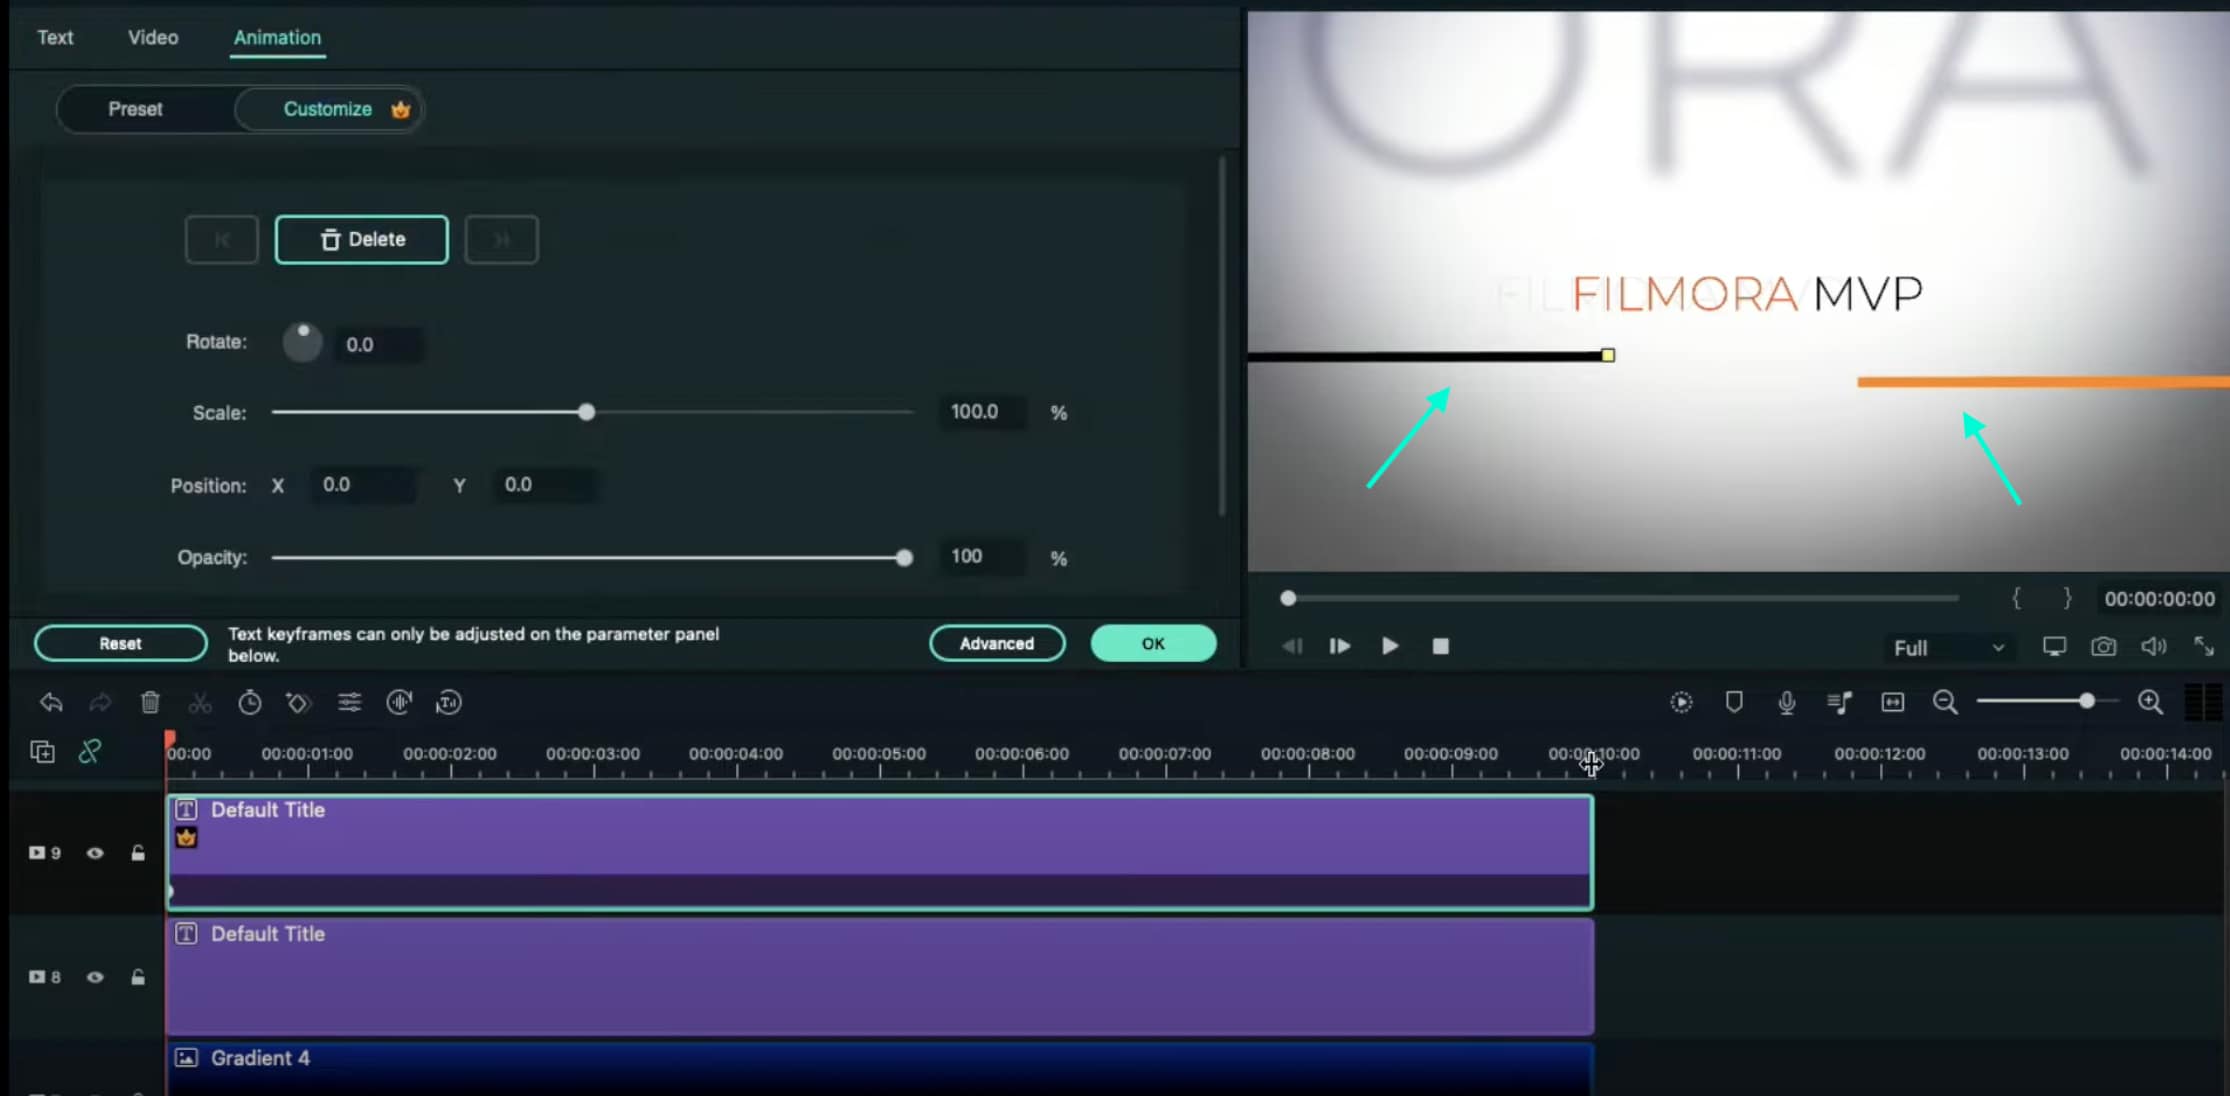
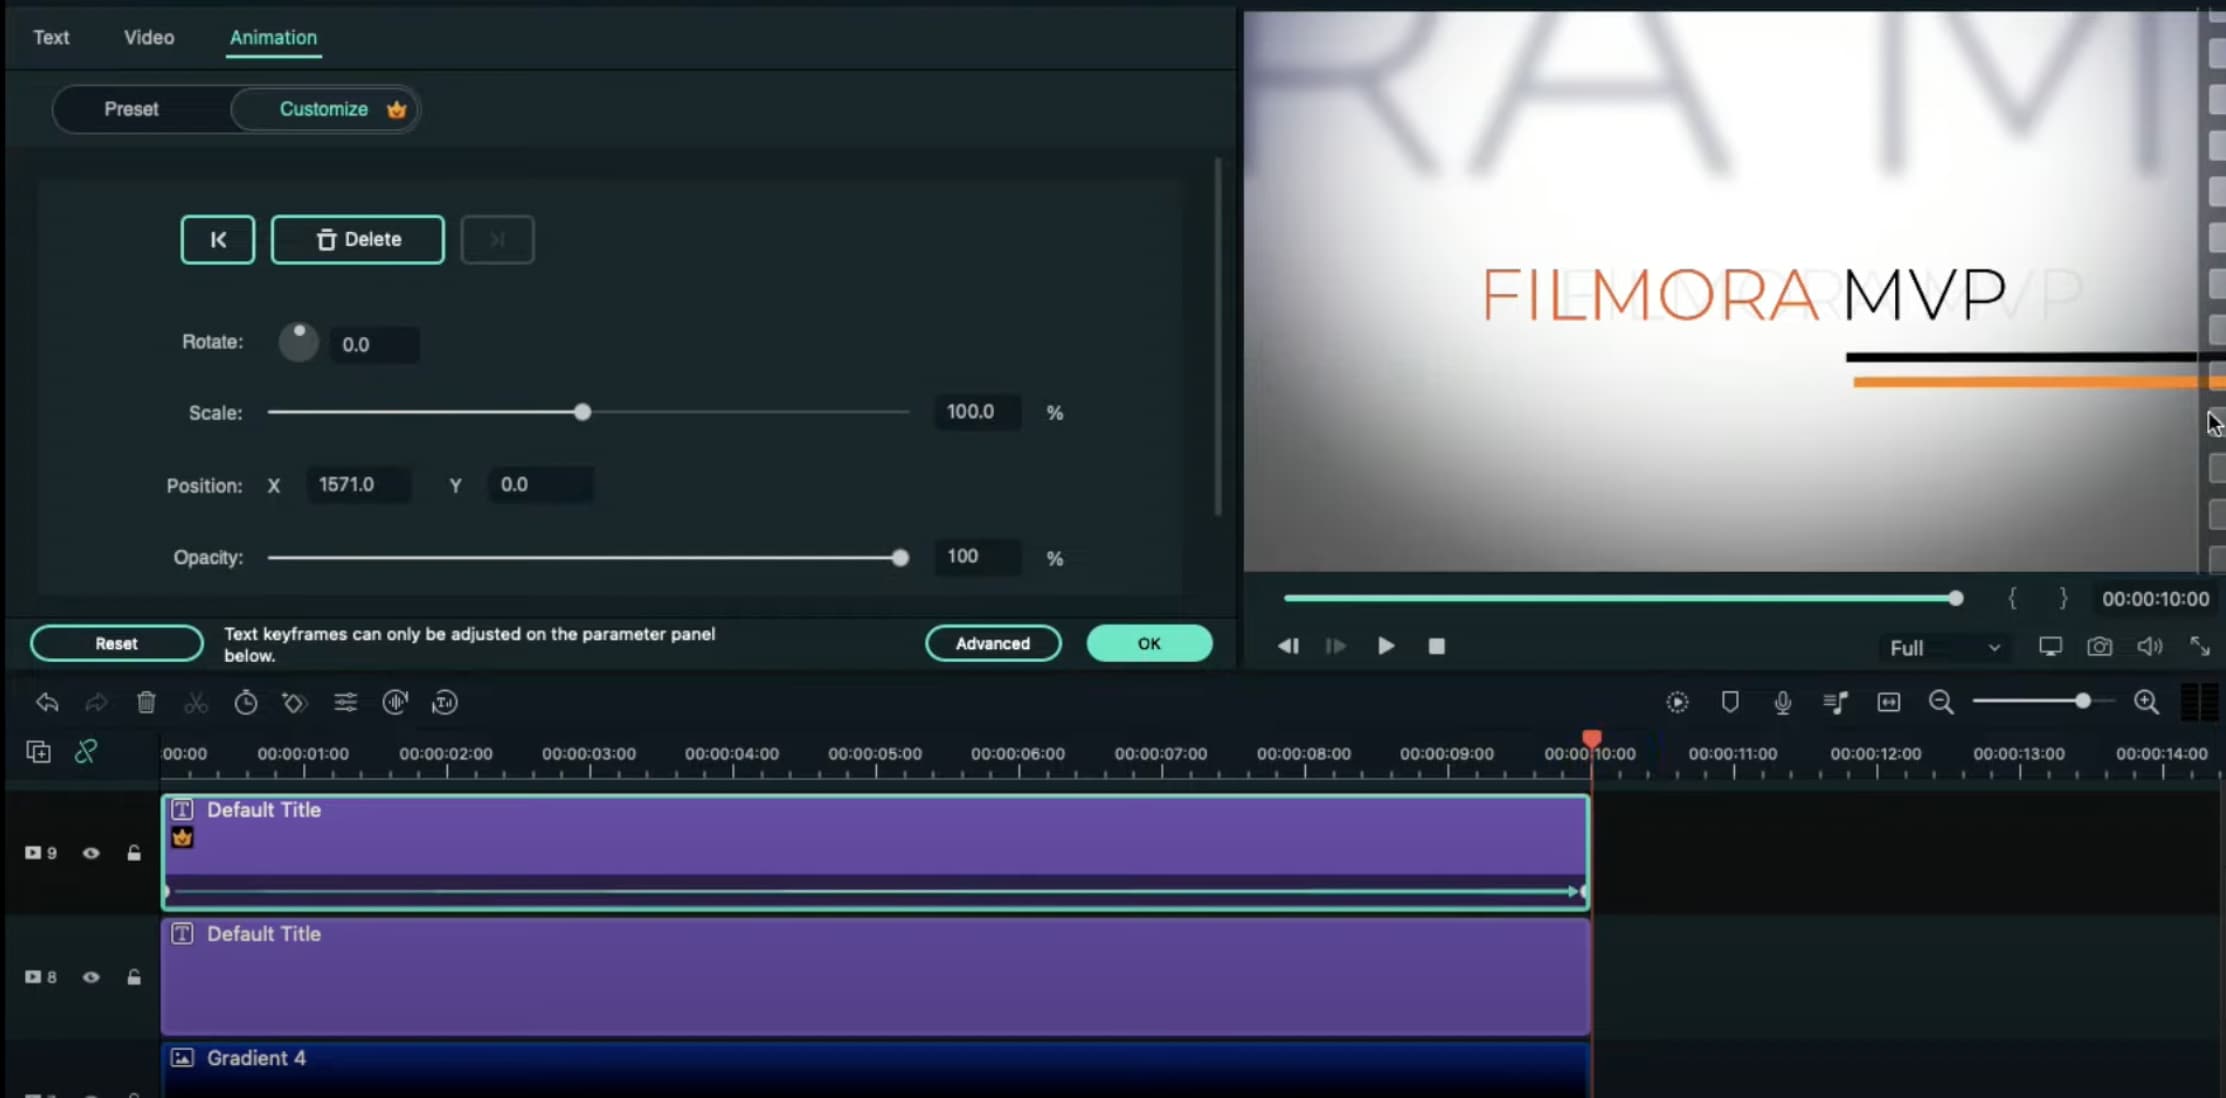
Now, select the Default Title on Track 9, double-click it, and go to the Animation tab. Move the Playhead at the starting point of the Timeline and add a keyframe. Then, move the Playhead to the end of the clip. Drag the X-axis position to the right until the Line shape moves all the way to the right side of the screen.
Do the same for the Default Title on Track 8. But this time, drag the X-axis position toward the other side. When you’re done, press OK.
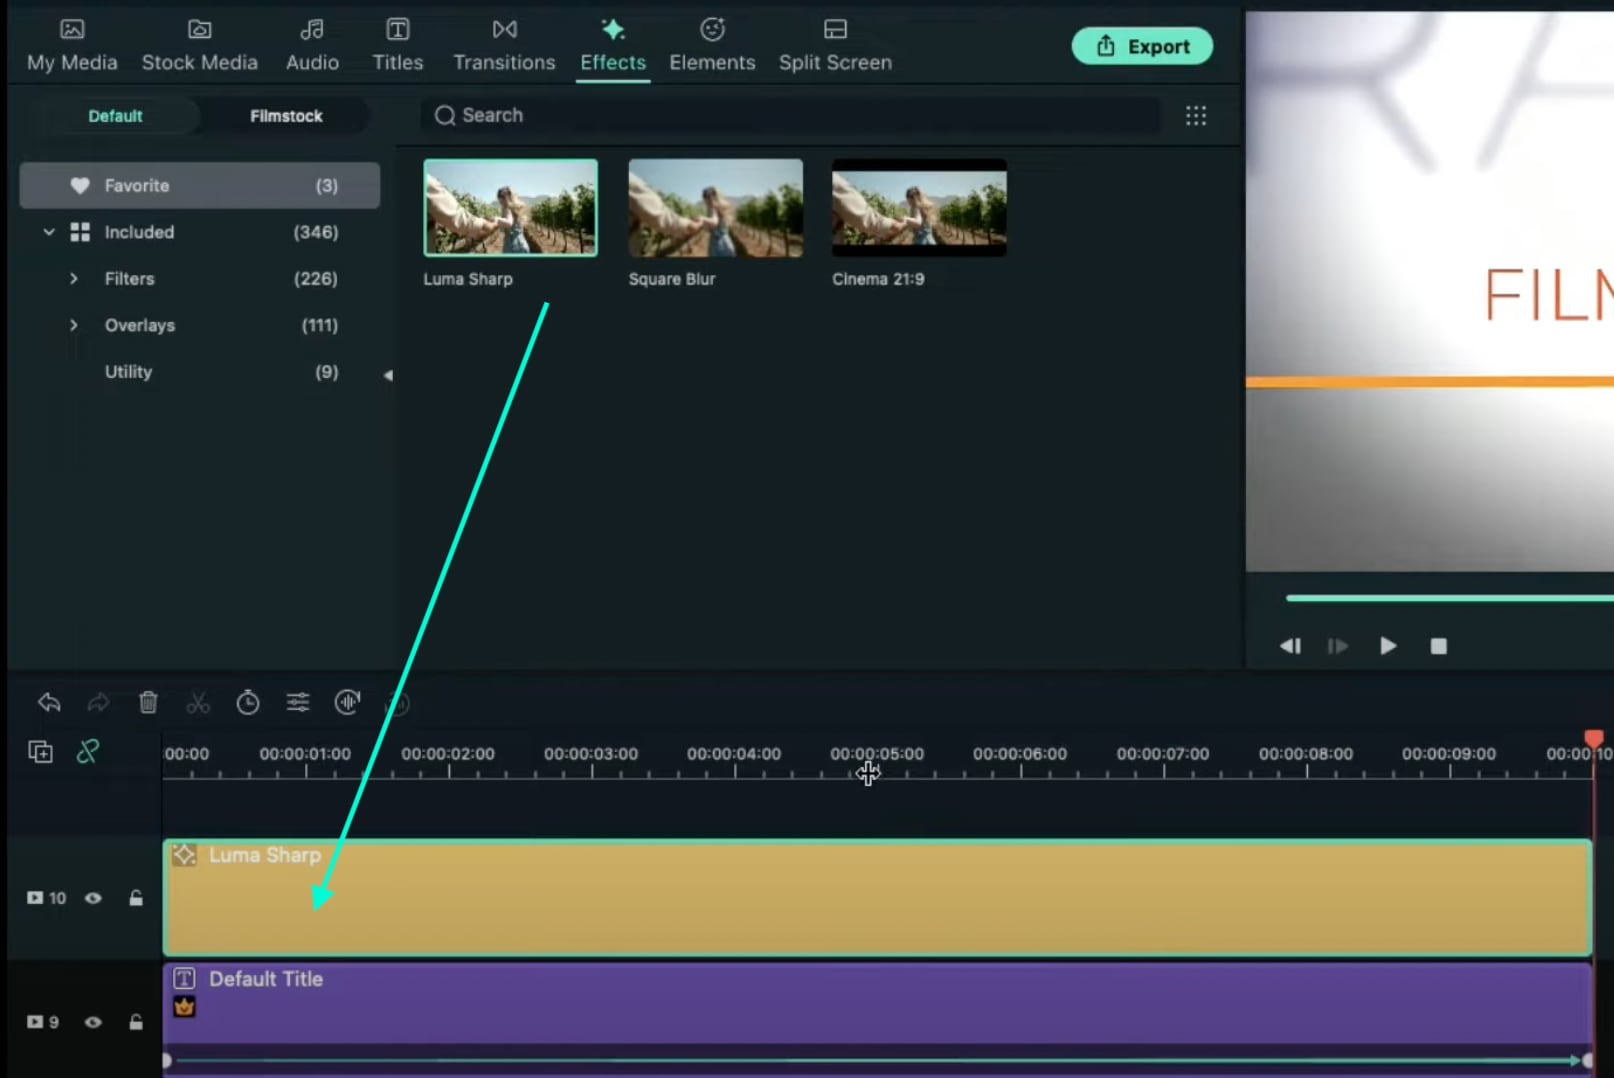
Go to the Effects tab → drag the Luma Sharp effect to Track 10. Click it and change its Intensity to 10.
You’re all done. Click on the Render button to render all the clips and finally preview your creation. Congratulations on creating a text animation intro in Filmora.

What you've learned:
- Create a unique text animation intro in Filmora
- Animate text and titles
- How to add and animate different shapes in Filmora
- Edit the advanced settings of elements in the Filmora video editor


Speak Your Mind