- Home
- DIY Special Effects
- Video in Text cinematic intro【Filmora Tutorial】
Transcript
First, go to file open project settings and make sure we're on full HD resolution with 60fps next. Add the background image to the timeline and decrease the opacity.
Then go to colour tab and change the temperature. Next go to titles tab and bring default title to the timeline. Type your text, choose your font, and then change its size.
To make a transition, open a new project with the same project settings. Go to sample colour and bring white colour to the timeline. Change the colour setting, add the transition, and export it.
Now, create a temporary project. Open a new project with the same project settings. Go to sample colours and bring white colour to the timeline. Then bring default title to the timeline.
Again, open a new project bring the background image to the timeline. Double-click on the image and change the saturation down to negative 100 to make it look black and white.
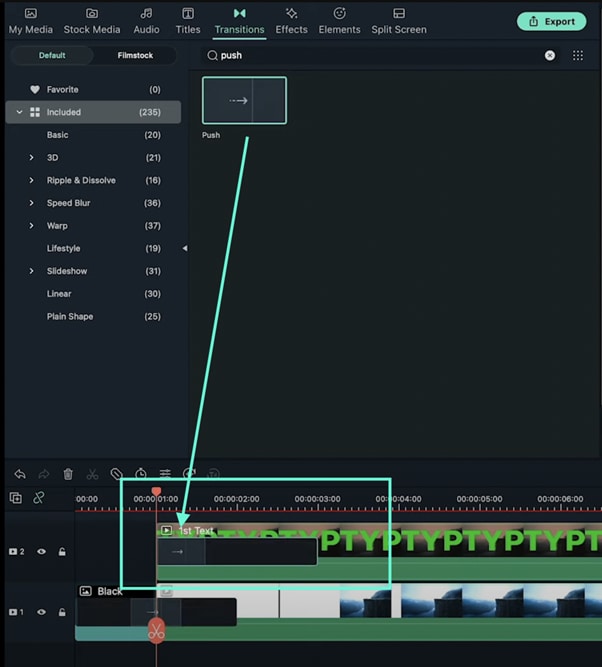
Go to sample colours and bring black colour to the timeline. Then locate in one second and add transition video on the timeline right behind sample colour. Now go to transitions tab search for a push transition and add it to the timeline.
Add our first text to the second layer of timeline and set the one second position as its starting point. Again, go to transition tab and search for push and add it from the beginning of first text.
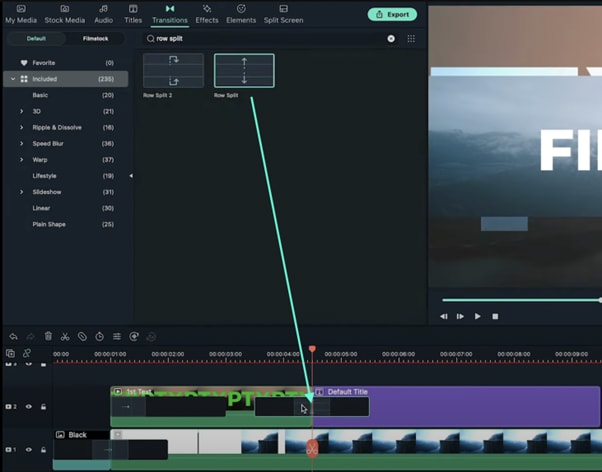
Now go to transitions tab and this time search for row split transition and add it between first text and default title.
Video in Text cinematic intro【Filmora Tutorial】
What you need to prepare:
- A computer (Windows or macOS)
- Your video materials.
- Filmora video editor
Visit filmora.wondershare.com and download the Filmora video editor. Hit Install. When it’s done installing, the app will start automatically. When it does, click on New Project.
Before we start editing, go to File from the navigation panel at the top and select Project Settings. Then, set the resolution settings like in the example here.
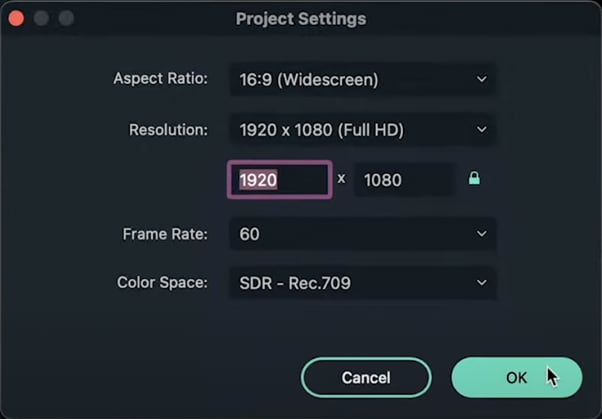
Now, download any background image you want. Make sure its resolution is 1920x1080. Import it and drag it to the Timeline.
From the Timeline, double-click on the Background clip and decrease its opacity to 70%. Then, click on Color from the upper-left corner and change the settings as you wish.
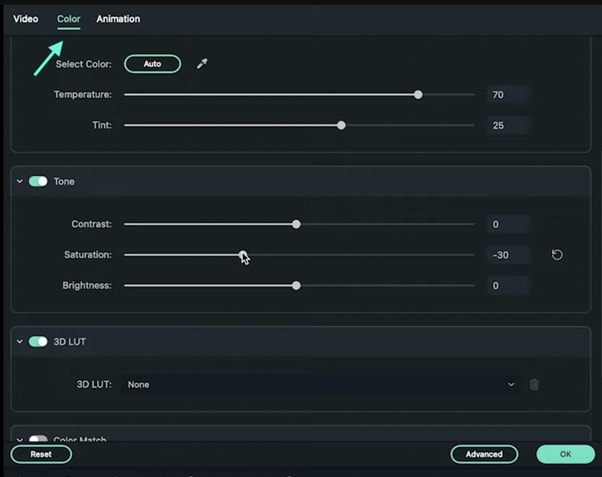
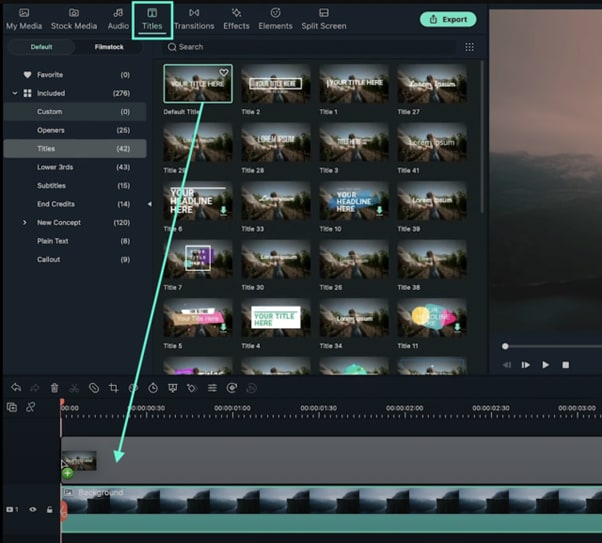
Go to the Titles tab and drag the Default Title to the Timeline. Double-click on the Default Title clip and change fonts, type in your text, etc.
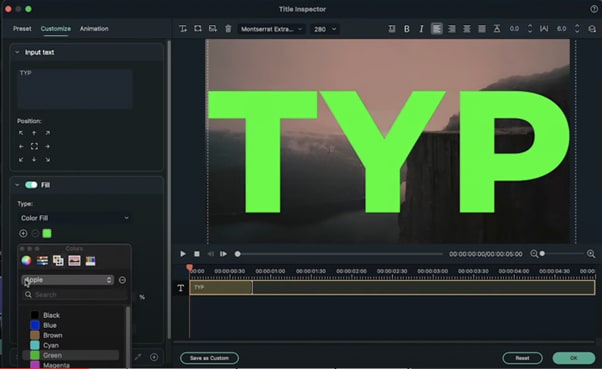
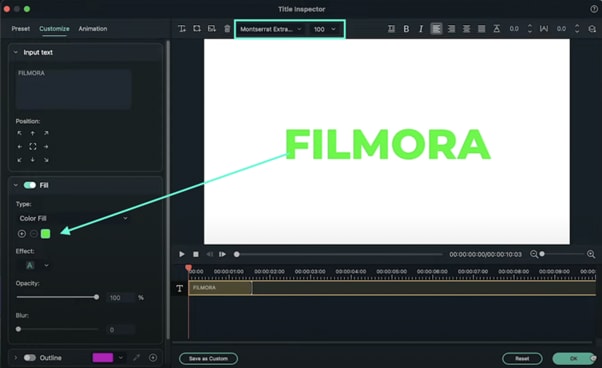
Drag the text to enlarge it so it fits the entire screen. Then, change its color to green. Press OK. Now, Export this clip and name it “1st Text”.
Now, open a new Filmora project and edit the Project Settings like we did before. Then, go to Sample Color and drag the white color to the Timeline.
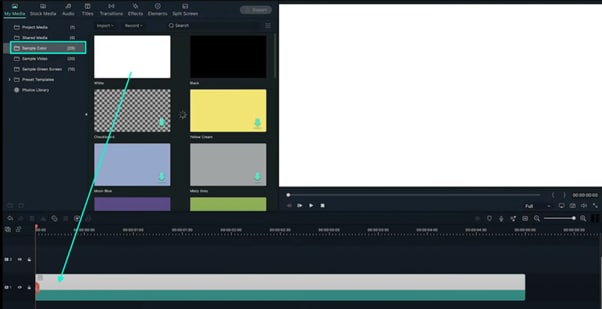
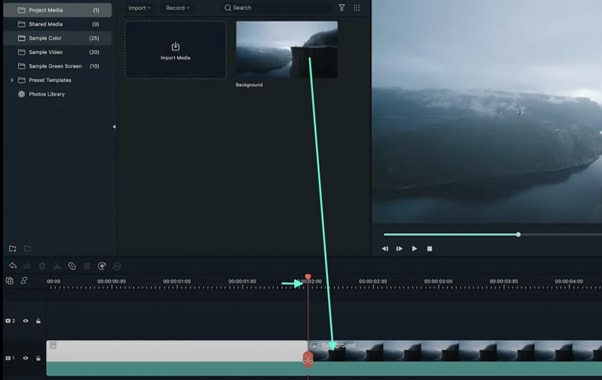
Drag the Playhead to the 2-second marker. Drag the same Background image as before to this point. Then, double-click on the Background clip and increase the Brightness and Saturation bars to 50. Click OK.
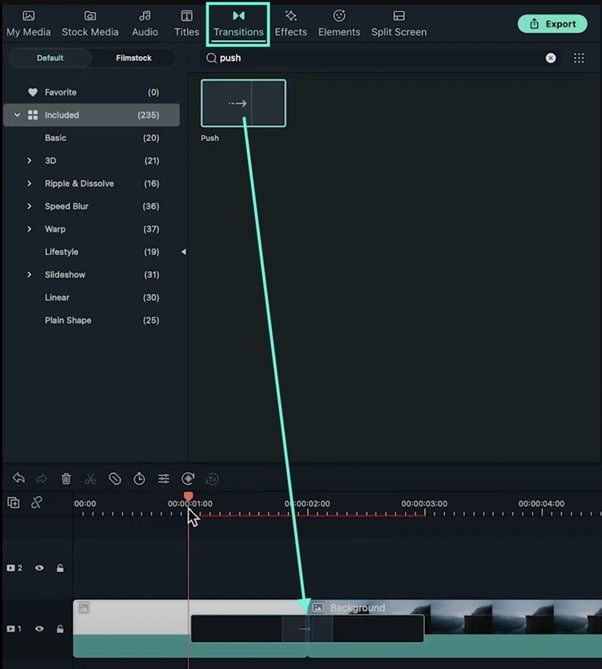
Go to Transitions and type in “Push”. Drag the Push transition between the White layer and your Background image. Click on Export once again and name this clip “Transition”.
Open a new Filmora project and adjust the Project Settings like we did the first time. Then, go to Sample Color and drag the White color to the Timeline once more.
Go to Titles and drag the Default Title to the Timeline, above the White Sample Color clip. Now, double-click the Default Title clip and go to ADVANCED. Here, set the text color to green, choose a font you like, and increase the text size. Click OK. Export it and name it “Temporary”.
Open a new project in Filmora. Import and Drag the same background image you used before to the Timeline. Double-click on it and drag the Saturation bar to -100. Now, drag the file you named “Temporary” into the Timeline.
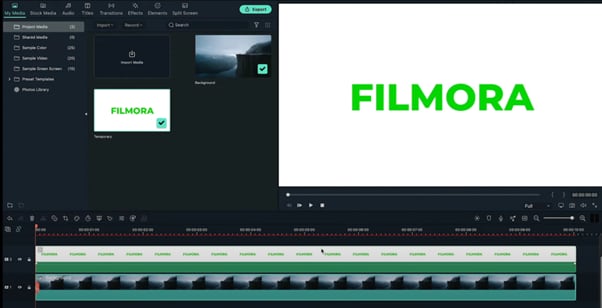
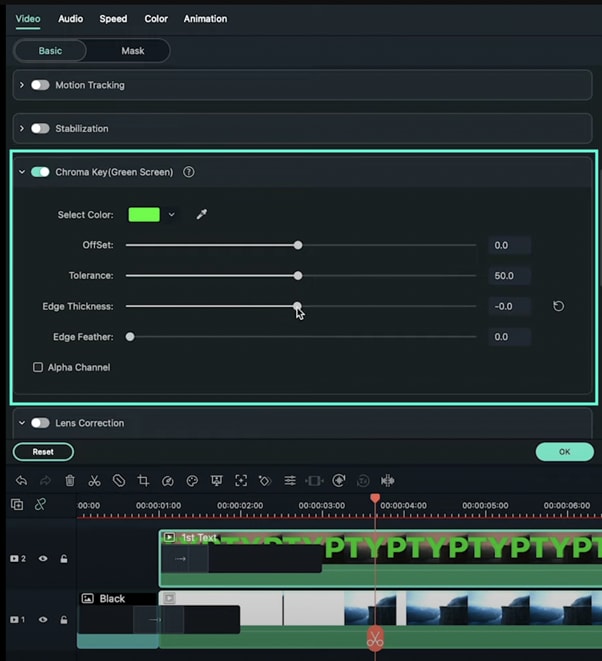
Double-click on the Temporary clip, scroll down when the new window appears, and find the Chroma key section. Enable this. Now, drag the Edge Feather bar to 0. Export this video and name it “2nd Text”.
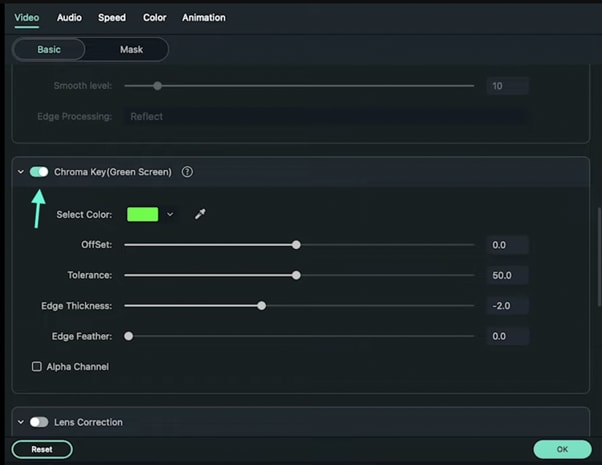
Open one more new project in Filmora and import the following files. There should be four, titled “Background”, “Transition”, “1st Text”, and “2nd Text”.
Click on Sample Color and drag the Black color to the 1st Track of the Timeline. Then, move the Playhead to the 1-second marker and drag the “Transition” clip to the same Track within the Timeline.
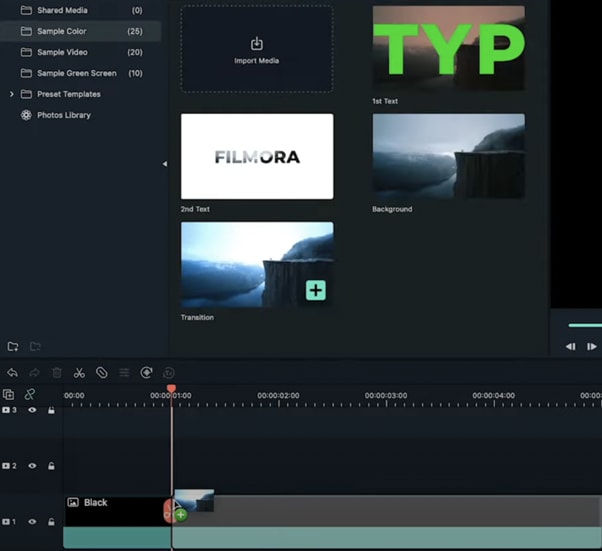
From the Transitions tab, select the Push transition and drag it to the Timeline.
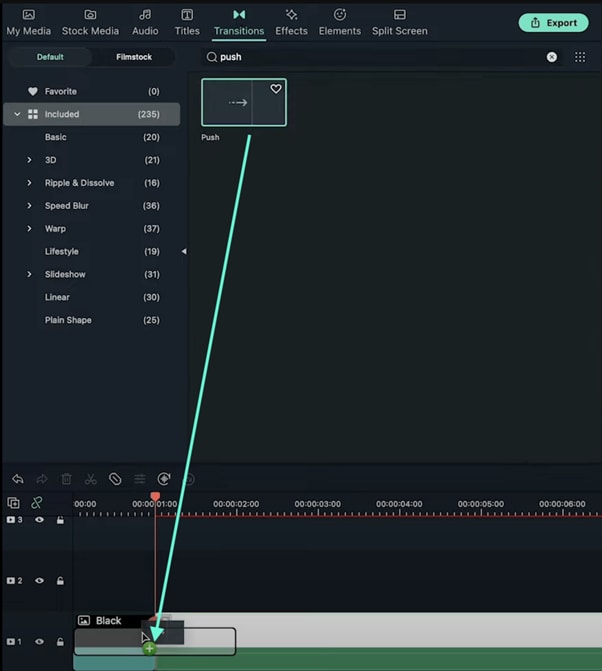
Set the Playhead at the 1-second marker once again. First, add the “1st Text” clip into Track 2 of the Timeline. Then, add another Push transition at the beginning of this clip.
Now, double-click on the “1st Text” clip and enable the Chroma Key option. Then, set the Edge Thickness and Edge Feather bars to 0.
Set the Playhead at 4.5 seconds. Snip the Timeline. Then, add a new Default Title on the right side of the Playhead on Track 2.
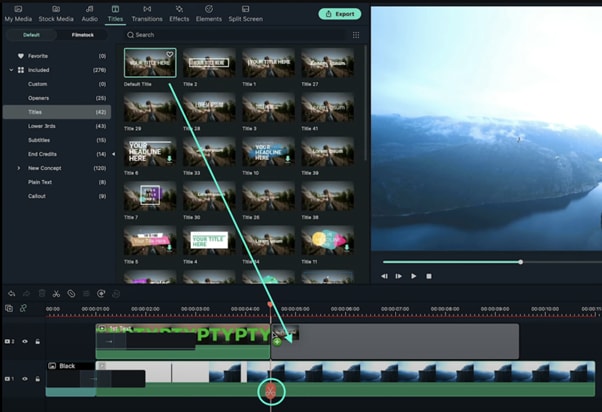
Double-click on the Default Title and go to Advanced settings. From there, delete the default text and click on the highlighted button like in the image below to add a new background to this clip. Add the same background you’ve used throughout the entire video.
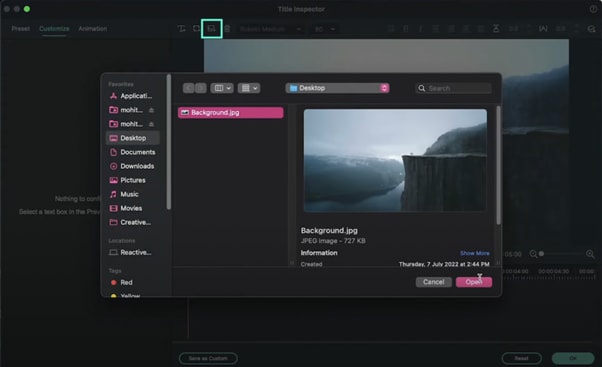
Add a new text here and customize it to match the text style in your “2nd Text” clip you exported earlier. Click OK.
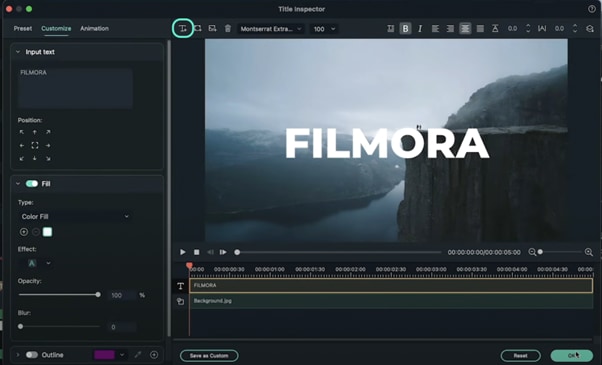
Next, go to the Transitions tab and drag the “Row Split” transition clip between Track 2 and the New Default Title you just created. Then, double-click on the transition and change its duration to 1 second.
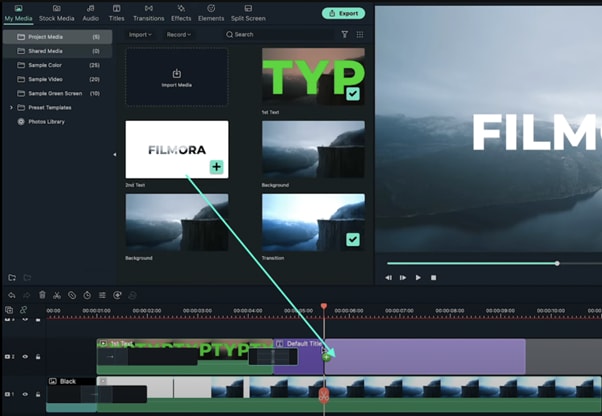
Set the Playhead to the 5.5 seconds marker. Drag the “2nd Text” clip you exported earlier here. Then, simply add another Row Split transition between this clip and the Default Title.
That’s it! You’re done. All that’s left is to Render and export the video. Congratulations on creating a video in text cinematic intro in Filmora.
What you've learned:
- How to make advanced edits on titles in Filmora
- Basics of using green screen effects on text
- Using transitions in Filmora
- Exporting and re-using edited clips
- Creating a unique video in text cinematic intro


Speak Your Mind