Color Correction with AVS Video Editor

Mar 27, 2024• Proven solutions
The footage captured with a camera often requires a lot of editing before it is ready to be shown in front of an audience. Adjusting color values may be a necessary step an editor must take because without it the colors in the video don't stand out. Enhancing the colors, adjusting contrast and brightness values in a video is also known as the 'Color Correction' process.
In this article, we will show you how to manipulate colors with AVS Video Editor in a few simple steps that don't require any previous editing experience.
Color Correction with AVS Video Editor
1. Import the footage into the editor
Before you can proceed any further you first need to import the footage you want to edit into the AVS Video Editor. Click on 'Import Media Files' option in the editor's welcome window if the footage you want to use is located on your hard-disc. Then navigate to the place where the file is located and click 'Open'. This action will place the video file you want to use, into the editor's 'Media Library'. Access the 'Media Library' and drag the file onto the video track on the timeline.
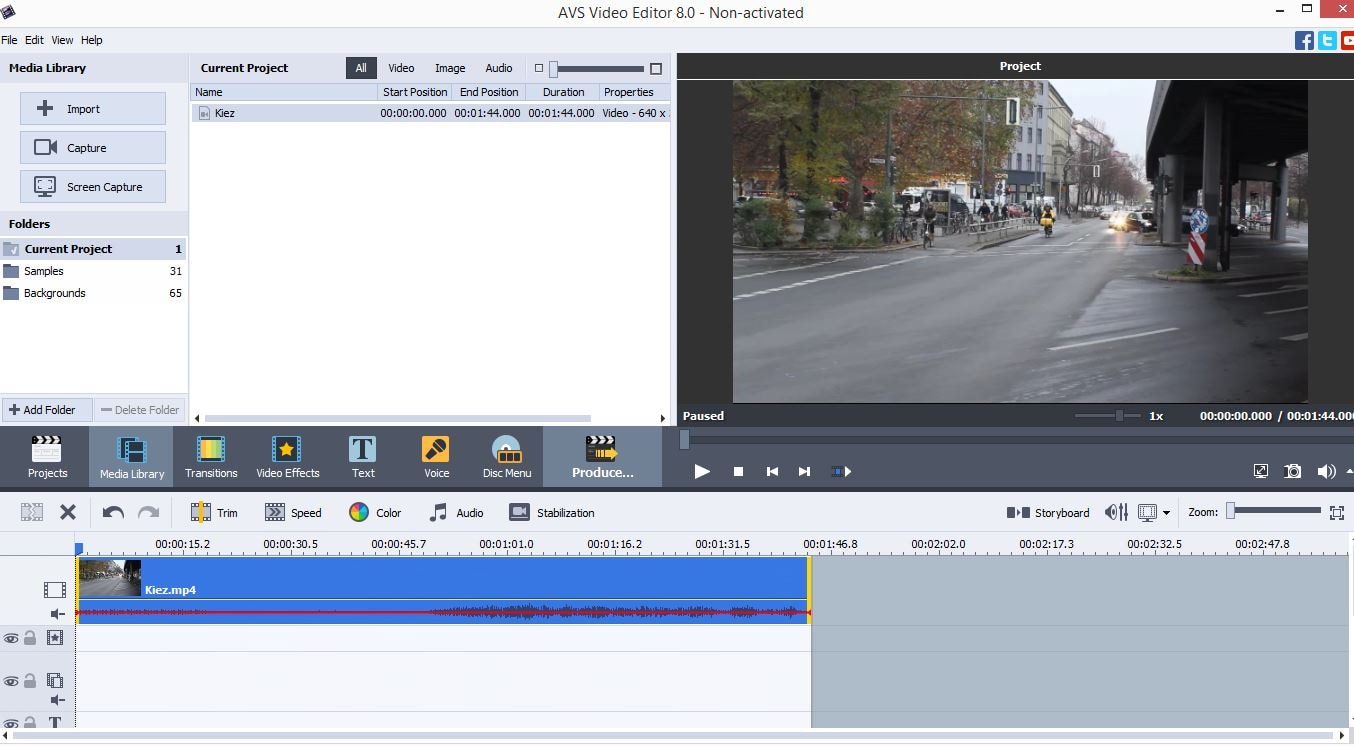
Once the file is correctly positioned on the timeline you will be able to see 'Color' option on the AVS Video Editor's toolbar, click on it to access the features that will enable you to perform color correction of your video.
2. Adjust the settings in the Color Correction Panel
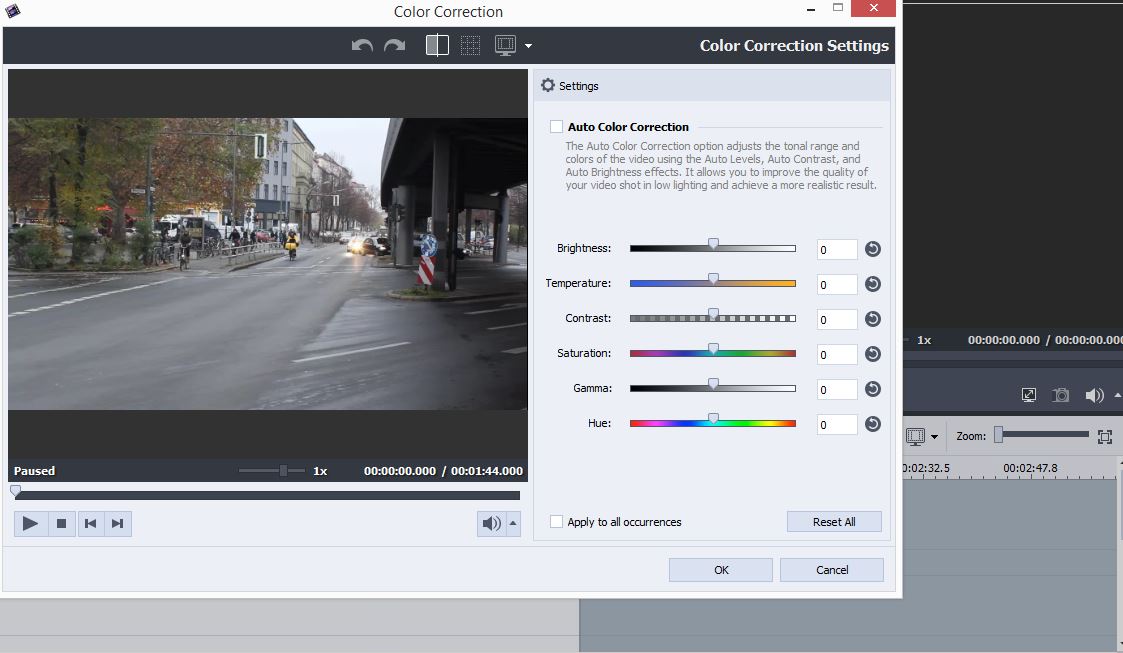
The 'Color Correction' panel will appear on the screen and you will be able to see a preview window on the left side of the panel and several different sliders that enable you to set basic color adjustment settings on the right side.
The first slider titled 'Brightness' will enable you to slightly alter the exposure of your video, which means that you'll be able to make the video a little bit lighter or darker depending on the footage. Keep in mind that heavily over or underexposed visual content can hardly be fixed with basic color correction tools such as this one. Furthermore, you can use the 'Temperature' slider to make the colors in your videos 'warmer' or 'colder' but use this feature carefully because colors may appear unnatural if you set the value on this slider too high in either direction.
You can keep track of the changes you make in the preview window, and you don't like the results, simply reset the value on the slider to zero.
3. Export the Video
After completing the Color Correction process, click the 'OK' button to save the changes you made and click on the 'Produce' icon. Select the output format and wait for your freshly completed video to be exported.
An Easier Way To make Color Corrections in Your Videos
Color correction process in AVS Video Editor is so simple that even a child could do it, but users who would like to have access to more options should use Wondershare Filmora video editing software. This video editing software enables its users to fine-tune the colors in their videos with a plethora of color correction tools and visual effects.


If you would like to perform a color correction on your video, you must first place the clip onto the timeline and click on the 'Advanced Color Tuning' icon 
After the settings window appears, you will be offered a choice to use color presets such as 3D LUT, COMMON, FILM to mention just a few. If you would like to change color values manually, you need to click on the 'Adjust' feature and choose whether you want to set new values for 'White Balance', 'Color' or 'HFS'. Clicking on the 'Color' option will enable you to alter the 'Brightness' levels, set 'Exposure' or increase the 'Vibrance' of the colors in the video. 'Saturation' option will help you to create more saturated colors while dragging the slider in the opposite direction will create a de-saturated black and white image.
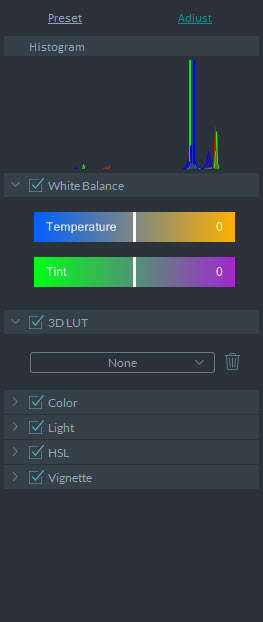
Filmora's 'Light' feature is designed to help users to effortlessly adjust values for 'Highlight', 'Shadows', 'Whites' and 'Blacks' options which can be quite useful considering the fact that most images require interventions in these segments.
Filmora is a much more powerful video editing software than AVS Video Editor and all video producers in need of a reliable program will benefit from obtaining Filmora.
In today's post we are about to discuss how to do the perfect color correction on GoPro Studio and how to edit the footages captured on your action camera.
by Benjamin Arango Mar 27, 2024 11:08 AM
After Effects is considered to be among the best editing programs for color correction. Here are some easy steps for color grading in After Effects.
by Benjamin Arango Mar 27, 2024 11:08 AM
If you are a beginner on Vegas Pro 15 and need some tips about how to edit videos over this software then the information below will be highly useful for you.
by Benjamin Arango Mar 27, 2024 11:08 AM
Benjamin Arango
staff Editor