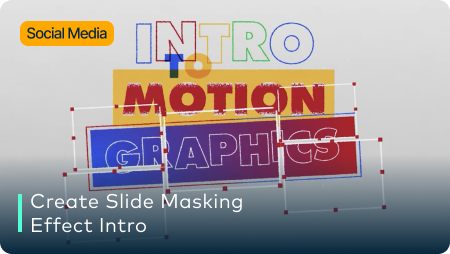
Guide on How To Create Glass Slide Text Intro
Introductions are the first impression your audience will have of you. Let’s read about making them creative through Wondershare Filmora’s glass slide text.
Key Steps of This Video Tutorial To Follow
Guide to using Filmora AI Tools
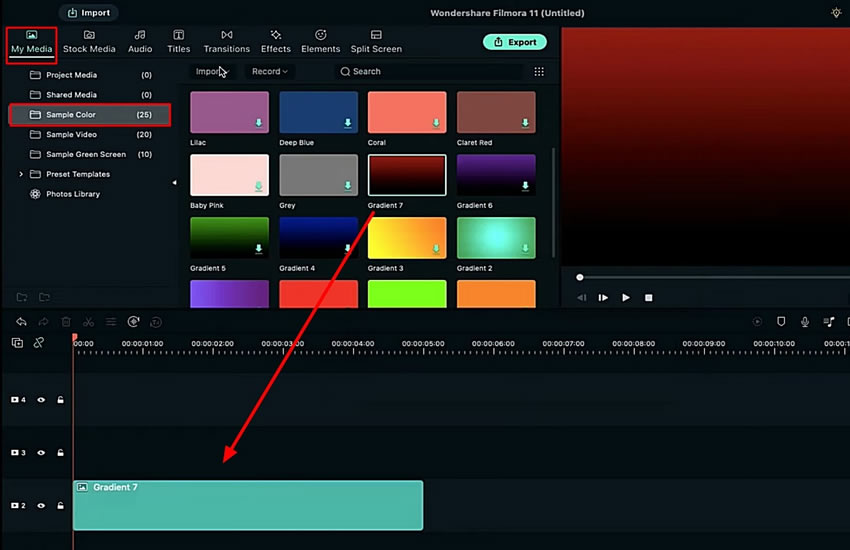
To create the glass slide text intro video, navigate into the “Sample Colors” section from the “My Media” tab. Add any gradient color onto the timeline and approach the “Titles” tab from the top.
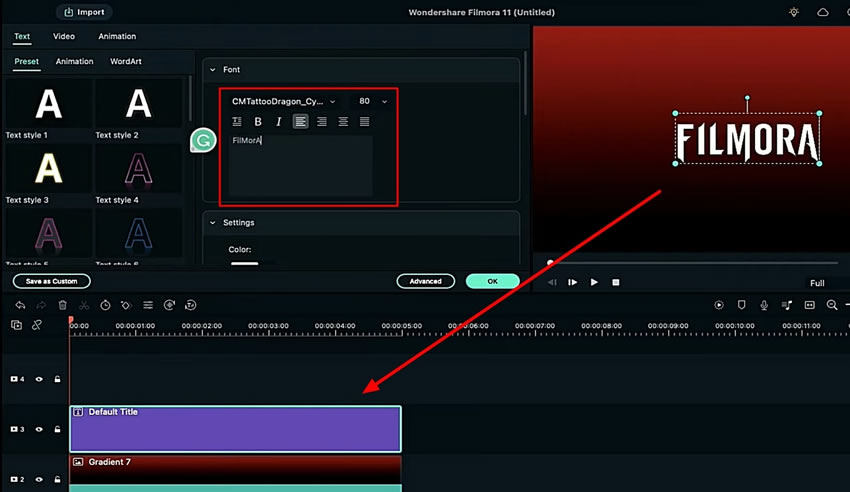
Select the required title and drag it onto the track. Double-click to open the customization settings for the title. Continue to add the text, adjust its font size and text spacing.
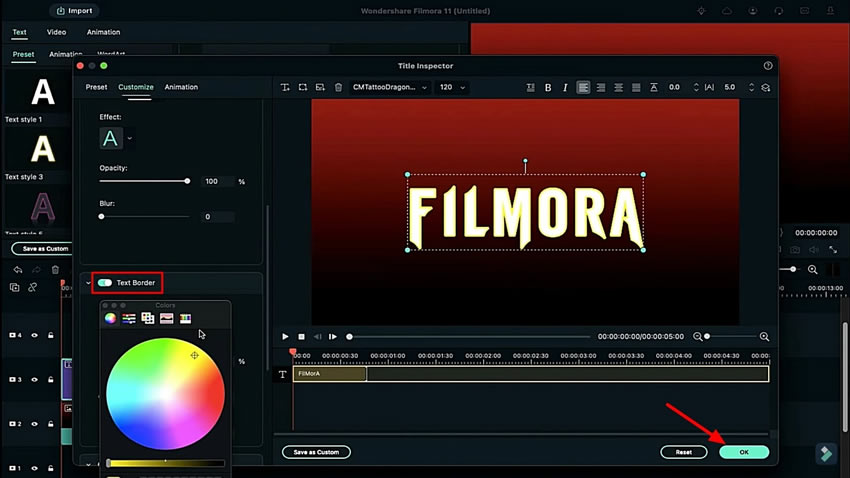
Look for the "Advanced" button on the settings screen to open a new window. Define the "Text Border" and change the color accordingly. Reduce the size of the border and click "OK" to complete all customization.
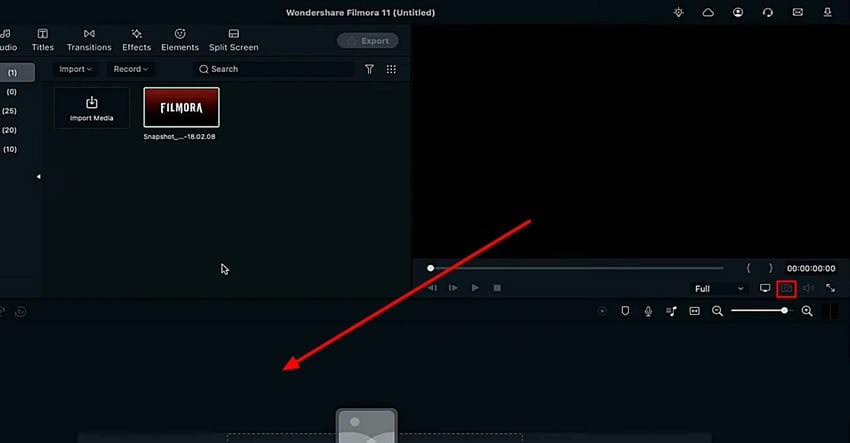
Continue to take a snapshot of the preview using the "Camera" icon on the right side of the screen. Delete both imported clips from the timeline.
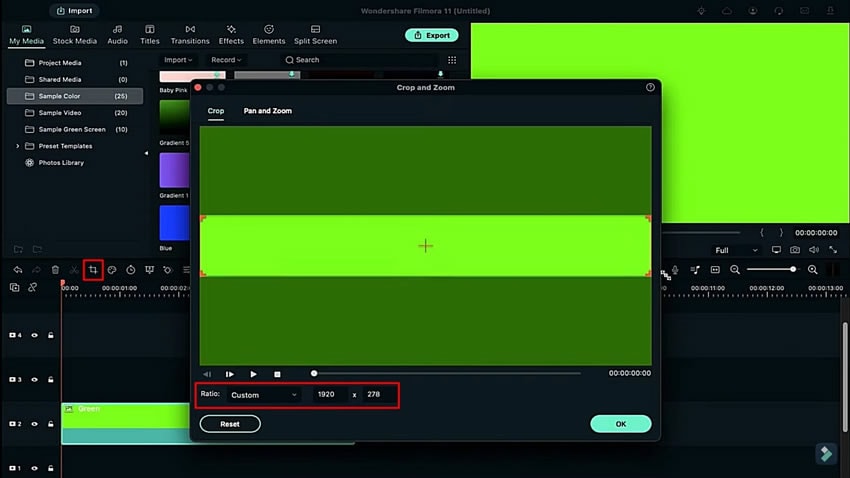
Lead to the “Sample Color” section to create a slider for the video clip. Select any color of your choice and drag it to the timeline. Select the “Crop” tool from the toolbar above the timeline and set its ratio according to the slider that is to be created.
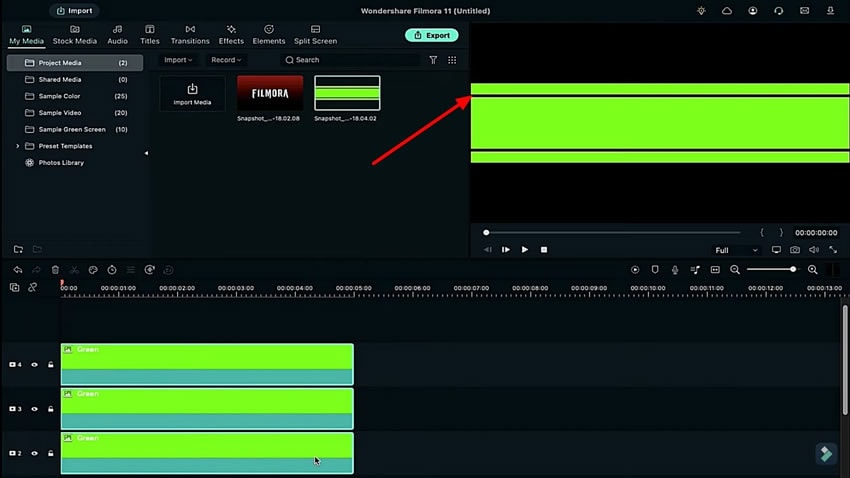
Drag more similar colors on the track and adjust their aspect ratio according to the requirements. To change the position of the color, double-click and change the axis position to align it. Take a snapshot and delete all the added color tracks from the timeline.
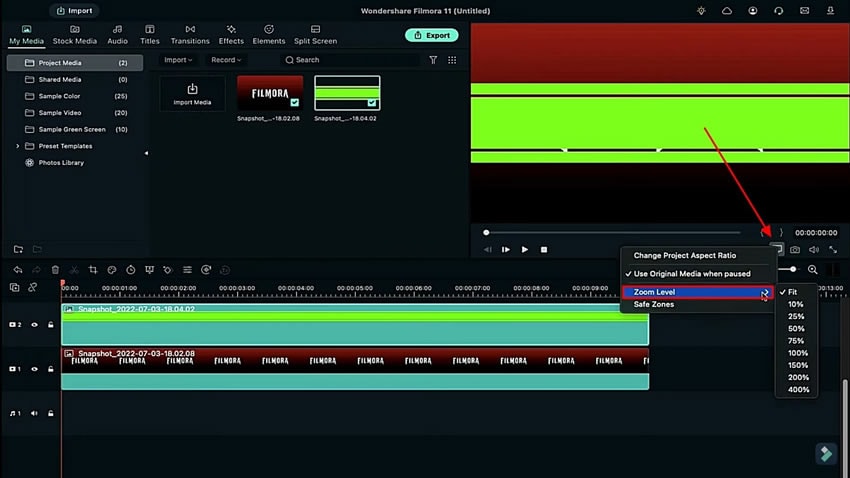
Start by dragging the logo snapshot on the track and adjust its duration. Continue to add the slider snapshot on another track and adjust its duration to a similar length. Change the "Zoom Level" according to your need from the "Preview Quantity and Display Settings" under the preview screen.
Open the slider snapshot settings and access the "Animation" tab. Look for the "Rotate" settings and stretch it on both sides to elongate it. Define the starting position by placing the playhead at the desired position.
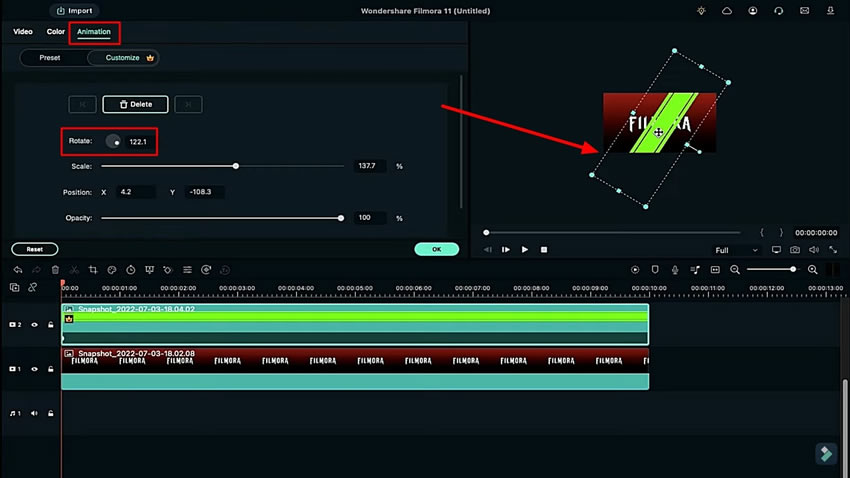
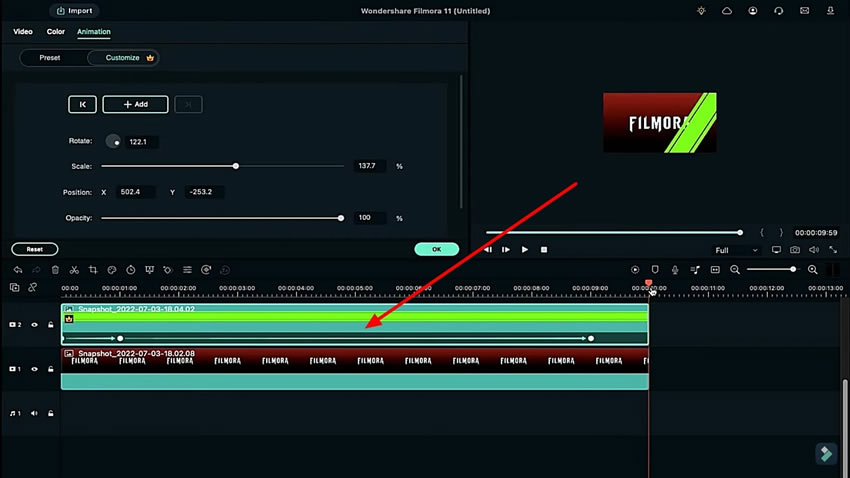
Adjust the position of the playhead at the second position and continue sliding it out of the screen. While this continually adds keyframes on the clip, slide it out of the screen to complete the process. Change the “Zoom Level” to “Fit” to view the clip in full screen.
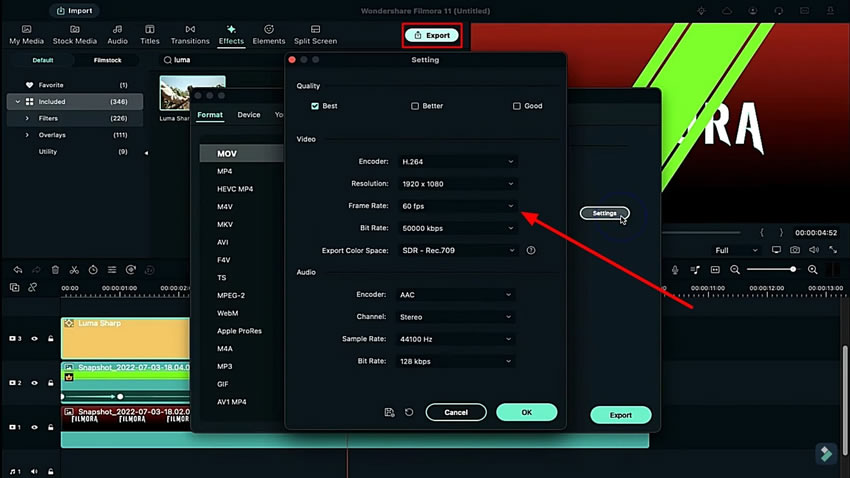
Navigate to the “Effects” tab to search for the “Luma” effect for adding the specific glass slide effect on the video intro. Apply this effect and export the final clip at a good resolution. Delete the slide clip from the timeline and open the video settings of the logo clip.
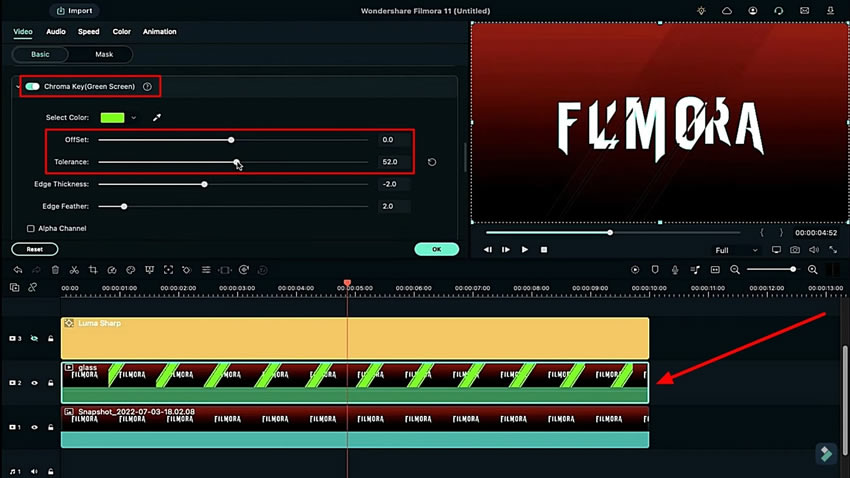
Increase the "Scale" value and import the exported clip on the timeline track. Access the video settings of the added video and enable "Chroma Key" in the "Video" section. Change the "Tolerance" and "OffSet" settings to create the effect. Click the "Render Preview" button to finalize all edits.
Creating a cool glass effect for your text with the help of Wondershare Filmora can save you time and effort. With this tool, you can present yourself as a professional content creator and video editor in front of the world and can engage a larger number of audiences. Following these steps, you can create multiple types of glass sliding effects.