Guide On How to Create Your Own Epic Cinematic Intro
Your passion for dynamic and heroic visuals is a great source of inspiration. In this video, we’ll show you how to create your own impactful intro using Wondershare Filmora.
Key Steps of This Video Tutorial To Follow
Guide to using Filmora AI Tools
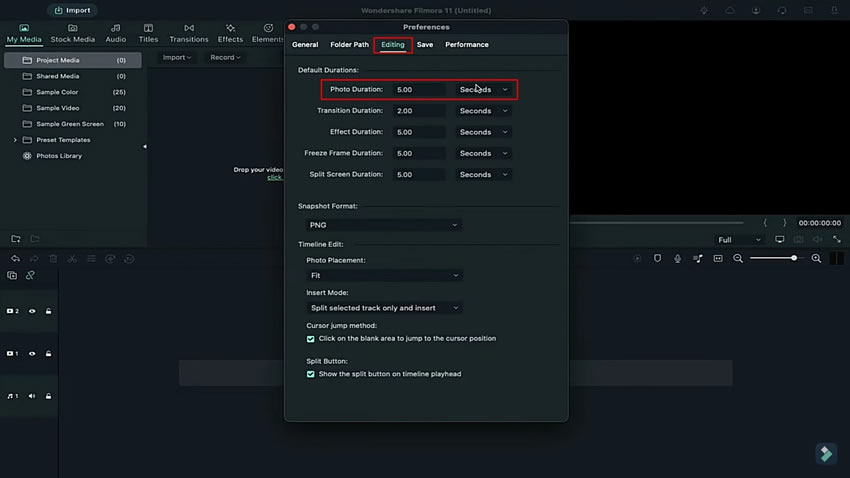
To start creating your desired cinematic style intro, you must adjust the video's photo duration. You can navigate to the “File” section in the top menu bar. This opens up a drop-down menu where you have to select the “Preference” button.
By clicking on it, you will be led to a new screen with more options. You should lead into the "Editing" section and locate the "Photo Duration" option. Adjust the duration of photos in your video clip according to your requirements.
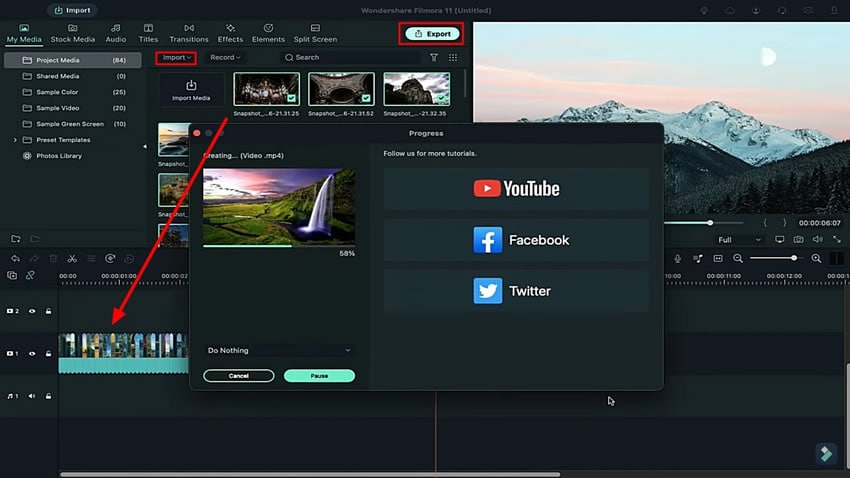
After adjusting the duration of photos, you can import all the files in the project media. You will require a huge set of images to create a small video. Therefore, you can select the number of images according to the desired length of the clip that you want to make.
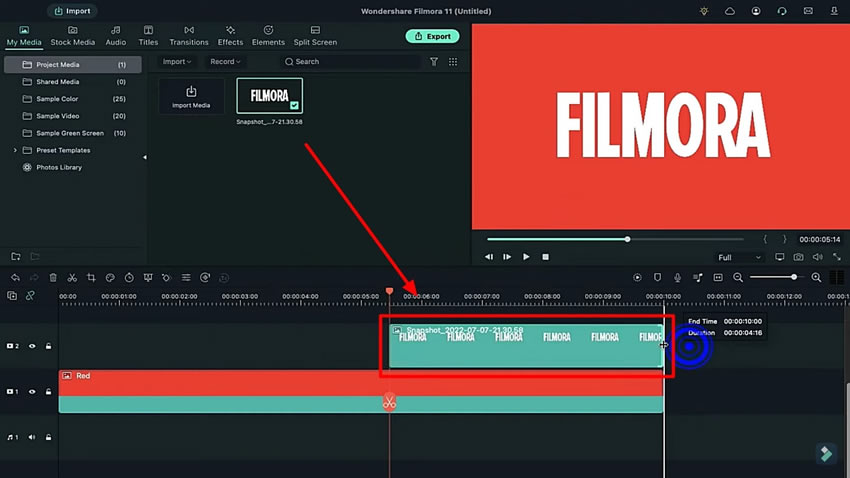
Now drop all the images in the timeline after importing them successfully into Filmora for intro creation. To make it long, you can copy these same images and paste them further to increase the length of your clip. Once your clip has the desired length, export it at a higher rate.
After you get the long clip, delete all the files from the project media. Lead into the “Titles” section in the menu bar to open a list of titles. Select the title you want to display in your intro and drop it in the timeline. You need to double-click on the added title to access the customization settings.
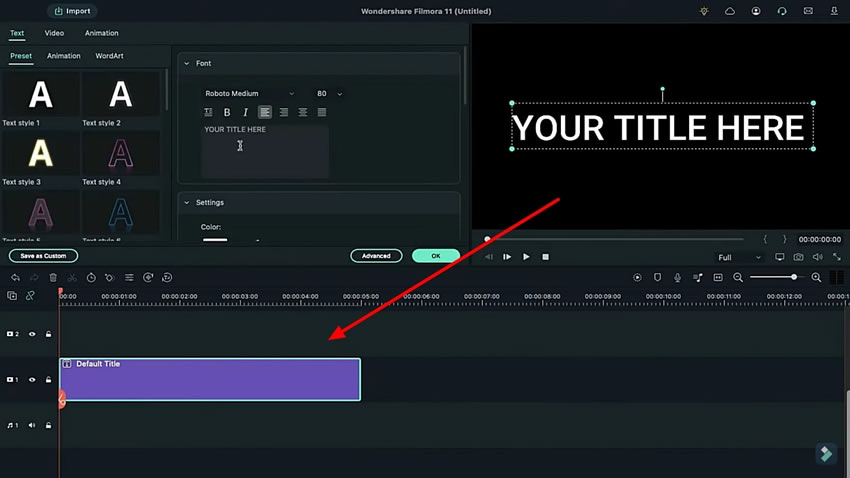
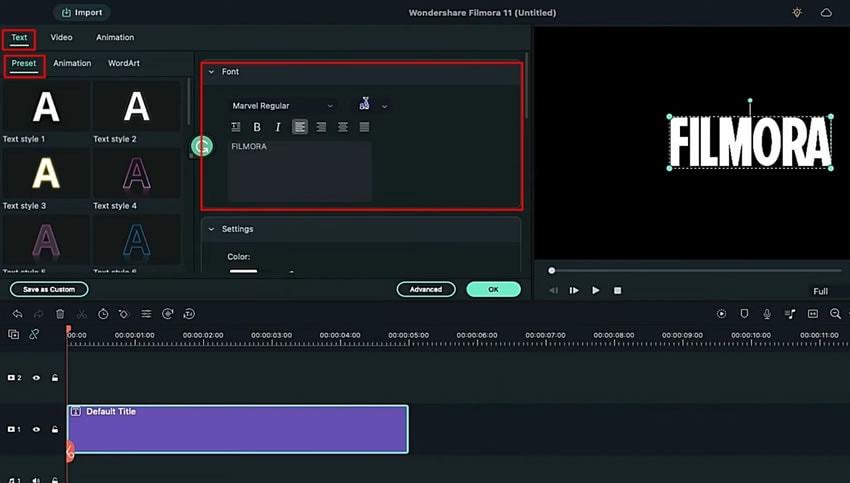
While keeping yourselves in the "Text" section, continue into the "Preset" sub-section to open the customization settings for your title. Here, change the font of the title in the "Font" section and add the text that you wish to display. Also, adjust its size using the correct options provided in the section.
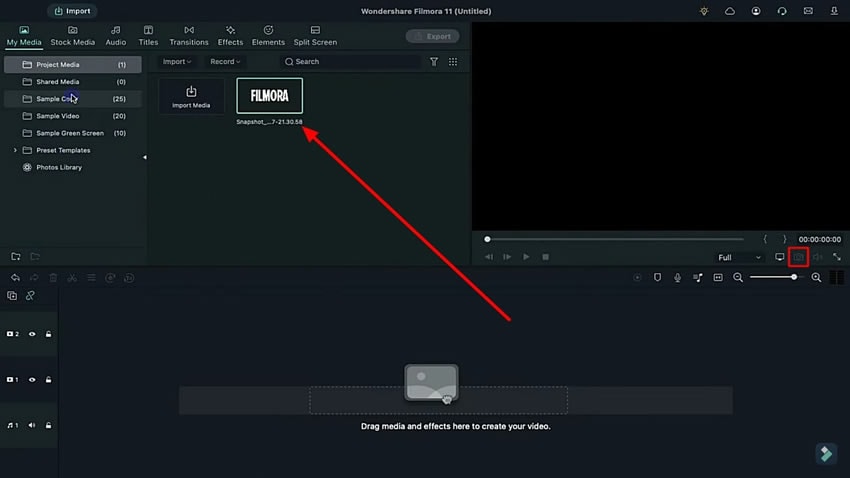
As the title gets ready, take a snapshot using the “Camera” icon on the right side of the screen under the preview window. Save the snapshot as a PNG and delete the added title from the timeline.
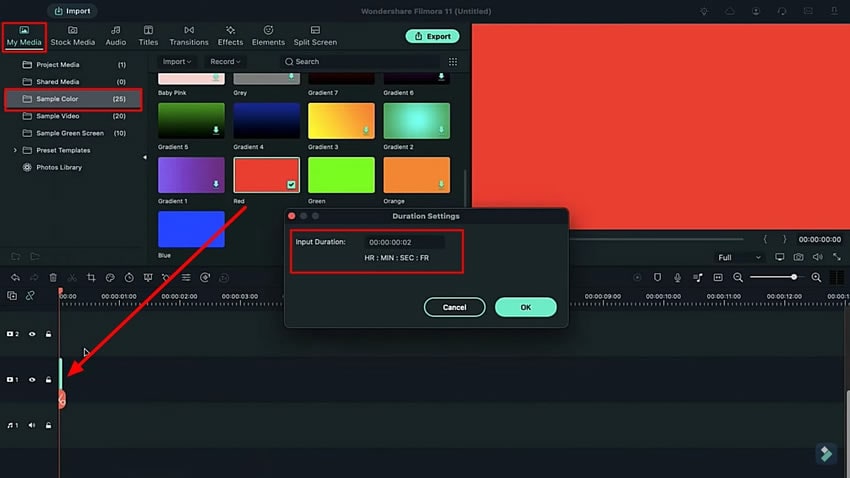
We need to drop a sample color in the timeline to add a **dynamic visual effect** to our clip. Add a color using the "Sample Color" panel under the "My Media" section. Select the desired color or go with red to make it look like a **powerful, impactful intro**. Once you drop it in the timeline, right-click on the color and select “Duration” from the drop-down menu that appears.
On setting the duration of the sample color track, put the playhead at a desired point and drop the text snapshot on the track. You should also right-click and set its “Duration” settings to adjust with the sample color track.
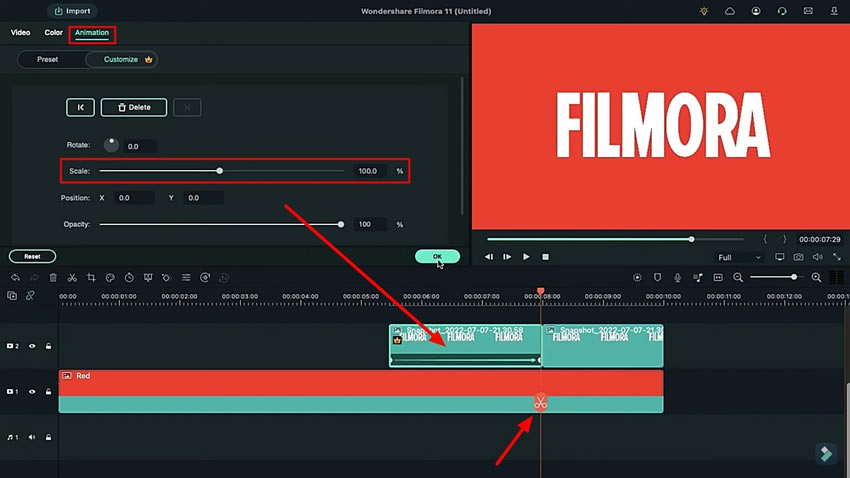
You need to split the added text snapshot from a particular point using the "Scissors" button on the timeline. Place it on the starting point of the snapshot on the timeline and double-click to open its settings. Redirect into the "Animation" tab from the top and increase its "Scale" settings. Change the scale at the beginning of the snapshot and place the playhead at the end of the split clip to reset the scale at that point.
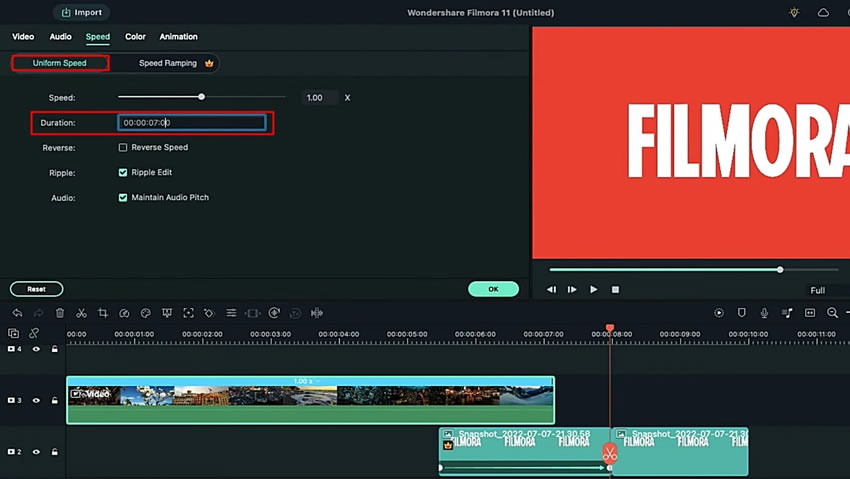
Import the video clip created at the start using the photos and add it to a track. Locate the "Speed" button on the bar above the timeline and select "Uniform Speed" to open its respective settings. Change the "Duration" of the clip using the suitable set of options in the panel that opens.
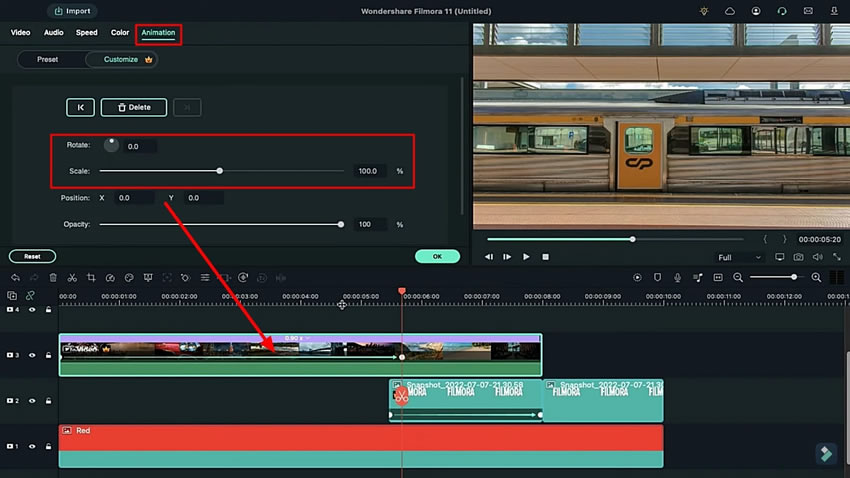
Continue into the “Animation” tab from the top and adjust the “Scale” and “Rotate” options according to your requirements. Do a similar change of settings on another position of the same clip to create a zooming and rotating effect.
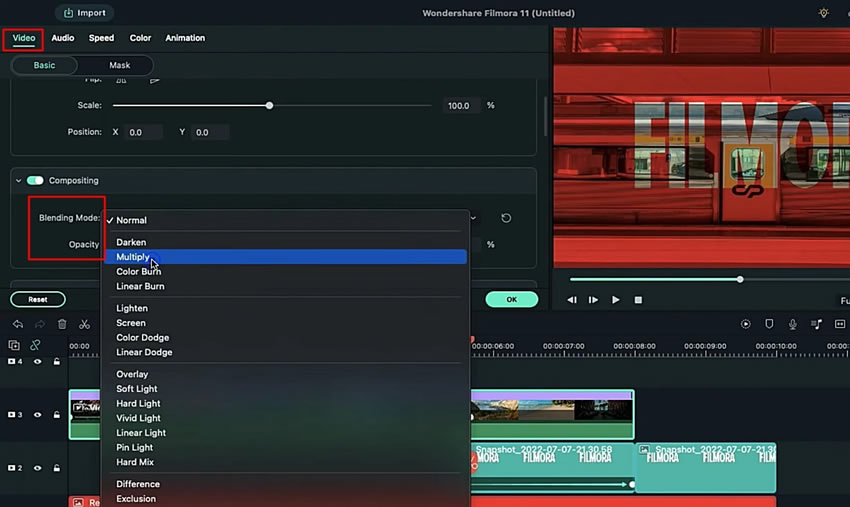
Once you have changed the animation settings of your added clip, lead into the “Video” tab from the top and change the “Blending Mode” according to your requirements. You can also adjust the “Opacity” settings in the same window.
On finalizing the adjustment of the clips, lead into the “Effects” tab from the top and drop the desired effect on the track. Change the settings of the effect by double-clicking on the timeline.

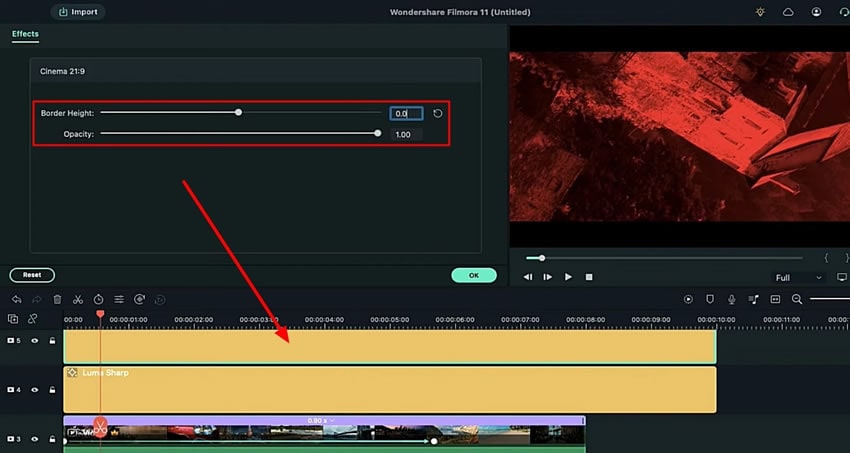
Meanwhile, you have to add the “Cinematic Bar” effect in your clip as well. Search the “Effects” tab from the top and search for the “Cinematic Bar” effect. Add it to the track and adjust its duration according to your video clip. Open its further settings and alter its “Border Height” and “Opacity” using the provided options.
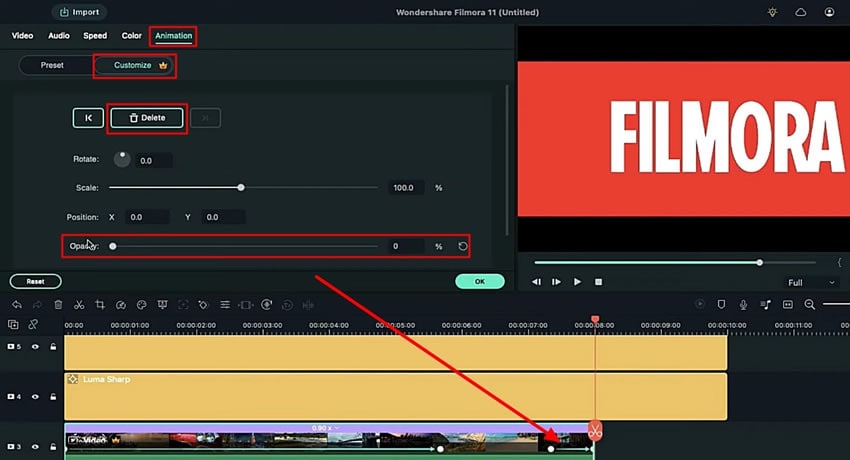
For finalizing the cinematic intro template clip, you will have to add more keyframes to your video. On placing the playhead in the desired location, double-click on the video and open its "Animation" settings. Access the "Customize" section and add a blank keyframe using the "Add" button. Move the playhead at the end of the video and change its "Opacity" while adding a keyframe.
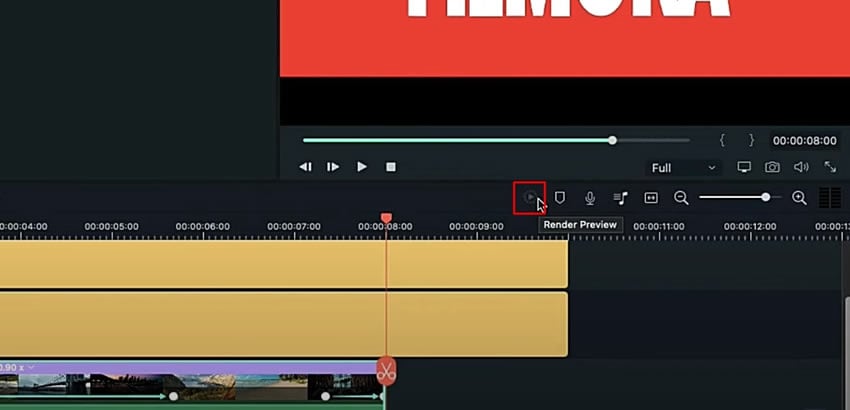
Once you are done customizing your video, you can have a final look at it. For this, simply click the "Render Preview" button, and you are ready to go.
Creating an intro like Marvel is always a dream for all Marvel fans. To fulfill this dream, Wondershare Filmora Marvel intro maker is the best tool to help you add cinematic intro effects. This will help you to create fan-based content and show the world your artwork with quality.