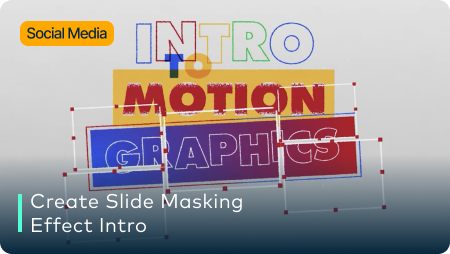
Guide on How to Create Slide Masking Effect Intro
Having a creative and customized intro leaves a long-lasting impact on viewers. Let’s see how you can make your intro creative by adding slide masking effects through Filmora.
Key Steps of This Video Tutorial To Follow
Guide to using Filmora AI Tools
To start creating your desired masking slide effect intro, you need to select the appropriate “Title” first. As you navigate the respective section from the top, you can drag down the “Default Title” on a track. Adjust its length according to your requirements.

There are a complete set of customization settings that allows you to change the font of your title and edit the text by double-clicking on the “Default Title” that you've added to the track. As you open the title settings, you can adjust its size and change the text spacing according to your need. Continue to take a snapshot of this frame using the "Camera" button present on the right side of the window.

We will need to make more changes to the title to take more snapshots. Double-Click on the “Default Title” to access its settings again, where you can change the color and take another snapshot.

You can access the “Advanced” panel from the similar editing section of the title. As a window opens, navigate to the “Shapes” icon to add a shape of your choice. However, you will need to switch off “Text Fill” from the left side of the window and select the “Shape Fill” option that can be found by scrolling through the panel.
This will help you to change the shape color and adjust it to the desired size. After this, you can rotate it in the position you want.

Continue to delete the text layer from your timeline of the "Advanced” panel and lead into the “Animation” tab from the top. Select any animation on the left you want to add to your intro.

After this, you need to locate the 5th frame and make it the starting point of the title clip according to your discretion. Adjust the title in the timeline according to the frames and drag the first snapshot clip on a track on the timeline at the position of the “Playhead.”

Once your clip length is adjusted, go to “Sample Color” in the “My Media” section and add any color you want on a new track. Adjust the size of the sample color and rotate it, so it can be placed on the desired position of the snapshot easily. Decrease the duration of it as well, which can help you fix the clip for the slide effect.

Now, double-click on the snapshot to access the “Settings” panel. Change the axis position using the “Position” options to make the text slide into the color shape you have placed in the frame. Re-adjust the position of the playhead, and change the values of “Position” again. Lead to the ending frames of the snapshot and add another keyframe.
Place the playhead at the end of the snapshot clip. Change the axis position and reduce the “Opacity” at the desired level. You need to do a similar change in opacity across the first frame of the snapshot as well. This will create a sliding effect from right to left, which you can export at a higher rate.

Drop the 2nd snapshot in the timeline on a lower track position and adjust its duration. Once it is adjusted, change the position of the color shape in the alternate direction. Hide the snapshot of the track that is not in use and add keyframes similar to the first snapshot, but make sure to slide it from right to left. On completing the edits, export the clip at a higher rate.

Delete all the clips from the timeline and import the clips that were created and exported before. Add a background clip in the data that is being imported on the platform.

Drop a music clip on the first track in the timeline. Continue to import the 1st exported clip on another track and adjust their lengths. Change the duration of the background clip as you like. Also, select the added clip to open its video settings and lead into the “Video” tab. Continue to locate the “Blending Mode” option in the “Basic” section and change it accordingly.

Drop the 2nd clip on another track in the timeline and adjust its length and blending mode. Place the playhead at the 5th frame and go to the “Elements” tab from the top. Drop the required motion element shape on a new track, keeping its length according to your need. Copy it, and move the play head further. Paste the elements, and align their position according to the effect.

Once you are done editing your video through Filmora masking techniques, you can have a final look at it. For this, click on the “Render Preview” option, and you are ready.

Making a sliding effect intro can be a bit difficult sometimes, but with masking in Filmora, your work can become easy and quick. Using its multiple effects and different features for adding sliding effects, you can create an engaging video intro that will keep the audience's attention and leave a positive impact on them.