Key Steps of This Video Tutorial To Follow
Guide to using Filmora AI Tools
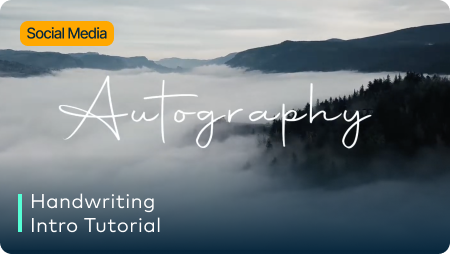
To get handwritten signatures on Filmora, select the “Titles” section from the top and add “Default Title” to the timeline. To edit the added title, double-click, and it will open a new window pane. While staying within the “Text” section, you can choose the “Font” and “Size” of your text as desired. You can get the idea of signature fonts from the internet as well.
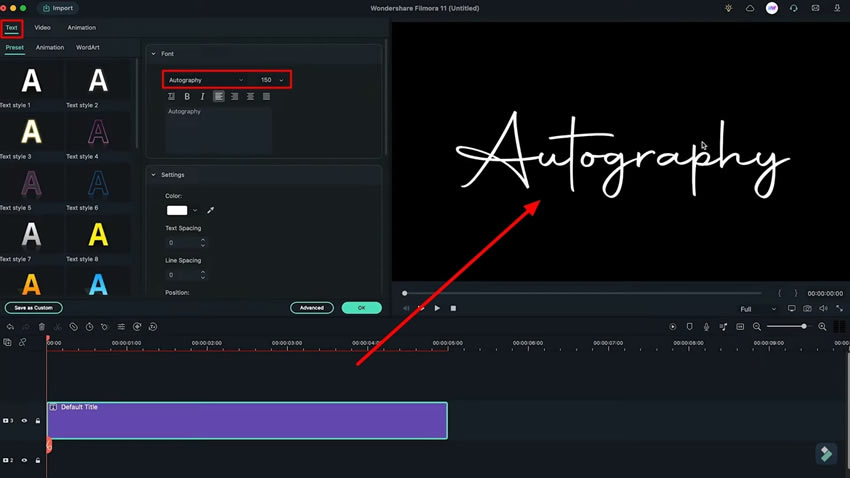
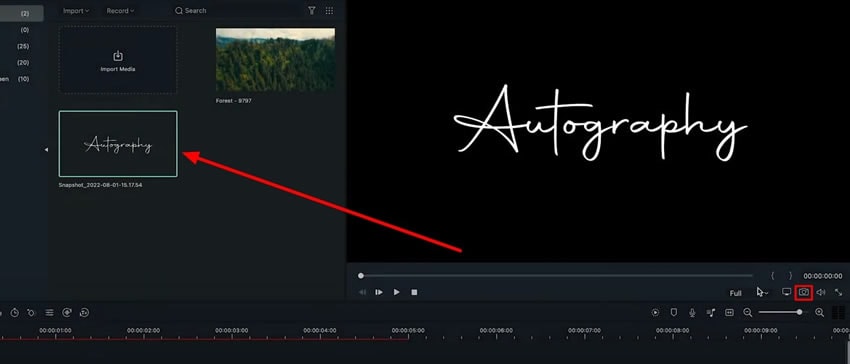
To save the text as an image, take a snapshot using the “Camera” button and save the file in a “PNG” format. In this way, the background will be avoided, and you will only get the text for further use.
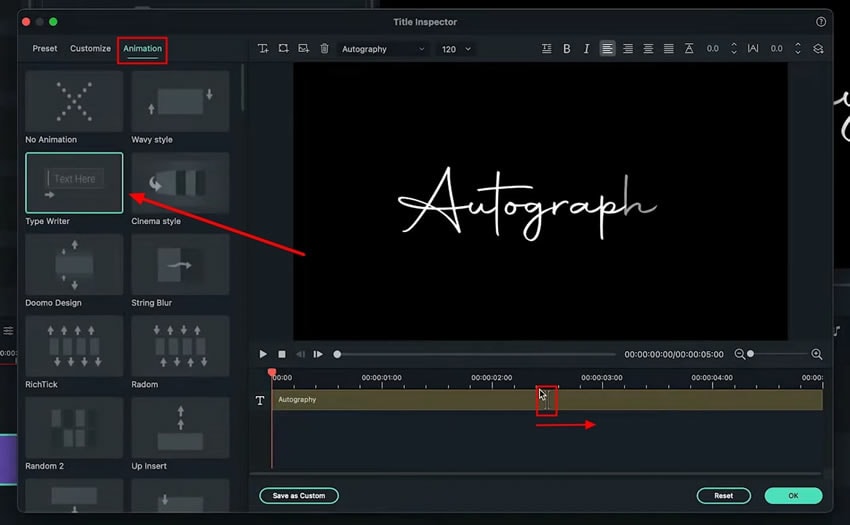
When it comes to how to create animated signature, double-click on the title track and navigate to its “Advanced” settings. A new window will appear on the screen from where you have to navigate into the “Animation” tab. Continue to select the “Type Writer” animation effect for the title track. Set the ending and starting point of the animation by simply dragging both the points of the animation effect to the right side.
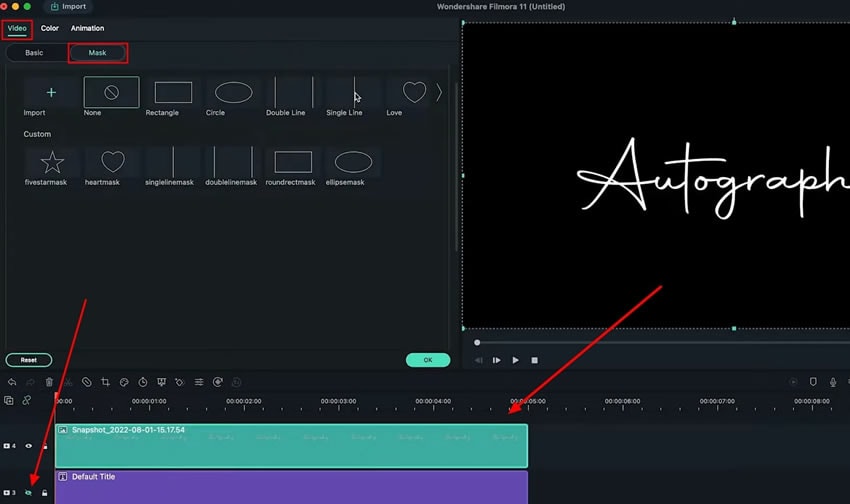
After adding animation to your text, hide the title using the "icon" present on the left side of the timeline. Drag the snapshot over the title track and double-click this to enter its settings. From the “Video” tab, continue into the “Mask” section.
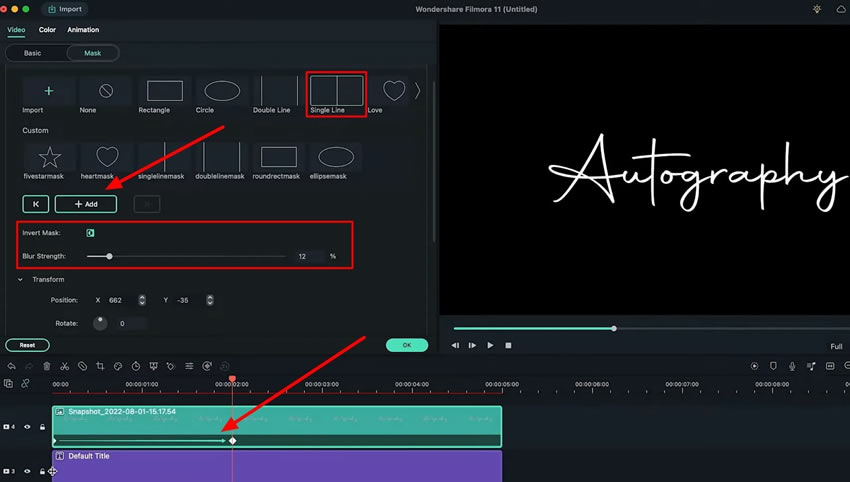
Select the “Single Line” masking style from the settings that open and turn on the “Invert Mask” option. To cover the complete snapshot, drag the line towards the left from the preview window and increase the “Blur Strength” as required. Add a keyframe at the beginning of the “Snapshot,” and after two to three seconds in frames, drag the line towards the right within the preview window to reveal the title.
Now “Unhide” the original title track from the timeline and cut a few frames further from the start. Go back to the “My Media” tab and add the video you want to add to the background on the timeline.
To adjust the background video, right-click to open a drop-down menu. Select “Uniform Speed” from the list and continue into the panel that opens. Navigate into the “Uniform Speed” section and change the slider against the “Speed” option. Drag the signatures on the timeline towards the right and place them at the center of the background video.
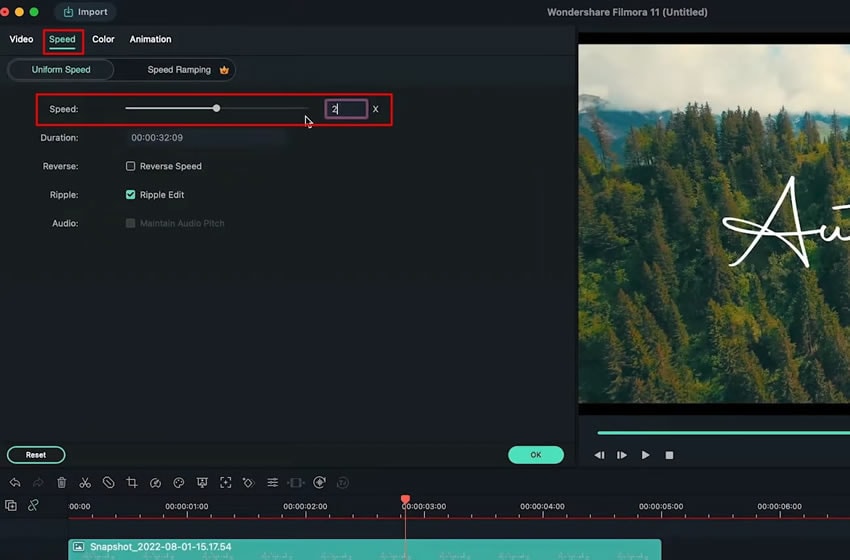
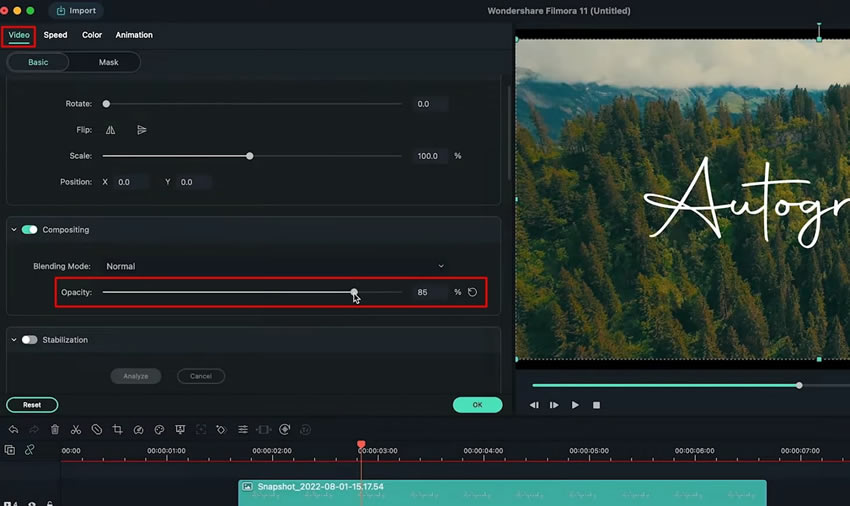
Double-click the background video track on the timeline to enter its settings. From the “Video” tab, adjust the “Opacity” of the background video.
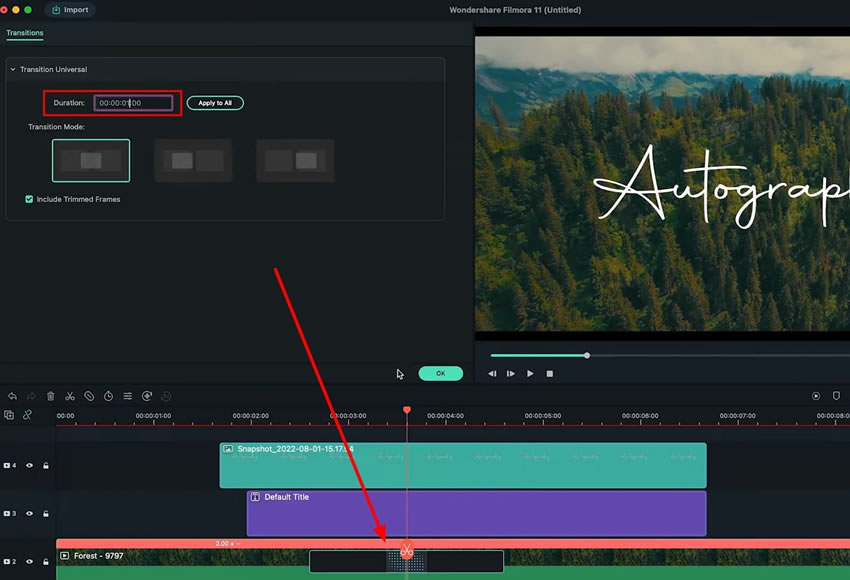
If you want to add “Transition” to the video, split the video from the timeline using the “Scissors” icon. Navigate to the “Transitions” tab and select the transition of your choice. Once the transition is added, you can adjust the “Duration” of the transition by double-clicking the effect.
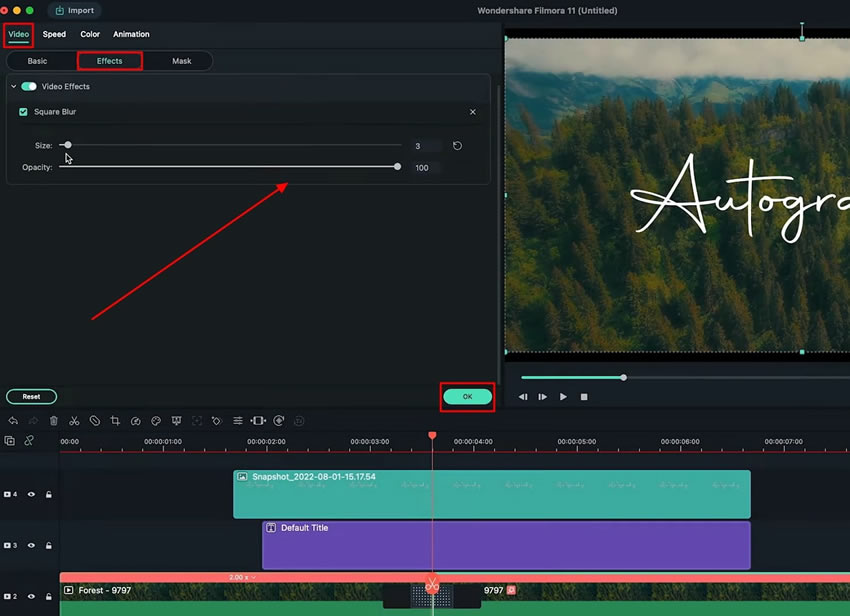
If you want to add more effects to the video, go to the “Effects” tab, select the effect of your choice, and drag it to the “Video” on the timeline. As you access its settings, head into the "Video" section, go to the "Effects" subcategory, and adjust the settings accordingly. Select "OK” to save all the settings for the effects of the video.
Wondershare Filmora has done wonders when it comes to any task related to headliner video editing. When creating handwriting video intros, you need the right elements to make something that looks great. With all the options provided by Filmora, the procedure not only becomes easy but attractive in all ways.


