

 TL;DR:
Due to the upcoming discontinuation of Adobe Premiere Rush, creators seeking a simple, cross-platform video editor should transition to Wondershare Filmora for uninterrupted access and advanced feature scaling.
● Adobe will remove Premiere Rush from all download platforms on September 30, 2025, and existing installed applications will completely expire and stop working on September 30, 2026.
● Filmora replaces the basic drag-and-drop functionality of Premiere Rush with scalable editing tools, offering AI Smart Cutout, motion tracking, and speed ramping without requiring the professional expertise needed for Adobe Premiere Pro.
● Although Filmora applies a watermark to free exports, it provides customizable resolution controls and budget-friendly lifetime payment plans that make it more accessible than upgrading to Premiere Pro's subscription model.
Ask AI for a summary
 ChatGPT
 Perplexity
 Gemini
 Claude
 Grok
Grok
If Premiere Pro feels a bit too much and keeps you stuck at your desk, Adobe offers a simpler option called Premiere Rush.
With Premiere Rush, you can create and edit videos more easily. You can also use it anywhere since it's also available as a mobile app. This video editor is designed to fit perfectly for YouTubers, vloggers, and social media content creators who want professional-looking videos without the complexity of advanced software.
If you've been searching for Adobe Premiere Rush tutorial that helps you from setting up your first project to exporting your final video, this is where you should start. Here, we will also share advanced tips and compare with alternative tools so you can get the best option for your needs.

Part 1. What is Adobe Premiere Rush?
Premiere Rush is known as beginner-friendly for its simple interface and easy drag-and-drop tools; hence, it has become a favorite video editor for vloggers and social media creators. It works on both desktop and mobile, so you can use it on both devices if needed.
However, Adobe has announced that starting September 30, 2025, Premiere Rush will no longer be available on the Adobe website or in app stores. If you already have it installed, you can keep using the app until September 30, 2026.

Why It's Called the “YouTube Generation Editor”
When asked why it's called the “YouTube Generation Editor,” the answer is that this application is indeed popular among YouTubers due to its speed and simplicity.
For creators who produce content continuously, Premiere Rush has the ability to sync projects across multiple devices. It helps you do simple, basic edits like cutting clips, adding titles, and adjusting colors. And, you can upload directly to platforms like YouTube, Instagram, or TikTok.
Adobe Premiere Rush vs Premiere Pro (Quick Comparison)

When comparing Adobe Premiere Rush and Adobe Premiere Pro, they both have slightly different features and target users:
- Premiere Rush is a lighter and faster version compared to Premiere Pro. It has fewer tools to learn, and this application is designed for quick editing.
- Premiere Pro is a more advanced version of Premiere Rush, it features professional tools such as color settings, multi-camera editing, and advanced effects.
To sum up, if you need powerful customization and are okay with more complex features, choose Premiere Pro. If you want quick and simple editing, choose Premiere Rush.
Part 2. Getting Started with Adobe Premiere Rush
How to Download and Install Adobe Premiere Rush
You can only use Adobe Premiere Rush if you have downloaded and installed it from the official Adobe website or from app stores such as Google Play and the Apple App Store before September 30, 2025.
The app is available for Windows, macOS, iOS, and Android. Once installed, you will need to sign in with your Adobe account or create a free account to start editing.
How to Set Up a Project in Adobe Premiere Rush (Beginner Guide)
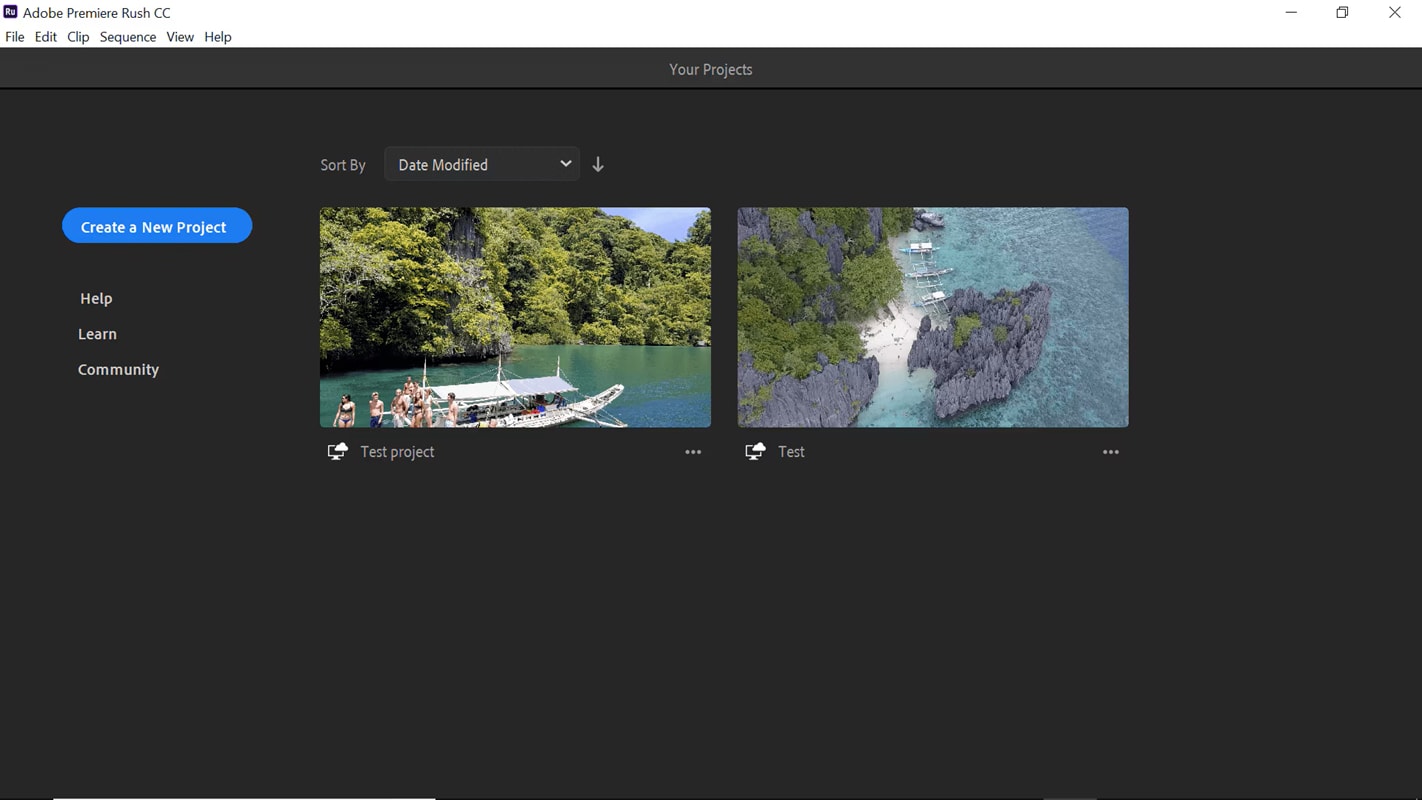
- Launch Premiere Rush and click "Create a New Project".
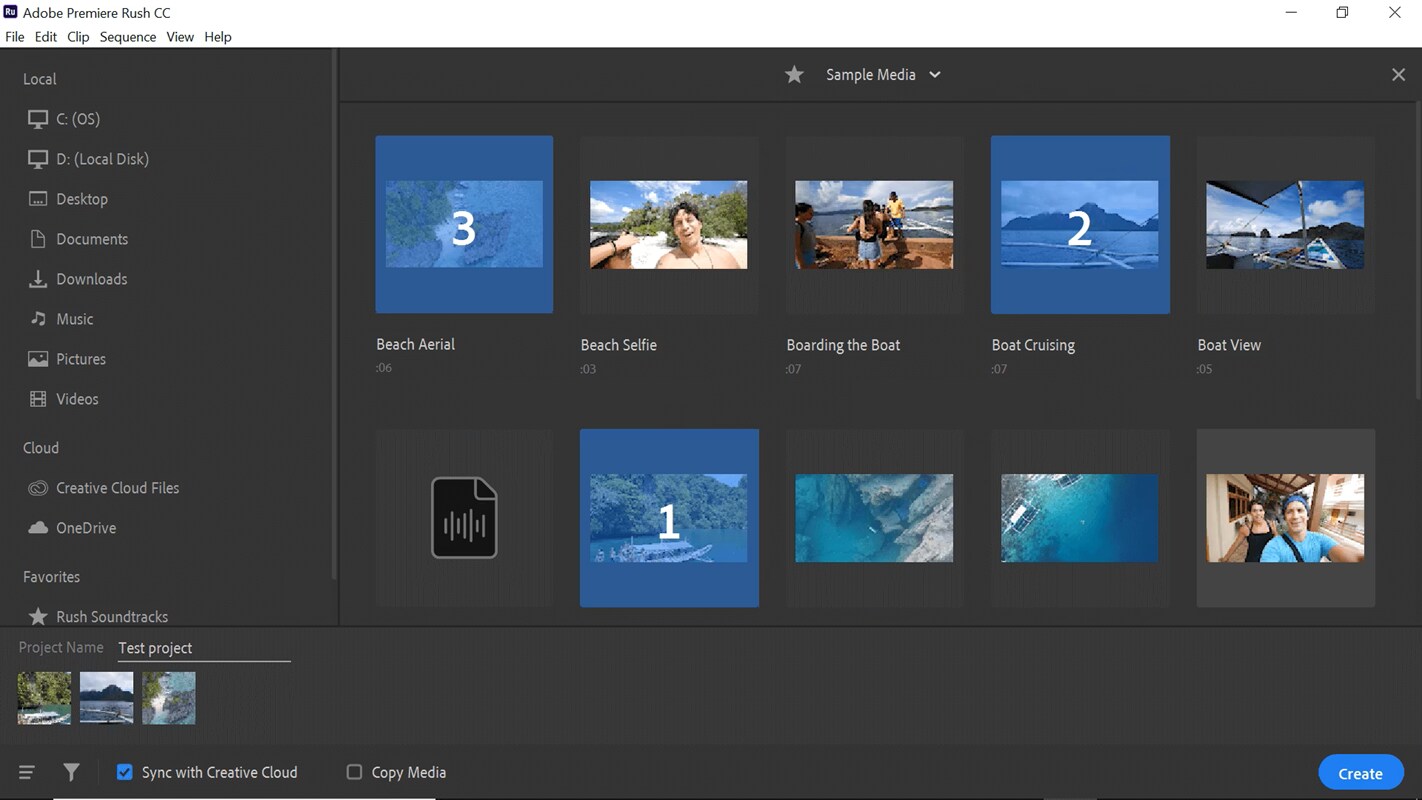
- Select the video clips, images, or audio files to import. You can rename your project and choose where to save it.
Rush will automatically place your clips on the timeline, so you can start trimming or rearranging them right away.
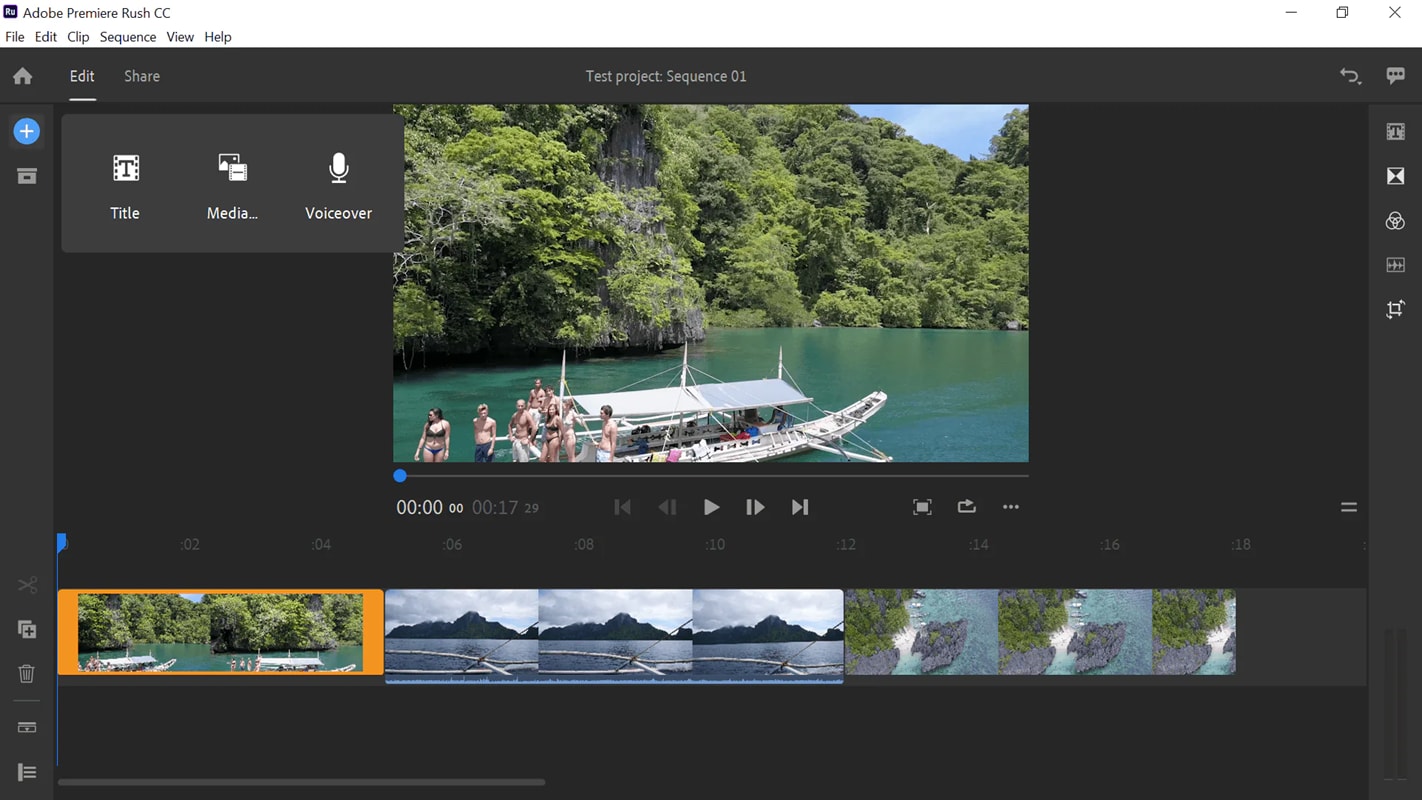
Understanding the Workspace and Interface
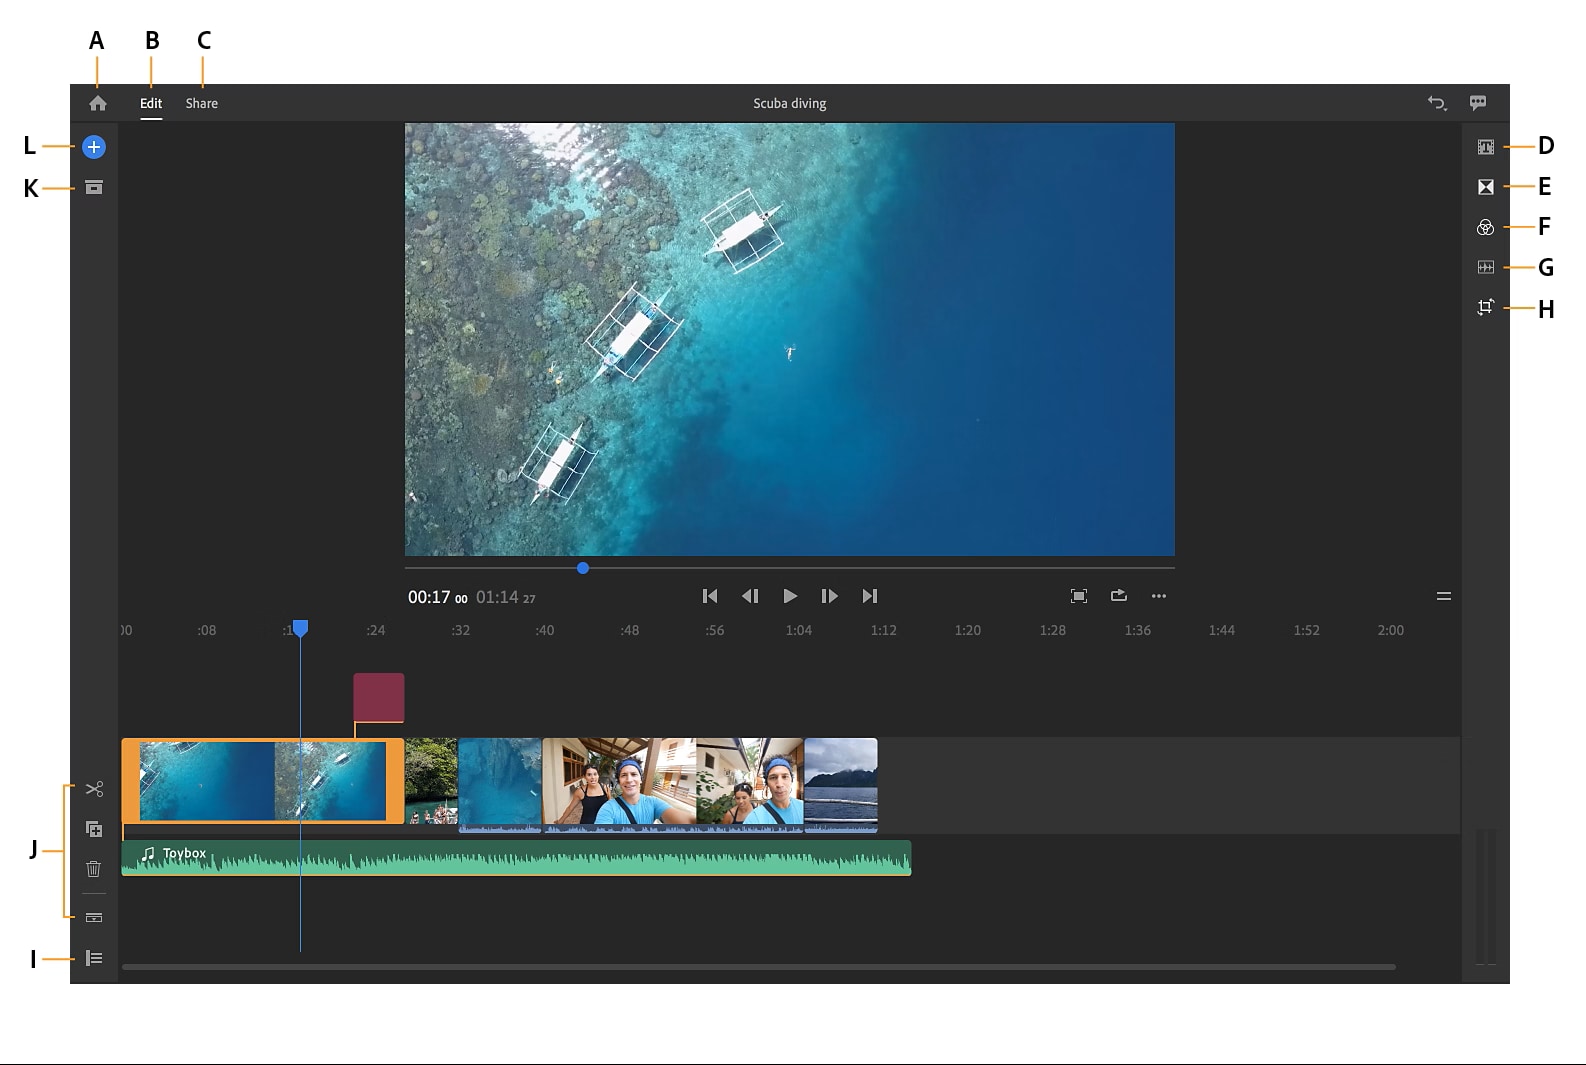
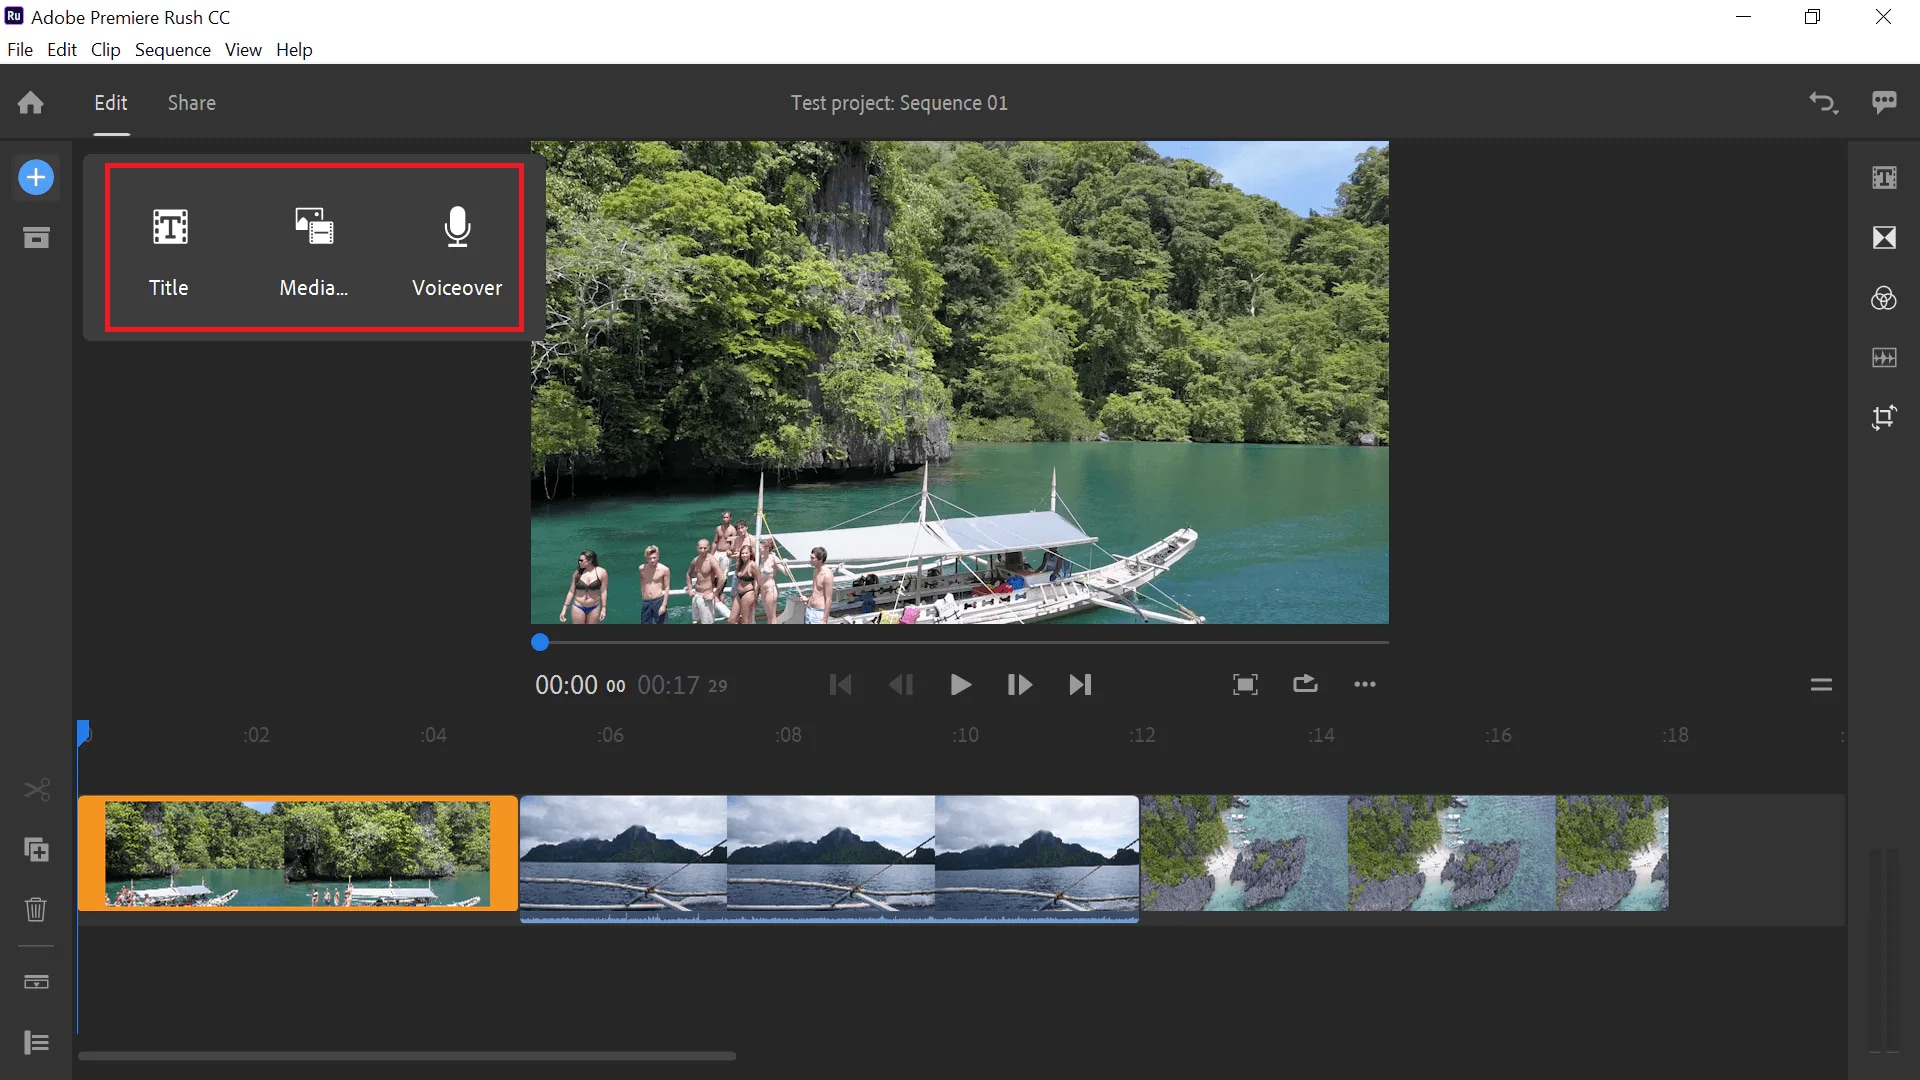
The Premiere Rush workspace is designed to be simple and intuitive. The preview window displays your video in real time, while the timeline allows you to trim, split, and arrange clips. Here are the functions of each labeled section (A–L):
- A. Home Button – Returns you to the home screen, where all your projects are stored.
- B. Edit Tab – Opens the main editing workspace where you arrange clips, adjust audio, and add effects.
- C. Share Tab – Switch to this tab when you're ready to export and share your video to YouTube, Instagram, or save it locally.
- D. Titles Panel – Add text, titles, and motion graphics to your video.
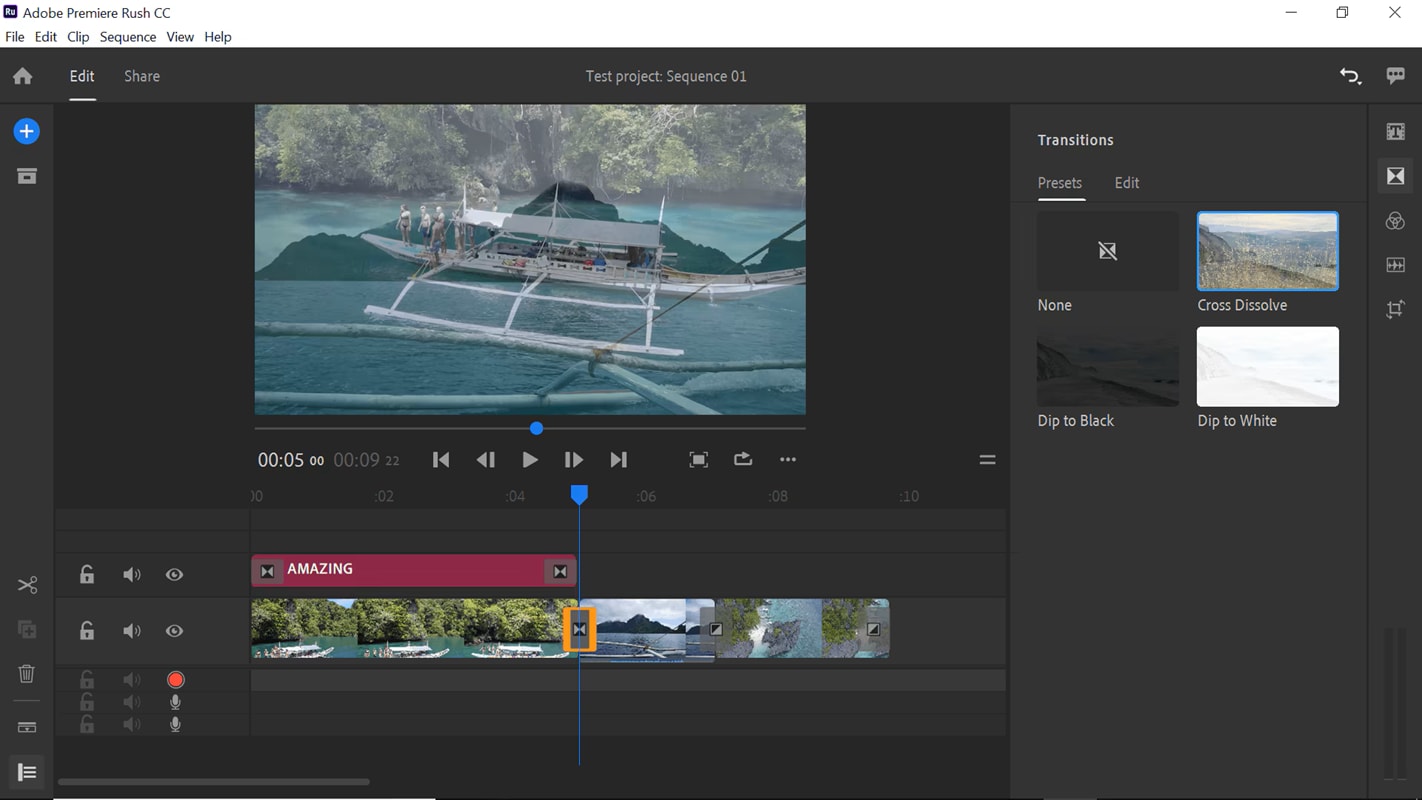
- E. Transitions Panel – Apply smooth transitions like cross-dissolve or dip to black between clips.
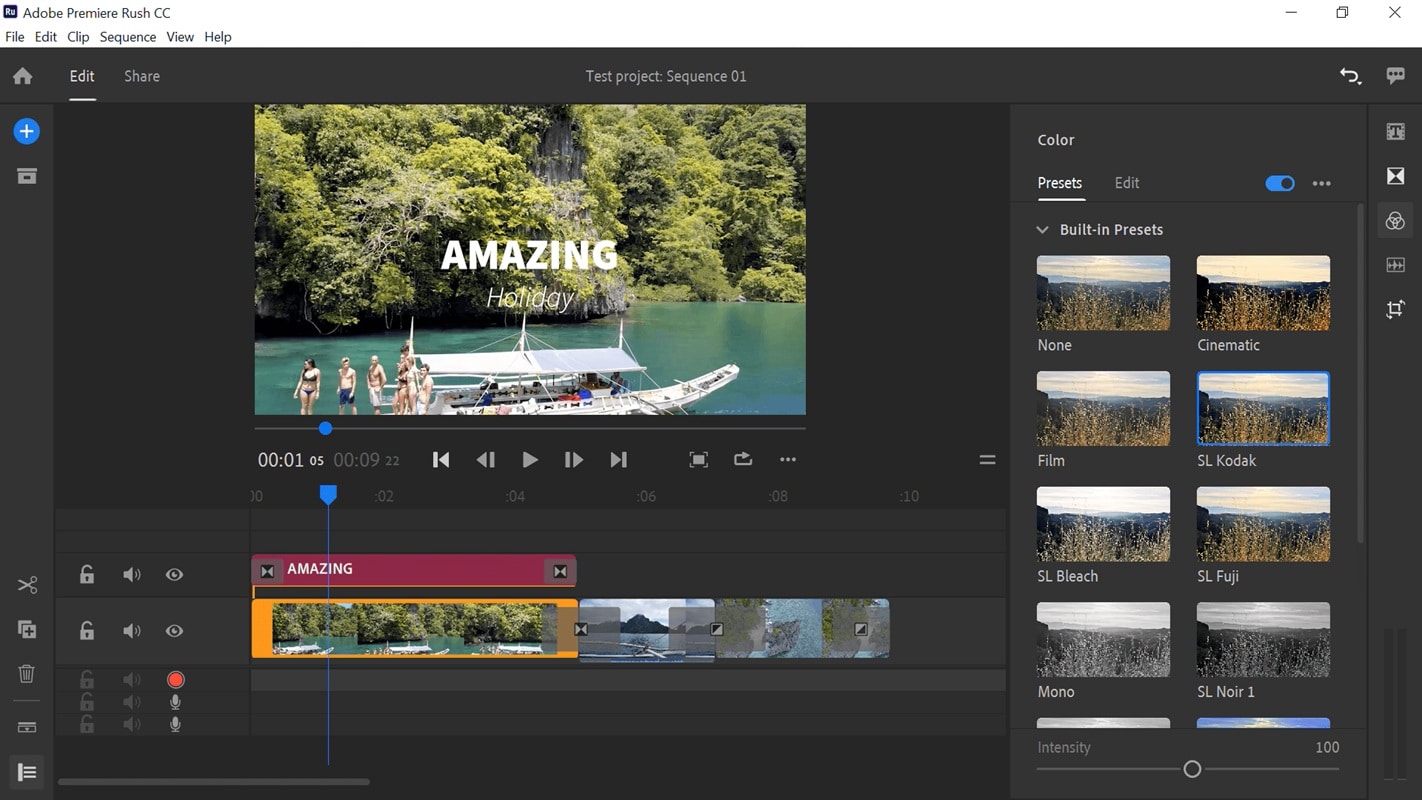
- F. Color Panel – Adjust color, brightness, contrast, or apply preset looks for a consistent style.
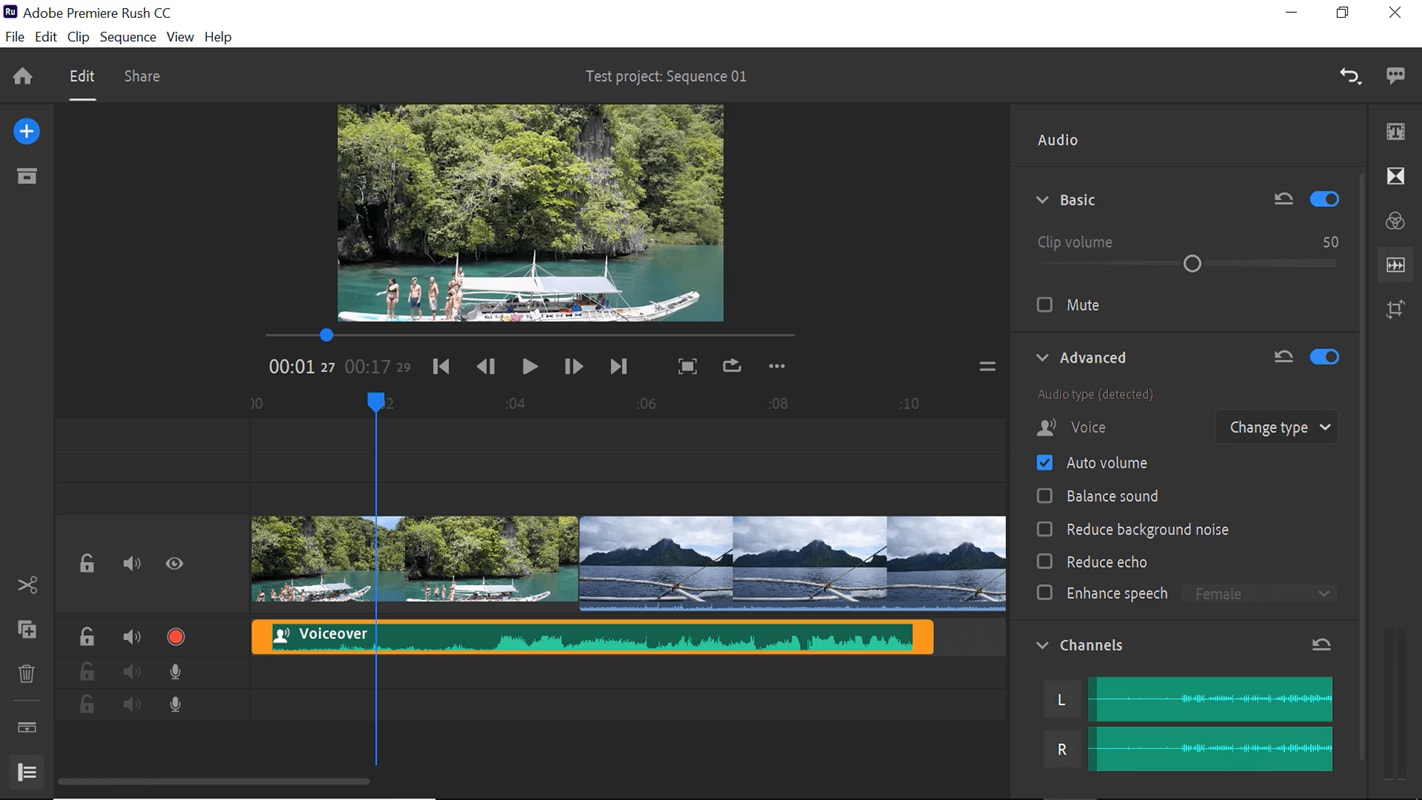
- G. Audio Panel – Control volume, reduce background noise, and automatically adjust music below dialogue.
- H. Transform Panel – Change clip size, position, rotation, and add picture-in-picture effects.
- I. Timeline View Toggle – Switch between an expanded or compact view of your timeline tracks.
- J. Timeline Tools – Includes split, duplicate, and delete for precise clip editing.
- K. Media Browser – Access imported clips or add new media to your project.
- L. Add Media Button – Quickly import videos, photos, or audio from your device or cloud storage.
Part 3. How to Use Adobe Rush Step by Step
If you are new to editing, you might feel unsure about how it works. However, learning Adobe Rush is easier than you might think. This article will discuss the Adobe Premiere Rush tutorial that you should know.
You can create your first vlog or quick social media content. These steps will help you stay organized, work efficiently, and get professional results without feeling overwhelmed.
Open Rush and choose Create a New Project.
Click the Add Media button and select files from your device or cloud. Rush will automatically place the selected clips on the timeline.
Arrange clips by dragging them left or right on the timeline. To change the order, drag a clip and drop it where you want it to play.
- Move the playhead to the point where you want to cut.
- Use the Split tool (scissors icon in Timeline Tools) to cut the clip at the playhead position.
- Select the unwanted segment and press Delete to remove it.
- Cut the clip by dragging the left or right edge of the clip inward to shorten it. The preview will update in real time.
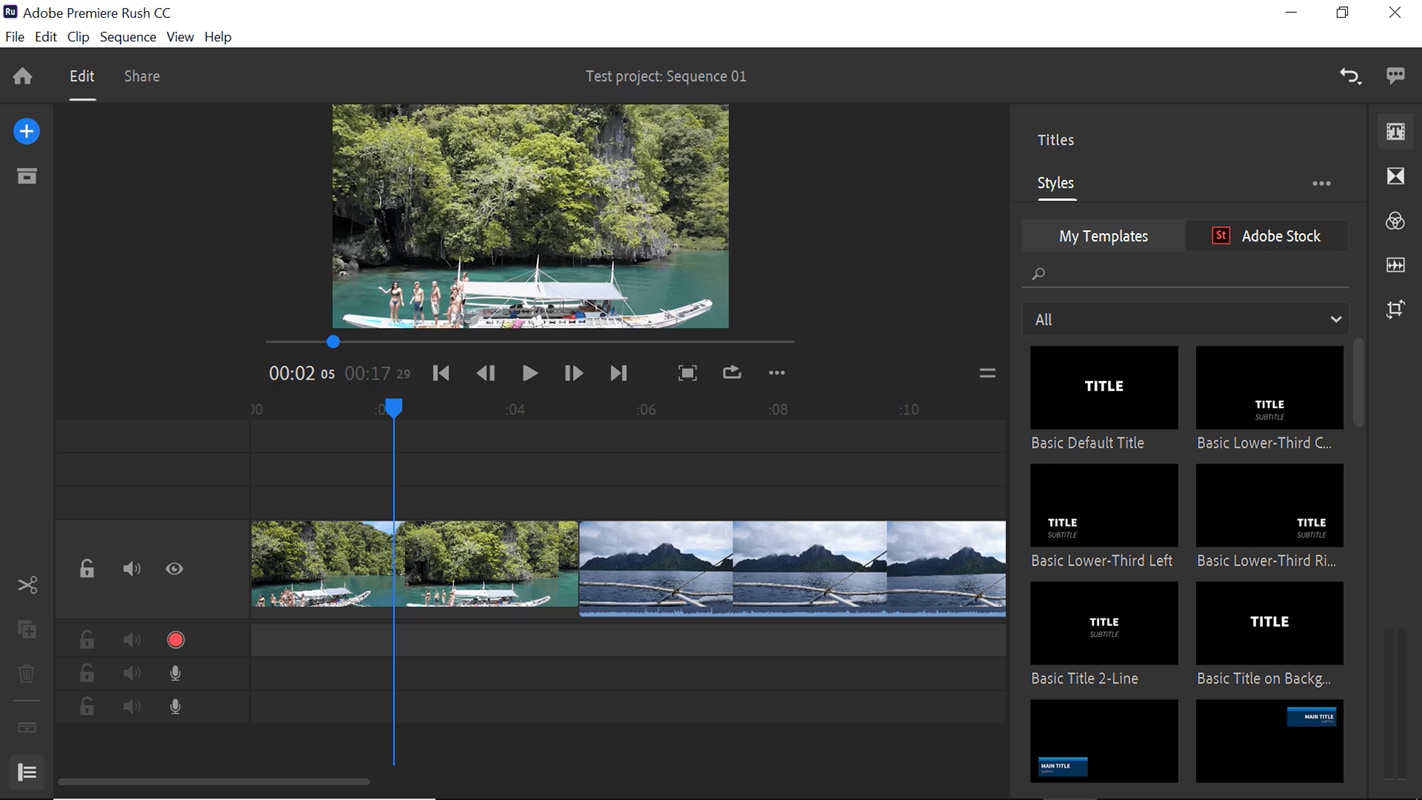
- Open the Titles panel, drag a title template onto the timeline, then click the text in the preview window to edit.
- Adjust font, size, alignment, and position in the title settings.
How to Add Voiceovers in Premiere Rush
- Move the playhead to where you want to start recording, then use the microphone/record button to record sound directly to the timeline.
- After recording, use the Audio panel to lower the background music and balance levels.
How to Add a Transition in Premiere Rush
- Open the Transitions panel, drag a transition between two clips, and drop it in place.
- Adjust transition duration by dragging its edges in the timeline.
- Select a clip on the timeline and click the Color icon in the right panel to access presets and adjustment options.
- Choose from the presets for quick results, or adjust in detail.
- Play your video to see the results. Adjust the settings until you get the style and mood you want.
- Click the Share button at the top to open export settings.
- Adjust file name, resolution, and destination. You can export to your device or directly to YouTube, Instagram, or Facebook.
- Click Export and let Rush process your video. Once it's done, your video is ready to share with your audience.
Part 4. Advanced Tips for Better Video Editing in Adobe Rush
With the basics and Adobe Rush tutorial covered, it's time to learn how to enhance your edits to make them look polished and professional. Here are some tips to help you turn your simple videos into more engaging content:
Best Practices for Titles and Fonts
Aside from being a label for a scene, titles can also function to set the mood of your video. The tip is to choose a font that's clear and easy to read, and try to use a consistent font throughout the video.
You can also use colors that match your brand colors to make it look more polished. Then, place the title without covering any important details in the video.
Audio Editing and Voiceover Adjustments
To keep the dialogue clear, you can lower the background music volume or use auto ducking to reduce the music during dialogue. Remove unwanted noise by synchronizing the voiceover with the clips and Rush's voice reduction tool, so the sound is clear and professional, as audio is just as important as visuals.
Using Consistent Filters for Cohesive Videos
Choose one filter or color preset that suits your video's mood and apply it to all clips. This ensures visual harmony and prevents the video from looking mismatched.
Common Mistakes Beginners Should Avoid
- Using too many effects or transitions, which can distract viewers from the main content.
- Overlooking audio balance, causing music, voices, or sound effects to overpower each other.
- Mixing up aspect ratios, leading to inconsistent framing or black bars in the video.
- Forgetting to check export settings, which can lower the final video quality before sharing.
Part 5. Other Beginner-Friendly Options to Make Editing Easier
Since Adobe has decided to discontinue Premiere Rush, it has introduced Premiere for iPhone as a replacement. With this change, you might be wondering if it's still the best choice for quick and simple edits, or if you should go for another beginner-friendly editor instead.
If you prefer the latter, Wondershare Filmora is a video editor that we recommend. It's perfect for beginners but powerful enough to grow with you. Plus, Filmora gives you the flexibility to edit anywhere, since it's available on both desktop (Windows and Mac) and mobile (iOS and Android).
Between Adobe Premiere Rush and Filmora, the choice comes down to what you prioritize: speed, creativity, or simplicity. Here's how they compare side by side.
Adobe Premiere Rush vs Filmora Comparison Chart
| Aspect | Adobe Premiere Rush | Filmora |
| Learning Curve | Super easy to learn | Beginner-friendly with templates and presets |
| Editing Features | Basic trimming, transitions, and simple color tools | AI Smart Cutout, motion tracking, speed ramping, keyframing, effects |
| AI Tools | None | Auto Captions, AI Copywriting, AI Image tools, and more |
| Export Option | For quick sharing, but it has limited settings | Platform optimized default settings and customizable exports |
| Pricing | Free plan + subscription for full features | Free with watermark, affordable paid plans (monthly, annual or lifetime) |
Conclusion
We discussed Adobe Premiere Rush tutorials in detail, including a comparison between Premiere Rush and its one ecosystem tool, Adobe Premiere Pro. Then there is Filmora, a simple video editor alternative.
In summary, Adobe Premiere Rush and Filmora are video editors suitable for beginners or casual creators; however, both offer different features to suit different needs. Filmora offers more creative control and AI features with an affordable pricing plan.
Consider how much time you want to spend editing and the level of customization you need. If you prefer creative flexibility and more tools, Filmora may be the better long-term solution.
Frequently Asked Questions
-
Is Adobe Premiere Rush free to use?
Yes, but the free plan has limited cloud storage and exports. A paid plan unlocks unlimited exports. -
Can I use Adobe Premiere Rush on mobile and desktop?
Yes. You can edit on Windows, Mac, iOS, and Android, and your projects sync across devices. -
What's the difference between Premiere Rush and Filmora?
Premiere Rush is simpler with basic tools. Filmora has more creative features, such as AI tools, motion tracking, and flexible export options. -
Can I edit YouTube Shorts or TikToks in Adobe Rush?
Yes. You can edit vertical videos and export them in 9:16 format.Yes. You can edit vertical videos and export them in 9:16 format.
