Key Steps of This Video Tutorial To Follow
Guide to using Filmora AI Tools
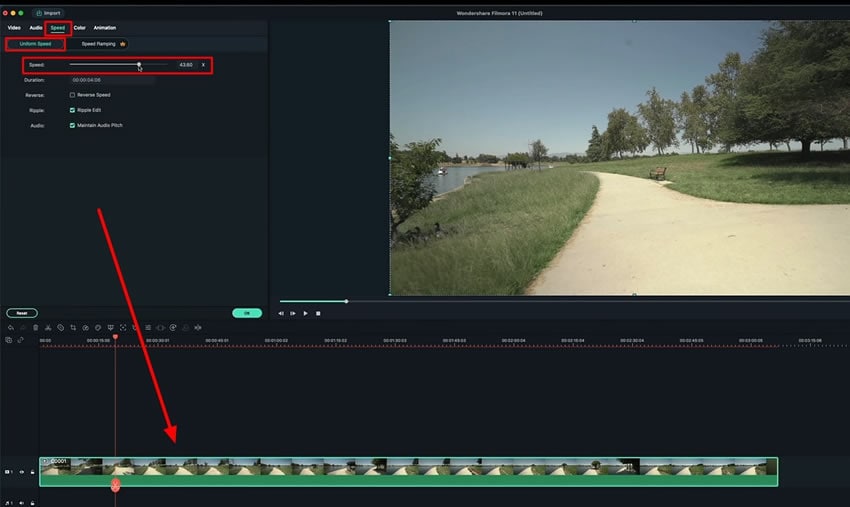
Import the video clip on the timeline and mute it. Zoom out the timeline to have the full video on the timeline screen. Select the clip on the timeline and navigate to its settings. From the “Speed” tab, increase the speed to its maximum to get a speed-up video for creating an effective Hyperlapse video.
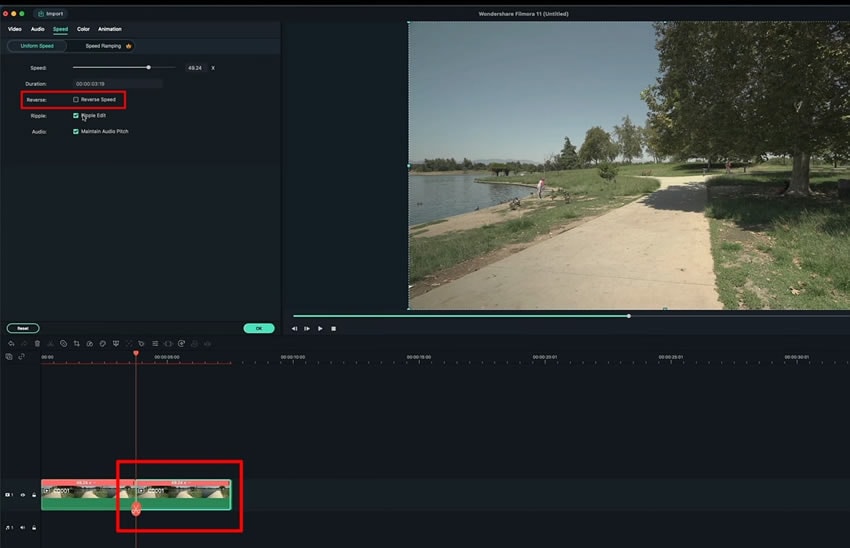
To make the video look cooler, add a "Boomerang Effect" to the video. While this moves the video clip in a forward and backward motion, copy the clip and paste it right next to it on the same track. Double-click on the clip and lead to the "Speed" tab. Checkmark the "Reverse Speed" option to apply the particular effect.
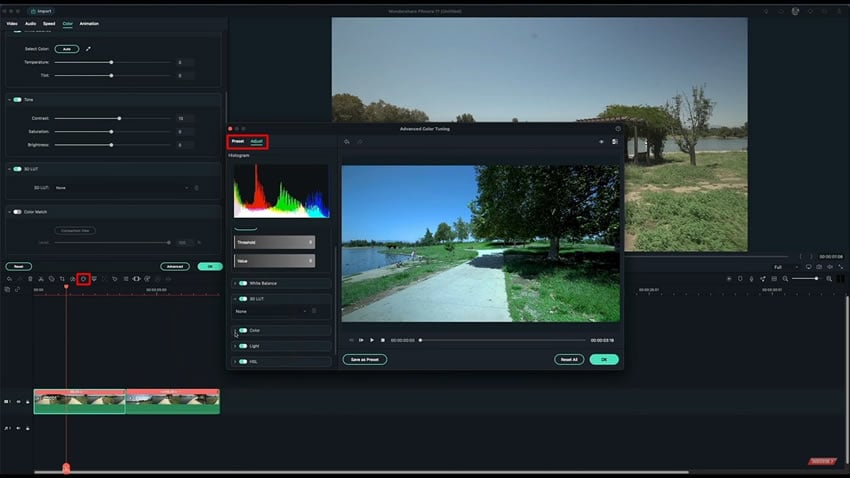
Select the color palette option from the bar above the timeline and choose “Color Correction” from the drop-down list. Select any particular color effect of your choice from the pop-up window. You can also customize the effect from the “Adjust” tab in this window.
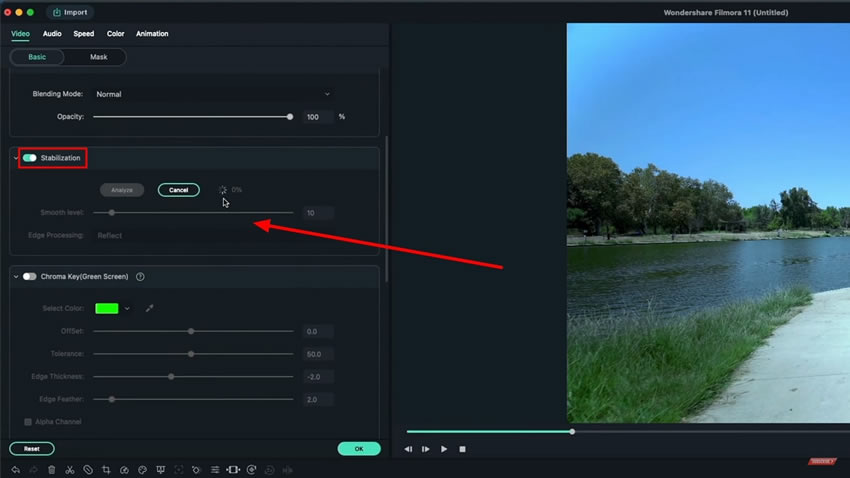
Furthermore, you can add stabilization to the clip by selecting the clip and navigating to the “Video” tab. From the “Basic” section, look for the “Stabilization” option and enable it. It will analyze your video clip, after which you can adjust the “Smooth Level” as required.
If there is any disturbance in the video due to an uncleaned lens or dust particles, you can remove it by inserting transparent letterbox templates on the clip. To do this, all you need to do is import them in Filmora in the "Media" tab, drag and drop them over the clip on the timeline and adjust the size accordingly.
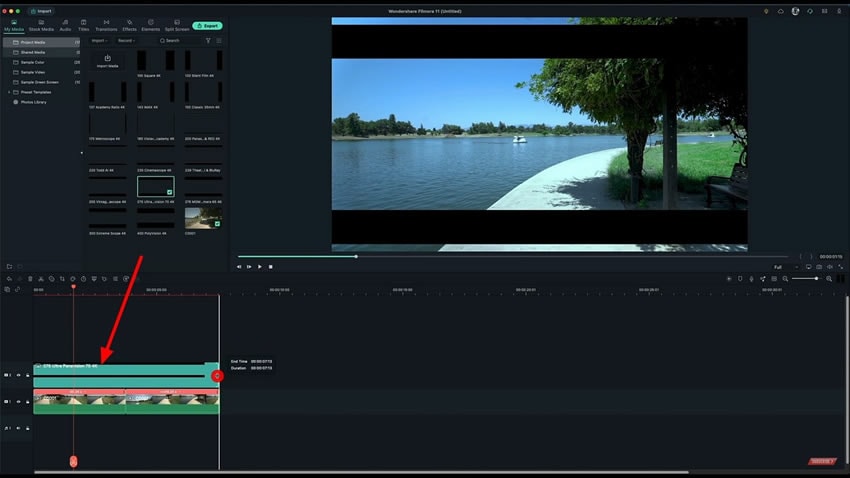
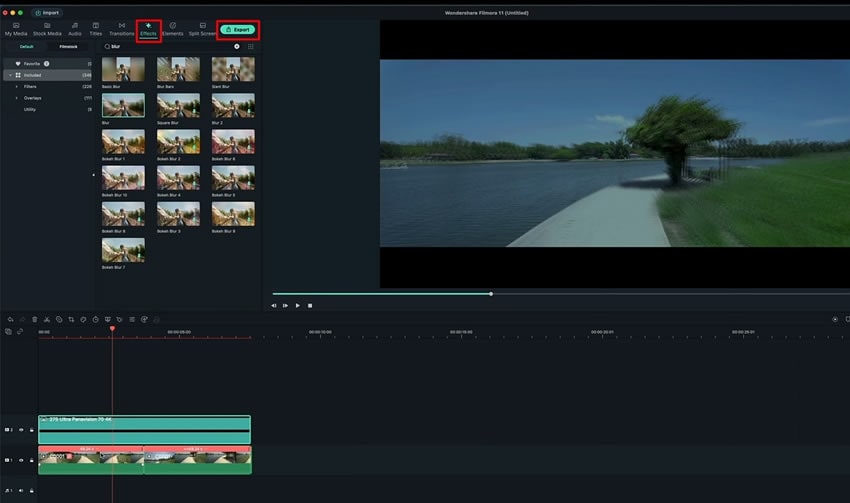
You can also add the motion blur effect to the video. Enter the “Effects” library from the top and choose the “Included” option from the left panel. Search for a blur effect and determine any effect of your choice from the options available. Drag and drop the effect on the clip, and you'll observe it on the video on the preview panel. Export the clip and play the video to see the free Hyperlapse video you’ve created using Filmora.
Hyperlapse holds more importance over time lapse because they show the camera movements and provide the viewer with a complete visual experience from different angles. Creating Hyperlapse of videos is no more a hassle now. The discussion has guided us on how to create a Hyperlapse video and to add extra effects to make it look more exciting and attractive.


