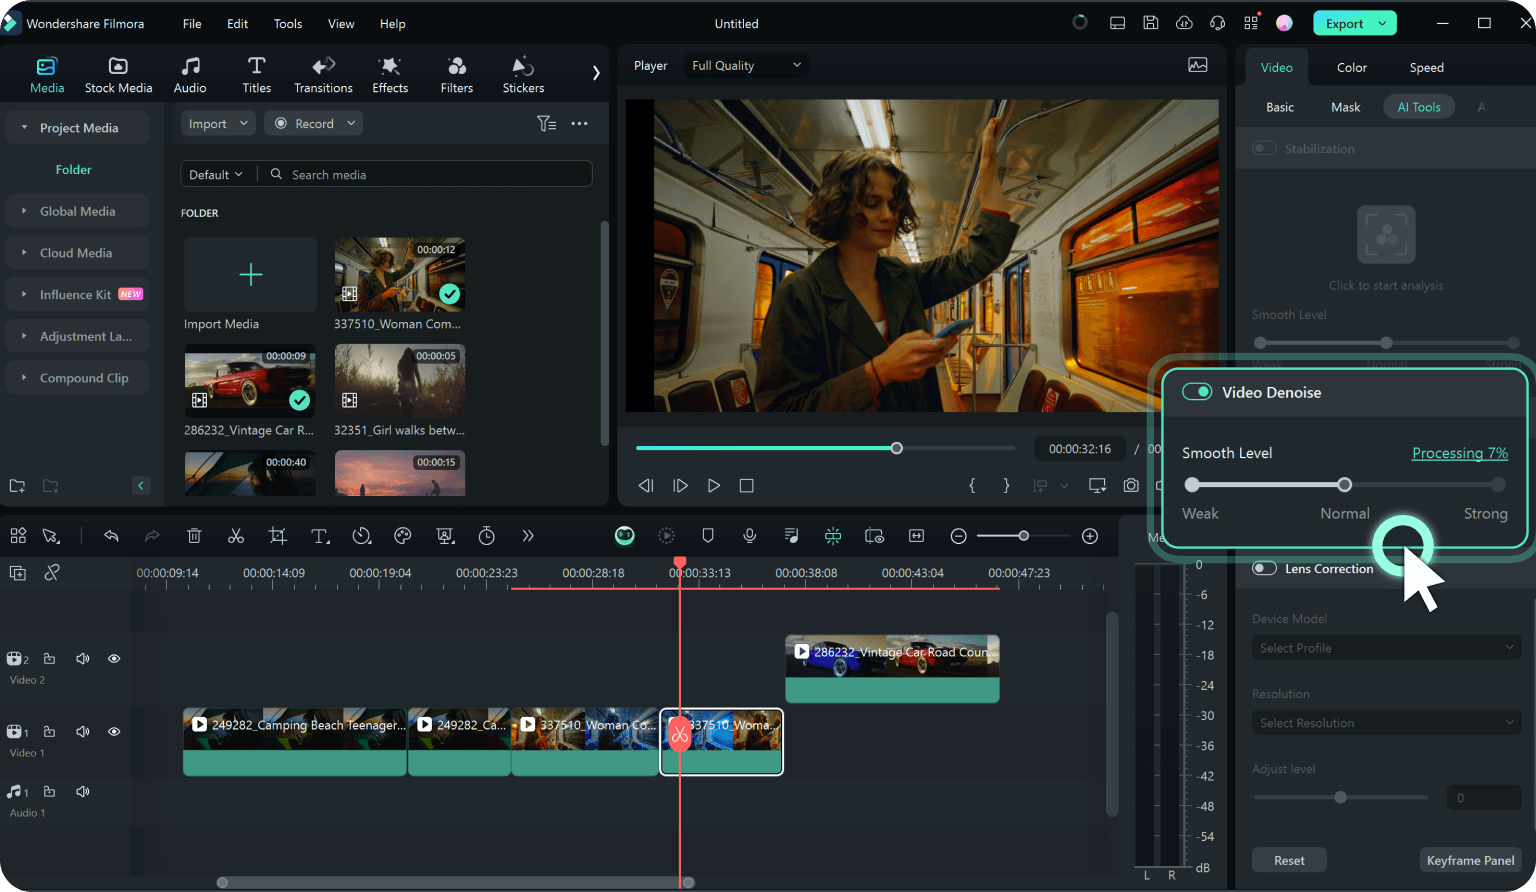
Video Denoise:
Denoise a Grainy Video Easily
Denoise videos to enhance visual clarity and overall quality. By reducing unwanted noise and adjusting lighting and contrast, you can create sharper, more vibrant footage.
 4.7
(15746 reviews)
4.7
(15746 reviews)
Win 11 / Win 10 / Win 8 / Win7 (64 bit OS) | System Requirements
macOS 10.15 - macOS 26 (10.14 or earlier? Click here) | Apple M1, M2, M3 & M4 compatible
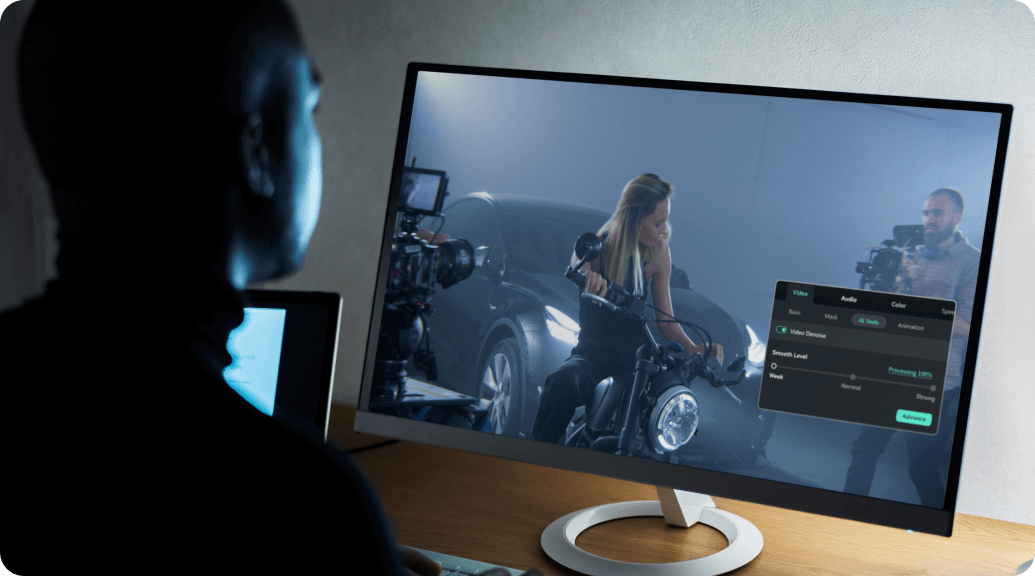
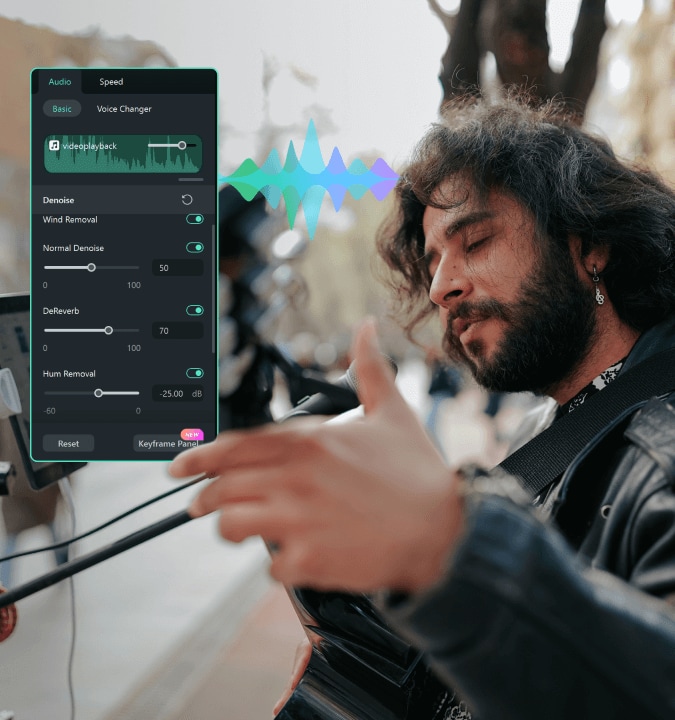
Make Your Video Grain-free with Filmora Video Denoiser
A Powerful AI-driven denoising tool to create cleaner and more professional-looking videos, perfectly balancing noise reduction and detail preservation.
- Low-Light Footage
- Archival or Historical Footage
- High ISO Settings
- Broadcast-Quality Requirements
Efficiently Remove Graininess From Videos for All Your Needs
Clear Up Grainy Video in Seconds With Presets
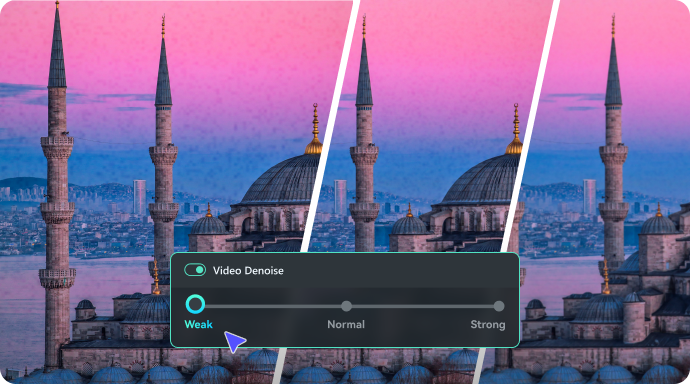
Three adjustable levels (weak/normal/strong), advanced AI algorithms, analyzing video content to selectively remove luminance and chrominance noise, leading in the industry. Filmora is your go-to choice whenever you need to denoise video while maintaining quality and clarity.
Reduce Digital Noise While Preserving Important Elements
Handle digital noises in footage shot in low-light conditions, and remove graininess or speckled appearances without sacrificing essential visual details and textures of the video.


Make Videos More Visually Appealing and Professional-Looking
Lessen video quality between you and professionals by optimizing videos for different platforms and devices. Leave a lasting impression on your audience in decreasing artifacts, whether for social media or commercial purposes.
How To Use AI Video Denoiser in Filmora
By following these steps, you can easily denoise your videos using Filmora's AI Video Denoiser on desktop and mobile.
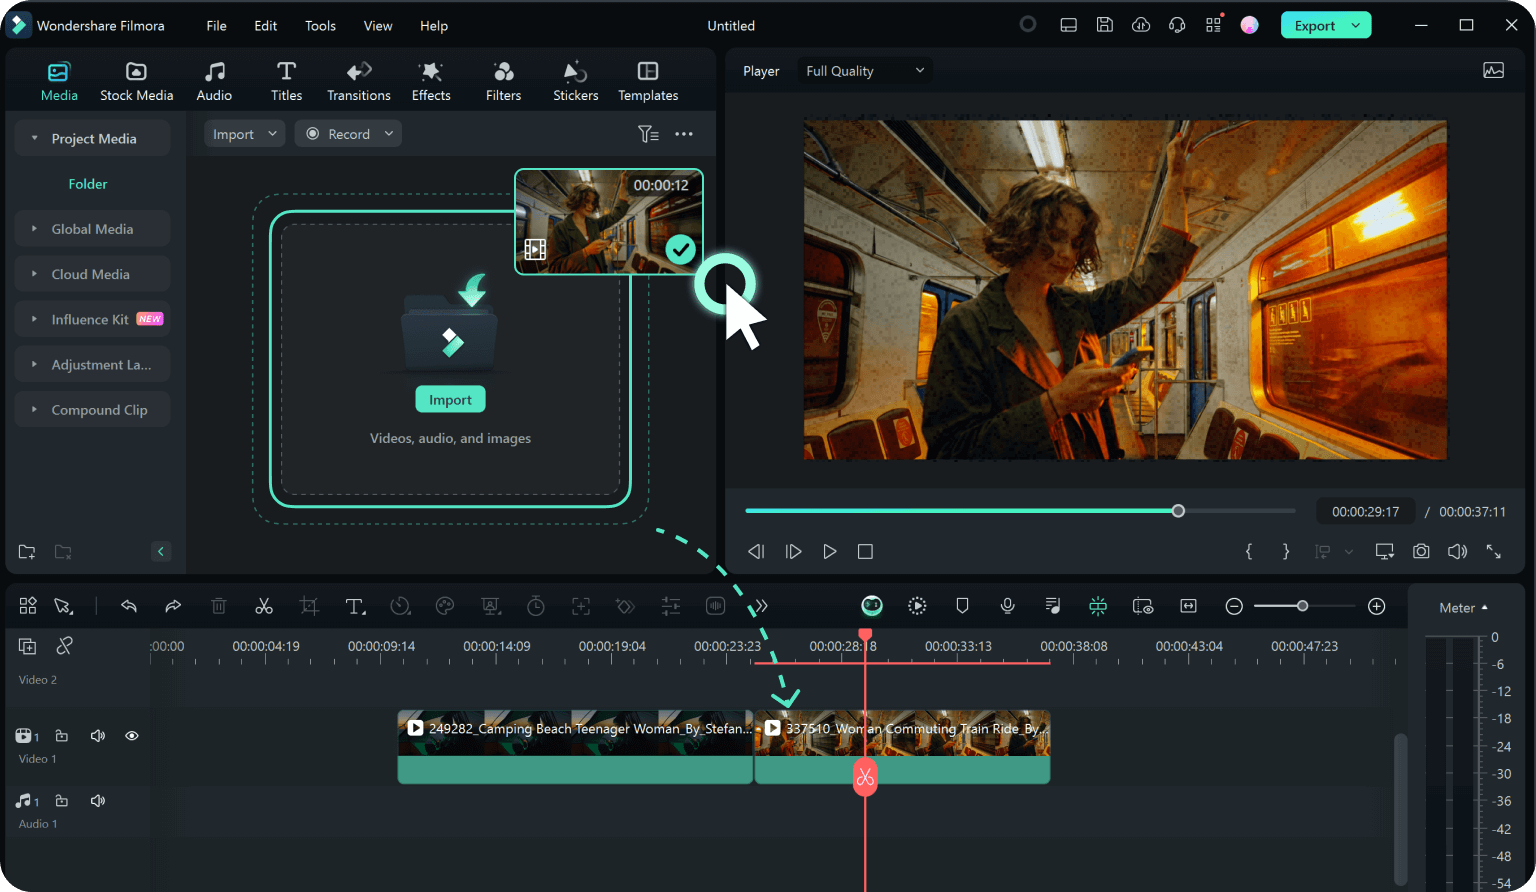
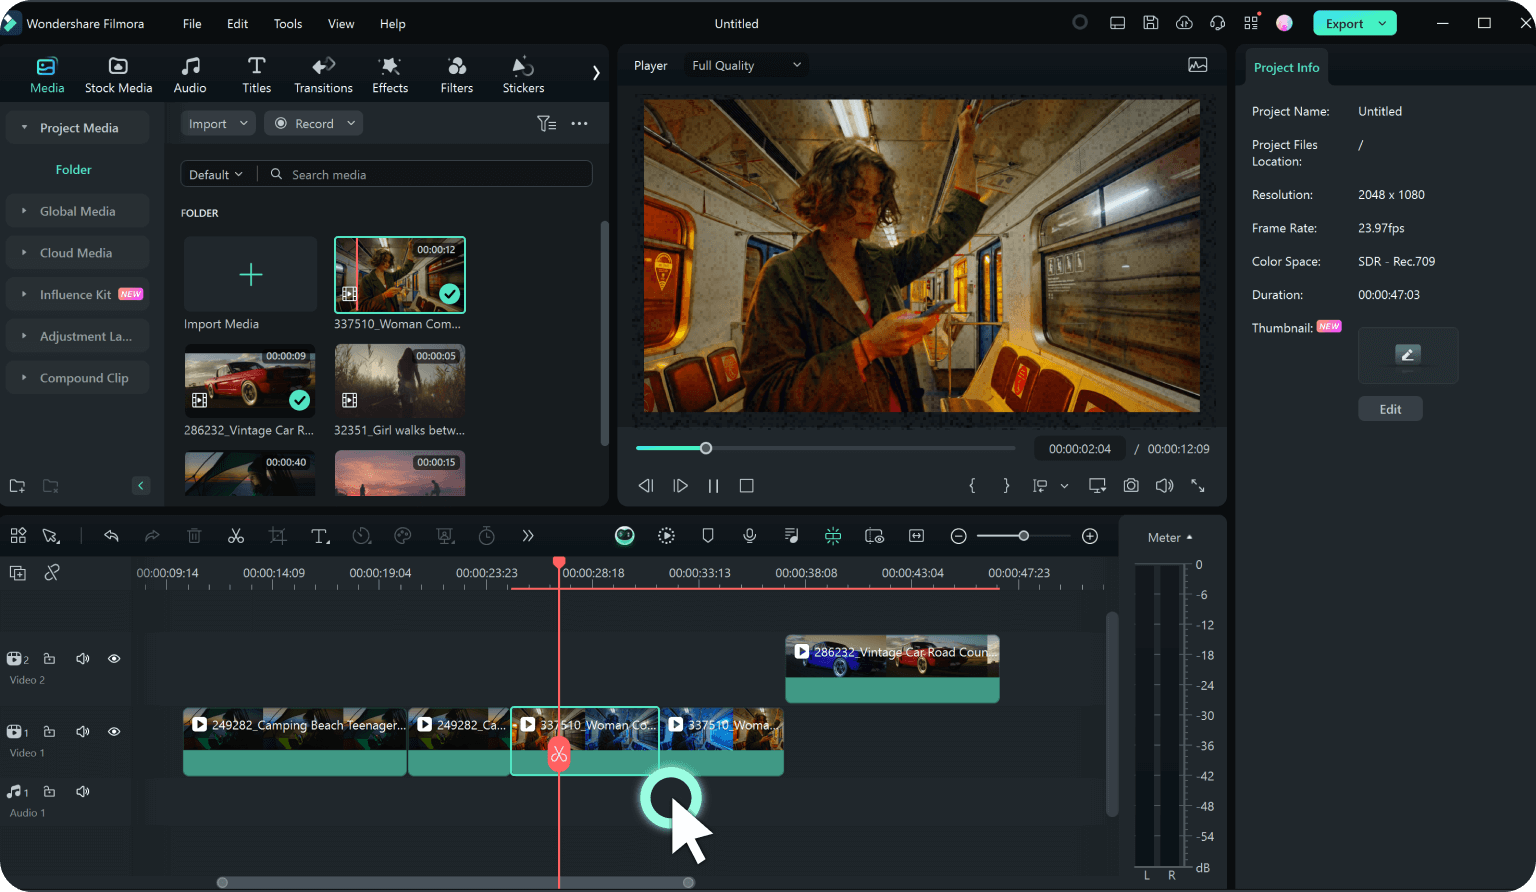
Step 1: Add Media to Timeline
Drag and drop your media files onto the timeline of your video editing software. And click on the video clip in the timeline that you want to denoise.
Step 2: Apply Video Denoising
Select the "Video Denoise" option from interface, choose from the three levels (weak/normal/strong) that best suits your needs for noise reduction.
Step 3: Preview and Export
Preview and make further adjustments to the denoise settings until you are satisfied with the result, click on the Export button.
-
Step 1: Add Media to Timeline
Drag and drop your media files onto the timeline of your video editing software. And click on the video clip in the timeline that you want to denoise. -
Step 2: Apply Video Denoising
Select the "Video Denoise" option from interface, choose from the three levels (weak/normal/strong) that best suits your needs for noise reduction. -
Step 3: Preview and Export
Preview and make further adjustments to the denoise settings until you are satisfied with the result, click on the Export button.

Step 1: Start a New Project
Open the Filmora mobile app and tap New Project. Select and import the video you want to denoise.

Step 2: Access AI Video Denoiser
Tap the video on the timeline, then find AI Denoiser from the editing toolbar.

Step 3: Enable and Preview
Tap the Video Denoiser option to automatically improve your video's clarity and sharpness.

Step 4: Export Your Video
Preview the result. When satisfied, tap Export to save and share your denoised video.
-
Step 1: Start a New Project
Open the Filmora mobile app and tap New Project. Select and import the video you want to denoise. -
Step 2: Access AI Video Denoiser
Tap the video on the timeline, then find AI Denoiser from the editing toolbar. -
Step 3: Enable and Preview
Tap the Video Denoiser option to automatically improve your video's clarity and sharpness. -
Step 4: Export Your Video
Preview the result. When satisfied, tap Export to save and share your denoised video.
Best Video Noise Reduction Software in Any Context

Professional Producer
For professionals who require strict video quality standards, remove noise and graininess with Filmora's video denoiser, ensure the purity and clarity.

Experienced Video Editors
Three different levels of controlling and advanced tech-applied, allow you to handle footage with precision and expertise, addressing issues like noise and grain to make your work perfect.

Video Hobbyists
Lack of extensive editing experience but want to make high-quality videos? One-click noise reduction can simplify the process and improving video quality.

Social Media Content Creators
Basic noise and grain reduction features will definitely make Influencers and freelancers with a budget and equipment issue satisfied.
Discover More Powerful AI Functions


FAQs on Removing Grain from Videos
Can you denoise a video?
Yes, you can denoise a video using various methods and technologies. Video denoising is the process of reducing or eliminating noise from video footage to improve its visual quality. Video noise reduction software like Filmora is available for video denoising.
What is video denoising?
Video denoising is the process of removing unwanted noise and grain from video footage. Graininess or sporadic spots are examples of noise. Denoising makes a video appear cleaner and more professional by enhancing its overall clarity and quality.
What does denoise do in video editing?
In video editing, denoising minimizes or removes graininess and visual noise from the video. By recovering minor details and adjusting irregular pixel patterns, it improves the overall quality of the video. As a result, the video is more polished, easier to watch, and visually appealing.
When should I use video denoising?
When you have a video that is noticeably noisy or grainy - which often happens in low light, at high ISO settings, or with lower-quality cameras—you should apply video denoising.
What Our Customers Say About Us

Fred
Freelance Video Editor
Using Filmora's Video Denoise is straightforward, and I noticed a significant improvement in my video quality. It’s a must-have tool for anyone working with footage shot at high ISO levels.

Sarah
Vlogger
I appreciate how intuitive Filmora is, especially with the noise reduction. Just a few clicks, and I can transform my noisy clips into something much more presentable. However, I wish the denoiser could handle extreme noise a bit better.

Laura
Videographer
As I often shoots in challenging lighting conditions, the Video Denoise feature in Filmora has saved me countless hours in post-production. It really helps to clean up grainy footage without losing too much quality.