Transcript
What is going on, guys? Welcome back to another video. In this tutorial, I will show you how to create this excellent message pop-up animation using Filmora 13. It is so simple to make, so let's jump into Filmora and get started.
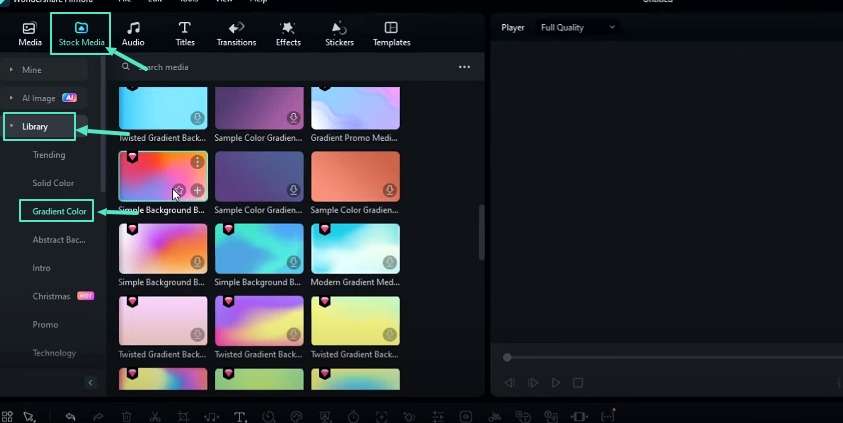
First, let's see how to create the message icon. Go to the stock media, select a library, then select gradient color. You can choose any gradient color you like. I selected this one and added it to the timeline. This one looks like this.
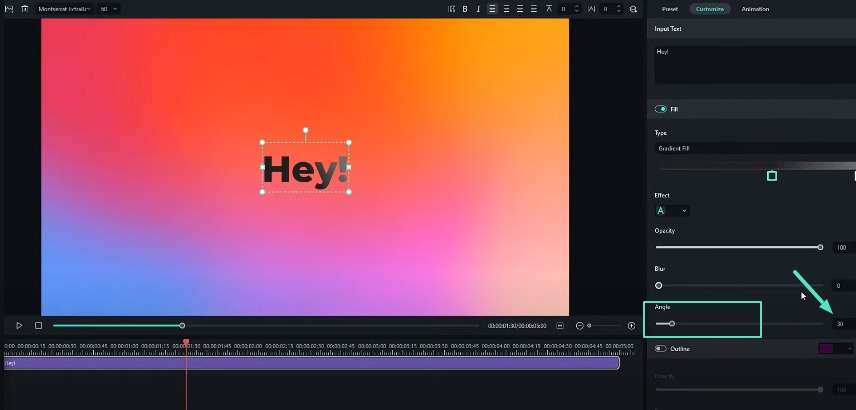
We need to add text. Go to the text, and I will add the default title to the timeline. I customize my text layer like this. I go to the advanced settings and add gradient color to my text. I add it like this, then I change the angle to 30, and after that, click the apply button.
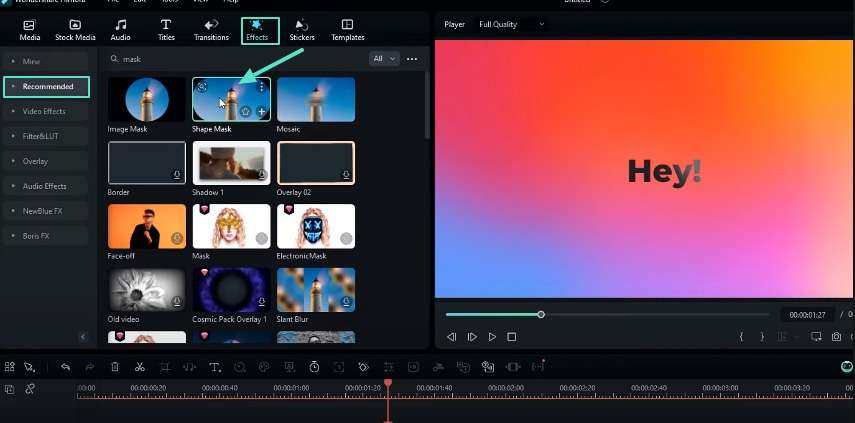
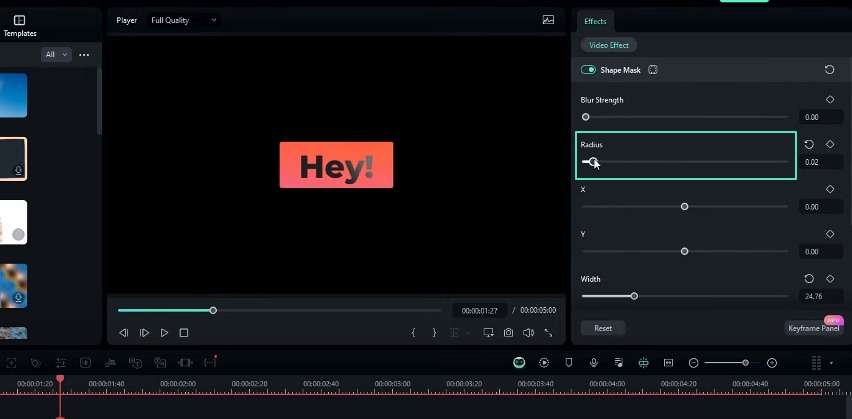
We need to change this to a message icon look. Go to the effects tab and search for the shape mask, then add it to the timeline like this. Go to the effects settings. I changed the width and height like this. Here, you can adjust the radius you want. I keep it to default. I need to center the text layer to move it up like this. Select our background layer, and I will bring down the scale to something like this.
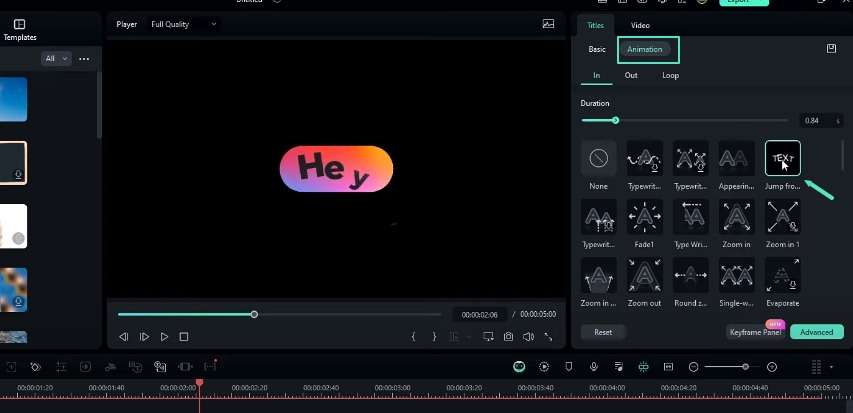
We need to add animation to this text layer. Select your text layer and go to the animation. I added this animation to my text layer and changed the duration to 1 second. Now, our message icon part is complete.
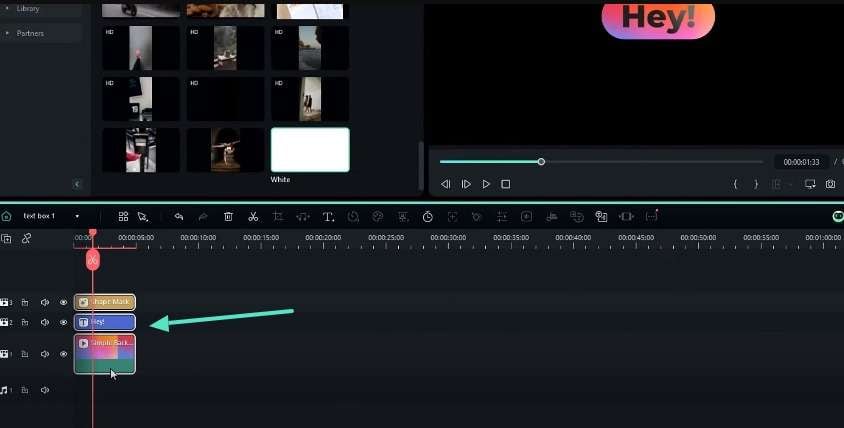
I select all these layers. I create a compound clip and name it text box 1. After that, I drag this to the second layer. We need to add background to this. Go to the stock media, and I select this white color for my background layer. I chose this layer and changed the position to something like this.
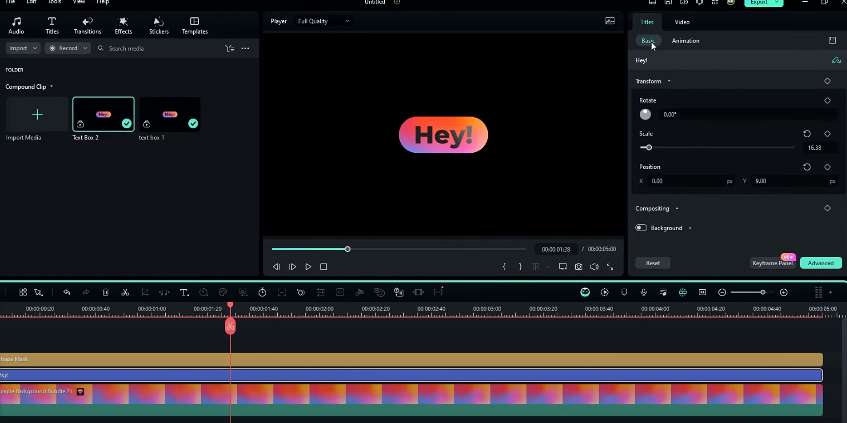
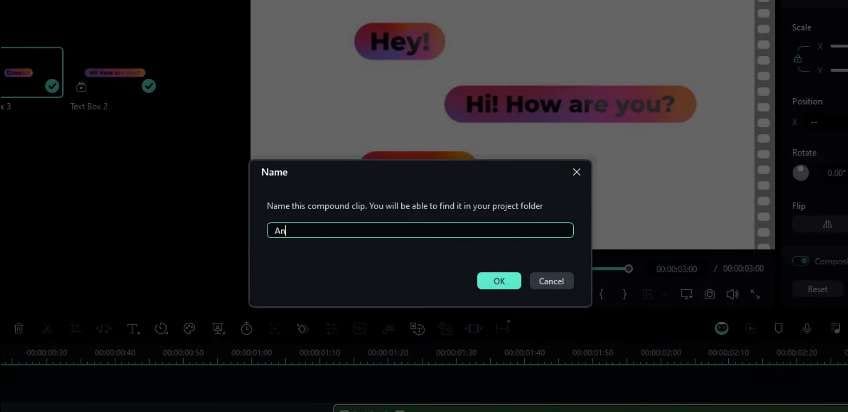
We need to add a few more of these kinds of message boxes. Go into this compound clip, and I will take a copy of all these layers. Go back to the main timeline, and I paste it here. I changed these layers to a compound clip, and I named it Text Box 2.
Go into the Text Box 2 layer and customize it like this. Here, I changed the background layer animation to reverse because it needs to look slightly different from other message boxes. I change the font size a little bit. Go to the main timeline, and I will adjust the position like this. Here, I added another message box.
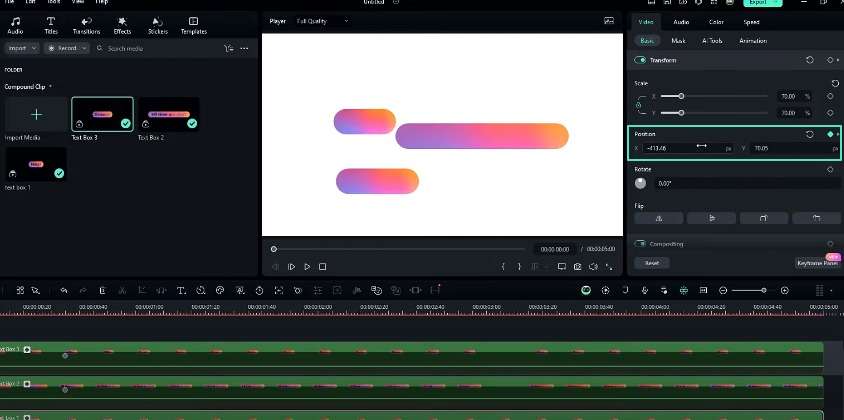
Now, we need to create the pop-up animation. First, I select all these layers and change the scale to 70. I choose this layer, create a keyframe on position, and change the position like this. I do the same thing for all my other layers. After that, I go to the start and change all these layers' positions to something like this. Now it looks like this.
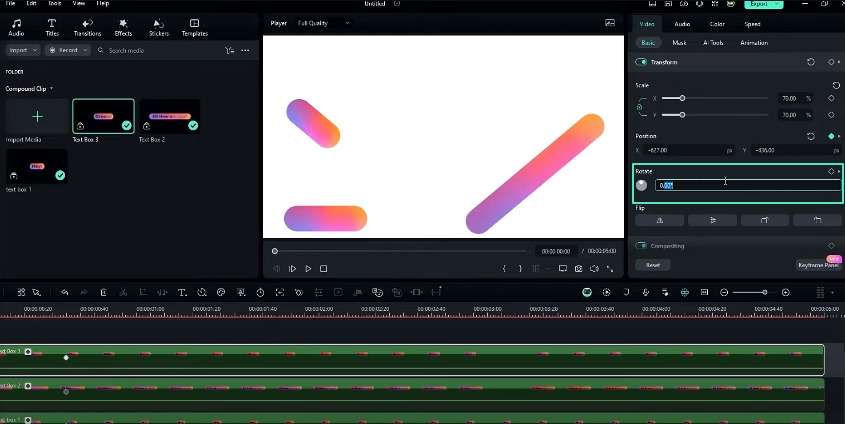
We need to add rotation to this. I select it on the timeline and create a keyframe for rotation in all layers. Go to the start, and I change this layer rotation to 40. I also change this layer rotation to -40 and this layer rotation to 40 again. Now, our animation looks like this.
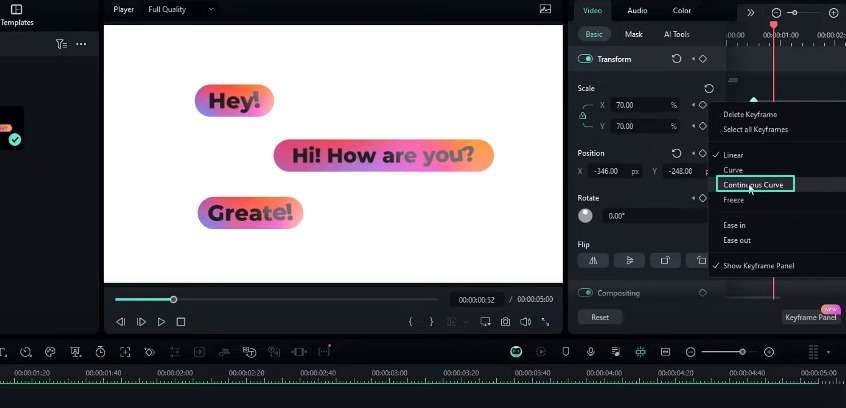
Finally, we need to add scale animation to this. I go here and create keyframes on the scale of all these layers. Go to start and change all these layers scale to zero like this. Now, it looks like this. Open the keyframe panel, select all these keyframes, and add this continuous curve preset to these keyframes.
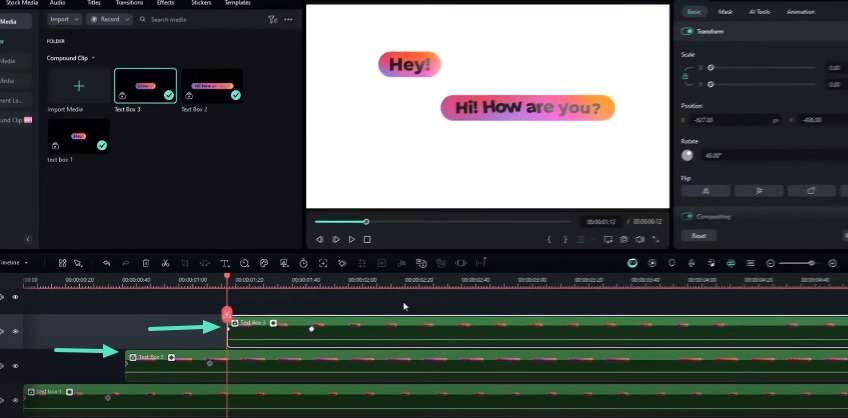
I do the same thing for my other layers. Now, it looks like this. Now you can see it has an excellent pop-up look. Let's adjust the layers. I select here on the timeline and drag my second layer to here. I choose here, and I drag my third layer here like this. Now, our main part is complete.
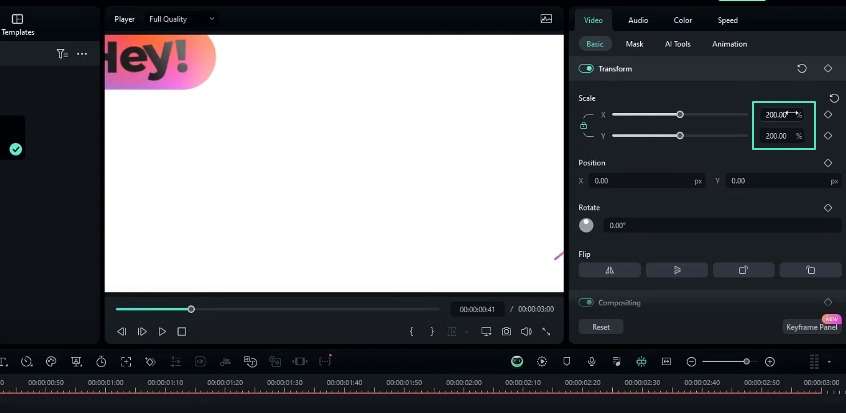
Now, let's see how to create this movement animation. First, I select these layers. I changed them to a compound clip and named it Animation. I choose here on the timeline, select this layer, and change the scale to something like 200, and I bring this to the center like this. Create keyframes on position and scale. After that, I go a few seconds forward, change the scale to 120, and change the position like this. I drag this key frame right here.
Now, our movement animation looks like this. I Select here and create keyframes on position and scale, then go a few seconds forward, and I change the scale to 100 and position to something like this. I drag this keyframe here, and now our animation part is complete.
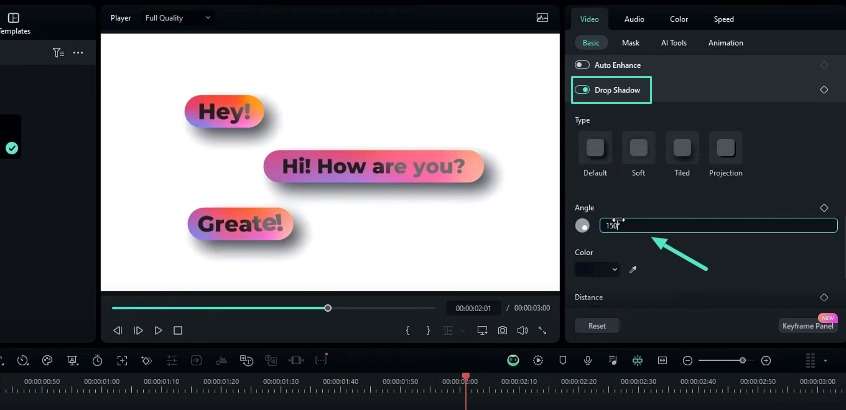
Finally, I would like to add a drop shadow to this. Go to the drop shadow, and I change the angle to 150, the shadow color to Black, and the opacity to something like 60. Our message pop-up animation is complete. Here's the result.
That's how we can make an excellent message pop-up animation inside Filmora 13. You can see it's so easy to create, and also, if you need to learn more about Filmora tutorials, you can check my Filmora tutorial playlist. I have done many tutorials about Filmora, and you can check them after watching this video.
Thanks for watching this tutorial! Please leave a like on this video, and be sure to subscribe to my channel and leave a comment about this video and what tutorial you would like next. Let's meet up for the next video! Take care and peace!
How to Create Impressive Message Pop-Up Animations?
What you need to prepare:
- A computer (Windows or macOS)
- Your video materials.
- Filmora video editor
Create the Message Icon
First, you will need to create the message icon. Thus, go to the stock media, library, and select the gradient color option. Choose any gradient color you prefer and add it to the timeline.
Next, go to the text tool and add the default title text to the timeline. You can also customize the text layer by accessing the advanced settings. Adjust the angle to 30 degrees and click the apply button.
Transform the Text into a Message Icon
To transform the text into a message icon, go to the effects tab and search for the "shape mask" effect. Add it to the timeline. Now, open the effect settings and adjust the width and height as desired.
You can also modify the radius to your preference. Center the text layer by moving it slightly upward. Select the background layer and reduce its scale to create a message icon appearance.
Animate the Text Layer
To animate the text layer, select it and navigate to the animation tab. Apply a suitable animation effect and change the duration to 1 second. It will give you the message icon.
Create a Compound Clip and Add a Background
Select all the layers involved in the message icon creation and create a compound clip. You can give it any name, like Text Box 1. Drag this compound clip to the second layer of the timeline. Next, go to the stock media and select a white or any other color for the background layer. Adjust the position of this background layer as desired.
Add More Message Boxes
To add more message boxes, go into the Text Box 1 compound clip and copy all the layers inside. Return to the main timeline and paste the copied layers. It will help you create a new compound clip from these pasted layers. You can name it Text Box 2.

Open the Text Box 2 compound clip and customize its elements. You can change the background layer animation to reverse or adjust the font size. Repeat this process to add additional message boxes as needed.
Create the Pop-Up Animation
Start by selecting all the message box layers and reducing their scale to a specific value. Let's say 70%. Select one layer and create a keyframe for that position. You can repeat this method for all other layers.
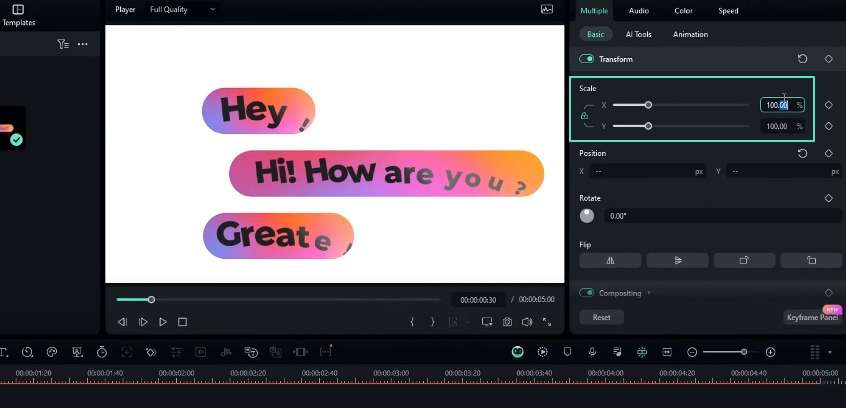
Go to the start of the timeline and adjust the positions of all layers. It will create the desired initial positioning.
Add Rotation to the Pop-Up Animation
While still at the start of the timeline, create keyframes for the rotation of each layer. Adjust the rotation values for each layer. You can give positive and negative values to create a staggered rotation effect. This step adds rotation to the pop-up animation.
Incorporate Scale Animation
You must add keyframes for the scale property of all layers. Go to the start of the timeline and set the scale of all layers to zero. Now, open the keyframe panel! Once there, select all the keyframes and apply the "continuous curve" preset. It will help smoothen the animation. Repeat this process for all layers to achieve a smooth pop-up effect with scale animation.
Adjust Layer Timing
Select a point on the timeline and drag the second message box layer to align with that point. Repeat this process for the third message box layer. You can position it at a different point on the timeline. This step ensures proper timing for the pop-up animation sequence.
Create the Movement Animation
Select all the message box layers and create a new compound clip. You can give any name, like "Animation." At a specific point on the timeline, increase the scale of this compound clip to around 200%. You can reposition it to the center of the frame.
Create keyframes for the position and scale properties. Move forward on the timeline and decrease the scale to 120% while adjusting the position. Drag the scale keyframe to align with the position keyframe. This step completes the movement animation.
Add a Drop Shadow Effect
You can also soften the visual appeal of the animation. A drop shadow effect can make your video look professional. Adjust the angle to 150 degrees, set the shadow color to black, and modify the opacity to around 60%. It will add a stylish drop shadow to the message pop-up animation.
Many video editors use message pop-up animations to make their content impressive. This dynamic effect can elevate your video projects. Experiment with various styles and techniques to further personalize your animations. Join the community at Filmora Creator Hub to learn more video editing tips.


