Must-Know Tricks for Polishing Your AMV Edits
What you need to prepare:
- A computer (Windows or macOS)
- Your video materials.
- Filmora video editor
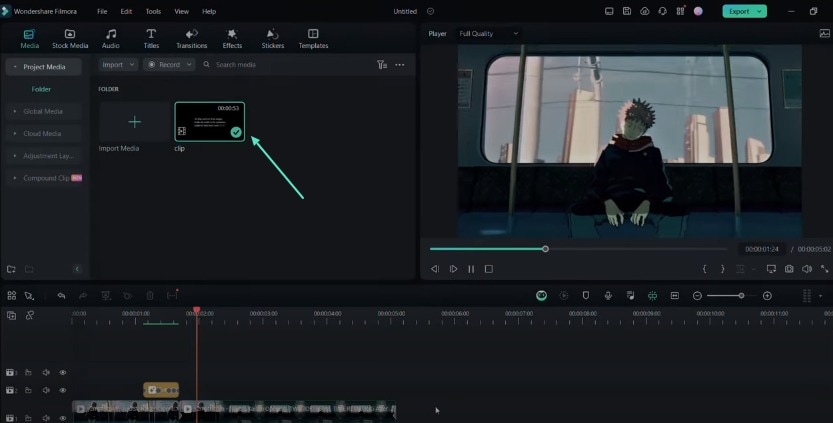
Get Your Clip in a Video Editor
To start making AMV edits, you should launch the Filmora and create a new project file. Next, import the clip you wish to edit in the editing window. It will allow you to control and edit the clip's properties.
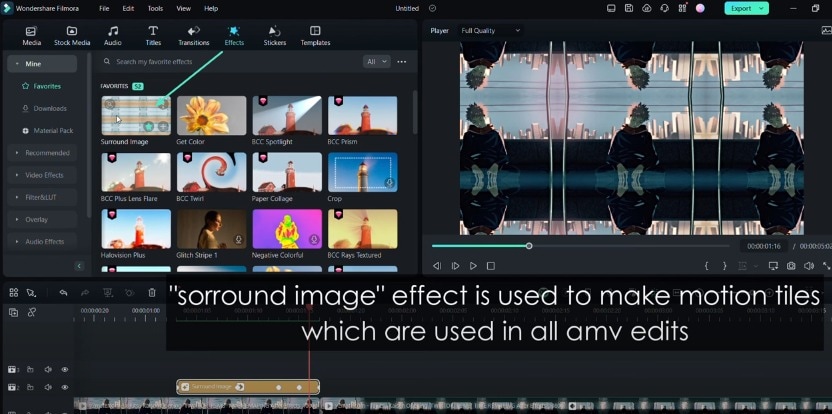
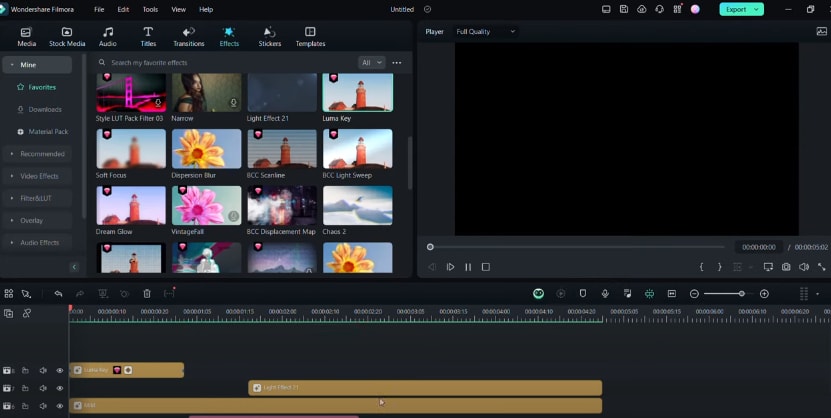
Apply the Surround Image Effect
The motion tile effect is widespread and commonly used in AMV edits. You should go to the "Effects" tab within Filmora's interface. Locate the "Surround Image" effect and select it. Drag and drop this effect onto your clip in the timeline. Once applied, click on the effect to open its settings panel. You can adjust the "Zoom" option by sliding the bar. It will let you achieve the desired level of zoom or magnification.
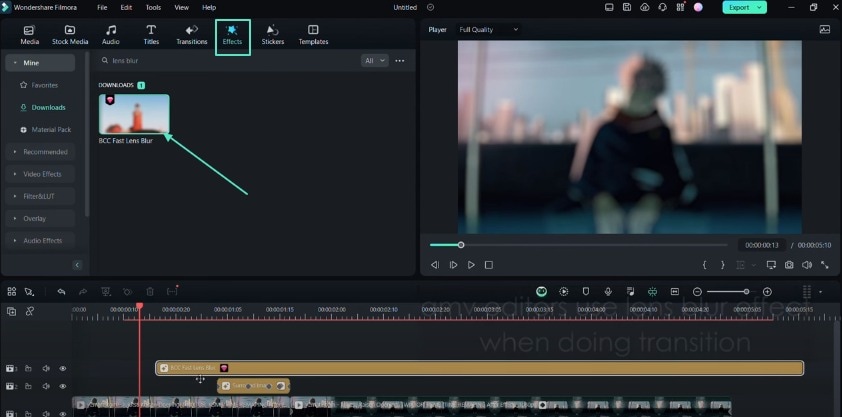
Apply the BCC Fast Lens Blur Transition
AMV editors often use blur effects to create smooth transitions between clips. To achieve this, locate the "BCC Fast Lens Blur" effect in the "Effects" tab and add it to your timeline. Position the effect at the point where you want the transition to occur. Click on the effect to open its settings and increase the blur intensity to the preferred level. You can do it by adjusting the "Blur Amount" slider. You can also change the "Iris Scale" parameter to customize the blur effect further.
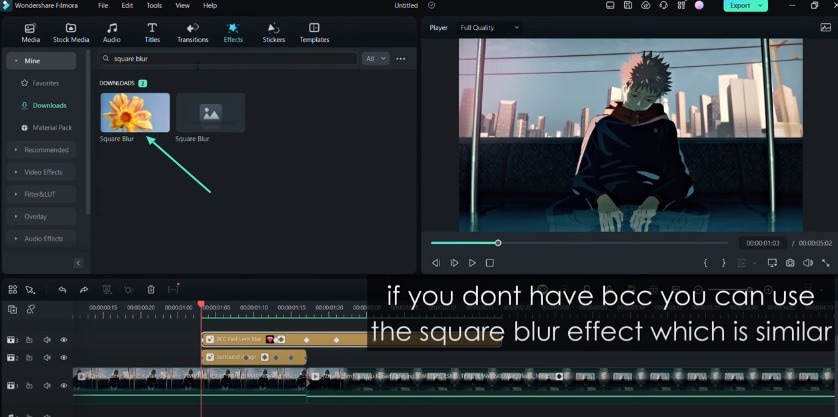
Use the Square Blur Effect (Alternative)
If the "BCC Fast Lens Blur" effect is not available, you can use "Square Blur" as an alternative. Search for it in the "Effects" tab, and once located, add it to your timeline. Open its settings panel and adjust the "Size" parameter to control the blur intensity.
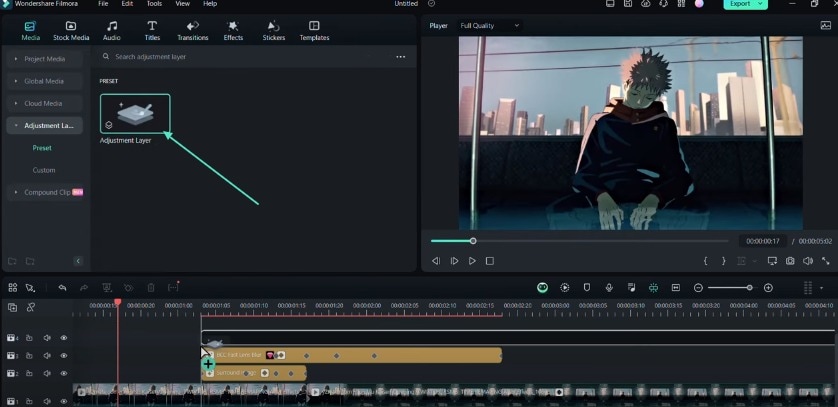
Create a Flash Effect with Exposure
You should first create an adjustment layer to add a flash effect to your AMV edit. Locate the "Adjustment Layer" tab under the "Media" section in Filmora. Add a new adjustment layer to your timeline. Click on the layer to access its settings. Within the "Color" tab, you should find the "Exposure" option. Set keyframes at multiple positions along this layer to control the exposure level. It will create the desired flash effect.
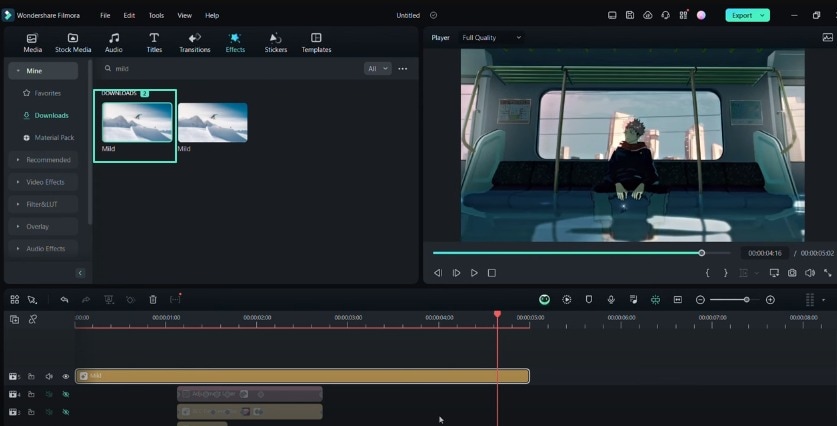
Apply the Mild Effect for Smooth Edits
To make your edits appear smoother and less linear, you can apply the "Mild" effect. Navigate to the "Effects" tab and locate this effect. Add it to your timeline and click on it to access its settings panel. Here, you can adjust the "Frequency," "X," and "Y" values. It will change the amount and direction of the shake or movement applied to your clip.
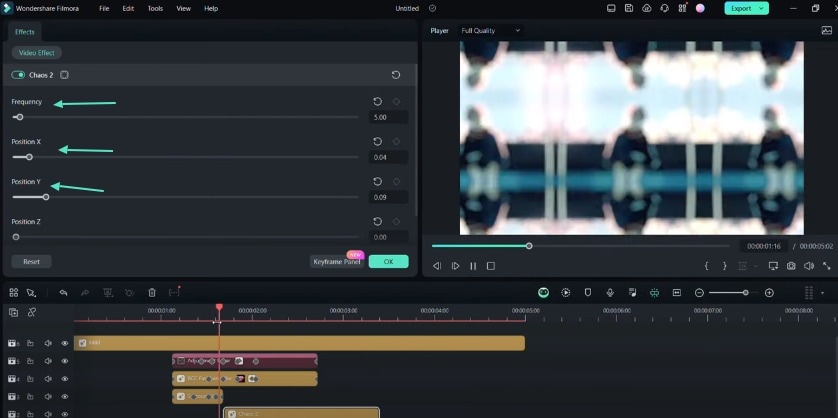
Use the Chaos Effect for an Aggressive Look
If you want to create a more aggressive or intense look for your AMV edit, you can apply the "Chaos" effect. Search for this effect in the "Effects" tab and add it to your timeline. Once used, adjust the "Frequency," "X," and "Y" values as we did above. It will provide the desired level of chaos or aggressive movement.
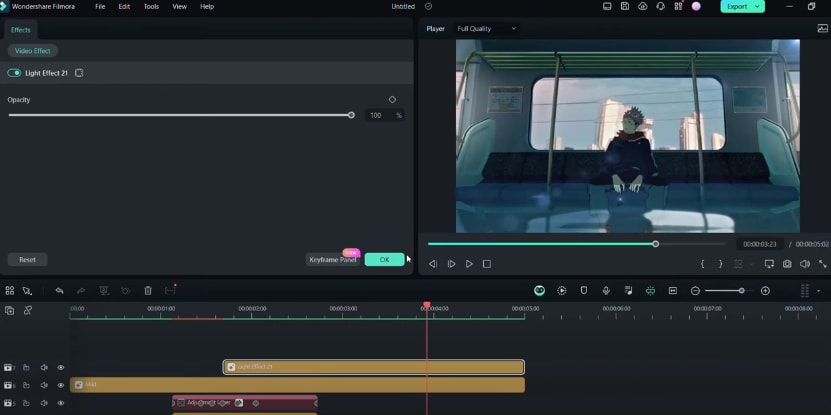
Add Depth with a Light Effect
You can use a light effect to introduce a sense of depth to your AMV edit. Add a suitable light effect in the "Effects" tab to your timeline. You can adjust the "Opacity" parameter to control the intensity of the light effect. You can also create fade transitions by keyframing the opacity value.
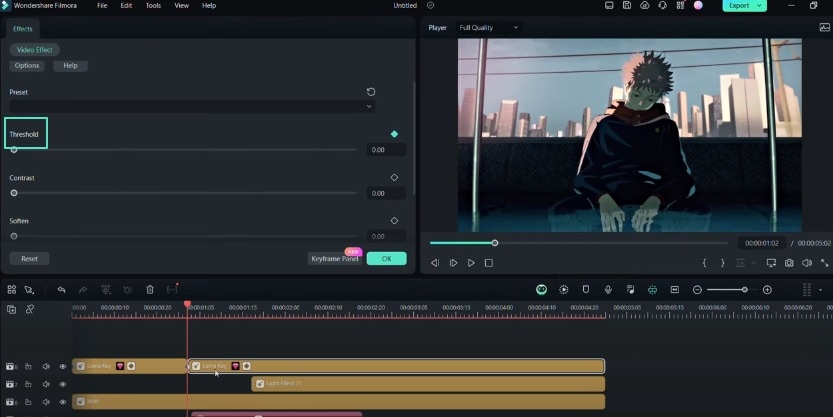
Use the Luma Key for Transitions (Alternative)
Using the "Luma Key" effect, you can achieve similar fade transitions. Search for this effect in the "Effects" tab and add it to your timeline. Adjust the "Threshold" value and set keyframes within the effect's settings panel.
Review and Finalize Your AMV Edit
Finally, you should review your AMV edit. Carefully examine the clip and its settings. You can make any final tweaks or adjustments as necessary.
What you've learned:
- The key to mastering AMV editing lies in continuous practice. Use Filmora's robust toolset and follow the techniques outlined above. The more you practice with Filmora, the more impressive your AMV projects will become. You can also find more tips by visiting Filmora Creator Hub. It is a great place to know the latest video editing trends.


