Transcript
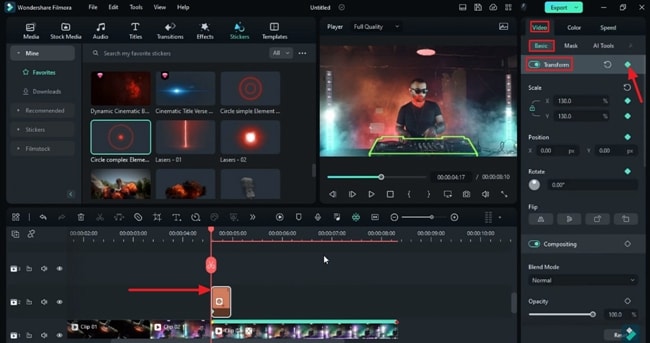
In this video, we will create a super cool DJ Bouncing Effect in Wondershare Filmora. Before editing, you need to download those neon outline elements from pixabay.com. Drop clip 1 on track 1, and keep it till 3 seconds and 10 frames. Turn on the "Opacity" keyframe at the start, change it to 0%, then at 1 second and 20 frames, change "Opacity" to 100 %.
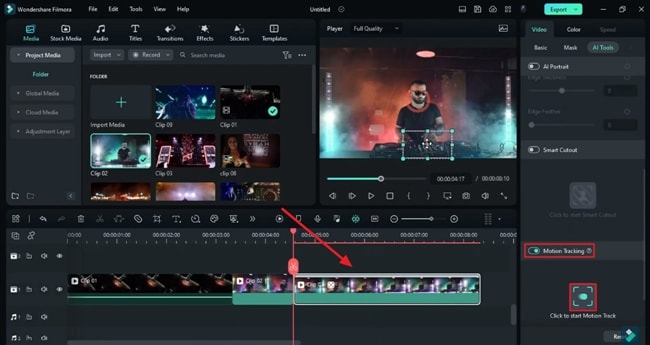
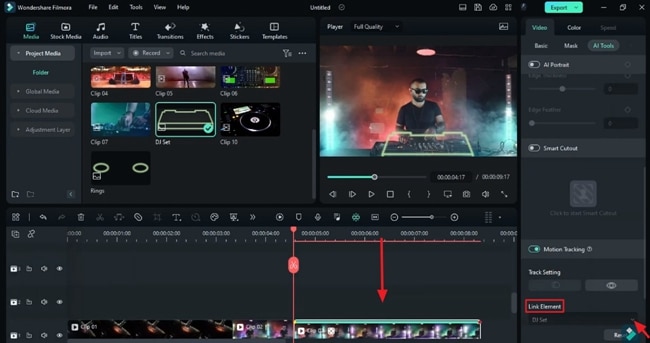
Drop clip 2 on track 1; keep it till 8 seconds and 10 frames. Then split it at 4 seconds and the 17th frame. Duplicate it on track 5, use "Smart Cutout" to select DJ, start and save it. Hide the track and go back to track 1, "Motion Tracking," on this split clip. Place it on the DJ device and track it, then drop the DJ set PNG on track 6, and under motion tracking, link it to track 1.
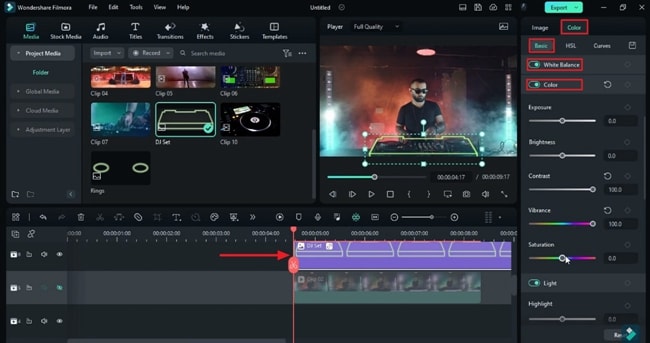
Then unlock the "Scale" for the DJ Set, adjust its position on the DJ set, then go to the color, change "Contrast," "Vibrance," and "Saturation" to 100.
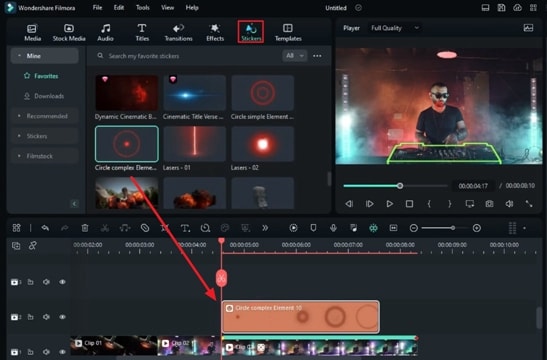
Adjust the “Duration,” then go to the “Stickers” and drop Circle Element 10 on track 2. Go to the speed and set “Duration” to 12 frames. Set “Scale” to 130 at the start and set “Scale” to 180 at the end. Duplicate on the same track, then drop Circle Element 12 on track 3 and repeat the same steps.
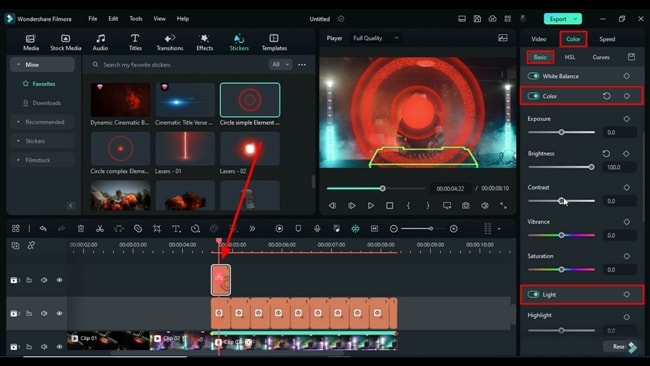
Go to “Color” and change “Exposure,” “Brightness,” and “Contrast” to 100. “Vibrance” and “Saturation” to negative 100, and “Highlight” to a 100. Duplicate further, then drop Circle Element on track 4. Follow the same steps.
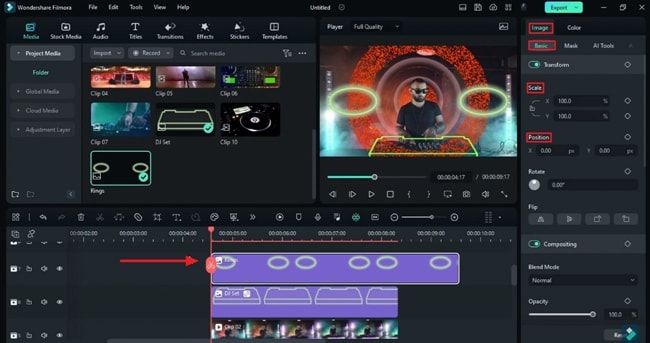
Then drop rings on track 7, unlock the “Scale,” keep it for 12 frames, change “X” to 49.7 and “Y” to 37.5 at the start, and adjust its “Position.” After three frames, bring right upward and change “X” to 50 and “Y” to 40. At the end, set “X” to 70 and “Y” to 60, duplicate on the same track. Next, remove the first keyframe, drop the second keyframe to start, and duplicate again.
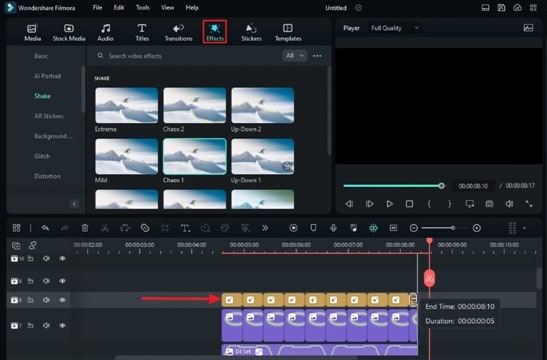
Apply the Chaos 2 effect on track 8 and keep it for 12 frames. Turn off "RGB Separate," then drop Chaos 1 after Chaos 2. Keep it for 12 frames, and turn off "RGB Separate." Copy both effects and paste it further till the end. Then drop the third clip on track 1, keep it till 11 seconds, and the 27th frame. Split at nine seconds and 27th frame. Select the first split part and use “Smart Cutout” to mask those screens. Then you will see only screens.
Apply the Chaos 2 effect on track 8 and keep it for 12 frames. Turn off "RGB Separate," then drop Chaos 1 after Chaos 2. Keep it for 12 frames, and turn off "RGB Separate." Copy both effects and paste it further till the end. Then drop the third clip on track 1, keep it till 11 seconds, and the 27th frame. Split at nine seconds and 27th frame. Select the first split part and use “Smart Cutout” to mask those screens. Then you will see only screens.
Go to the "Smart Cutout" and "Invert" selections. Then duplicate on track two, set the start at nine seconds and eighth frame. Then go to "Mask" and use the "Linear" mask to hide the screen on the right side. Then, set "Scale" to 370 at the start and 100 at nine seconds, and the 11th frame. Duplicate it on track Three, and set the start time at nine seconds and 24 frames. Go to "Mask" and turn off the "Invert" option. Set "Scale" to 370 at the start and set "Scale" to 100 at the end./p>
Then go to the “Stickers” and apply “Electricity Energy” to track 5. Change “Speed” to 4x at 10 seconds and the 25th frame and keep it till 11 seconds and the 15th frame. Drop this Slash effect on track four, increase “Speed” to 2x, and keep it till 11 seconds and 23rd frame. Then drop the Broken Glass effect, set “Speed” to 20x, and keep it till 12 seconds and the fifth frame.
Then drop the fourth clip on track 1, keep it till 16 seconds and 22nd frames. Then split it at 16 seconds, then 14 seconds, and the 11th frame. Then, at 12 seconds and 15 frames, then at 13 seconds and 10 frames, split after every five frames for this split clip and every three frames for this part. Then, for every two frames on this part, flip the first five frames, split the clip, and change "Color" to "Black&White Film" preset. Do the same on every split clip till 14 seconds and two frames.
Select this long-split part, paste it on track two, use “Smart Cutout” to select the speaker, and split it every 11 frames till the end. Turn on the "Transform” keyframes at the start. Set “Scale” to 150 at the end, then use the “Linear” mask to hide the speaker on the right side and change “Blend Mode” to “Darken" and “Opacity” to 90. Do the same for the rest. Duplicate on track Two. Now change the “Scale” to 190 and “Opacity” to 70 at the end and adjust its “Position.” Do the same for the rest of the parts.
Then copy and click clips from track Two and paste them into track Four. Go to the "Mask," hide the speaker on the left side, and adjust "Position" on the end keyframe. Do the same on the rest of the clips. Copy track three clips and paste them on track five. Repeat the same process as we did on track three. Shift the last split part to track two, and turn on the "Transform" keyframes at the start.
Then, at 16 seconds and the fourth frame, set "Scale" to 158 and rotation to 16.36. Then, set "Scale" to 300 and rotation to 73.64 at 16 seconds and the 18th frame. Then, set the scale to 3,000 and rotation to 90 at the end.
Drop clip 5 on track 1 at 16 seconds and third frames. Go to the "Speed," use the "Montage" speed ramp and modify it, then split it at 18 seconds and 11th frames. Now select track 2 clip and turn on keyframes, adjust the "Position" to fill the screen. Turn on the "Transform" keyframe at the start of clip 5. Set "Scale" at 3000 and rotate to 90 degrees.
Set "Scale" to 100 and rotation to 0 degrees at 17 seconds and 17th frame. Split this clip at 17 seconds and 15 frames. Duplicate on track 4, go to the "Smart Cutout" tool, and create a subject selection. Run it and save it. Now, drop the Realistic VFX effect at 17 seconds and 25 frames on track Two. Change "Speed" to 2x and split at 18 seconds and fifth frame.
Then drop the "Kung Fu Burst" effect on track 3 at 17 seconds and 15th frame. Change "Speed" to 2x and keep it till the main clip. Then, at 17 seconds and the 28th frame, drop the Realistic Broken Glass effect on track 5. Keep it till 18 seconds and the 11th frame.
Now match the duration of the rest of the clips. Drop clip 6 on track 2, keep it till 20 seconds, and the 25th frame. Split it at 20 seconds, then go to the “Effects” and apply the "Chroma Key Pro” effect on both split parts. Go to the effect settings, choose green color, and increase the "Color Range" on both clips to remove the green screen. Then, set "Scale" to 500 and rotation to 120 degrees at the start and set "Scale" to 100 and rotation to zero at the end.
Then apply the "RGB Stroke” effect on the first split part. Go to the effect settings, then set the “Opacity” keyframe at 19 minutes and five seconds, then at the end, set "Opacity" to zero. Then, at 20 seconds and the fifth frame on "Transform" keyframes, then at 20 seconds and the 17th frame, set "Scale" to 850 and adjust the "Position" on the green screen section.
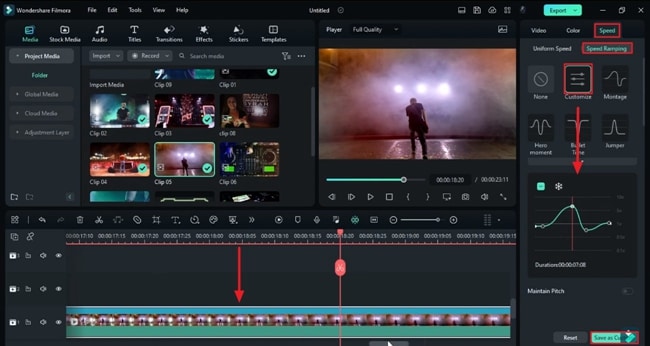
Drop the clip on track 1, go to the "Speed Ramping," select "Hero Moment," and split the clip at 21 seconds and the 16th frame. Remove the speed ramp on the split part, set "Hero Moment" again, and increase it to 21 minutes and 16 seconds. Drop clip 8 on track 1, keep it till 23 seconds and the 10th frame, then split at 22 seconds and the 15th frame.
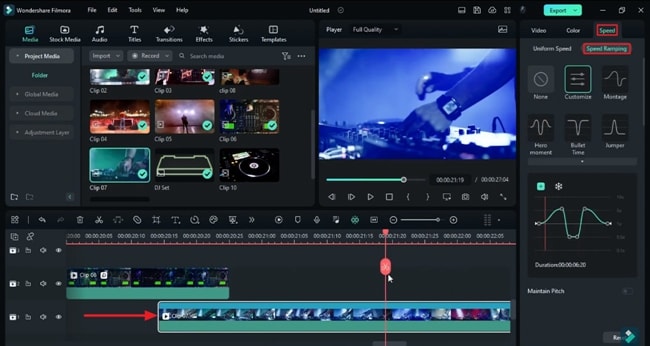
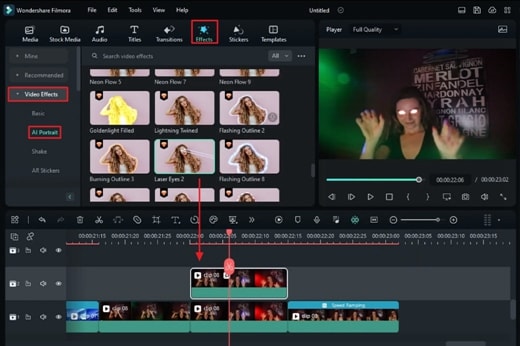
Split again at 22 seconds, select the last split part, and choose "Montage" in "Speed Ramping." Select the middle split clip and duplicate it on track 2. Now select the subject to isolate it. Then go to the "AI Portrait" effect, apply "Laser Eyes 2" on the track two clip, go to the effect settings, change "Color" to red, and turn off "Ray." Adjust the section length accordingly.
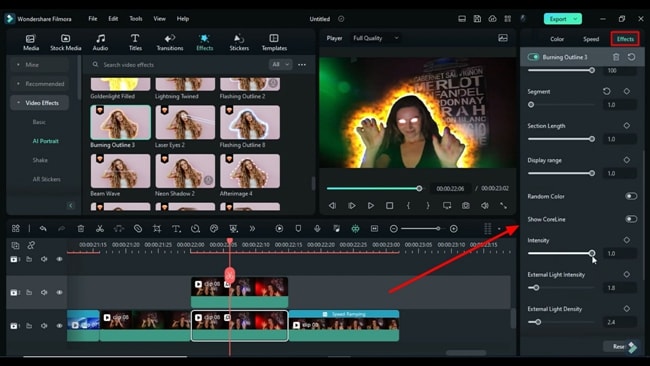
Now drop “Burning Outline 3” on track 1. Go to the settings, change “Radius” to 12.5, “Eclosion” to 100, “Segment” to 1, and turn off CoreLine. Set “Intensity” to zero at the start and set it to a maximum at the end. “External Light Intensity” to 20, “External Light Density” to 1.9, “Core Light Intensity” to 4.0, and change “Color” to red. Drop clip 9 on track 1, use the DJ part, and keep it for 24 seconds and 13 frames.
Then split it at 23 seconds and 16 frames, duplicate on track 3. Go to “Smart Cutout” and isolate DJ. Now go to the “Stickers” and drop the Adventure Film effect on track 2. Go to “Speed” and change “Duration” to 27 frames. Drop clip 10 on track 4, keep it till 25 seconds and the 14th frame, then split at the 25th frame.
Duplicate on track 5, go to the "Mask," select "Linear" mask, rotate at 90, then send track 4 clip, select "Linear" mask, rotate by 90, and invert the mask. Now, turn on the "Transform" keyframes at the start of both clips. Then, after 10 frames, click on the track 4 clip, take out of the half part of the screen downward, and track to upwards shutter effect.
Then, at 25 seconds, drop your logo on the letter on tracks 1, 2, and 3 and adjust them. Keep them till 27 seconds and the 19th frame. Now apply the "Extreme Shake" effect according to the need. Then, apply the "S-Log 03" effect to amplify the colors and change "Opacity" to 50. Now, let's render it to see the final preview.
Detailed DJ Effect Tutorial Using Filmora
What you need to prepare:
- A computer (Windows or macOS)
- Your video materials.
- Filmora video editor
Import the Required Clips and Make Basic Changes
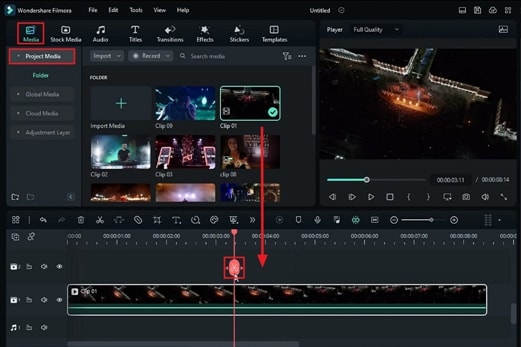
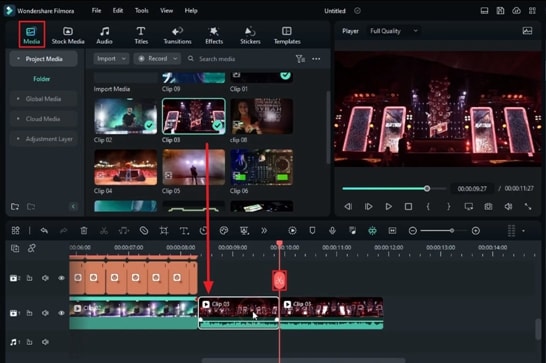
At first, you will need to import some neon lights using the "Media" button at the upper left side and then pressing the "+" icon in the “Project Media.” You will also need to import some required clips using the same process to put the effect on.
Afterward, drag the first clip from “Project Media” and drop it on Timeline. Adjust the playhead accordingly, split the clip at the required point, and delete the unnecessary part.
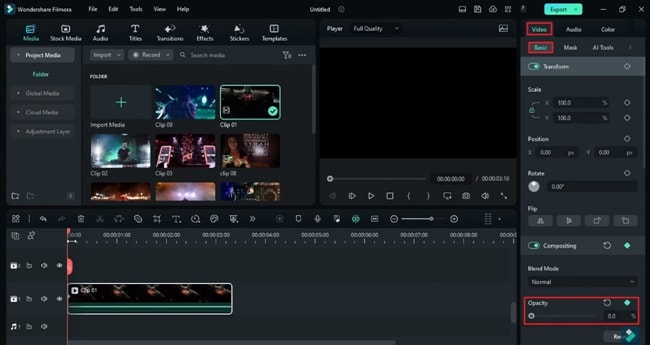
Now, select the clip, tap on the "Video" tab at the upper right corner, and proceed to the "Basic" section. Next, turn on the keyframe for "Opacity" and change its value accordingly. Adjust the playhead again and change the "Opacity" value. Following this, drop another clip on the same track, adjust, and split it accordingly.
Duplicate Your Videos and Enter Smart Cutout Mode
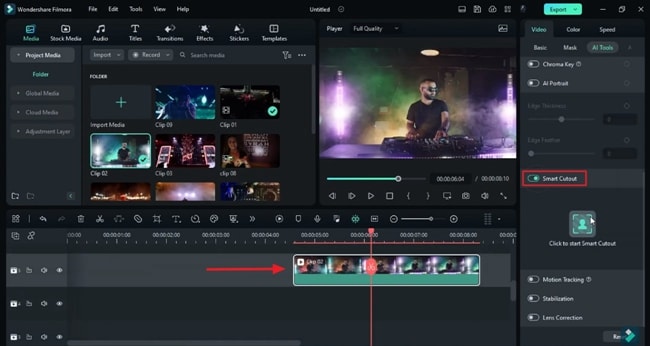
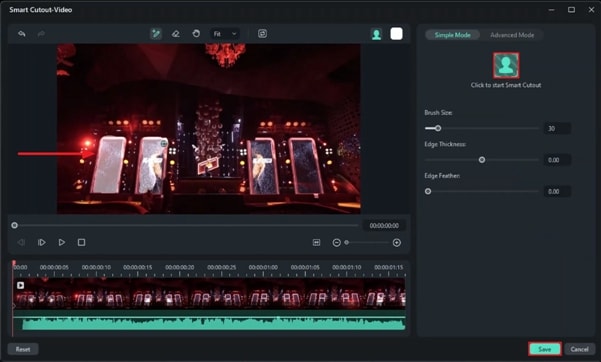
You can now duplicate this video on any other track for further processing. Choose the duplicated clip, head to the "Video" tab at the top right corner, and select "AI Tools." Toggle the "Smart Cutout" switch and hit the "Click to Start Smart Cutout" option.
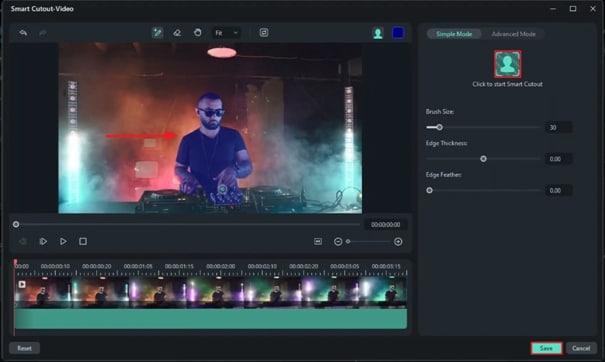
In the "Smart Cutout-Video" Window, click on the "Smart Brush" icon in the top bar and select the required object. Tap on "Click to Start Smart Cutout" under the "Simple Mode" tab, and after it is completed, tap on the "Save" button at the bottom right. After that, on the left side of the Timeline panel, tap on the "Eye" icon to hide this duplicated clip.
Use AI Tools, Drop PNGs, and Motion Track
Here, head back to the original track and adjust the playhead. In the right panel, turn on "Motion Tracking" under the "AI Tools" option. Afterward, adjust the box in the preview panel and hit the "Click to Start Motion track" option. After this, drop the required PNG on the track above the duplicated clip.
Under the "Motion tracking" section, open the "Link Element" drop-down menu and link it to the required clip. Choose the PNG, and in the "Basic" section under the "Image" tab, tap on the "Scale" lock icon to unlock it and adjust the "X" and "Y" values for "Position."
Head to the "Color" tab and scroll down to change the "Contrast," "Vibrance," and "Saturation" under the “Color” section. Also, adjust the "Duration" for this PNG through playhead.
Apply Stickers and Adjust the Color of Clips
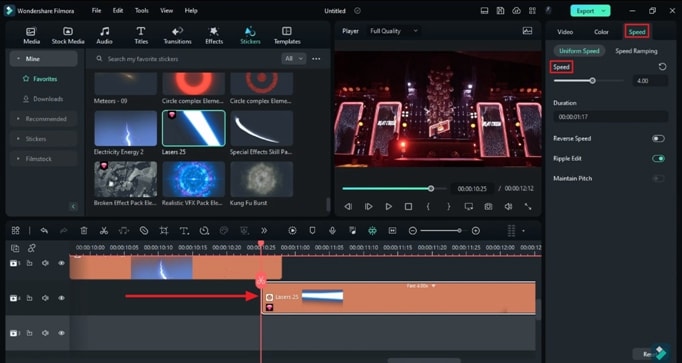
Afterward, head to "Stickers," drag and drop the required sticker on the track above the first clip. Choose the "Speed" tab, and under the "Uniform Speed," set the "Duration" for this sticker.
After that, choose the "Video" tab and turn on the "Transform" keyframe under the "Basic" option. Set the "Scale" at the start and at the end. You can also duplicate this sticker multiple times or import another one and repeat the steps.
For the second sticker, head to the "Color" tab and adjust the values for "Exposure," "Brightness," "Contrast," "Vibrance," and "Saturation." Also, set the "Highlight" value under the "Light" section and duplicate this sticker multiple times. Again, drop another sticker and adjust the same settings for it.
Set Keyframes at Different Points
Following this, head to the "Media" tab and drop another PNG image on the track in the timeline. Then, unlock its "Scale" and adjust the duration using playhead, switch on the "Transform" keyframe, and set the "Scale" and “Position” values throughout PNG. After this, duplicate it and adjust the keyframes accordingly.
At this point, select the "Effects" tab from the menu bar, drop the required effect in the timeline, adjust its duration, and under the "Effects" tab in the right panel, turn off "RGB Separate." Then, drop another effect, repeat the same process, and duplicate them on the same track.
Invert Mask Your Slips After Duplicating Them
Here, head to the "Media" tab and drop the third clip on the timeline. Now, split the clip and set the required duration for it.
Head to the "Smart Cutout" option, mask the parts, and "Save" the results. Repeat these steps for invert masking if required. Duplicate the clip and set it at the needed timeframe. Afterward, head to the "Mask" option under the "Video" tab and choose the "Linear" mask from there.
You can also toggle the switch for "Invert Mask" and head to set the "Scale" values for this clip. Again, duplicate the clip and repeat the steps, but here, you will need to turn off the "Invert Mask" option.
Import a Few More Clips and Set Durations
Now, hit the "Stickers" tab and drag and drop the required sticker on the desired track. You can also drop more than one sticker here. Head to the "Speed" tab and set the "Speed" and "Duration" for this sticker. Repeat these steps after importing other stickers on the same track. After this, import the fourth clip and drop it on track 1. For this clip, split it as many times as you want to make the smaller parts of it.
"Flip" the first few frames for this clip using the "Basic" option, and choose the desired "Preset" under the "Color" tab. You can now apply the same settings for each split frame throughout this clip. Now, for the last frame for this clip, you can duplicate it on the track above and use "Smart Cutout" to choose the required object and "Save" the results. Also, split this duplicate clip where needed.
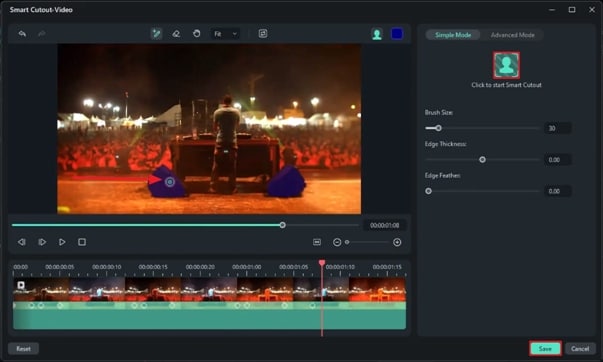
Now, turn the "Transform" keyframe on and set the "Scale" at the needed timeframes. Head to the "Mask" option, choose "Linear" type, turn on the "Invert Mask" button, set the "Position," and from the drop-down list, set the "Blend Mode" and "Opacity" as needed. Then, duplicate these split clips and apply the same settings.
Speed Ramp Clips
Afterward, head to the "Speed" tab, and under the "Speed Ramping," choose the required ramp and customize it as per requirements. Now, adjust the keyframes on the duplicated clip to match the timeframes of this clip. For the last imported clip, set the "Scale" value and also set the "Rotate" value as per needs on the different timeframes.
Set Scale and Rotate Values at Different Timeframes
Drop another clip, split it, and drop the "Effects" on split parts. Here, head to the "Effects" tab, choose "Color," and set the "Color Range" accordingly for effects on all split parts. Under the "Video" tab, set the "Scale" and "Rotate" values as per need. Now, drop another "Effect" on this clip and set its "Opacity" under the "Effects" in the top right corner.
Continuing this, drop another clip in the Timeline, head to the "Speed" tab, and perform "Speed Ramping" on this clip. Then, split this clip and set the speed ramp at different timeframes.
Drop Effects from AI Portrait and Customize
Head to the "Effects" tab and tap on "AI Portrait" from the left side panel. Now, drag and drop the required effects on the tracks in the Timeline. For this effect, head to the "Effects" tab, set its "Color," and toggle the "Ray" switch to off. Adjust the "Section Length" and "Display Range" options as needed.
Next, drop another effect in the timeline from "AI Portrait" and set its "Radius," "Eclosion," and "Segment." Then, toggle off the "Show CoreLine" option. Now, change the "Intensity" value at various timeframes and, at last, set the "External Light Intensity," "External Light Density," "Core Light Intensity" figures, and modify the "Color."
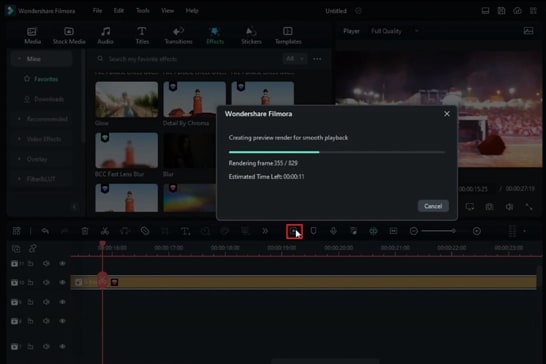
Render Preview Video and See the Results
Import a few more clips and drop them in the timeline. Perform "Smart Cutout," duplicate these clips, and drop some stickers on them after splitting them. Also, turn the "Transform" keyframes for these clips and adjust the "Position" and "Scale" values.
Finally, drop some logotype "Stickers" on the tracks in the Timeline, set their "Scale" and "Position," and split them as per needs. Next, hit the "Render Preview" icon in the Timeline's toolbar to view the results for this video.
It is easy to edit the DJ videos to your liking. Moreover, you can apply any of the required effects on them. However, you will need to take up some considerations, such as adjusting the proper colors to not mess up your videos. Follow each step carefully and make the best edits using Wondershare Filmora.


