Transcript
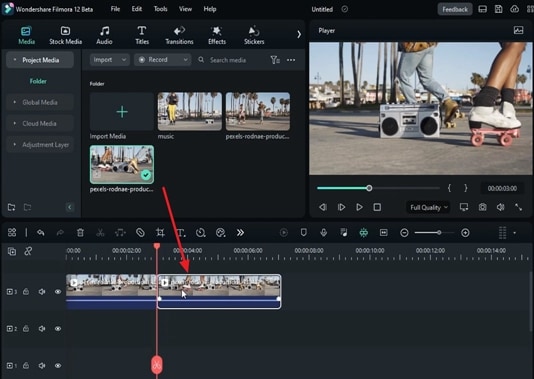
In this video, we will show you how to create a fast mask zoom transition in Wondershare Filmora. First, drop your footage on track 3. Your footage should have an object for which you can use a zoom transition.
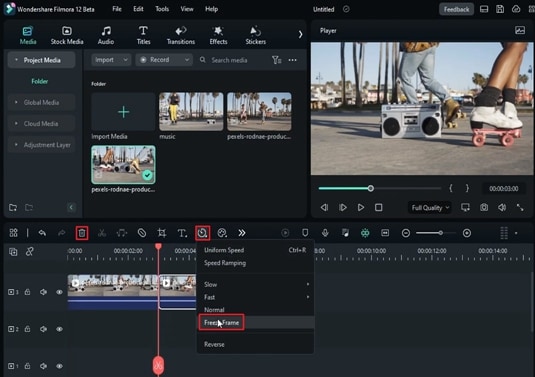
Here, we have this player, and we will use the speaker as a transition point. Find out the position for transition. Split your footage, select "Freeze Frame," split the footage at 1 second again, and delete the rest of the part.
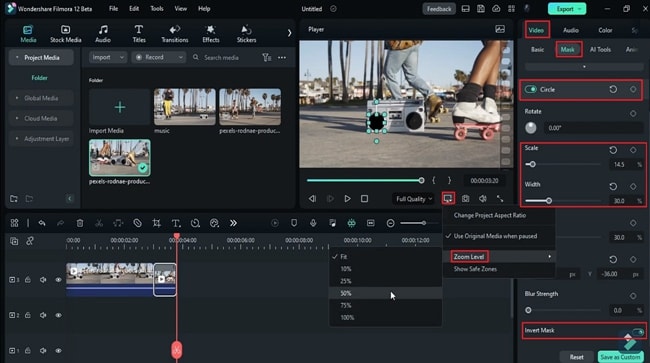
Apply the "Mask" on the split part and select "Circle." Change the "Width" to 30 percent. Click on "Invert Mask". Now, set the "Mask" "Scale" according to the transition point. Place the "Mask" on the object using the "Position" tool to get a close-up view, and change the "Zoom Level" to 75 percent. Adjust the screen and mask "Position." Then, add a keyframe at the start of the split clip. Then, add a blank keyframe 12 frames further. Change "Mask" "Scale" to 1 at the start. It will create an effect in which the Mask is expanding.
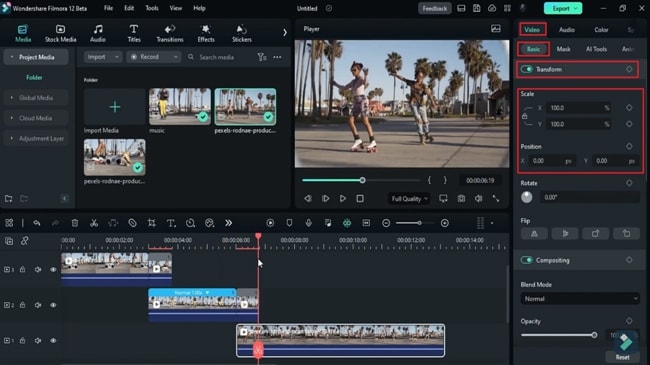
Then, drop your second clip on track 2 just under the split clip. Now, you can see we are getting our transition. Next, select the "Freeze Frame" clip, go to the "Basic," and turn on keyframes for "Transform." Change "Zoom Level" to fit 15 frames further. Lock the "Scale" ratio, increase the "Scale," and adjust the "Position." Use the "Position" tool to adjust the "Mask" "Position" in the center of the screen. Once you get the results, slide the keyframe to the end of the split clip. Now, you can see what we are trying to get.
Last, in the second clip, we have a similar object which we can use to create a further transition. Create a transition on this clip by following the same process. Now, we are done with both transitions.
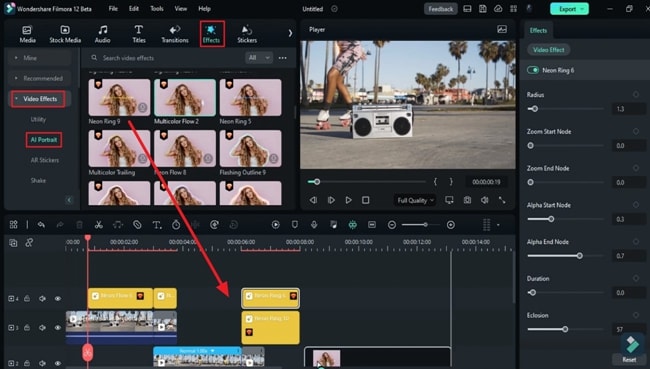
Let's add some effects to our clip to make it more cinematic. Go to "Effects," under "Video Effects," click on "AI Portrait," and start placing them on your footage one by one. Now, split your last clip. Here it is!
Guide to Make Clips Fast Mask Zoom Transition in Filmora
What you need to prepare:
- A computer (Windows or macOS)
- Your video materials.
- Filmora video editor
Import Media from Your Device
After launching Filmora, go to the "Media" tab in the main toolbar and import your media. Press and hold your videos in the media panel and drag it to the timeline panel. Then, select the footage in the timeline panel and split it at the duration that will be your transition point.
Select the "Speed" icon in the timeline panel and click "Freeze Frame" from the drop-down menu. Now, split the footage once again. Click on the footage part that comes after the playhead and click the "Delete" icon in the timeline toolbar.
Apply Mask and Make Necessary Adjustments
Click the split clip in the timeline track. Click the “Video” tab in the top-right panel and select “Mask” under it. Under the “Mask” tab, choose “Circle.” Make necessary alterations in the “Width” of the “Mask” under the “Circle” section.
Enable the “Invert Mask” switch and set the “Scale” value according to the transition point. Change the “Position” values to set the mask on the object/person you are trying to put the effect on.

Click “Setting” in the preview panel and select “Zoom Level” to change it as per your video requirement. Press and hold the screen in the preview panel and move it around to adjust it. Change the “Scale,” “Position,” and “Width” values again to fit the “Mask” on the object.
Now, adjust the playhead at the start of the split clip and add a "Circle" keyframe. Add another keyframe further from the first one. Following this, place the playhead at the start of the split clip and adjust the “Scale” value as per the video's requirements.
Add More Clips as Video Layers
Drag and drop another video from the media panel into the timeline on other tracks under the split clip. Under the "Basic" tab, enable the "Transform" keyframe. Make the necessary adjustments in the "Scale" and "Position" sections to make the zoom-out effect. In the last clip, we can use a similar object to create a transition repeating the same process.
Add More Effects & Render the Final Preview
Adding effects to your videos to give them a cinematic look is important. For this, go to the "Effects" tab in the Filmora’s toolbar, and under "Video Effects," choose "AI Portrait." You'll have multiple options there. Start adding your desired effects on the clips in the timeline.
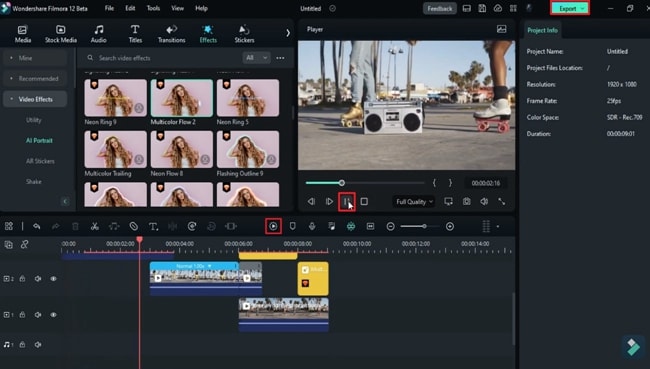
Once you're done adding effects, go to the "Render Preview" button in the timeline to see the final preview. After watching it, move toward the "Export" button to save this file.
Adding transition effects to your videos can significantly enhance their impact and reach. By applying these effects, your videos will communicate creatively and distinctively. There is no need to hire editors; follow this step-by-step guide and make a content creative video right now by using Wondershare Filmora.


