Transcript
In this video, we will teach you how to create the card overturned effect in Wondershare Filmora. To create this illusion, you need to do a simple setup. As you can see, we have set up everything. Use your smartphone to film. Next, you need regular-sized playing cards and large-sized playing cards. The distance between small and big playing cards should be about 4 to 5 feet.
Distance depends on the size of the big card. Your smartphone should be at the same level as a regular playing cards setup. The big cards should be above the regular card setup at an angle of 15 to 20 degrees. You can adjust the angle until all cards are in the right position like this.
Let's import your footage and drop it in on tracks 1 and 2. Select track 2 clip, go to the "Mask," and select the pen tool. Zoom in on the footage and create a mask around the big cards. Copy this clip and paste it on track 3.
Card Overturned Effect | Filmora Tutorial | Simple & Easy
What you need to prepare:
- A computer (Windows or macOS)
- Your video materials.
- Filmora video editor
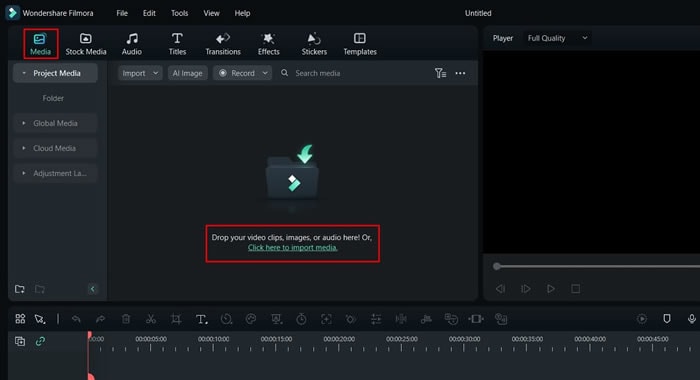
Launch Wondershare Filmora to Import Footage
After downloading Wondershare Filmora software, launch it on your computer. As you enter into the Filmora editing interface, import your recorded card overturned clip by selecting "Media" from the top-left corner. Continue to press the "Click here to import media" button to import the video.
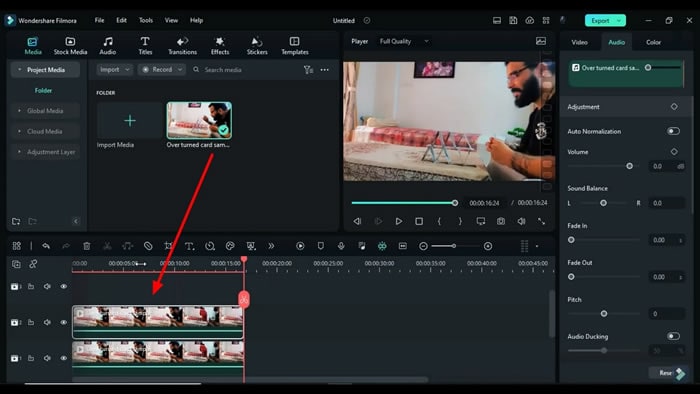
Drag to Timeline and Create Duplicates
Once your video is added to the "Folder" of "Project Media," drag it to the timeline below in track 1 and track 2 layers.
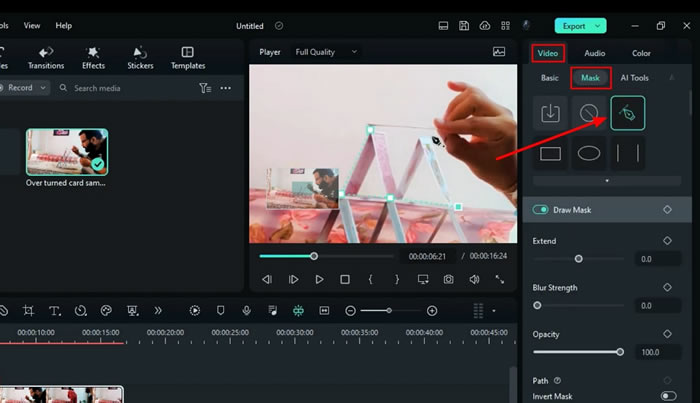
Apply Making Effect to Visualize
Double-click on the track 2 clip, and a setting panel will appear on the screen's right side. Choose the "Video" category and press the "Mask" function. Continue to select "Draw Mask" and start creating a mask around the big cards on the video on the playback screen. You can use a mouse cursor for this task.
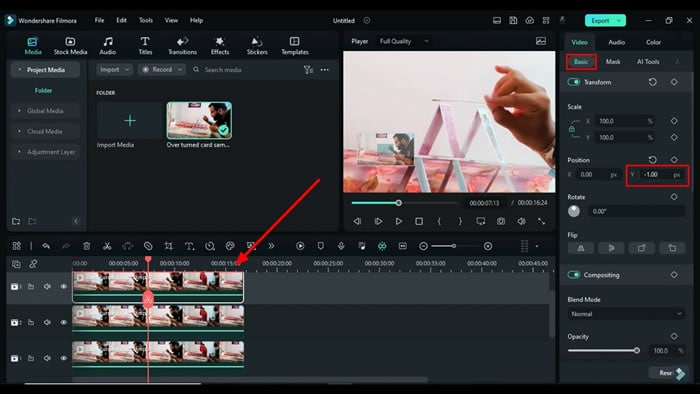
Copy Clip, Make Duplicate and Adjust Settings
Press the “Manage Tracks" icon from the screen's bottom left side and press the "Add Video Track" option. This will add a third layer of track to your project timeline. Now right-click on your track 2 clip and select "Copy." Move into the third layer, press the "Mute" icon from the left side, and select "Paste" after right-clicking on the layer. A duplicate clip is thus added in the third layer.
Double-click on the duplicate clip, and from the settings panel, move into "Basic" from the "Video" category. From the "Position," adjust the y-axis position to place the clip properly on the card.
Adjust Timeline Tracks to Position and Adjust Mask
Perform a double-click on the track 2 clip, and move into the "Mask" section from "Video." Continue to adjust the mask shape on the cards by selecting the "Draw Mask" pen tool. Move forward to lock track 3 by clicking on the "Lock Track" icon, which exists on the extreme left side of track 3.
Click track 2, and from the video on the playback screen, shift the mask on the left side by dragging through your mouse. After this, hide track 1 by clicking the "Hide Track" icon, and proceed to change the settings of the track 2 clip.

Match the Footage Colors to Wall Colors
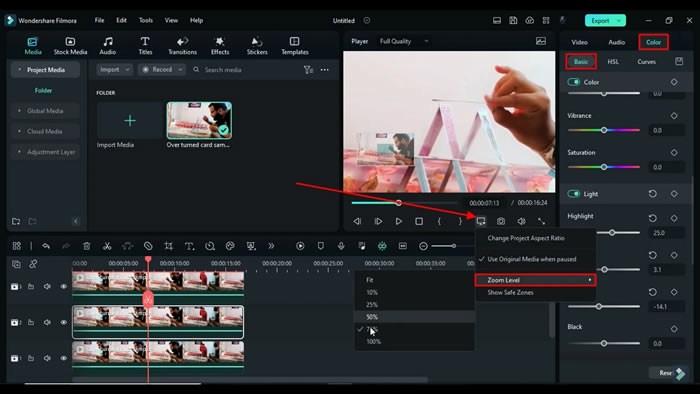
Trigger a double-click on track 3, and select "Basic" from the "Color" category. Scroll down and turn on the "Light," after which you need to adjust "Highlight," "Shadow," "White," and "Black" accordingly. Afterward, click the "Preview quality and display settings" icon under the playback screen, and set the "Zoom Level" to "Fit."
Identify and Reduce Clips Duration
Move the playhead across the frames to identify the point where the second person is picking up the card. When you find that point, reduce the duration of clips 2 and 3 by dragging the right corner of the layer to the left side.

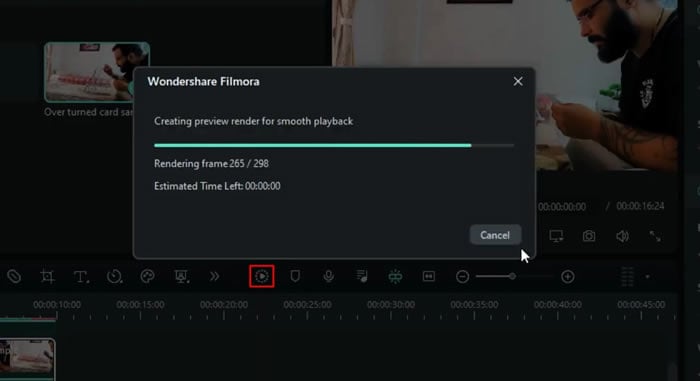
Preview Render Clip and Download
Click on the "Render Preview" icon to view your final overturned card video in high-quality resolutions. If the video meets your requirements, move ahead to download it. For this purpose, press the "Export" button from the top-right corner, provide a name to your video, set the desired saving location on the device, and click the "Export" button again.
Magic is a special form of entertainment that people of all ages love. Apparently, most magic is performed using cards with different techniques. One of these techniques is the card overturning effect. In this video, you learned how a card overturning magic video could be created using Filmora effects. The steps are straightforward, so you won't face any problems.


