Transcript
In this video, we will teach you how to create Spit Fire visual effects in Wondershare Filmora. First, film yourself in front of a green screen, pretending to be spitting fire. Also, you need a creepy, dark background image. Then drop the background on track 1, make it 6 seconds long, then go to the "Image" and change "Scale" to 1094, and set X "Position" to 100. Open the "Color" section, change "Temperature" to 45, "Brightness" to -64, and "Highlight" to -5.
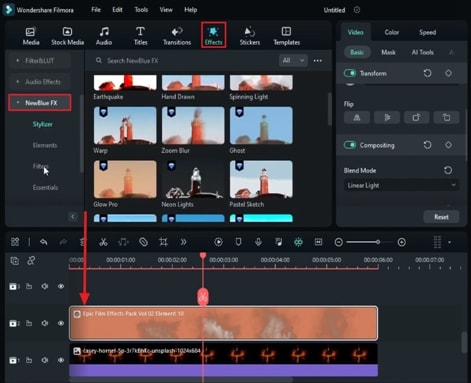
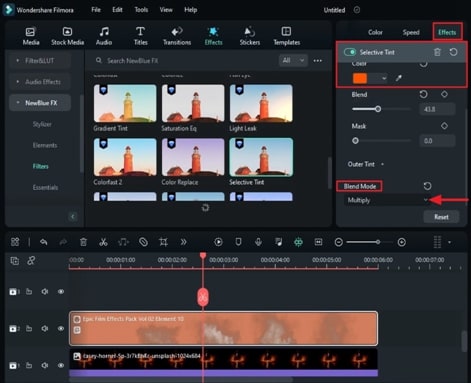
Then go to the "Stickers" and apply the "Smoke" effect on track 2. Increase "Scale" to 207 and align its Y-axis "Position." We just need the upper part of the smoke. Here, we change "Blending Mode" to "Linear Light" and then check out the effects, "New Blue FX," under the "Filter" section, find the "Selective Tint" effect, and apply it to the smoke clip. Under the "Effect" tab, expand "Inner Tint" and select orange color. Change "Blending Mode" to "Multiple," or you can choose whatever you like. Change "Blend" to 43.8 so we got the outcome well blended with smoke.
Again, go to the “Stickers” and apply “Ground Fire” on track 3. Increase the "Scale" to 214 as we need only a few upper parts of the smoke.
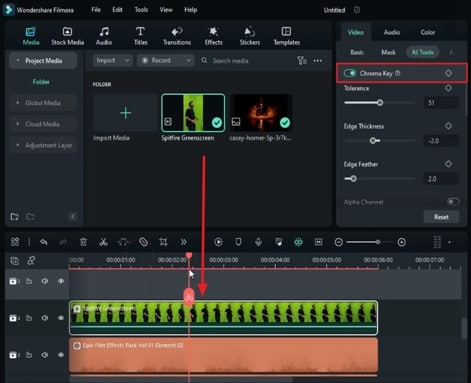
Then drop your green screen footage on track 4. Go to the “AI Tools" and turn on "Chroma Key," if the green color is visible, use this option to remove it. Then go to the "Basic," increase "Scale" to 180, and set Y at negative 155 and X at negative 232.
Now, we will make some "Color" adjustments to remove the white reflection on the face and blend the object with the background. Go to the "Color," change "Temperature" to 50, "Exposure" to 3, "Brightness" to -15, "Contrast" to 35, "Vibrance" to 18, "Highlight" to -48, "Shadow" to -10, "White" balance to -20, "Black" to 64.
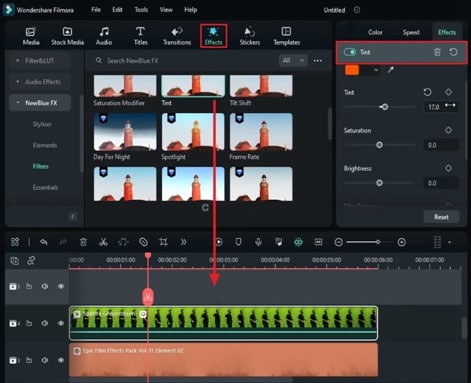
Go to the "Effect" and apply the "Tint" effect on the footage. In the "Effect" setting, choose orange color, change the "Tint" value to 17, "Saturation" to -20, "Brightness" to -24, and "Film Grain" to 38. All those values depend on your footage and the environment.
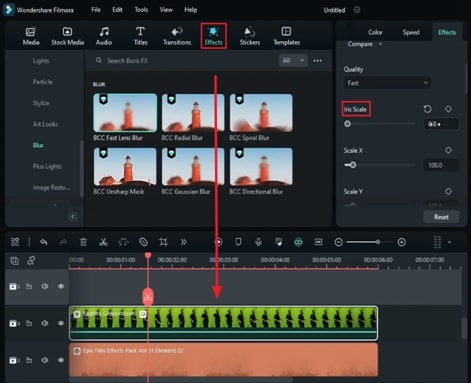
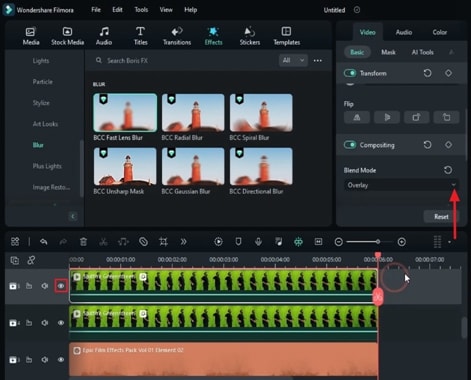
Now, to create the spitting fire effect, go to the "Boris FX" folder, and under "Blur," apply the "BCC Fast Lens Blur" effect on the footage. Change the "Iris" scale to 0.8. Now copy this footage and paste it on track 6. Select a duplicated clip, go to "Tint," and choose a light orange color. Change "Tint" to 100, "Saturation" to 66, "Brightness" to 92, and "Film Grain" to 0, and change "Blending Mode" to "Overlay."
Now go to the "Fast Lens Blur" effect, change the "Iris" scale value to 145, and "Scale" Y to 10. Then go to the video and set "Blending Mode" to "Overlay" and "Opacity" to 62.8.
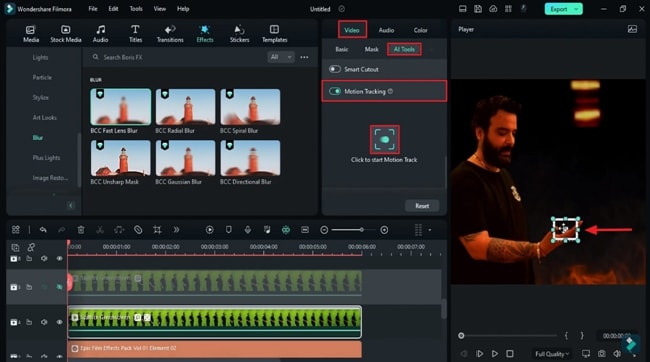
Hide track 5, select the clip on track 4, go to "AI tools," and turn on "Motion Tracking." Stop at the starting point. Select the tracking point and change its "Shape" to square. Place it on hand and click on "Start Motion Track."
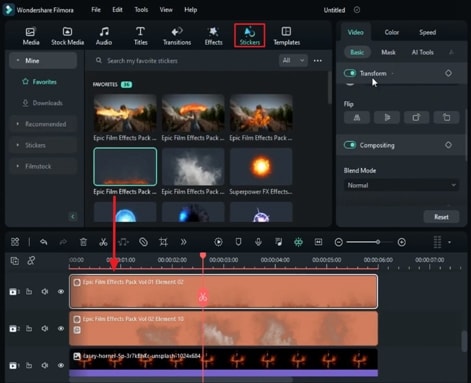
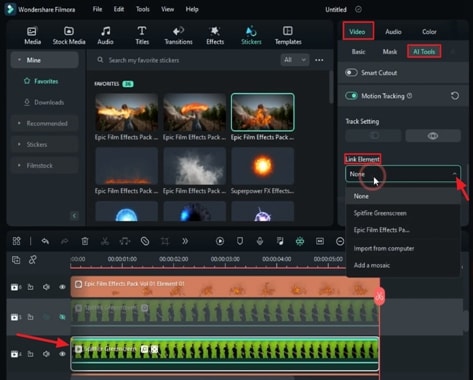
Next, go to the “Stickers,” apply the fire clip on track 6 and keep it 6 seconds long. Select the main clip. Select fire clip under “Link Element” in the "Video” setting tab. Now adjust the fire to attach to your hand in the preview screen.
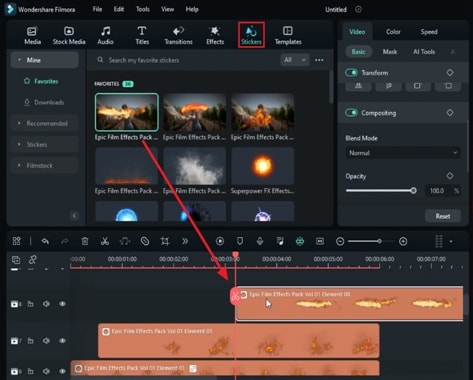
Unhide track 5; meanwhile, hide track 6. Use the "Motion Track" option to locate the shoulder. Again, drop the fire clip on track 7 at 1 second, remove the rest part, and adjust the fire clip on the shoulder. Flip it horizontally and vertically. This step helps to create the illusion.
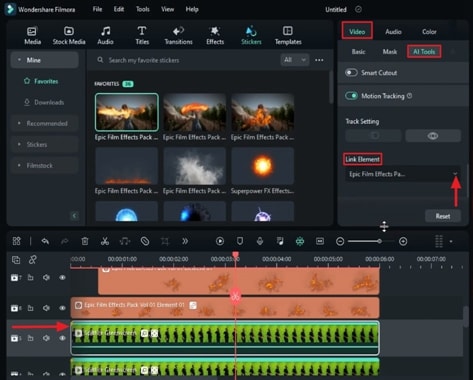
Next, unhide track 6; rop the long fire clip on track 8 at the next frame, where you start to open your mouth. Click on the duplicate clip and select "Long Fire Clip" under the "Link Element" option. Now adjust the long fire "Scale" and "Position" to match the mouth.
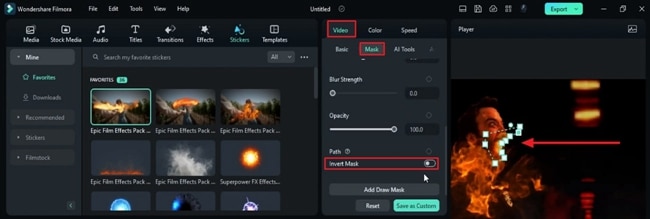
Go to the “Mask” and use the “Pen Tool” to create a mask at the mouth. “Invert the mask,” increase “Blur Strength,” and adjust the mask shape. Delete the part after 6 seconds, go to "Color," and do some color adjustments.
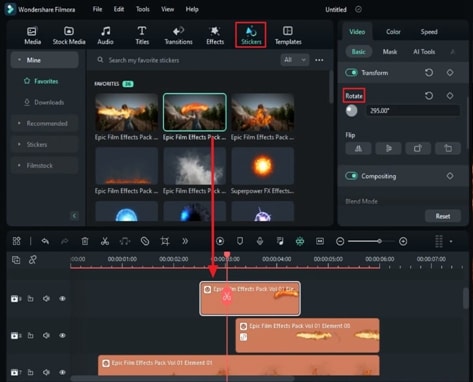
Then drop this rotating fire clip at 2 seconds in the 15th frame. This clip helps us to create inner heat generation on the neck and chick parts. Keep it till 4 seconds and the 14th frame. "Rotate" it by 272 degrees. Increase its "Scale" and change "Blending Mode" to "Overlay."
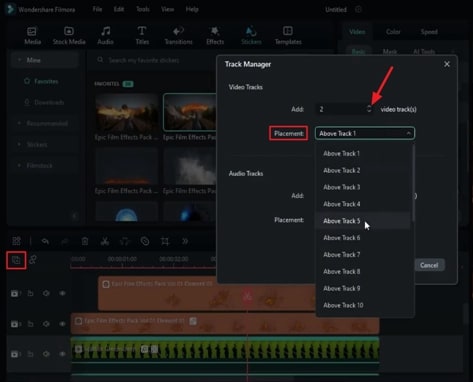
Now go to the "Track Manager," add two tracks above track 5, and shift both fire clips to tracks 6 and 7. Adjust the track 7 fire "Position."
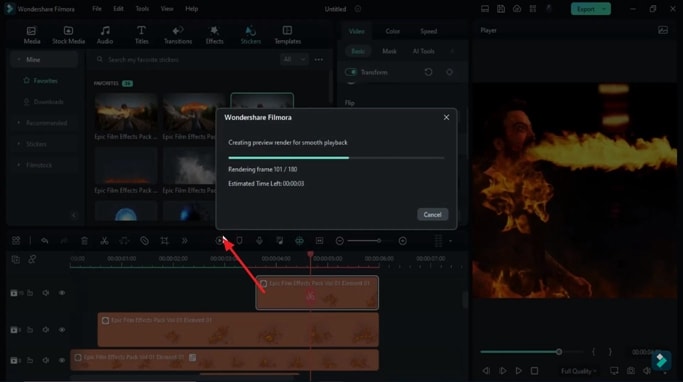
Finally, let's create an inner fire effect on the face. Apply the fire clip at 0.3 seconds and the 18th frame and keep it 6 seconds long. Reduce its "Scale" by 50%, "Rotate" it by 197 degrees, adjust it on the face, and change "Blending Mode" to "Overlay." Now, let’s render it and see the final preview.
Guide on How to Create Spit Fire Visual Effect in Filmora
What you need to prepare:
- A computer (Windows or macOS)
- Your video materials.
- Filmora video editor
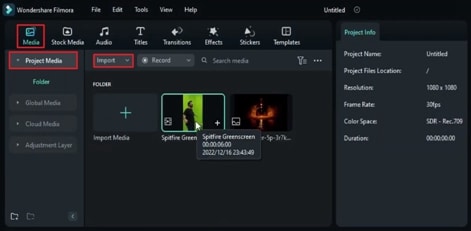
Create a New Project and Import Media
To create this type of effect, you'll need a video of you pretending to spit fire and a PNG image of a dark background that matches the theme of the video. Launch Filmora and click on the "New Project" button to start editing. Once you find yourself in the main editing window, import your video and PNG image in "Project Media."
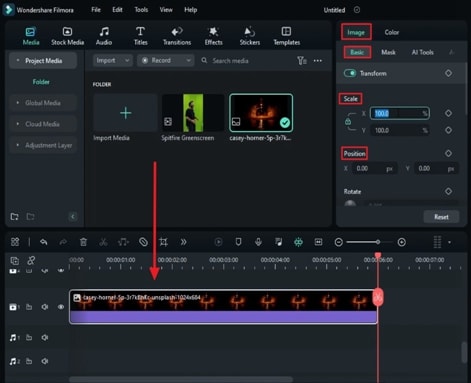
Prepare the Background for Video
In this step, we will prepare the background for the video. For this purpose, click the PNG image, drag it, and drop it on the timeline track. Increase the time duration of the PNG image to a few seconds by moving the playhead forward on the timeline. Go to the "Image" settings on the right side, and under "Basic," change the "Scale" to its max and adjust the "Position" according to your video.
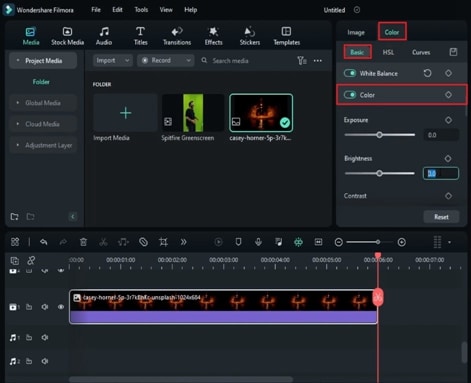
Adjust the Colors for Background
To make changes in the background, go to "Color" settings in the same panel and explore the options under the "Basic" tab. Modify the elements under the "Color" and "Light" sections from there. Adjust these elements like "Brightness," "Contrast," "Highlight," and more in a way that fire looks lit up and closer to reality.
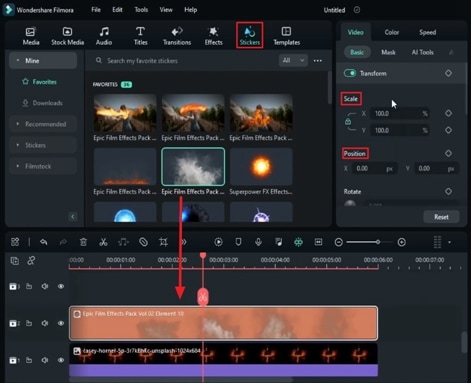
Add Smoke Effect for the Background
Let's give your background a more realistic look by adding smoke to the fire. Go to the "Stickers" tab in the custom toolbar and find a suitable smoke effect. Add it to the next available track in the timeline and make some "Basic" changes in the "Scale" and "Position" of this smoke under the "Video" settings on the right panel. Make sure to change the values as per your video. Afterward, go to the same tab and change the "Blend Mode" to "Linear Light."
Blend Smoke with Fire Background
To blend smoke with fire, go to the top toolbar again and tap "Effects." Under the "New Blue FX" category, select a suitable effect and drop it on the smoke track.
Go to the "Effects" settings at the right of your screen, find and expand "Inner Tint." Select an orange color to align the smoke with the fire's color. In the same tab below, change “Blend Mode” to “Multiple,” or whatever suits your video better. Then go to “Blend” and increase its value to make the smoke blend perfectly with the background.
Add Ground Fire Sticker
Go to the "Stickers" again and apply a ground fire sticker on the available track in the timeline. Then, make some changes under the "Basic" settings. Change the "Scale" and "Position" settings to adjust the sticker according to your video.
Drop Green Background Clip
Go to your "Media," click on the green background clip, and drag it to the timeline. It is time to remove the green background and merge your clip with the fire background. Following that, go to "Video" settings under "AI Tools" and enable "Chroma Key." It will remove the green background from your clip. Then, under the "Basic" tab, adjust "Scale" and "Position" according to your video.
Blend the Object With The Background
Because the person is in the fire, we need to remove the white reflection of the face and blend it with a background. For this, again, go to the right tool panel and make changes in the "Color" settings. To make the reflection and light on the face warm, experiment with the elements like "Contrast," "Brightness," "Highlight," and "Shadow."
To get more precise results, go to the custom toolbar, and under the "Effects" tab, choose a tint effect and place it on the background video in the timeline. Go to the "Effects" settings on the right side of the screen and select the orange color right below the "Tint" button. Afterward, change the values of "Tint," "Brightness," "Saturation," and more according to your clip's surroundings.
Initiate the Spitting Fire Effect
First, you need to go to the "Effects" tab in the top toolbar, and under the "Blur" category, click on "BCC Fast Lens Blur." With the help of your cursor, drag and drop this effect on the background clip's track. Change the "Iris Scale" under the "Effects" settings at the top right and duplicate the background clip on one clip above.
Afterward, click the latest track clip and go to the right-side panel. Under the "Tint" section, choose a light orange color and increase the value of "Tint," "Saturation," and "Brightness." Meanwhile, decrease the value of "Film Grain" to zero. Then change "Blend Mode" to "Overlay."
Adjust the Blur Settings for Track 5
With the help of your cursor, go below the right side panel and stop at the "BCC Fast Lens Blur" section. Make alterations in "Iris Scale" and "X & Y Scale," Go to the "Video" tab and change "Blend Mode" to "Overlay"; meanwhile, increase the value of "Opacity." At the end of this step, go to the timeline panel, and from the left side of the track, click on the "Hide Track" icon.
Enable Motion Tracking
Once you hide the clip of the track, click on the clip on the track below and hover towards the right-side panel. Tap on "AI Tools" under the "Video" tab and enable "Motion Tracking." Once you enable it, you'll see a detecting box on the preview screen. Crop the size of this detector according to your hand and place it on your hand.
Adding Burning Fire Sticker for Hand and Link it
Go to the "Sticker" tab in the custom toolbar and find a burning fire sticker. Once you find the one you like, select it and bring it to the timeline panel. Adjust the duration of this sticker accordingly. From the right side panel, go to "AI Tools" once again, and under the "Link Elements" section, select the name of your burning fire sticker.
Add & Adjust the Burning Fire for Shoulder
Then click on the locked track and enable "Motion Tracking" just the way you did before. Except for this time, place and adjust the detector on your shoulder. Add a burning fire sticker on another track and adjust it the same way for the shoulder you did for the hand. At the end of this step, unhide the track below it.
Add Fire Spitting/Long Fire Sticker for Mouth
Now, go to "Stickers" again and add a spitting fire sticker for the mouth on a new track. This sticker's starting point should be where you're opening your mouth on the timeline.
Following that, click on the 5th track and go to "AI Tools" on the right for it. There, expand the "Link Elements" section and select the name of this spitting fire sticker.
Adjust Sticker at the Beginning of the Mouth
After this, the sticker will be shown on the preview window; adjust it on the mouth. Then, go to the "Mask" tab and select the "Pen Tool" to create a mask at the mouth.
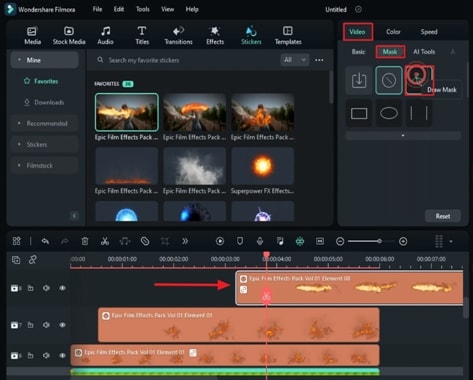
Enable the "Invert Mask" button and adjust the "Blur Strength." Trim and delete the rest of this sticker that is exceeding. Adjust this sticker's "Color" settings to match the background. Repeat the same process you did for other stickers in the timeline.
Create Inner Heat Generation for Neck
Go to "Sticker" and add a heat-generating specimen on a new track. Go to the "Basic" tab under "Video" settings, adjust the "Scale" and "Position" of this sticker according to the neck, and change its "Blending Mode" to "Overlay."
Afterward, go to the 5th track and click "Track Manger" on the left side of it. Choose the "Add Track" option from the drop-down menu and add 2 tracks above the 5th track. Go above on the timeline panel and shift tracks 10 and 11 clips on new tracks 6 and 7. Adjust the fire position of track 7 according to your video needs.
Add Final Fire Sticker and Render Preview
Ultimately, it is time to add the inner fire effect on the face. From "Sticker," apply fire clips at the timeline and adjust their duration. Then, adjust its "Scale" and "Rotate" values according to face. Then change "Blending Mode" to "Overlay." Go to the timeline toolbar and select the "Render Preview" icon. If you're satisfied with the preview, select the "Export" button and download the final clip on your device.
After familiarizing yourself with the steps, you can make a spitting fire effect video. With Wondershare Filmora's easy-to-understand interface, such videos can be made in less than an hour. Such videos not only make your content different but also engage your audience.
