Transcript
You may have seen this transition in many music videos. Let’s create this super cool and super easy transition in Filmora.
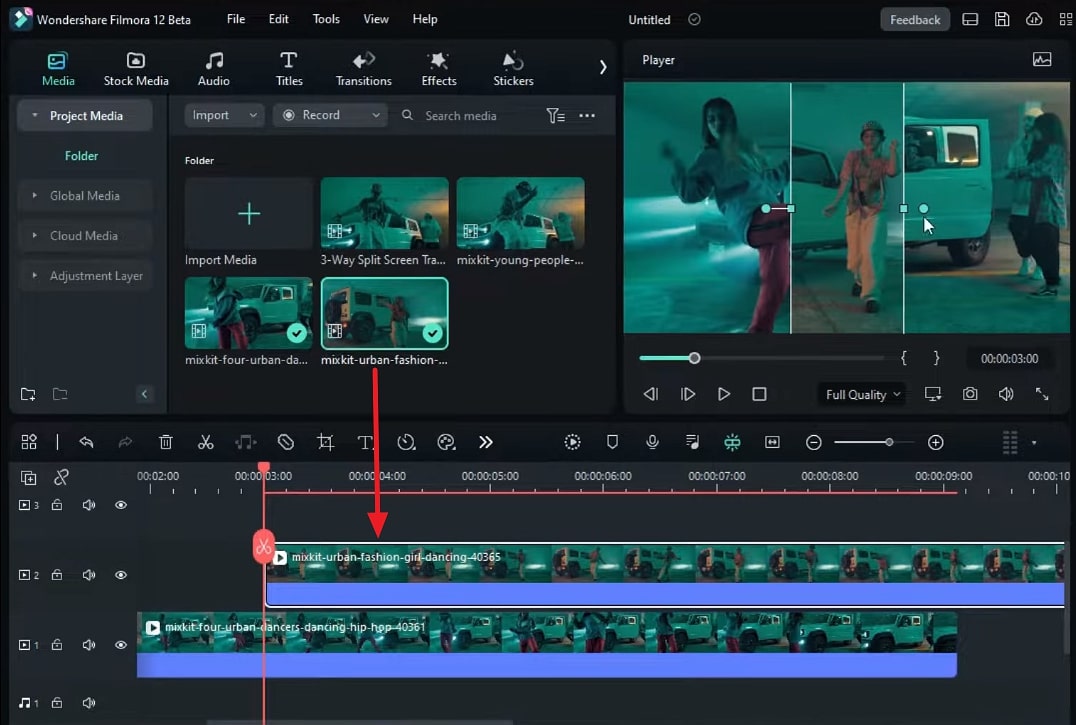
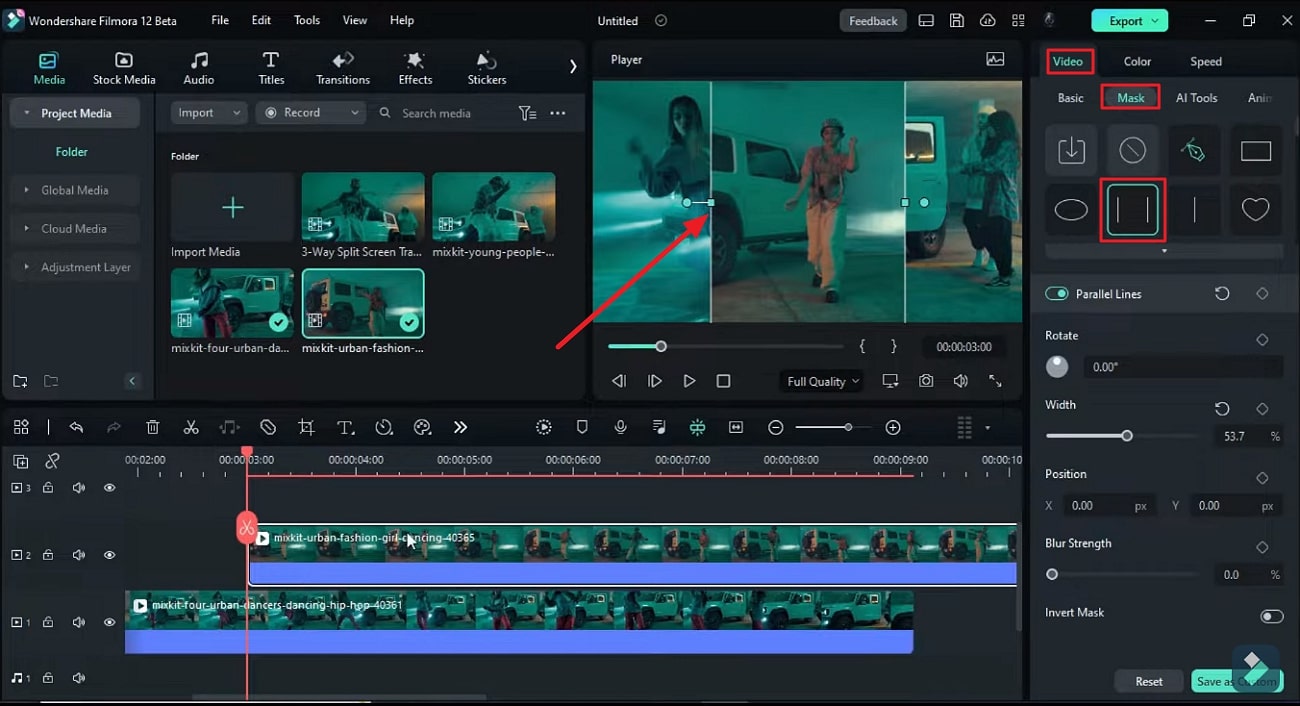
First, drop your footage on track and zoom in on the timeline. Now, find out the point to create the transition. Then, drop the 2nd clip at that point on track 2. Go to the “Mask,” select “Parallel Lines," and set its width in a way that we can have the same space on both sides of the clip, a kind of middle position.
Then, go about ten frames further, and drop your third clip on track 3. Turn on the keyframe and slide the clip out of the screen by the x-axis. Then go 5 frames further, bring the footage back, and set it at the edge of the track 2 clip.
Now, select the track 2 clip and turn on keyframes at this "Position." Go 5 frames further and slide the footage out of the screen towards the left side. At the same "Position," change the "X" value of track 3 clips to 0. Now delete all the clips after 5 seconds. Let's see the preview.
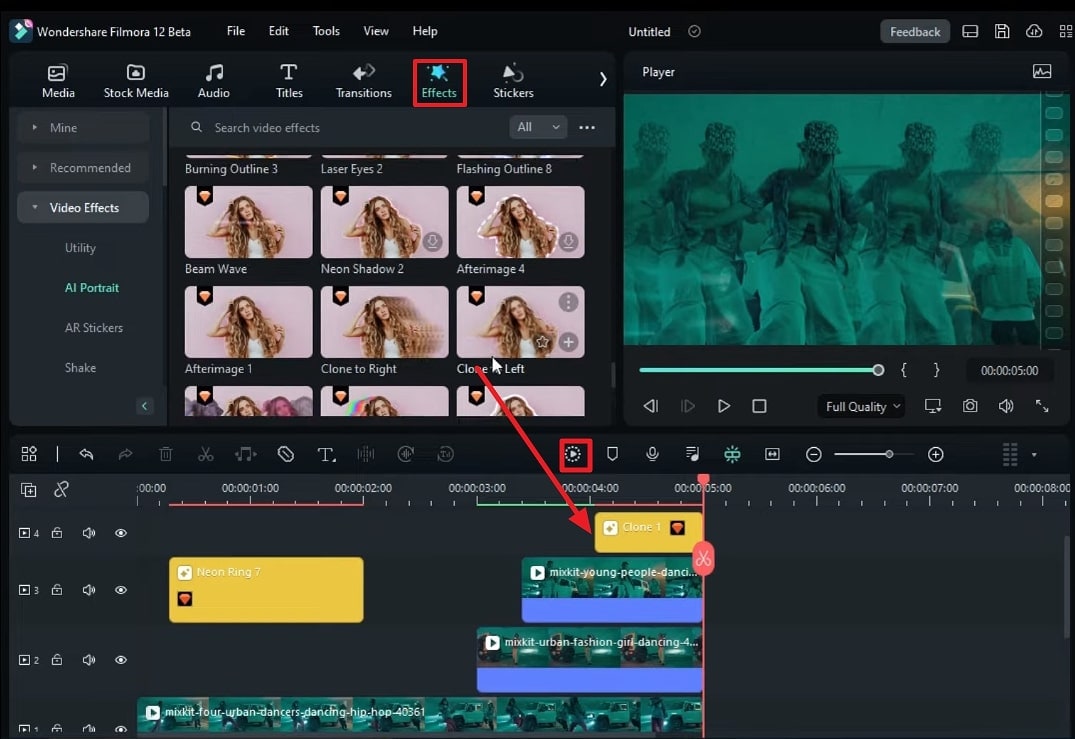
Now, you can add different effects to make your clip catchier and awesome. Here, we applied the "Neon Ring 7" and "Clone 1." After applying the effect, let's see the final preview.
Tutorial to Create a 3-Way Split Screen Transition by Using Filmora
What you need to prepare:
- A computer (Windows or macOS)
- Your video materials.
- Filmora video editor
Launch Filmora and Start the Process
Launch Filmora on your computer and create a “New Project” at its main interface. As you start the editing process, "Import" your media into the "Media" panel. Select the media with the help of a cursor and bring it to the timeline by simply drag and drop method.
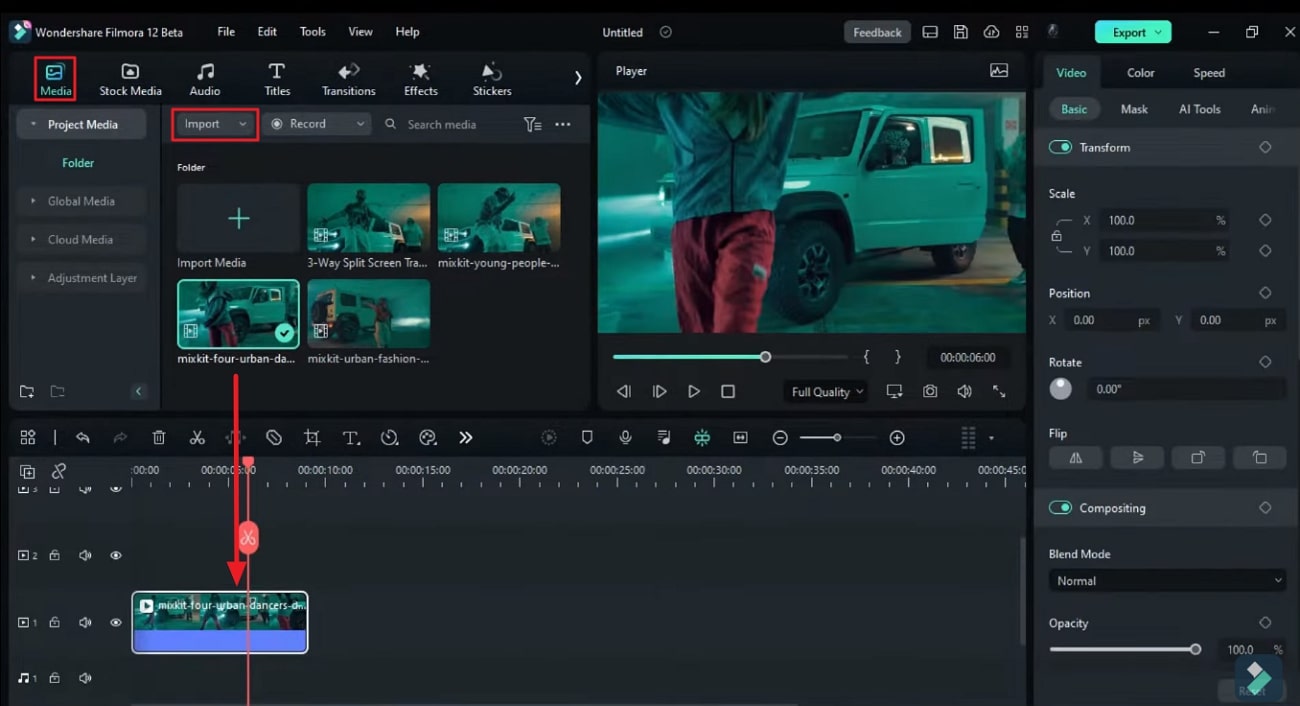
Create Video Layers on Timeline
After dropping the first footage on the timeline, extend its duration towards right along the track by dragging it. Now, move your playhead to the point where you want to create the transition. Keep it there and return to the media panel to bring more footage on the above track. Place it right above the point where the playhead is placed in the first video.
Add Mask on the Footage
After placing the footage in the desired position, click on the second clip, go to the "Video" settings, and select the "Mask" section. From the expanded section, choose “Parallel Lines," where you can adjust its width manually from the preview window so that its lines have equal space on both sides of the video.
Create the Transition by Changing Position
Next, move towards the media panel and drop another clip on the above track. From the right-side panel, click on the latest clips and change the "Position" of the clip to bring the object in and out of the screen to create the transition. Furthermore, keep adding keyframes at every changing "Position" on the clip.

Apply Effects on the Video Clips
After doing this, you can remove the extra parts by trimming all the clips. You can add effects from the "Effects" tab on the custom toolbar to make your clip more attractive. Finally, click the "Render Preview" icon from the timeline panel to see the final preview.
Creativity has become rare with the growing competition in digital content. The only way to get the desired outcome is to provide quality content that can engage the audience. This tutorial has explained how to create video transitions in a step-by-step method. Splitscreen transitions can be used for multiple purposes, especially in music videos, to make them catchy. Click here for more tips about splitting screens.


