Echo Motion Trail Text Effect Tutorial
The echo motion trail text effect is always trendy, as many people use this in creating intros or outros for their videos. This effect instantly grasps the attention of the audience, which can help you to make your videos more interesting. Filmora is capable of creating an echo motion trail effect as it gives the user complete freedom to operate this tool.
Tool
Assets

Transcript
First of all, find out track manager on the left side of timeline. Then, click on this plus box icon and add eleven tracks above track 1. Now let's drop the default title on track 11.
Drop the first snapshot on track 11 and keep it 25 frames long. Now drop the second snapshot on track 10 and keep it 25 frames long. Copy track 10 clip and paste from track 9 to track 2.
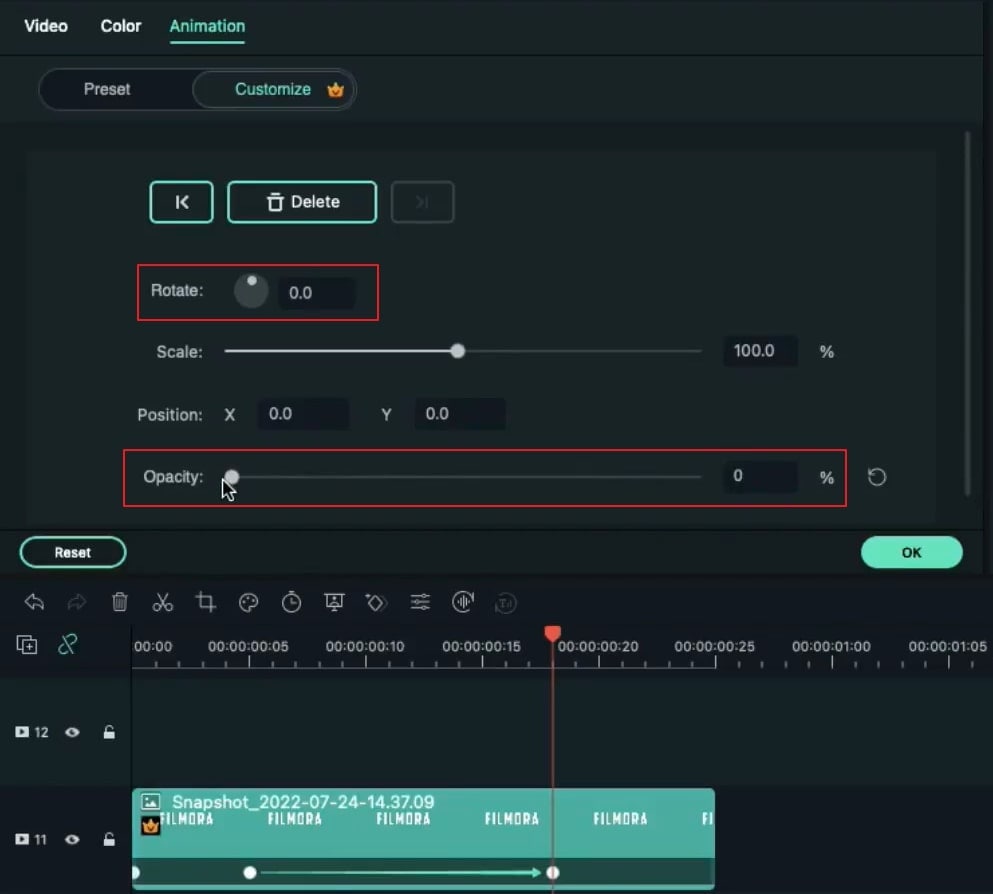
Go to track 11 and place the play head at the starting point.
Add a keyframe at the 5th frame. Place the playhead at the 18th frame.
Go one frame back and set the opacity to 100%. Then, place the playhead at the starting.
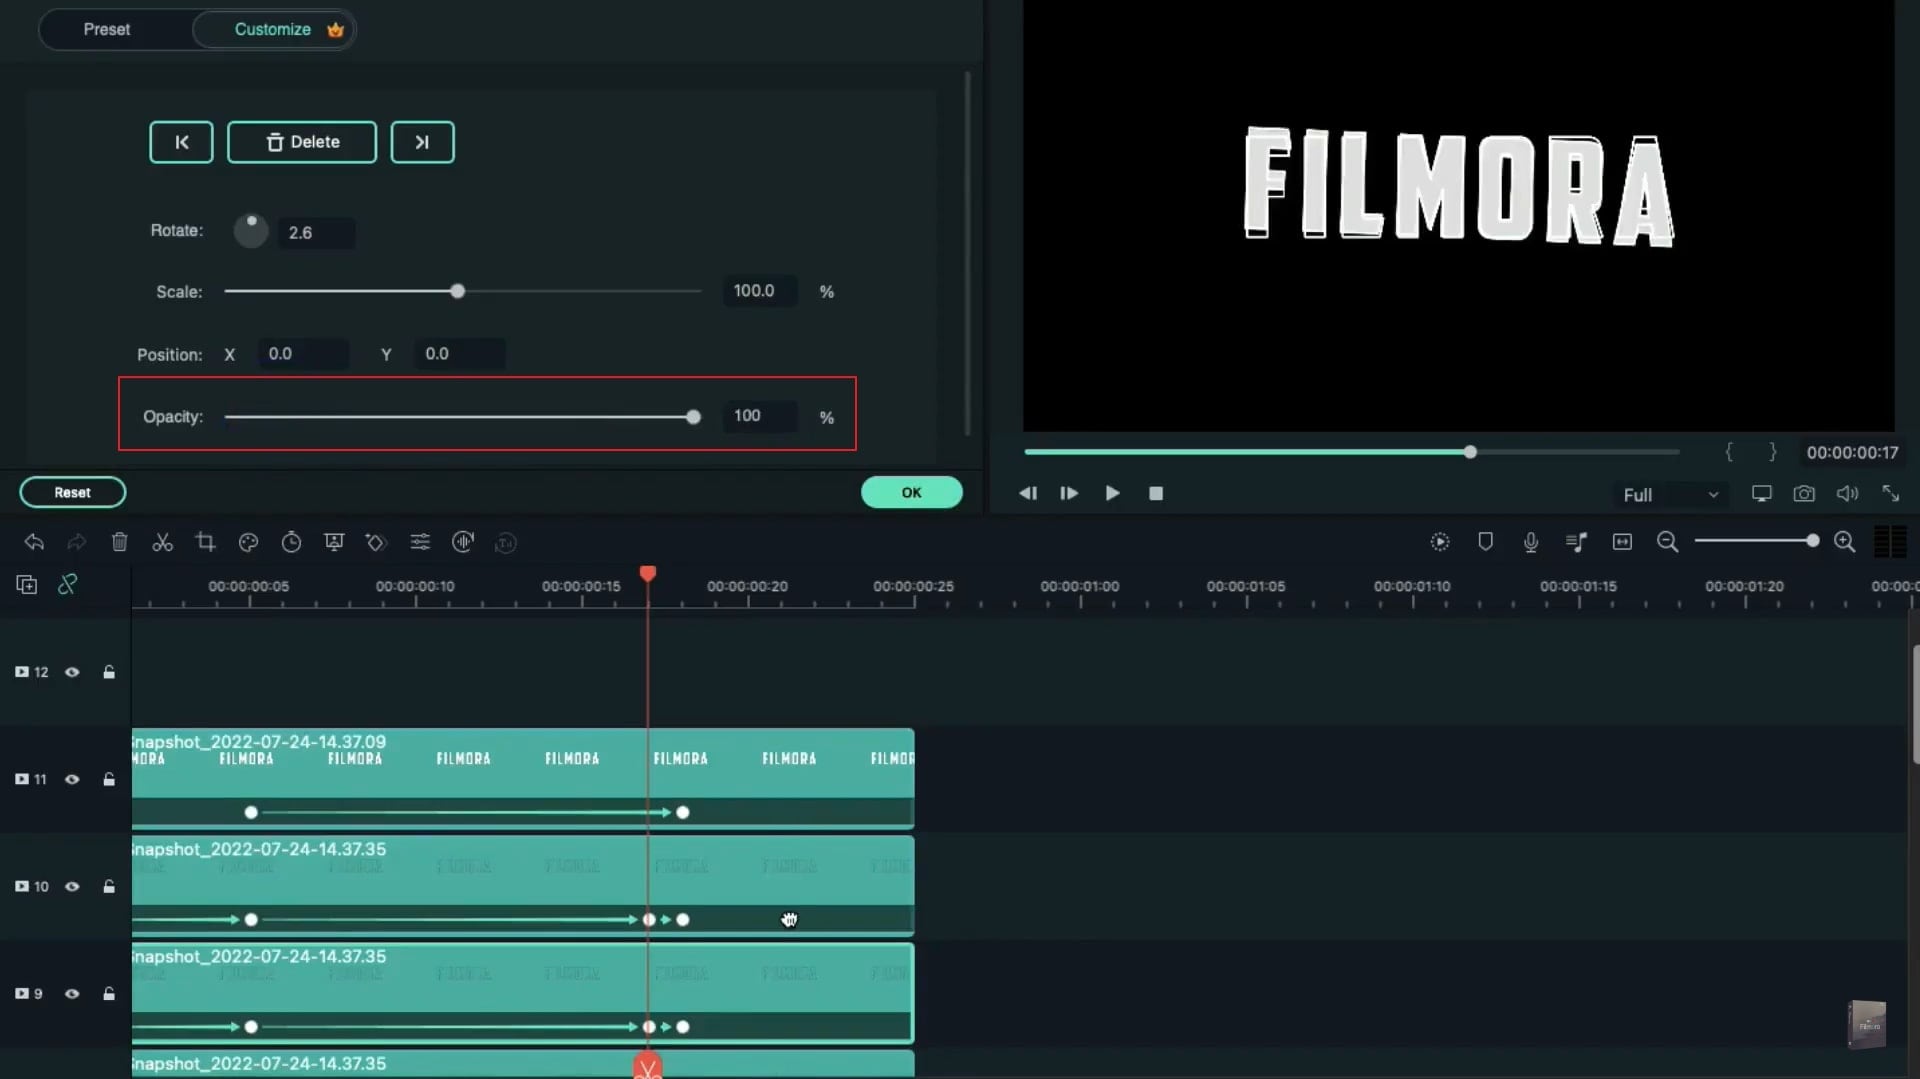
Go to 5 frames further. Reset the scale then place the playhead at the 18th frame reset the rotation and opacity to 0%.
Follow the same steps for the rest of the clips. Just to make sure to increase rotation by four in each clip like 30, 34, 38, 42, 46, 50 and so on.
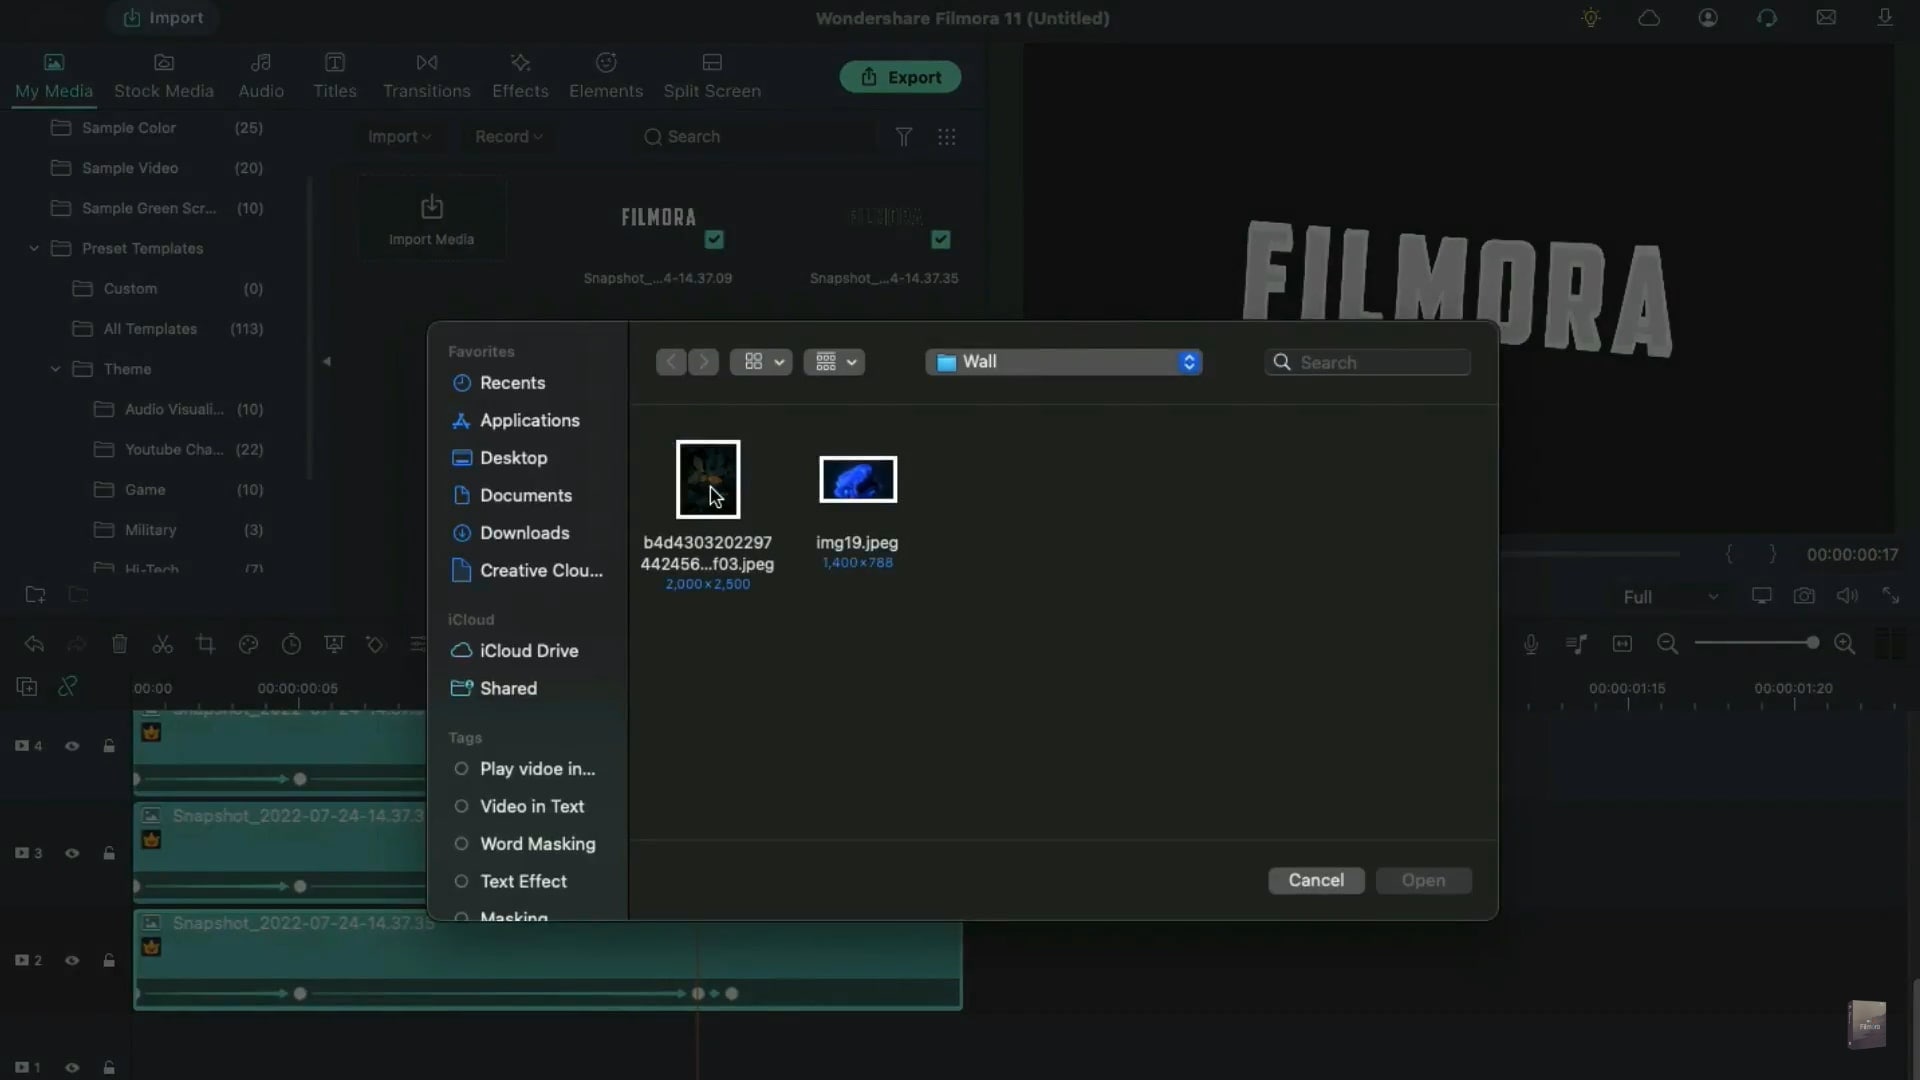
Once you're done with all the clips, go to the project media and import your background and place it on track 1.
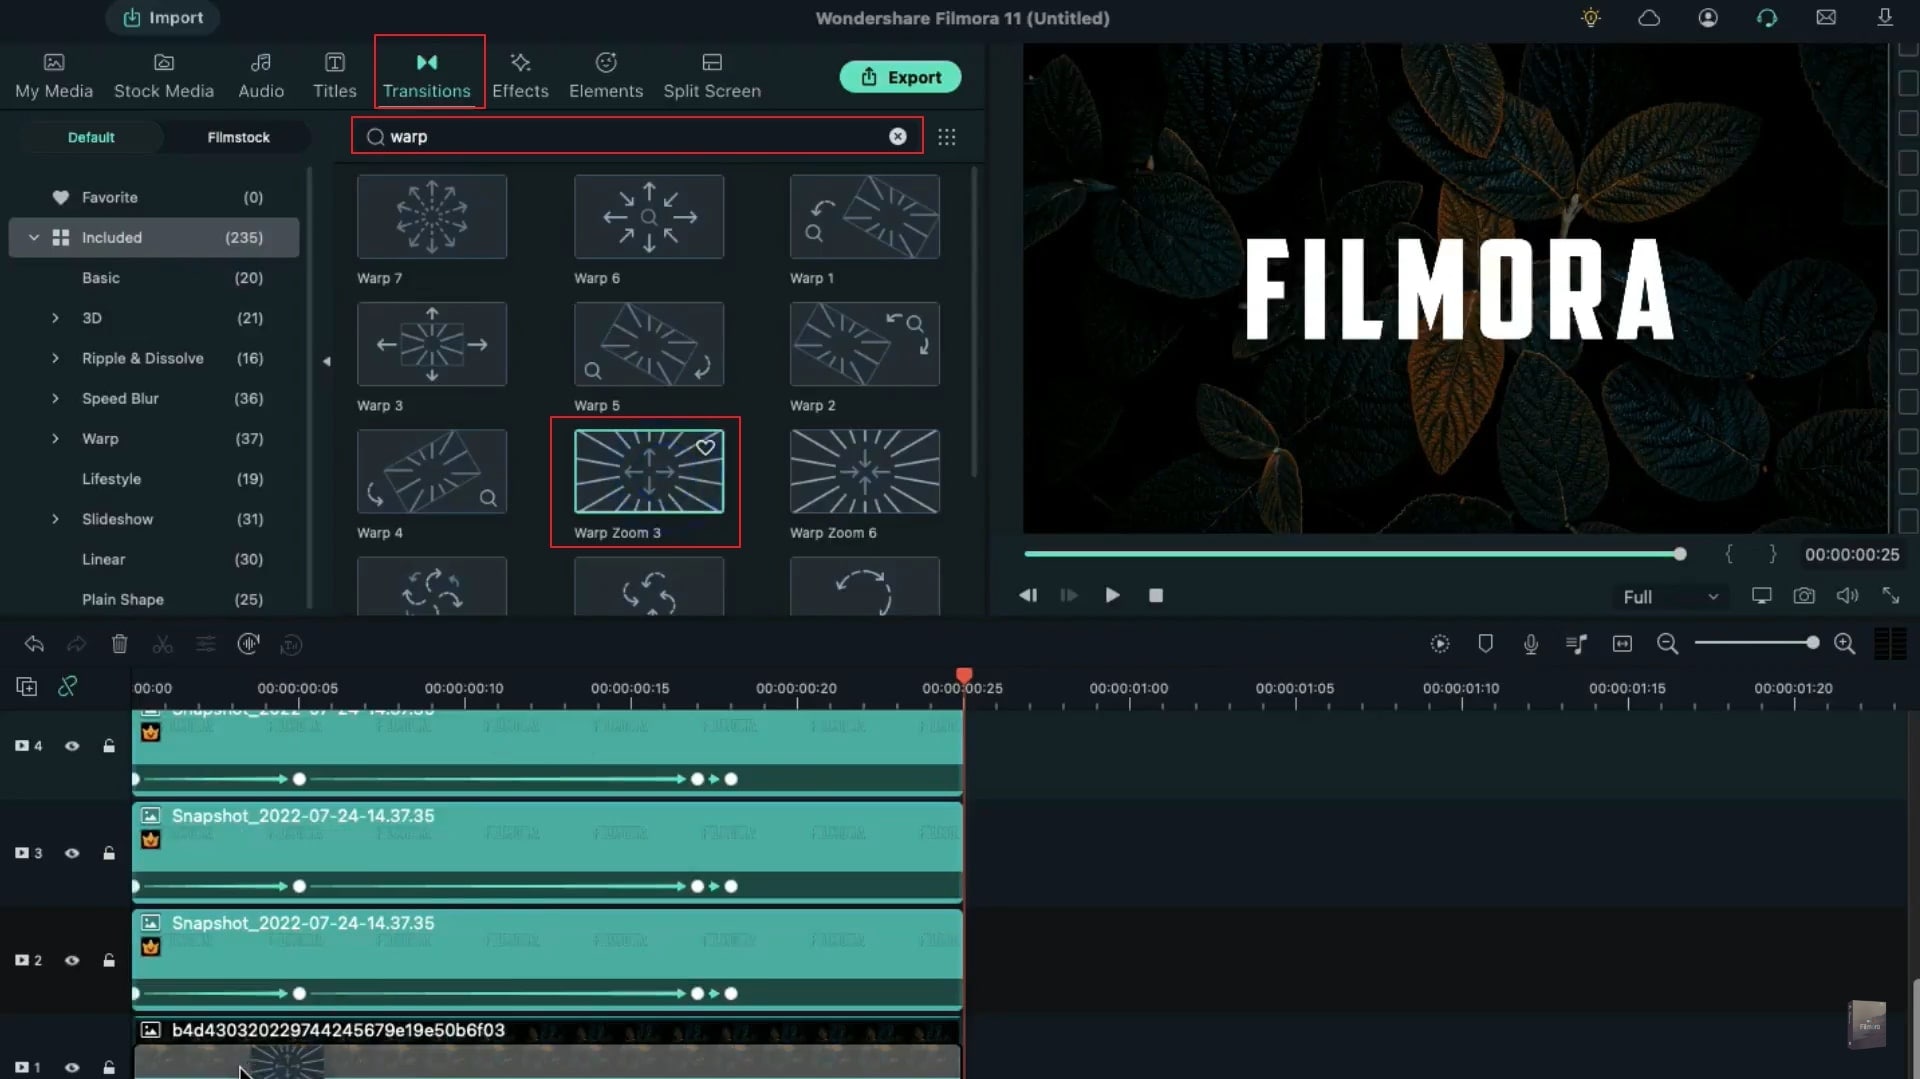
Finally, go to the transition tab. Search for wrap and apply wrap zoom 3 on your track 1 clip and set the duration of the transition.
Echo Motion Trail Text Effect Tutorial
What you need to prepare:
- A computer (Windows or macOS)
- Your video materials.
- Filmora video editor
Proceed to the official website of Filmora and hit the “Free Download” button. After hitting the download button, the installer will start downloading on your system.
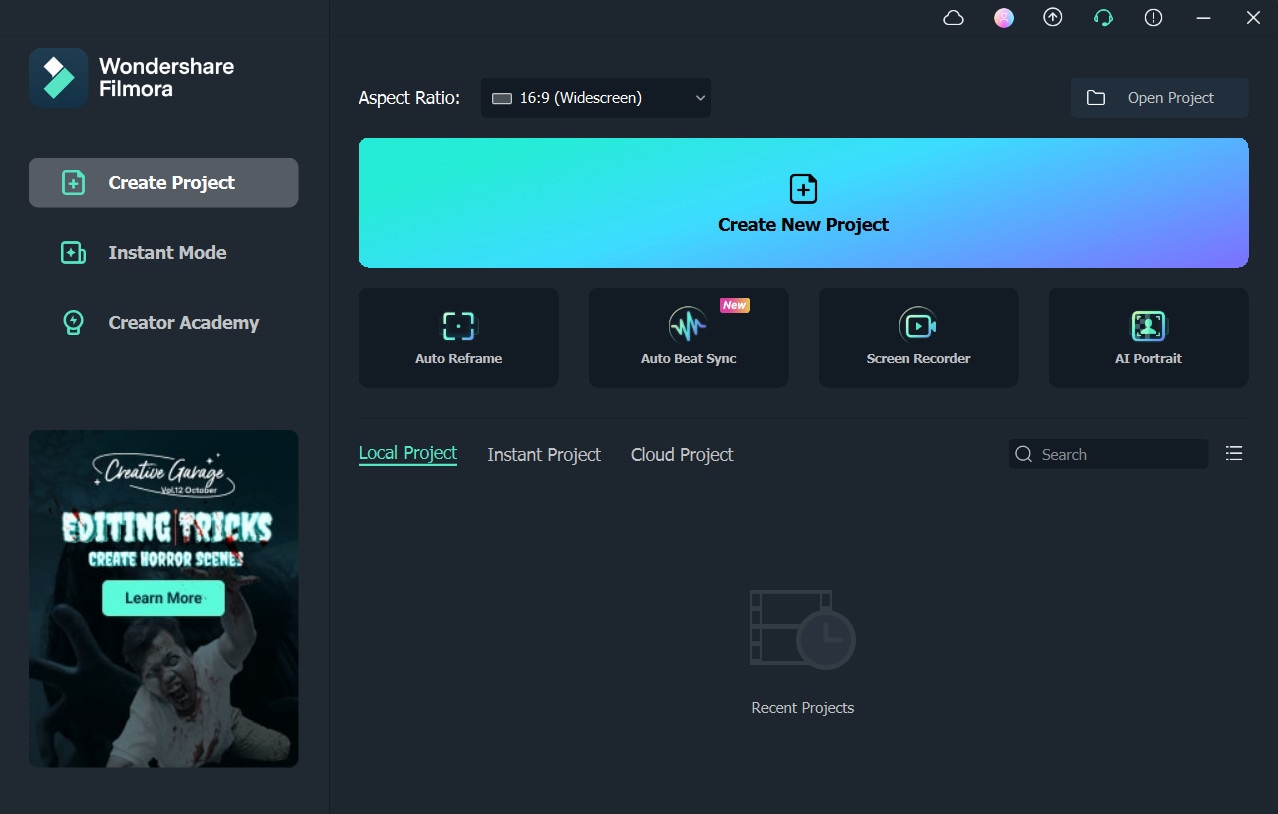
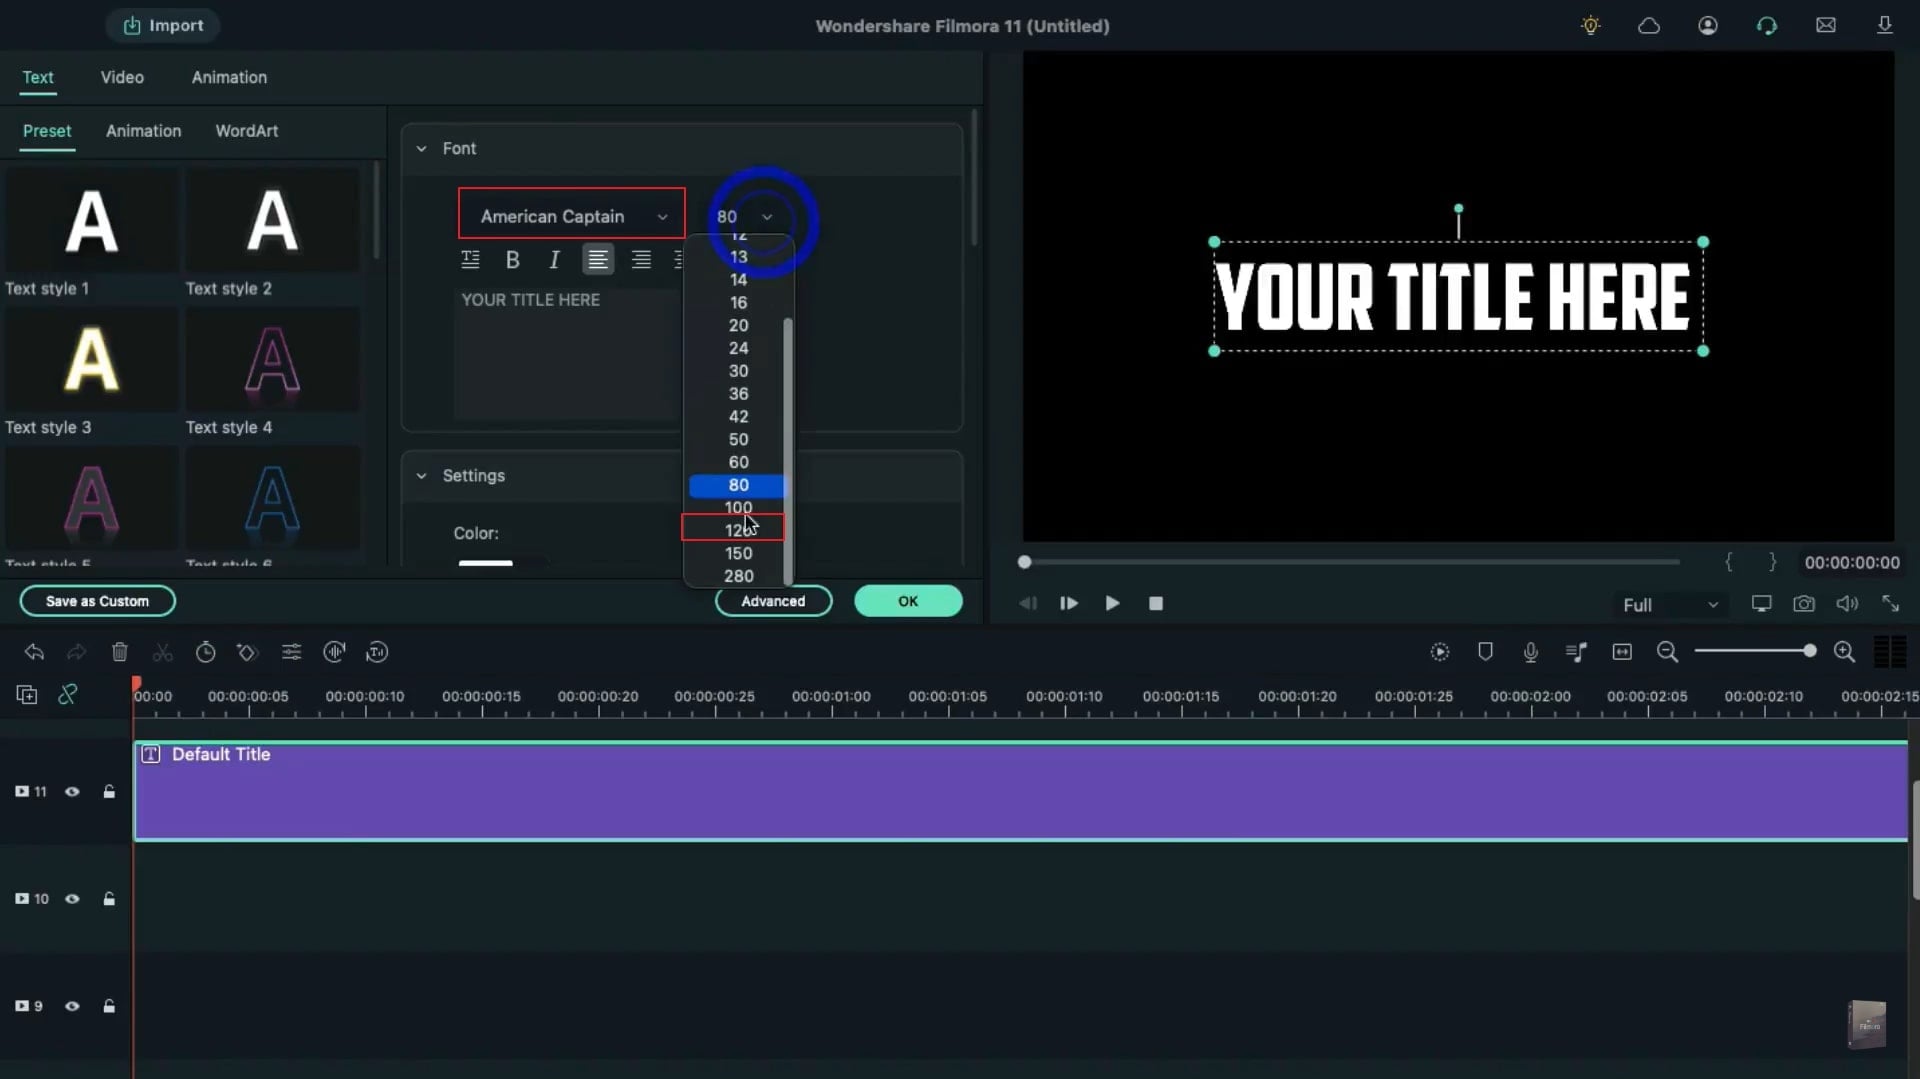
The interface of Filmora will run automatically. Now locate the Track Manager from the left side of the timeline and click on Open Track Manager. A Track Manager window will open in which you have to add 11 Video Tracks above the track one. Once done, add the default title on track 11. Double-click on them and change the font style to American Captain. Adjust the size to 120 and enter your word. Once done, change the word spacing and take a snapshot.
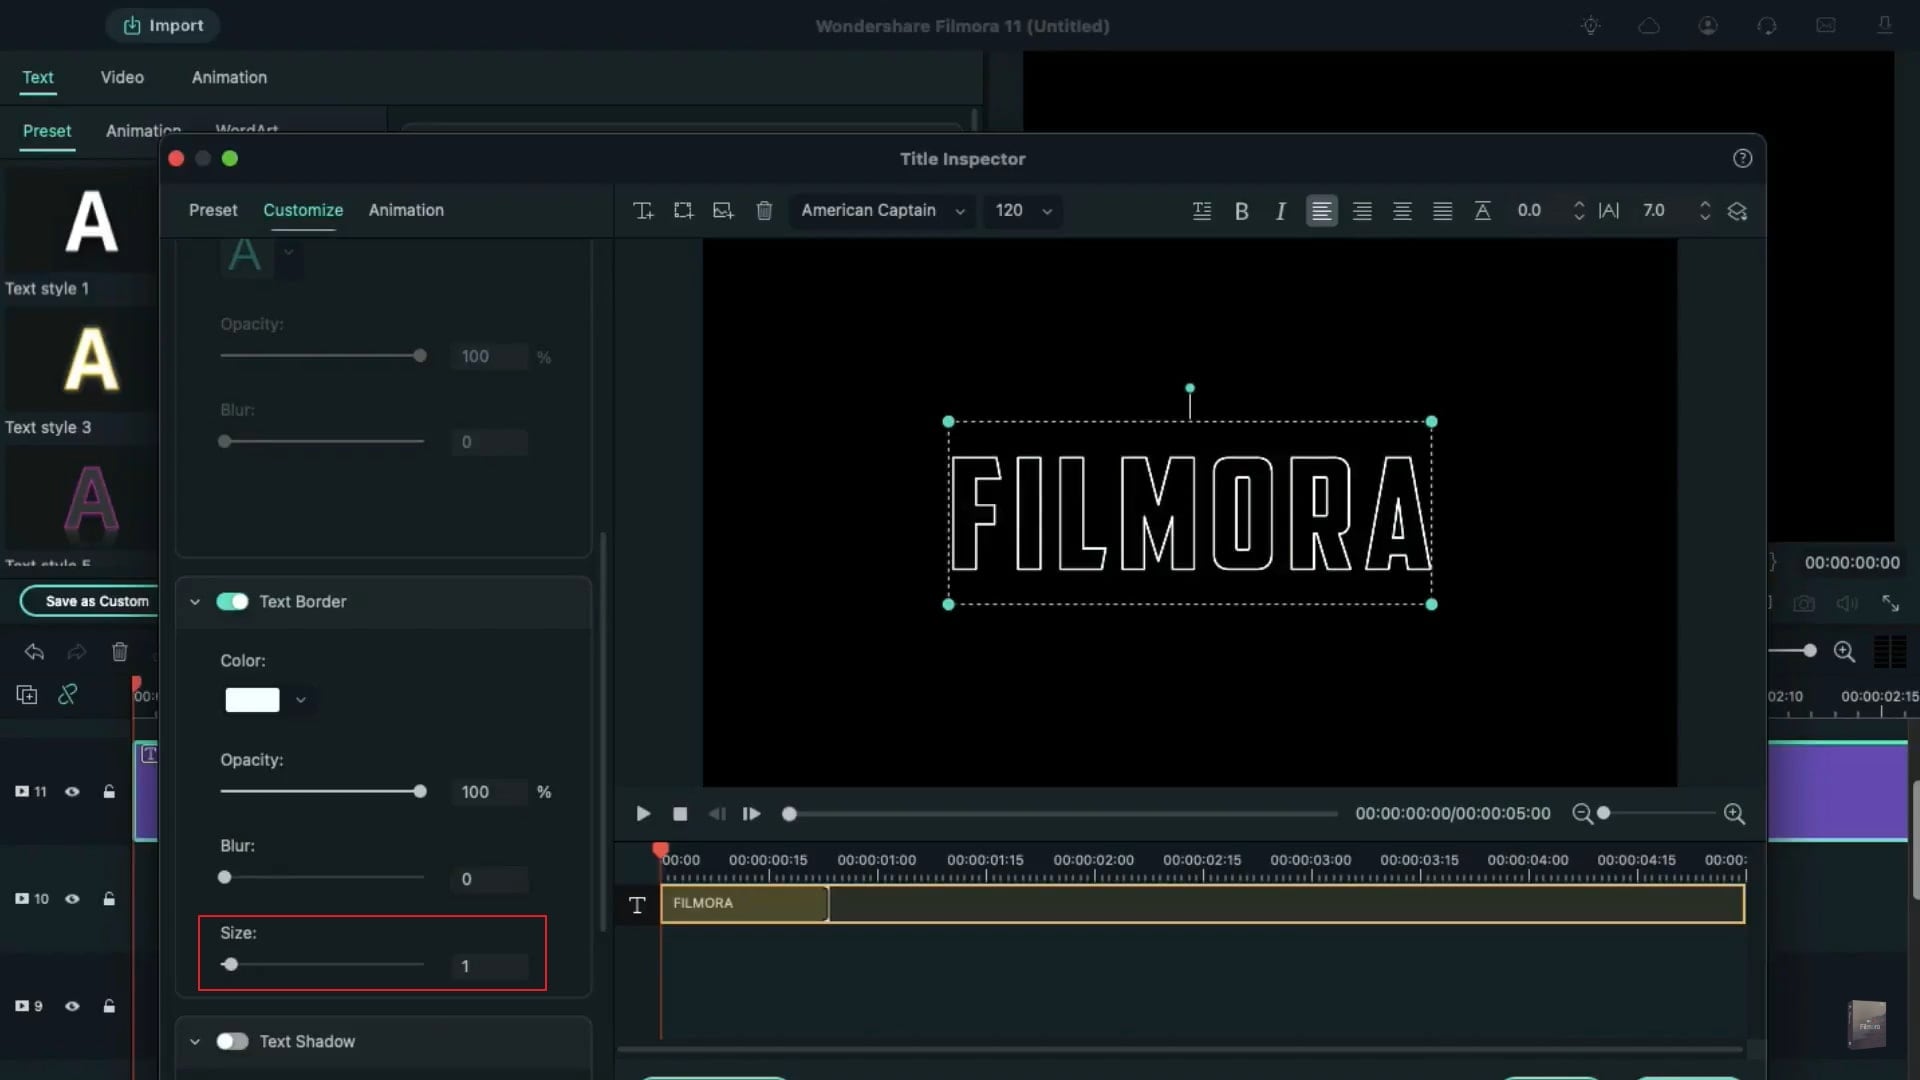
Now again, double-click on the default title given on the timeline and open the Advanced panel. Here, turn off the text fill and choose white color. On the text border section, adjust the size to 1. Afterward, take another snapshot.
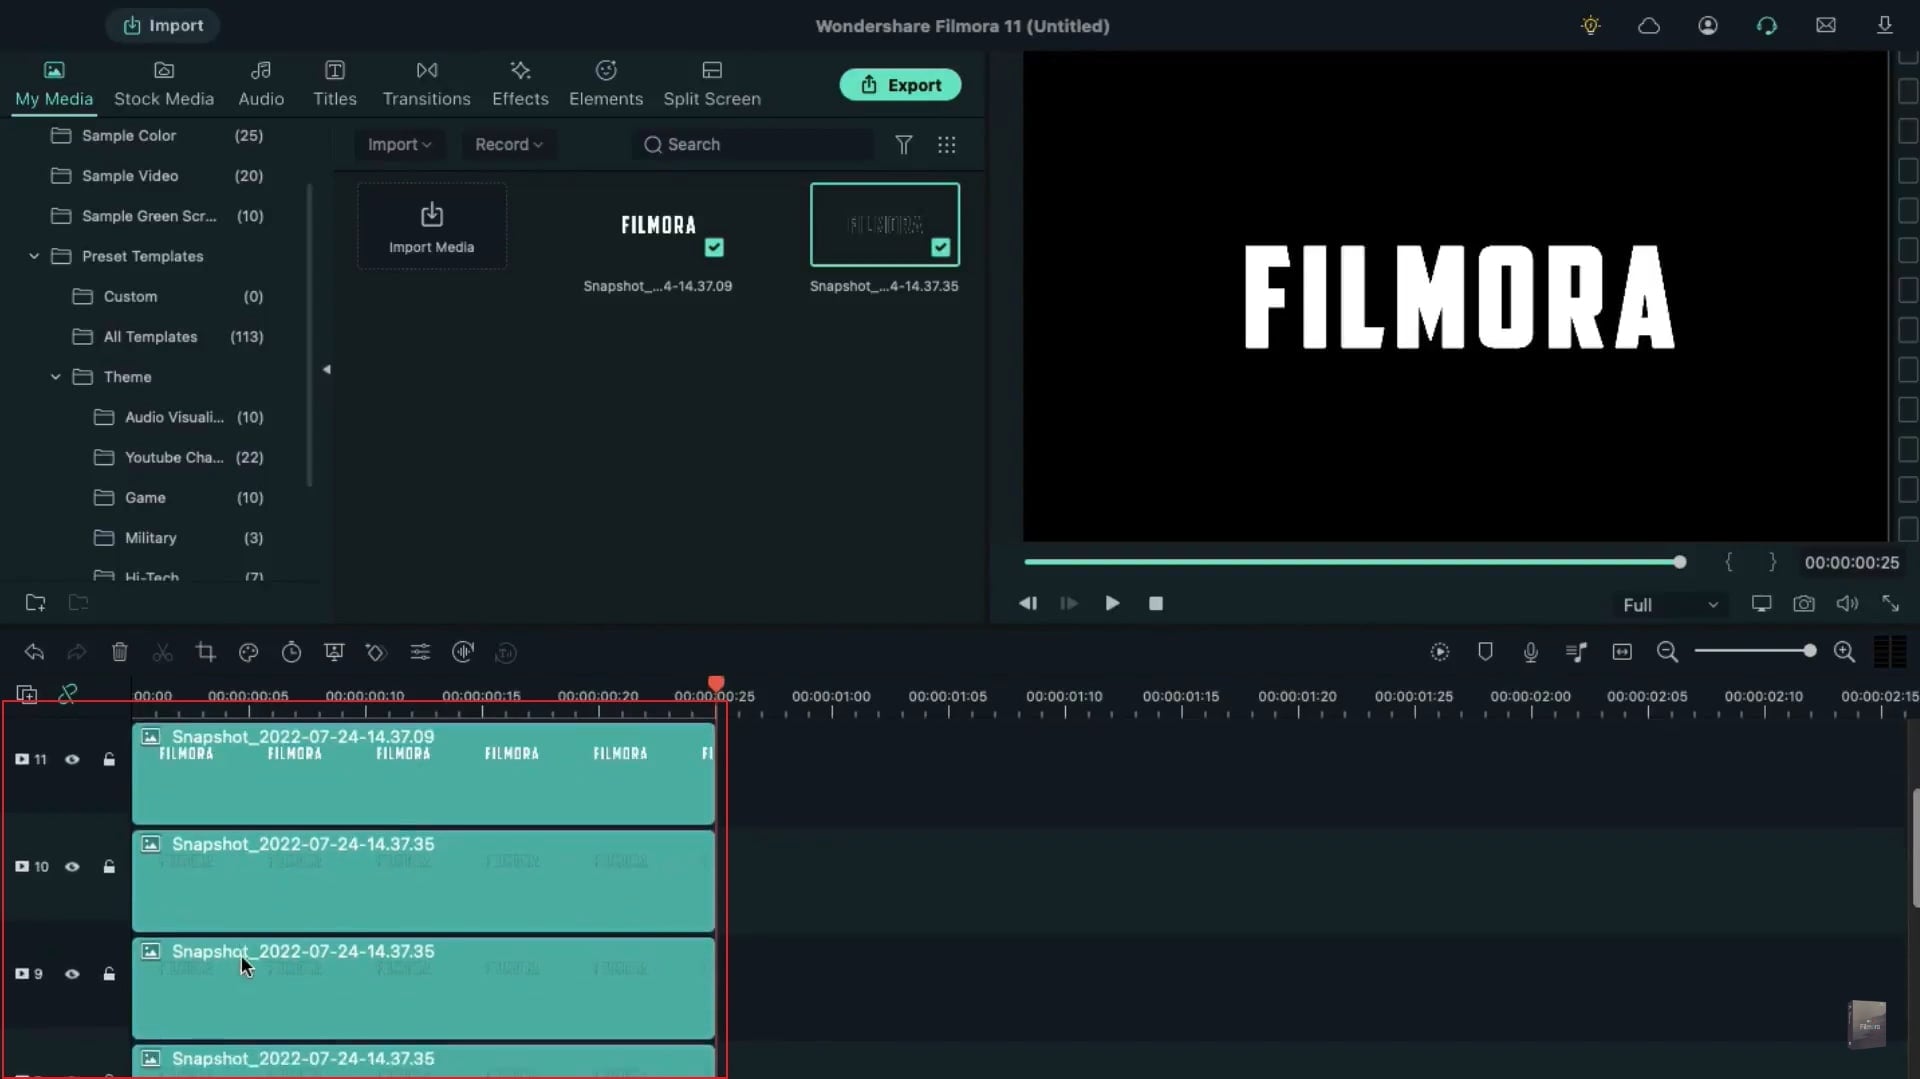
Delete the default title from the timeline to continue. Now drag the first snapshot to track 11 and keep it 25 frames long. Afterward, drag the second snapshot to track 10 and keep it 25 frames long. Now copy the clip from track 10 and paste it to track 2 from track 9.
Go to track 11 and place the play head to the start. Double-click on it and head to the “Animation” tab. Here, change the Rotation to 26 and Opacity to 0%. Afterward, add the keyframe to the 5th frame. Now move the play head to the 18th frame and change the Rotation to 0. Also, enhance the Opacity to 100%.
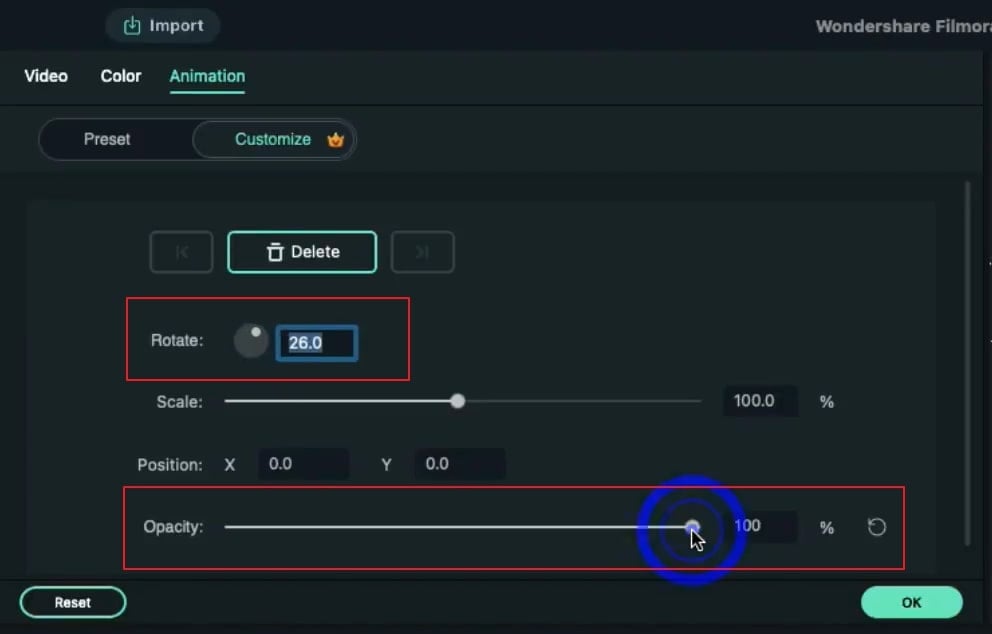
Now choose the clip from track 10 and move the play head to the starting point. Change its Rotation to 30 and Scale to 0%. Afterward, go to 5 frames further and enhance the Scale to 100%. Once done, go to the 18th frame and adjust the Rotation to 0 and Opacity to 0%. Traverse 1 frame back and set the opacity to 100%.
Now move the play head to the starting point and choose the clip from track 9. Adjust the Rotation to 34 and Scale to 0%. Move 5 frames further and reset the Scale. Afterward, move the play head to the 18th frame and change the Opacity and Rotation to 0. Move 1 frame back and change the Opacity to 100%.
Repeat the same process with other snapshots on tracks. To add more rotation, ensure to increase the Rotation by 4 eventually at every track, such as 32, 36, 40, 44, 48, and so on. Once you have completed the process, go to the project media and import your background and drag it to track 1.
Double-click on it and go to the Video section. You can do some scaling if needed and change the Opacity to 50%. Make sure to keep this track 25 frames long only. Afterward, go to the Transitions tab and search for the “Warp” effect. From the results, click on Warp Zoom 3 and apply it to track 1. Also, set the time duration for your transition. After rendering, you can see the final preview of a proper echo motion applied to the video.
What you've learned:
- You can change any background in video with green screen.
- Use transitions in video to make it more smoothly.
- Filmora comes with many types of background, including social, busiess, sports and more.
