Google Meet green screen is the latest addition to the virtual meeting app. It is a crucial feature as it allows users to maintain a semblance of privacy through virtual backgrounds. This video communication app has been a popular choice for classrooms and workplaces since the COVID-19 pandemic of 2019. Since then, Google Meet has seen an increase of 3 million users per day since 2020.
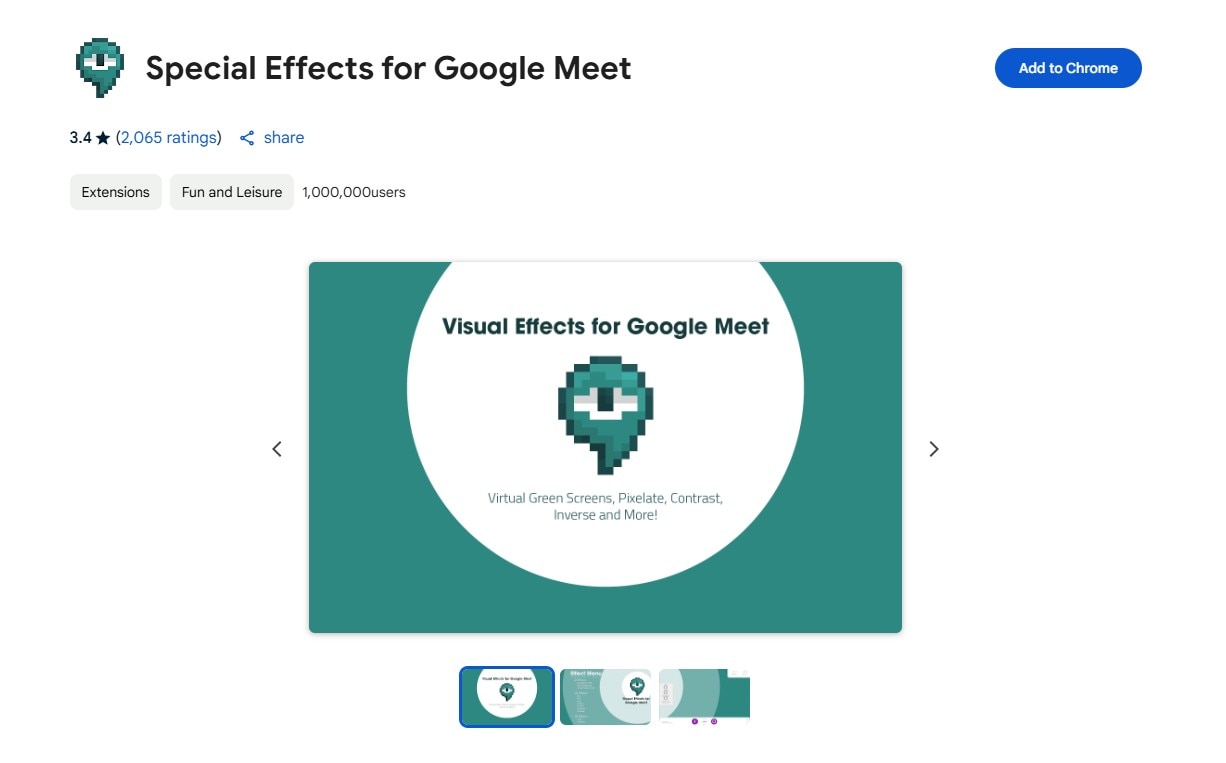
The green screen for Google meet has come in handy for its millions of active users across the globe. It is an important feature that safeguards the privacy of its user in the cyber world. Google Meet green screen allows you to alter the meeting’s background in real-time, similar to how movies employ the famous green curtain behind the performers during filming. You can use this feature to immediately insert a backdrop image of your choice by activating the green screen provided in the browser extension Visual Effects for Google Meet.
Uses of Google Meet Green Screen
The Google Meet Green Screen feature keeps things interesting in corporate meetings. It also allows users to hide their backgrounds, which can often be a source of discomfort or vulnerability. The green screen for Google Meet is a handy feature as you can now attend meetings without worrying about the background.
Virtual Green Screens, Blur, Pixelate, Inverse, Contrast and More! This extension allows you to apply effects like Blur, Pixelate, and Inverse to your camera live during Google Meets. And you can use the Virtual Green Screen feature to mask whatever you would not fancy appearing in your videos’ background.
Green screen from Google helps you limit distractions or make video calls more fun, you can now blur or replace your background or replace it with an image, an immersive background, or a video. You can also apply styles to customize your video with various light, color filters and stylized backgrounds.
How to Use Green Screen on Google Meet
With Google Meet Green Screen, you can create a virtual background by either uploading photographs from your PC or using the extension’s stock photos. You can utilize an office background as a backdrop for business meetings. Teachers can add a classroom background to their online classes. Parties and vacation backgrounds from other nations might be used for informal encounters with friends.
For a get-together with friends, you might choose a Hawaii theme or an office wall for business chats. You can create and save as many background photos as you want with Google Meet Green Screen. In addition to all of this, it offers a picture-in-picture (floating window) function that users can enable if desired.
How to use green screen for Google Meet: A guide
You can select a virtual background before beginning a meeting or during an ongoing video conversation. However, this feature is only available on the desktop currently. You can follow the steps given below to use the Green Screen for Google Meet.
Prior to a video call
-
Go to Google Meet and select a meeting.
-
Change the background of your self-view by clicking Change Background in the bottom right corner.
-
Click Blur your background to totally blur your background.
-
Click Somewhat blur your background to blur your background slightly.
-
Click background to select a previously downloaded backdrop.
-
Click Add to add your own image as a background.
-
Click on Join Now.
During a video conference
-
Click More at the bottom of the page.
-
Select Change Background from the drop-down menu.
-
Click Blur your background to totally blur your background.
-
Click Somewhat blur your background to blur your background slightly.
-
Click a background to select a previously downloaded backdrop.
-
Click Add to add your own image as a background.
Extra Tips: Apply the Green Screen Effect with Filmora on Mobile Phone
While Google Meet green screen feature is great for real-time background replacement, you can achieve even more professional results by using Wondershare Filmora’s mobile app, which supports creating and editing green screen videos with advanced tools, making it perfect for pre-recorded content or enhancing your Google Meet setup.
Filmora's Chroma Key tool allows you to remove the background cleanly. You can replace your background with a professional image, an office setting, or even a custom animated backdrop. Follow these simple steps to enhance your videos effortlessly.
Step 1: Import Your Green Screen Video
Open Filmora on your Mobile phone and tap "New Project."
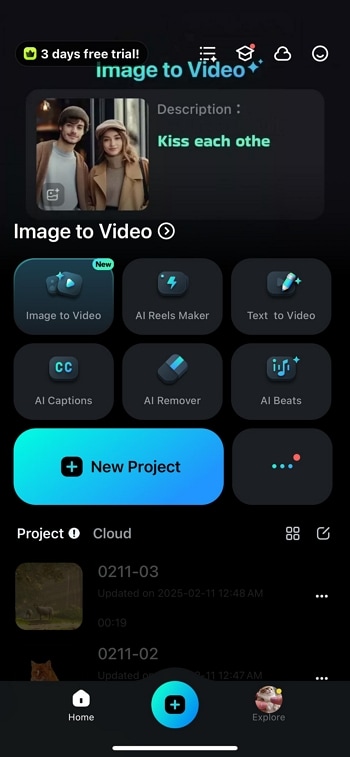
Select any pre-recorded video with a green background and tap "Import."
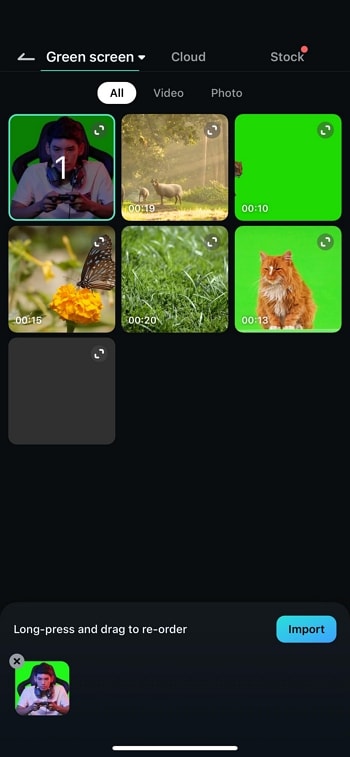
Step 2: Activate the Chroma Key Feature
Tap on the video in the timeline and select "Trim" from the bottom toolbar.
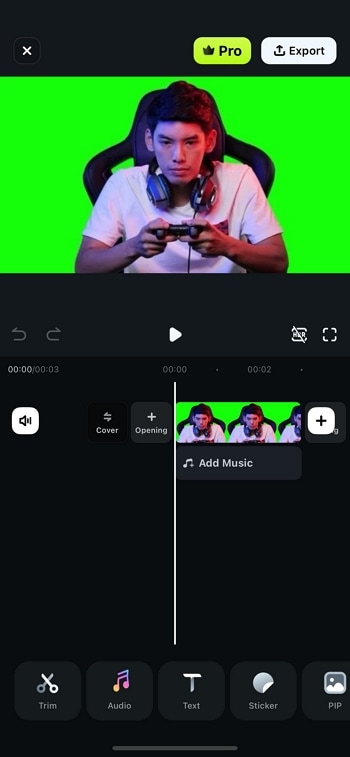
Scroll through the options and tap "Smart Cutout," then choose "Chroma Key" to enable the background removal tool.
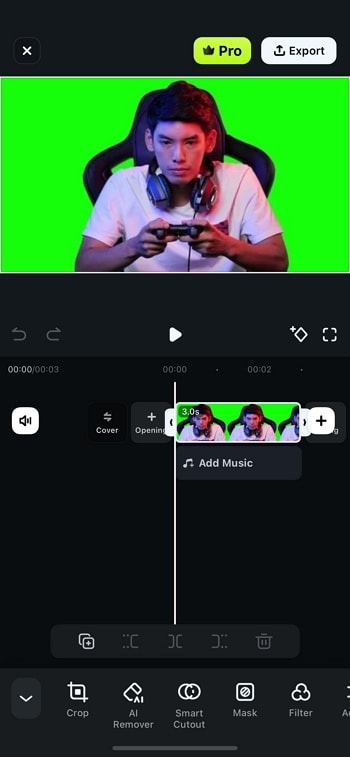
Step 3: Remove the Background
Use the "Color Picker" tool to select the green background in the video preview. Adjust the "Strength" and "Shadow" sliders to refine the effect for a clean cutout. Tap Checkmark to confirm the background removal.
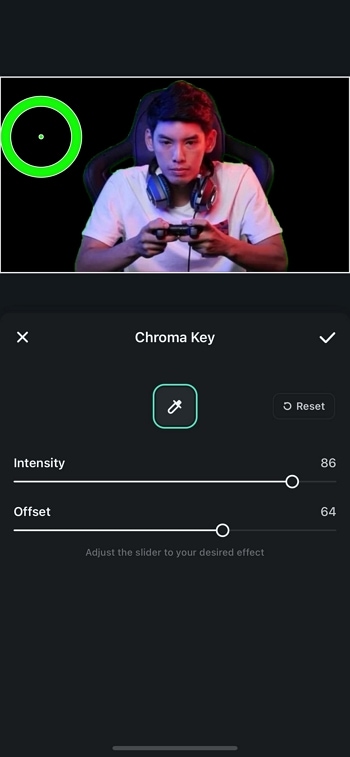
Step 4: Insert a Professional Background
Swipe through options in bottom toolbar and then choose "Background". Add a new background, this can be a solid color, office background, or custom image.
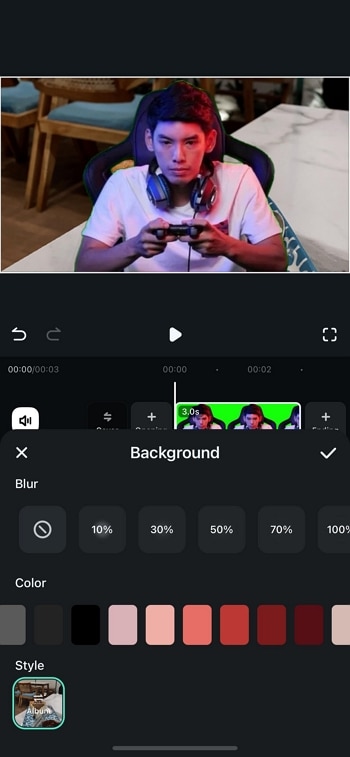
By using Filmora's Chroma Key tool, you can create polished, professional-looking videos that stand out. Whether you're preparing content for presentations, interviews, or virtual meetings, this method ensures a clean and visually appealing result.
Conclusion
The zoom meeting green screen for Google background feature essentially allows users to display an image or a video in place of the actual background during video calls. The feature is especially helpful when you are video conferencing in a messy room. The feature is starting to gain popularity among users and is also available on WebEx for iOS. While Google Meet does not come with a built-in feature to blur or obscure the existing background while on camera, there are still ways you can do it.


 100% Security Verified | No Subscription Required | No Malware

