- Home
- DIY Special Effects
- Journey Vlog Video
Transcript
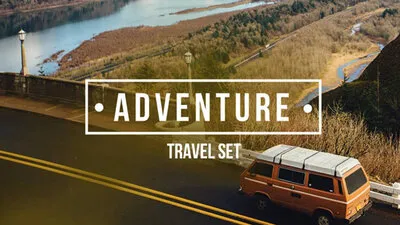
Journey Holiday Pack
Making Vlog through Filmora 11
I have put together all the elements of the project on the timeline. I will mute the music so things can go smoothly. Here I'll explain how I added titles, transitions, and how to do color matching.
Adding the Title
First, I will add a unique title to the slideshow. You can do so by selecting the title from the title tab. Here I am going to use one of the frame titles from the journey holiday pack.
Reposition the Footage within Frame
You can reposition the footage so that it fits in the frame completely. Here I have clicked on the padlock of the second track so that the title doesn't move.
Changing Title Text
You can modify the title text as you want, to give an exceptional outlook to the vlog title. Here, there are two individual text pieces that I will change separately.
Adding Transitions
In my video, I will be using some transitions. For that, you can navigate to the Transitions tab. The journey holiday pack has six transitions.
Adding Color matching
You can also use the color matching feature to make the video more consistent. Color matching comes in handy with the footage from different environments or different times of the day.
Journey Vlog Video in Filmora 11
What you need to prepare:
- A computer (Windows or macOS)
- Your video materials.
- Filmora video editor
Add Titles to the Your Journey Vlog Video
Titles are useful for highlighting the key actions and making your journey vlog more attractive. You can follow the below steps to add titles to your vlog with Filmora 11:
Click and drag one of your videos to the timeline. Go to the title tab and then to the journey holiday pack. Now you will have a variety of titles to select from.
For my video, I am using journey holiday title 13. Drag it to the timeline. You can adjust the length by clicking and dragging the side in and out.
You can also see the clip duration from the pop-up box. Also, you can click and drag the clip underneath to match its length with the title.
Reposition the Footage within the Frame
Just like any other feature, your footage should be placed correctly within the frame to make a perfect vlog. Here's how you can do so:
Double-click on the footage underneath the title. Click and drag on the preview. Reposition your footage as you want.
Alternatively, you can go to the settings in the transform tab to make the adjustments.
Once the footage is perfectly repositioned, you can unlock the track through the padlock (seconc track, that was locked earlier at 1:54)
Change the Title Text
You can make the titles even more innovative by modifying the title text. Simply follow the below steps to do so:
Double-click on the title. The title I have chosen has two pieces of text that you can click and change individually.
Here I'll change the term "Holiday" to "2022". Now, we have the title text, "Journey 2022".
Just like that, you can change the font, font size, and other settings. You can reposition the text on the preview so that it fits within the frame.
Add Transitions to the Video
Transitions combine the video footage into a cohesive program. It keeps the story of the video moving while conveying the ideal tone to the viewers. Follow the below steps to add transitions to your journey vlog:
Go to the Transitions tab> journey holiday pack. Here I have got six transitions.
Now, click and drag any transition to the timeline in between the clips.
Adjust the speed of the transition by dragging the sides in. This will make the animation faster. Similarly, you can make the animation slower by dragging the sides out.
Double click on the transitions to access some additional features. For example, you can make the transition appear just on the clip before or after.
Add Color Matching to the Video
Color matching is an outstanding feature of Filmora 11, where you can match the color of the current clip to the reference clip. This feature is helpful for adding consistency across your video. To add color matching to your journey vlog, follow these steps:
Go to the Media folder. Select the video footage and drag it to the timeline. Here I have selected two pieces of footage. We will use the second one as a sample.
Choose the footage that you want to color match and click on the palate icon (just below beach 12 media). Now, select color match option. This will open the comparison view.
Choose the point of the video that you want to use as a reference. Click on match.
You can modify the adjustments and soften the video by moving the sliders for the comparison view. Move it to the left side to decrease to a point where there is a right compromise between the reference and the color matching footage.
Exit the comparison view and check the before and after results. You can do so by quickly checking and unchecking the color match option.


