Make Cut Out Animation in Filmora like Reels
Cut-out animations are a great way to engage the viewers instantly. It uses photos and illustrations to tell a unique story in a compelling manner. Moreover, it gives more depth to the illustrations that can help the viewer comprehend the animation's main idea. With Filmora, you can create cut-out animations to tell your story in a unique way.
Tool
Assets


Transcript
In order to make the video look better, try to apply the photos in the same filters. Besides, keep each object outstanding in the photos so that we can get the outline of the object clearly.
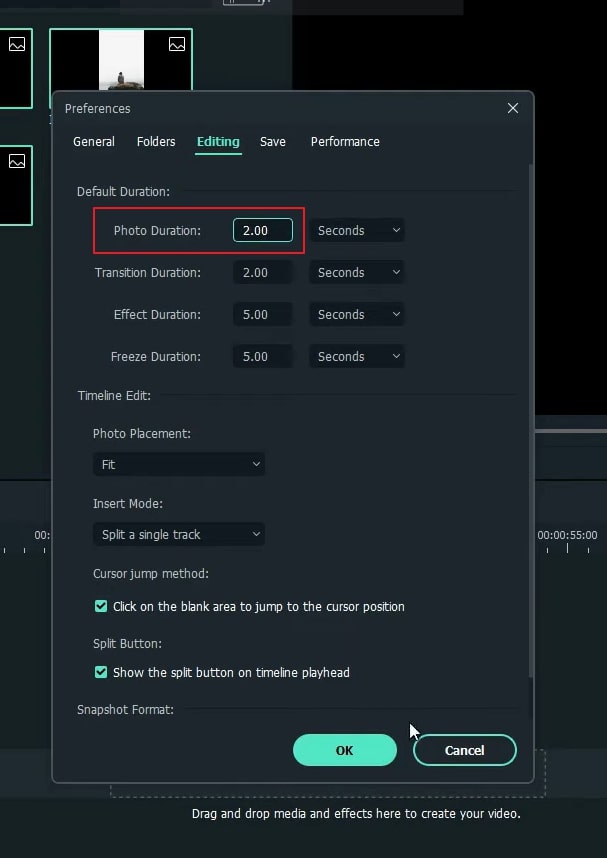
First, import all the photos to Media. Then, go to File on the top bar. Open Preferences panel, then we can see Editing section. Here, we change photo duration to two seconds. Click ok.
Back to the main interface. Now, we drag all the photos to the timeline. As you can see, all the photos are of two seconds long. Now we need to create the paper cut of all the photos.
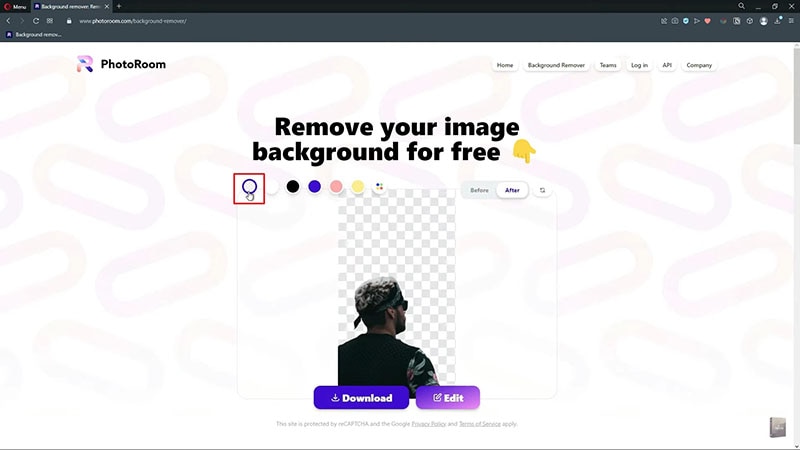
Go to the PhotoRoom website. In this website, you can remove your photo background for free. Upload the photo, select No Background icon on the left upper side of the box. When it's done, click on download button. Do the same to all your photos and save the paper cut image in one file.
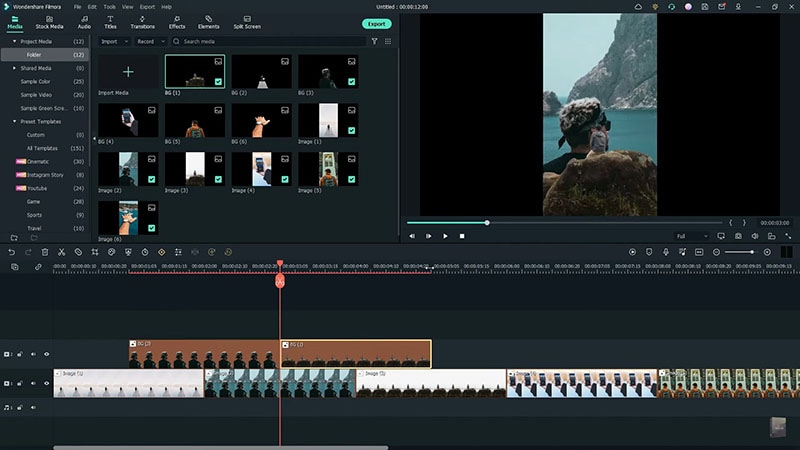
After finishing all the background removing jobs, go back to Filmora. Import the paper cut file. Now zoom in the timeline to see all the clips clearly. Go to first second position, drag the papercut image of the second to the timeline.
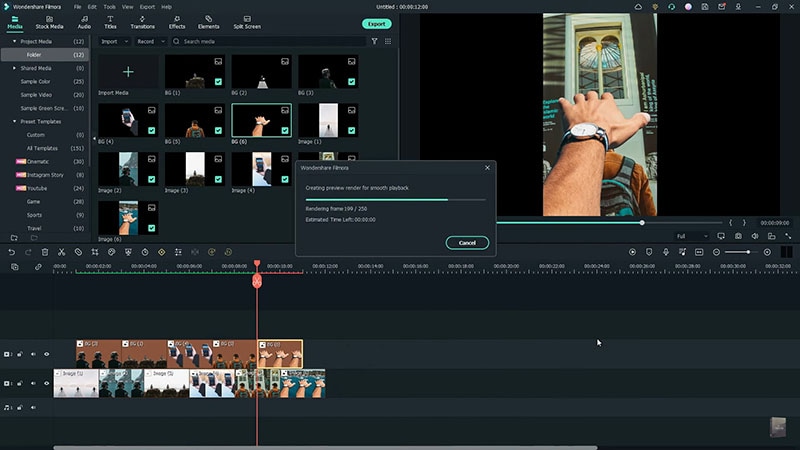
Next Step, go to the third seconds. Drag paper cut of third photo to the timeline. Do same to the rest of the photos now render this. Let's see the preview.
How to Make Cut Out Animation in Filmora like Reels
What you need to prepare:
- A computer (Windows or macOS)
- Your video materials.
- Filmora video editor
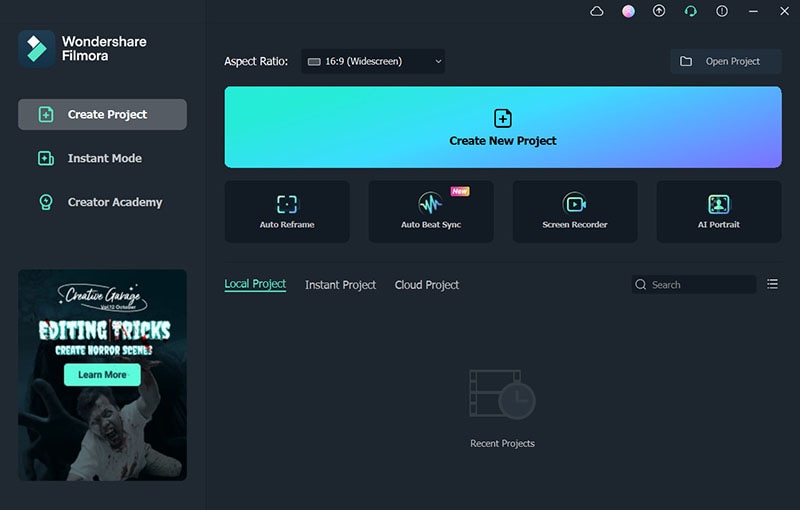
Wondershare Filmora is free software that can be easily downloaded on your system. Visit its official website and click on the “Free Download” button to download the Filmora installer.
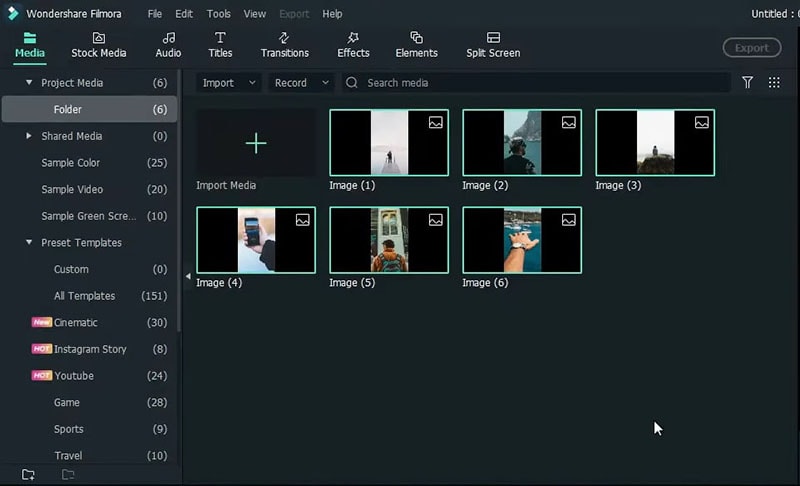
To make your cut-out animation video look captivating, try to capture your photos in the same filter and appropriately. Now open the interface of Filmora and import all the photos in the Media section.
Afterward, go to the File tab and choose Preferences from the drop menu. From the Preferences window, go to the Editing section and change the duration of your photos to 2 seconds. Head to the main interface and drag all the photos to the timeline.
To create a paper cut for your photos, go to the online website of PhotoRoom. On this platform, you can efficiently remove backgrounds from your photos free of cost. Upload the photo on this tool and choose the No Background option on the extreme left side of the panel just above the added photo. Once the background is removed, download the photo. Repeat the same process for all the photos.
Now head back to Filmora and import all the paper-cut files on this tool. Zoom in on the timeline so that you can see all the clips clearly. Now go to the 1st-second position on the timeline and drag the second paper-cut photo on it. Afterward, head to 3rd-second position on the timeline and drag the paper cut of your third photo. Repeat the same process with all your paper-cut photos.
Once you have created your timeline by adjusting all the paper-cut photos appropriately, render the video. Afterward, you can see your cut-out animation in the preview window.
What you've learned:
- You can change any background in video with green screen.
- Use transitions in video to make it more smoothly.
- Filmora comes with many types of background, including social, busiess, sports and more.
