Transcript
First, drop your footage on both tracks. Select track 2 clip and select "B&W Film" preset under the "Color" tab. Change "Exposure" to 16.2, "Brightness" to -25.4, "Contrast" to 50, "Vibrance" to -5. Under "Light," change the "Highlight" value to 30 and "Shadow" to -40.
Go to the "Video," and under the "Mask," let's select the "Square" mask. Change "Scale" to 71, "Width" to 100, and Y value to 725. Increase "Blur Strength" to 70 and "Radius" to 60. Then turn on "Invert Mask."
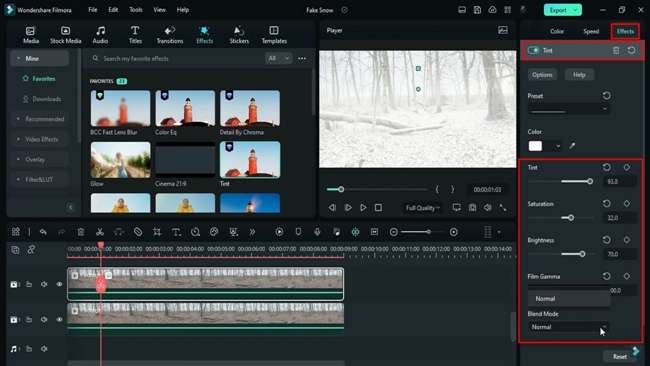
Go to the "Effect" and apply the "Tint" effect on the track 2 clip. Go to "Effects," change "Tint" to 94, "Saturation" to 32, "Brightness" to 70, "Film Gamma" to 100, and change "Blending Mode" to "Overlay."
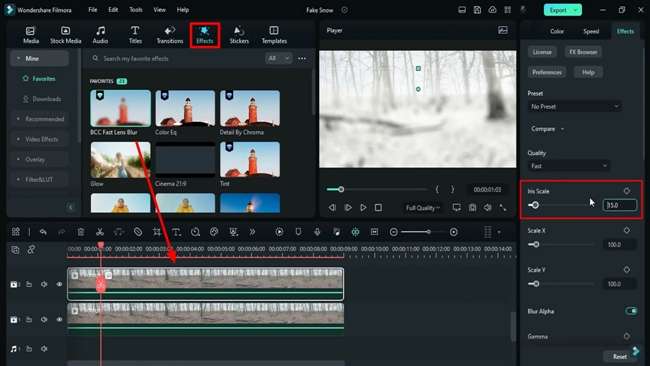
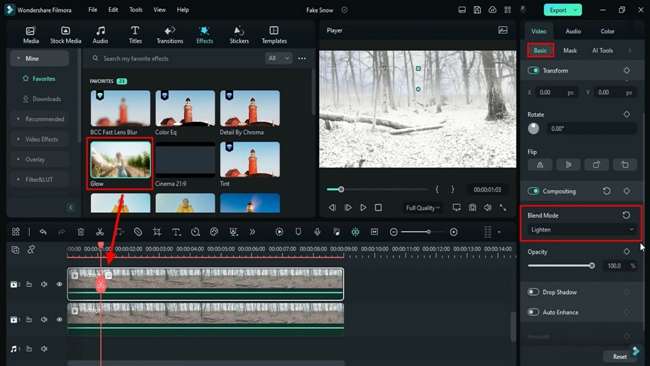
For the Snow effect, we will apply the "BCC Fast Lens Blur" effect to track 2 clips. Change the "Iris Scale" to 0.3, then apply the "Glow" effect to the same clip. Change glow "Opacity" to 50%. Go back to the video and change "Blending Mode" to "Lighten." Now you can see we have a bit of a blue sky in the background.
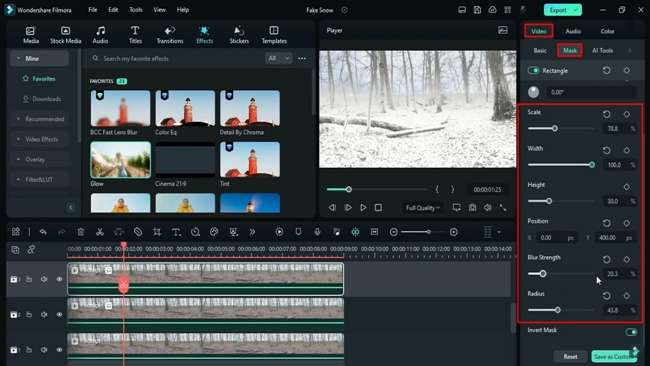
To give it a real touch, duplicate track 2 clip on track 3. Now, to create a fog at a distance, which normally happens during the snowfall. Now go to the "Mask" and change "Scale" to 78.8, Y value to 400. Here, we have a fog at a distance, change "Blur Strength" to 20.5 and "Radius" to 44. You can set the Y value accordingly, making the environment foggier. Play with "Blur Strength" and check which value is better.
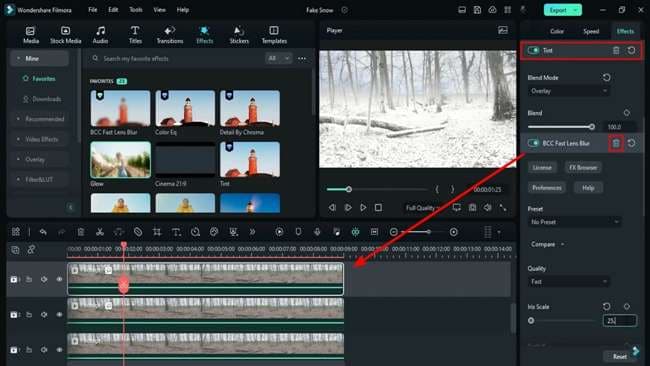
Under the "Color" tab, change "Shadow" to -27, and change "Brightness" to -34. Then go to the "Effect," under "Fast Lens Blur" and change "Iris Scale" to 25.3. Change "Glow" and "Opacity" to a 100. Then go to "Video" and change "Blending Mode" to "Overlay" and change "Opacity" to 27.3.
Again, duplicate track 3 on track 4. Change the "Blending Mode" to "Normal" and "Opacity" to 30%. Remove the "Mask." Then, under "Color," change "Exposure" to 100, "Highlight" to -100, "Shadow" to -70, "White" and "Black" to -100. In the "Video" section, adjust "Opacity" accordingly. Then go to the "Effects," change "Glow," "Radius" to 2, "Opacity" to 40. Delete the "BCC Fast Lens Blur" effect. Change "Tint," "Saturation" to a 100, "Brightness" to a 100. Under the "Color," turn on the "Curve" and change the Alpha line as we're doing. Now again, do some color adjustments according to your needs and adjust the opacity.
Then apply the "Detail by Chroma" effect on Track 4. Go to "Effects," choose green color, increase the range to 50, and strength to 58. Then, apply the "Color EQ" effect to it. Choose the color to white, change the "Range" to 92, "Fade" to 66, "Soften" to 50, "Saturation" to 53, "Brightness" to -19, and "Contrast" to 100.
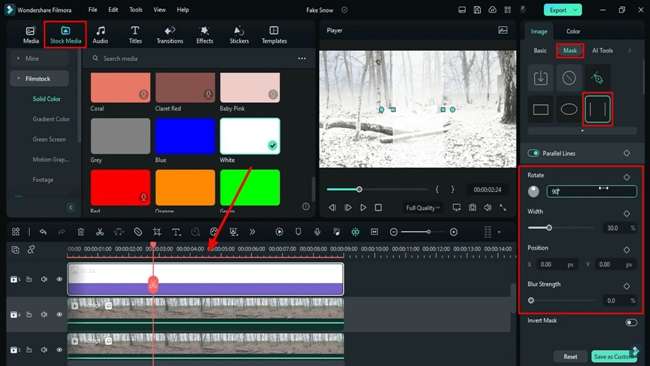
Next, let's make the environment hazier. Go to the "Sample Color" and apply a solid white color on track 5. Change "Blending Mode" to "Screen." Go to the "Mask," select double line, and rotate the double line by 90 degrees. Change Y value to 570 "Blur Strength" to 70.
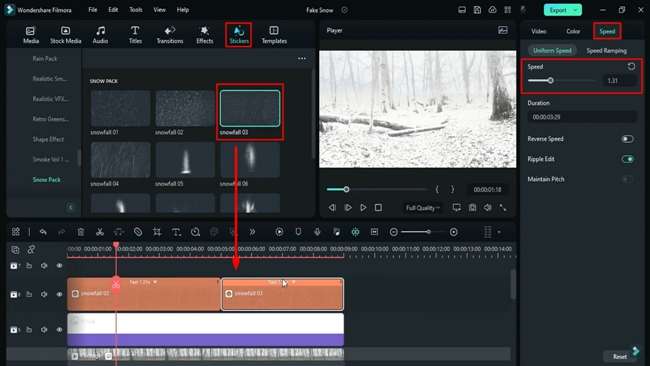
Now, go to the "Stickers" and apply the "Snowfall 03" clip on track 6. Go to the "Speed" and change the speed to 1.50, duplicated on the same track.
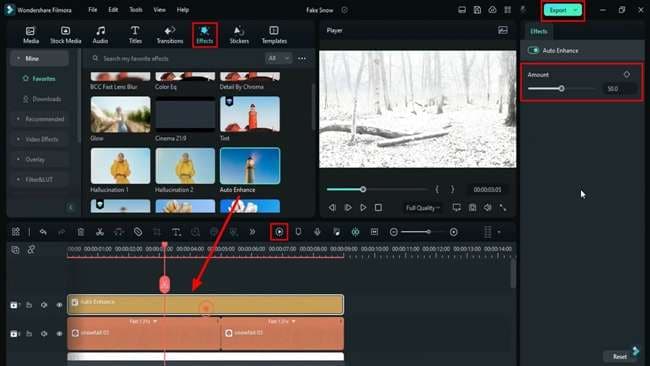
Finally, apply the "Auto Enhance" effect to increase "Amount" to a 100. Now, select Track 2 clip; from this clip, you can control the intensity of snow in your clip. Now, let's render it to see the final preview.
Guide On How to Apply Snow Effect in Filmora 12
What you need to prepare:
- A computer (Windows or macOS)
- Your video materials.
- Filmora video editor
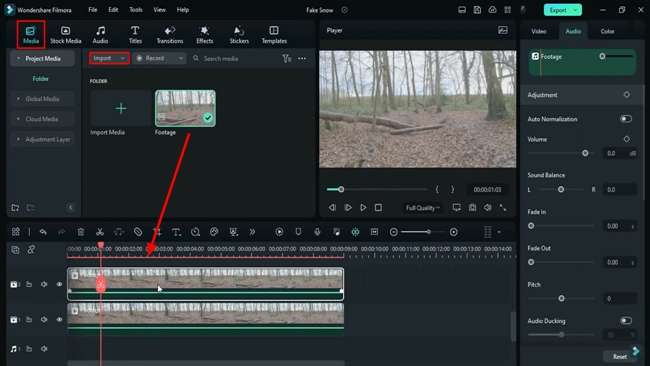
Launch Filmora and Import Media Files
Firstly, you have to download and install Filmora 12 to add snow effects to your videos in Filmora. Once the process is done, launch it on your device and click the "New Project" button. Import your data in the editing window from the "Media" tab in the top toolbar. Once your video is imported, drop this video on track 1 and track 2 to start the editing process.
Choose B&W Film Preset and Adjust Settings
Once you’ve successfully placed the imported video on both of the tracks in the timeline, select the track 2 clip and access the "Colors" tab at the right-side panel. Afterward, from the "Preset" menu, select the "B&W Film" preset for the second track.
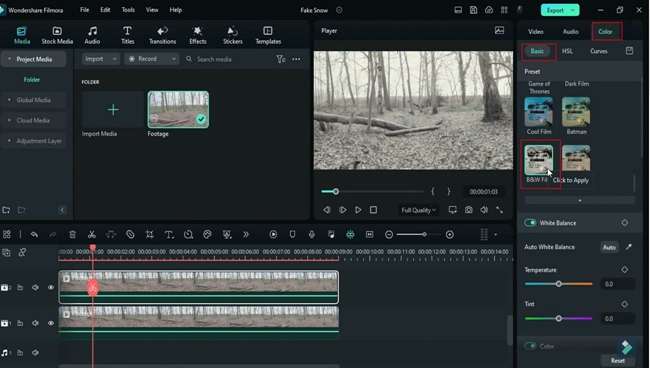
Make relevant adjustments to exposure, brightness, and so on under the "Color" tab. You can also change the highlight and shadow values under the "Light" tab.

Add Mask to the Track 2
Go to the "Video" option and click the "Mask" tab from where you can select the “Square” mask. Make the desired adjustments to the scale, width, height, and blur strength options. Once done, proceed to the “Invert Mask” to apply changes to the second track.

Adjust the Tint Effect Settings
After applying the mask, go to the "Effects" tab in the top toolbar and add the "Tint" effect in the second track to enhance the colors of the video. From the top toolbar of the right-side panel, find the "Effects" option and make the required changes to tint, saturation, and other settings.
Add a Blurry and Glowy Sky in the Background
Once again, go to the "Effects" tab on the top toolbar and add the "BSS Fast Lens Blur" effect in track 2 to give a snowy effect. Adjust the different "Iris Scale" settings to enhance the snowy feel of the video.
Add the "Glow" effect in the second video track and adjust the “Radius” and “Opacity” settings in the "Effects" options. Afterward, in the "Video" tab from the right-side panel, change the "Blending Mode" to "Lighten" to add a blue wintery sky in the background. To further give a realistic look, duplicate the clip on another track.
Create a Foggy Effect at a Distance
While working on the duplicated track 3, go to the "Mask" tab in the "Video" option and change the values in the “Rotate,” “Scale,” and “Position” settings. Proceed to manage the "Blur Strength" and "Radius" options until you see a perfect foggy effect in your video.
Adjust the color and effects settings to change the outlook of the video clip. Add more "Blend Mode" under the "Video" tab to enhance the video.
Duplicate Video and Make Adjustments
Now, to move further, duplicate the clip present on the third track onto a new track. Change the "Blend Mode" to “Normal” and tweak the "Opacity" settings of these clips. Afterward, remove the "Mask" from the new track and play with other “Color,” “Video,” and “Effects” settings according to the requirements.

In addition to that, remove the "BCC Fast Lens Blur" effect and further alter the "Tint" saturation and brightness settings to the required value.
Adjust the Alpha Line Curve and Apply the Chroma Effect
After adjusting all these settings, go to the "Curves" tab under the "Color" option and adjust the “Alpha Line” to make more color adjustments. From the "Effects" tab in the top toolbar, add the "Detail by Chroma" and "Color Eq" effects in the duplicated track and adjust their settings.

Make the Environment Hazier
To make the environment hazier, access the "Stock Media" tab, and from the "Solid Colors" option in the left sidebar, drag the white color on a new track on the timeline. After adding the color, change "Blend Mode" to "Screen." Afterward, select the “Double Lines” in the "Mask" tab and position these lines in the area you want to make the environment hazy.
Apply Snowfall Effect and Export
Finally, go to the "Stickers" tab in the top toolbar and add the "Snowfall 03" effect on a new track. Adjust the speed of snow falling from the "Speed" option.
Now, add the "Auto Enhance" effect on a new track and increase the effect “Amount” to enhance your overall video. If you want to make any changes, go to the second track and make adjustments from the right-side panel to control the intensity of the snow. Click "Render" to see the preview of your video. Once satisfied with your video, click “Export” for finalization.
Editing is the most important step of video creation that requires skills along with patience. Utilizing the different creative video editing techniques, you can enhance the quality of work with the help of Filmora. As in the video, you have learned how to add the snow effect comprehensively.


