Transcript
In this video, we will show you how to create a Star Wars intro in Wondershare Filmora.
First, drop "Default Title" on track 1 and change the font to "Star Jedi Hollow." Go to "Advance" and enter your first word. Change the font size to 232, place the word upward, and select this yellow "Preset." Add another text, enter your word, change the font size to 210, and adjust its position. Click on "Apply" and take a snapshot of it.
Delete the title from the timeline. Add a few more tracks, drop a snapshot on track 4, and make it 8 seconds long. Unlock the "Scale," change "X" to 145 and "Y" to 129. Turn on "Transform" keyframes and "Opacity" keyframes. Set "Opacity" to 0, set "Opacity" to 100 in two frames, and change the "X" value to 0.6 and "Y" to 0.5 at the end. Now, you can see how it's going on. Change the "Y-Position" "X" value to 2.92 and the "Y" value to 1.95. Now, we have a slightly straight zoom animation.
Now, drop the start background footage on track 3 and change its “Blending Mode” to “Screen.” Then go to 5 seconds and 9th frame. Go to the "Title" and drop the "Default Title" on track 1, and stretch it until 20 seconds.
Now, create your text and paste it into the text column. Adjust the text in the center, change the "Scale" to 51, select your main words, and increase their “Size” to 40. Use the "Color Pick" tool to select the yellow color from your snapshot.
Then go to the start of the default title, turn on the "Position" keyframe, and change the "Y" value to negative 398. Then, change the value to 290 at 7 seconds and the 19th frame. Go two frames before the end of the title and change the “Y” value to 257. Now, you can see how the text goes from down to up.
Next, go to the media and drop an “Adjustment Layer” on track 2. Stretch it to 20 seconds, then go to the "Effect." Under "Image Restoration," apply the "BCC Lens Correction" effect on the adjustment layer. Go to the "Effects" setting; you can see we're getting our Star Wars effects.
Furthermore, change "Correction" to 4.1, "Scale Master" to 118, "Scale-X" to 121, "Scale-Y" to 53, "Vertical Perspective" to -35. Now, you can see we're about to get our own Star Wars intro. Just change "Vertical Perspective" to -23 and change "Scale X” to 128. So now text comes out from the right and left corners, too. "Render" it.
Guide on How to Create Star War Effect in Filmora
What you need to prepare:
- A computer (Windows or macOS)
- Your video materials.
- Filmora video editor
Start a New Project in Filmora
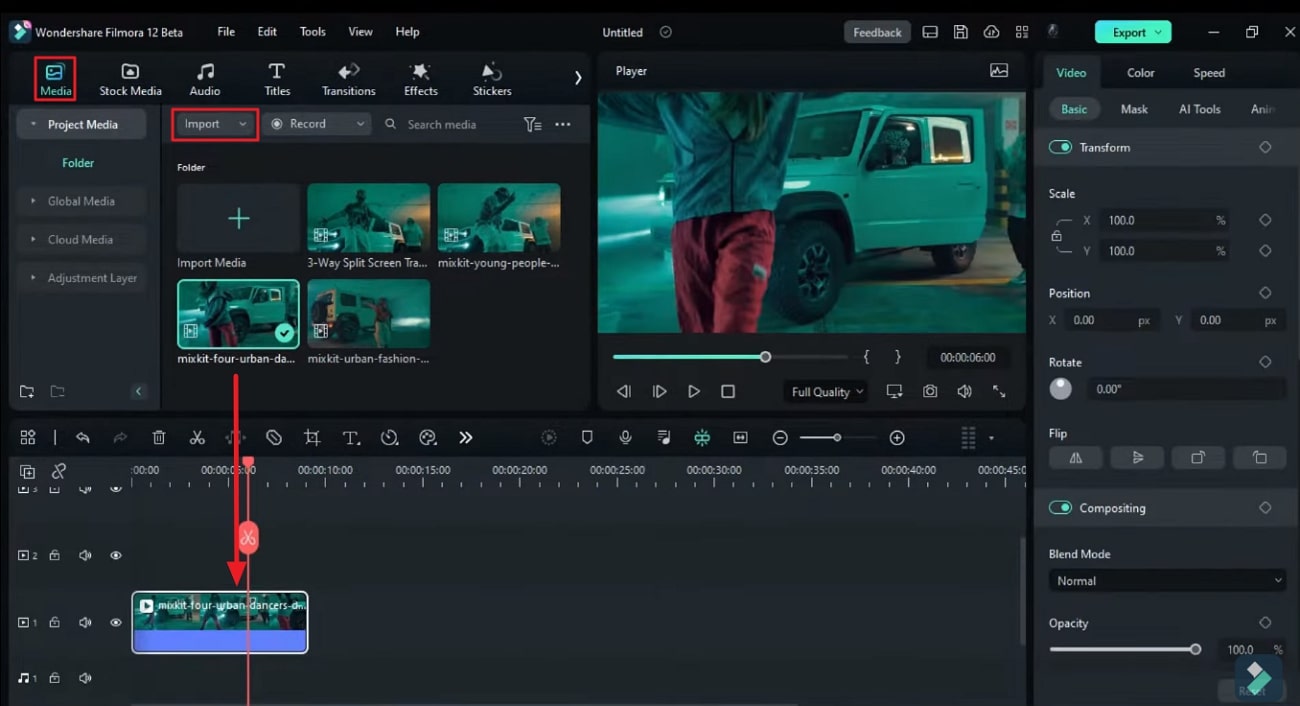
Open Filmora and access the editing window by clicking the "New Project" button. Go to the "Titles" tab in the toolbar and drag "Default Title" on the timeline track.
Edit the Text Elements
Click on the title you added to the timeline, and a panel will appear on the right side of the screen. Go to the "Titles" tab there, and under the "Basic" tab, change the font style to "Star Jedi Hollow." Click the "Advance" button available at the bottom right corner.
A new window will emerge, where you have to type the first word of your intro in the text box in the preview window. Afterward, change the font size as per your preference. Go to the right panel of this window, and under the "Preset" tab, select the color of the text of your choice.
From the top toolbar, go to the "Text" icon and choose the "Quick Text" option from the drop-down menu. There, add the second word of the intro in the textbox. After adjusting the font size and position of the second word, tap the "Apply" button below.
Add Tracks in the Timeline
After clicking "Apply," you'll return to the main editing window. Take a snapshot of this text by clicking the camera icon beneath the preview screen. Now, go to the timeline and delete the "Default Title." Insert 3 more tracks and add the snapshot on the top track.
Right-click on the snapshot in the 4th track and select "Duration." Following this, a small new window will appear, increasing the duration of your snapshot from this pop-up window.
Create a Zoom Out Animation
Click on the snapshot in the timeline and hover towards the right side panel. By clicking the "Image" tab, you'll see many options under the "Basic" tab. Turn on the "Transform" and "Opacity" keyframes from there.
Decrease the "Opacity" of text in the starting keyframes and increase it gradually while moving forward. Change the "Scale," "X," and "Y" values, similarly creating a zoom-out animation. You can also adjust the "Position" for a smooth animation.

Add Starry Background
Now, it's time to add stars in the background. For this, add the star background clip in the lower timeline track. Then, under the "Video" tab, go to the "Basic" and change the "Blend Mode" to "Screen."
Copy and Paste the Additional Text
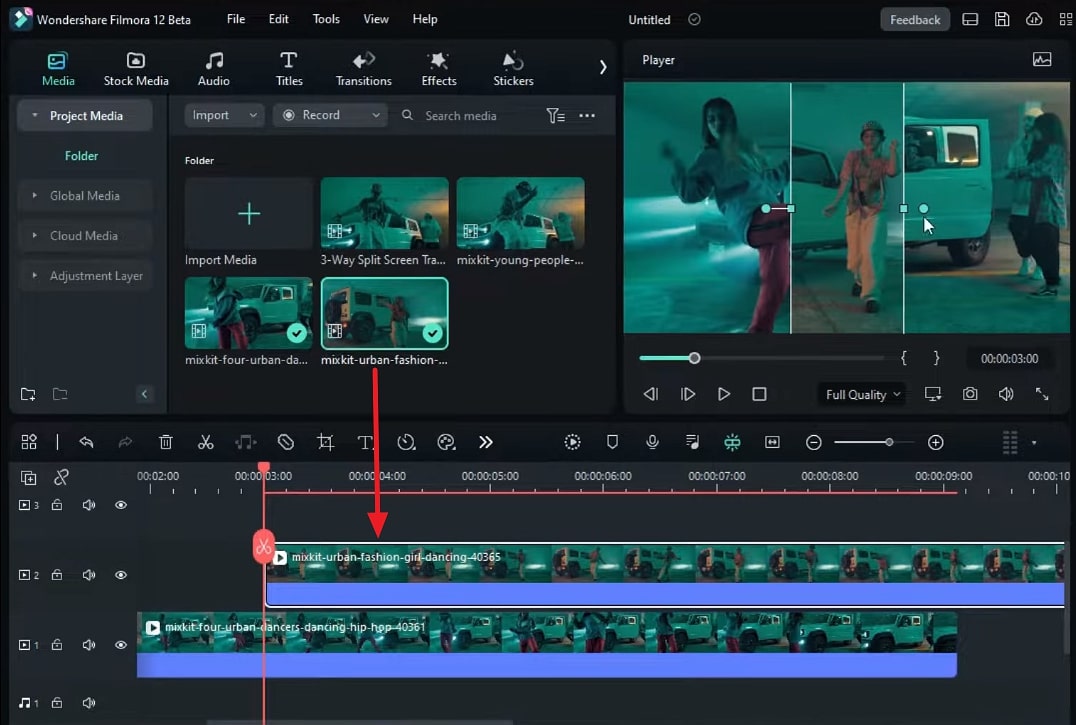
Moving forward, place the playhead on 5 seconds and 9th frame and add a "Default Title" on track 1. Extend the time duration of the default title to 20 seconds. Then, copy-paste the text you want to add in the intro.
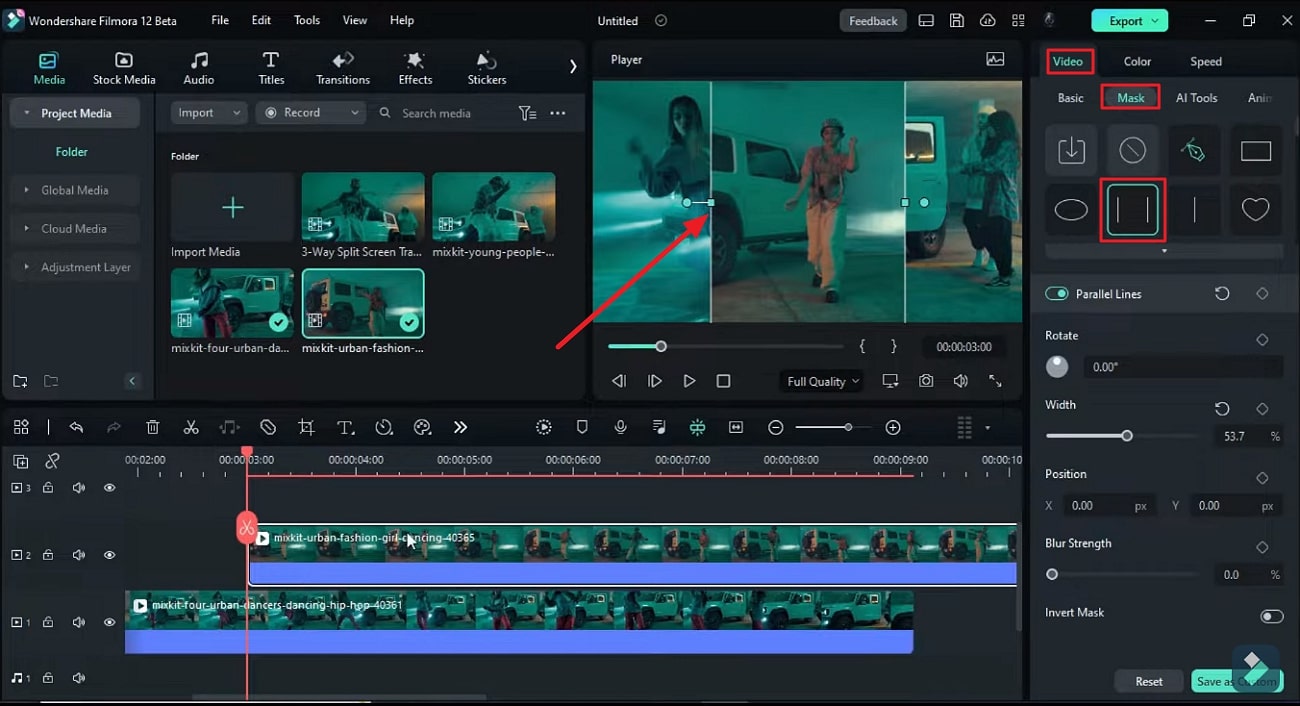
Make changes in the font style and size of this text and its color. To highlight the main text, you can increase its font slightly more than others. From the "Basic" tab, make adjustments in the "Position" and “Scale” of this text at different keyframes. This way, the text will go from downward to upward.
Match the Perspective of the Text to the Star Wars
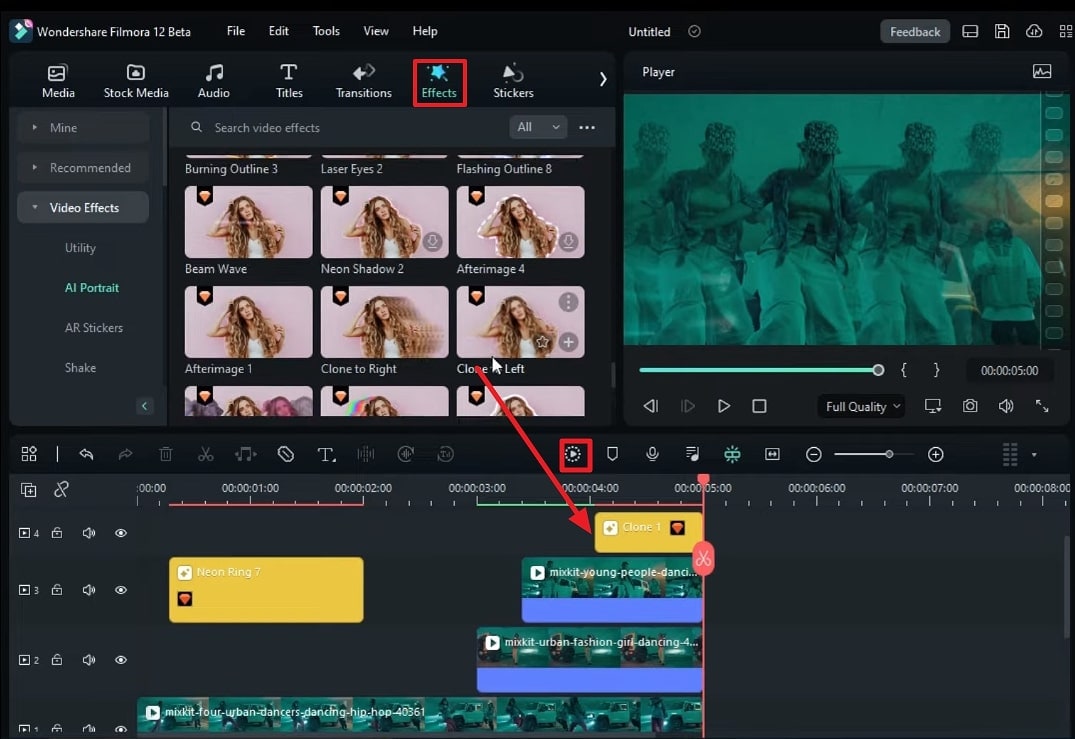
Go to the "Media" tab in Filmora's toolbar and drop "Adjustment Layer" in the second track. Expand the duration of this layer to 20 seconds by dragging it toward the right.
Next, go to the "Effects" tab and add the "BCC Lens Correction" effect on the track. Now, go to the "Effects" at the right panel and make different adjustments. Changing the "Vertical Perspective" will give your text a vertical view, exactly like Star Wars. Playback to see the final results, and if you are satisfied with the outcome, you can export it.
There's a technique of marketing that involves advertising your product in a way that reminds the audience of something. You can add Star Wars Intro in your videos as a creative measure and a means to increase the audience's reach. With Wondershare Filmora, this type of editing is a matter of minutes.